

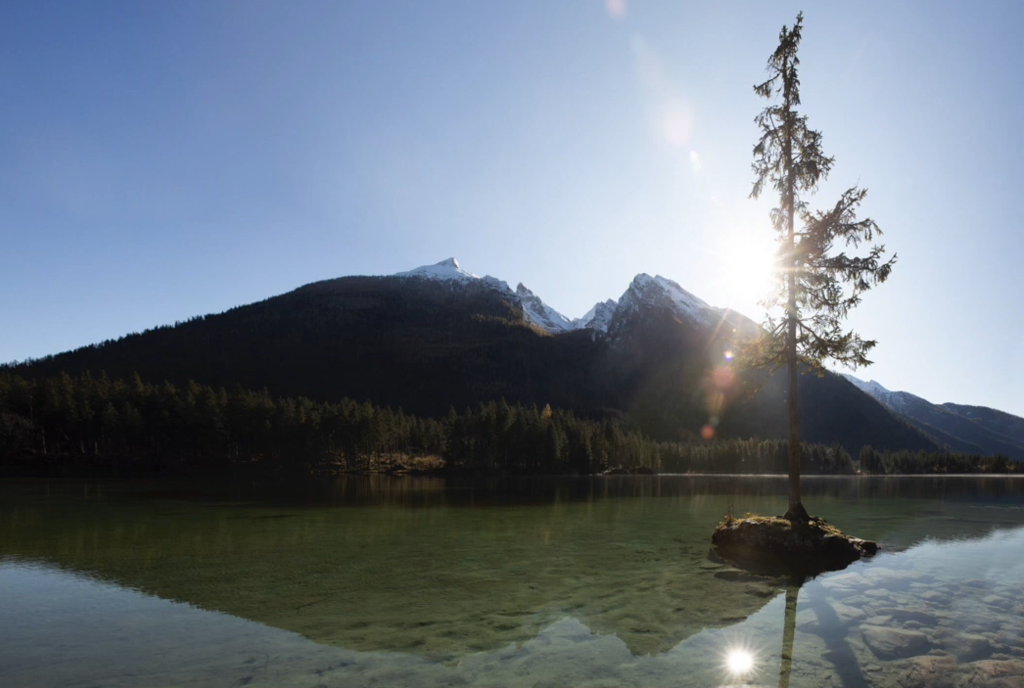
Now, imagine you’re on your winter holidays and you take some beautiful pictures of an inspirational spot. Because you cannot manage to hit all the remarkable details in one image, you want to merge them later on. Well, with Photoshop you can do anything, so that should not be a problem, right? In today’s tidbit you’ll learn how (if you didn’t know already).
Meet Jakub Cezary Kaliszewski, a well known professional photographer from Germany, who created a live drawing tutorial for you to follow along. No need to write down all the steps, we have them summarized below his tutorial:
Let’s take it step by step
Step 1: Select the images
Open Photoshop and browse to the images you stored of that beautiful spot. Select those with the details you want to have in your final output and any image that could help covering blanks in between them. Then go to Tools > Photoshop > Photo Merge and a window will pop up.
Step 2: Merge images
The easiest way now is to simply select Auto and let Photoshop merge the images automatically. It does a good job already, but that does take some time.

Step 3: Make a selection & crop
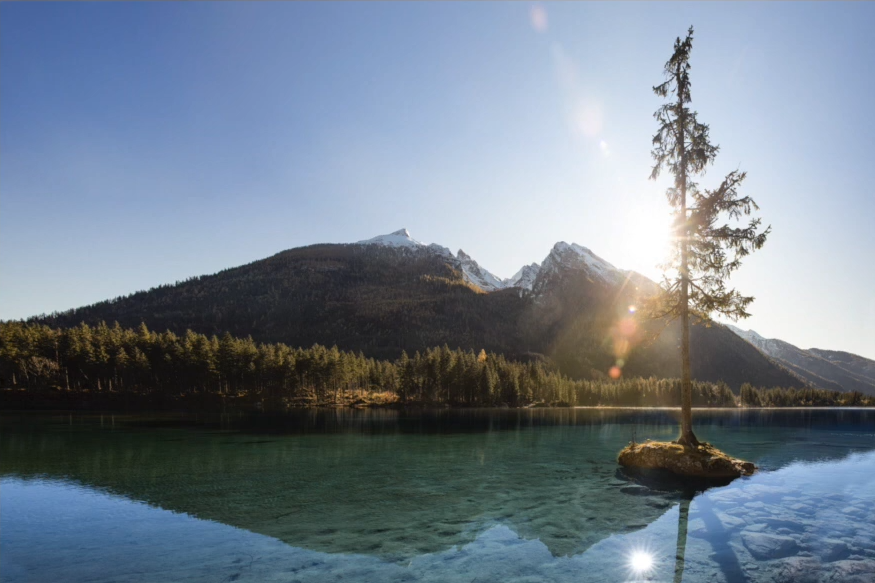
You might get some strange borders, according to how Photoshop merged the images. In order to keep as much detail as possible, make a thorough selection. You can still “correct” the blanks by stamping. But obviously, these areas should not attract too much focus, so people can only recognize you stamped when taking a closer look. You might also want to align with the horizon, if necessary.
Step 4: Duplicate the layer & erase unwanted details
As this part of image editing is going to be photo manipulation, you want to keep the original layer untouched to get back to it, should the manipulation not yield the results you hoped for. If there are any details you don’t want to show on your image, like lens flairs and apply the patch tool to erase those details.
Step 5: Stamp to fill the blank areas & use the patch tool
With the stamp tool you’re able to fill those gaps. Just pick up a color or a position with similar content, and stamp it onto the gaps with a soft brush. It does not need to be nice, you could use the patch tool afterwards. Select the area in question and find an adequate place of the rest of your image to copy it in. Repeat this procedure for the other blank areas as well. If necessary, to avoid duplication, do a second round of stamping from a more distant origin, perhaps with a lighter opacity of your stamp tool.
Step 6: Final touches
Now that you completed your image, you could start editing according to what you want it to look like.
(Some tips and tricks on how to edit the particular image of the tutorial are included in the video.)
Thank you, Jakub!
This tutorial also gave us some insight on how Jakub retouches his landscape photography – not that hard, right? So we want to say “Thank you, for taking your time and showing us the steps you perform to merge multiple images!”. If you’re also in photography and image editing, Jakub might be an inspiration to you as well every now and then. So make sure to find and follow him online:
Website
Instagram
Facebook
And don’t forget to subscribe to our newsletter,
if you want to be informed about promotions, product releases, challenges and inspirational articles.


![Advent Calendar [25] – Merry Christmas 2019!](https://community.wacom.com/en-de/wp-content/uploads/sites/20/2020/09/CartoonCrunch_BlogHeader_800x400-400x284.jpg)
![Daria Khoroshavina (kitchenghosts) – 7 days of inspiration – Advent Calendar [24]](https://community.wacom.com/en-de/wp-content/uploads/sites/20/2019/12/Advent-Calendar-Day-24-kitchenghosts-400x284.jpg)
![Alex Vede – 7 days of inspiration – Advent Calendar [23]](https://community.wacom.com/en-de/wp-content/uploads/sites/20/2019/12/Advent-Calendar-Day-23-Alex-Vede-400x284.jpg)
![Anna Kuptsova – 7 days of inspiration – Advent Calendar [22]](https://community.wacom.com/en-de/wp-content/uploads/sites/20/2019/12/Advent-Calendar-Day-22-Anna-Kuptsova-400x284.jpg)
