

You just love editing and manipulating images, but don’t want to endure “the claw” anymore? Well, then it’s time to *get yourself a Wacom Intuos Pro, which currently #ComesWith 2 months membership of Premiere Rush or Adobe CC Photography plan. If you wish to skip learning the hand-eye-coordination right from the beginning, here’s some good news: the same offer currently (until the end of this year) also applies to purchasing a Wacom Cintiq Pro. And, just in case you already have a drawing tablet you want to upgrade from, why not support a good cause #giftofgiving?

What is the Adobe CC Photography plan?
As you all know, Adobe offers a lot of different creative software solutions on a monthly membership subscription basis at different monthly or annual fees. Subscribing for the Adobe CC Photography plan you will get these features and software solutions and some tidbits on top – for less (in total):


We will introduce the major components (Photoshop, Lightroom and Lightroom Classic) next, to give you an idea of what they are. If you already know them, you could just skip the following 3 paragraphs.

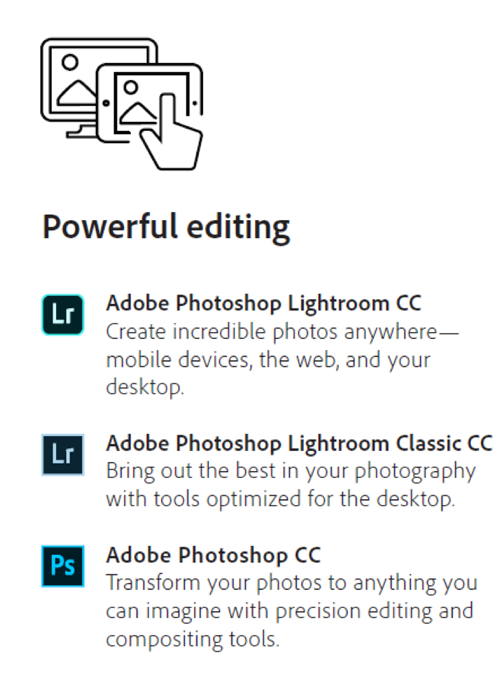
Photoshop
Ah, you probably all know what Photoshop is and what you can do with it, right? If you don’t: Adobe Photoshop is a well known creative software, quite a lot of digital artists actually turn to. Because of the excellent features it provides, it is often used as a drawing software. Just think of all the jaw-dropping digitally painted outputs you have come across that were created with Photoshop. Today, we will focus more on a photographer’s workflow using this software together with the other software solutions contained in the Photography plan.
Lightroom Classic
Lightroom is very similar to Corel Aftershot. It is a desktop-based image editing software that is well integrated with other adobe creative software solutions. If you are a fan of a more folder-based workflow and love your files to be stored on your local hard-drive you will love this software. However, it works quite well with Lightroom, which you could use from anywhere around the globe (with a lighter set of features) – you only need access to the internet and an Adobe ID.
Lightroom
Lightroom itself might not cover all of the Lightroom Classic features, but it does support a cloud-based and thus more flexible workflow. You might not always (want to) sit at your desk and work on one computer. So Lightroom gives you the opportunity to access your documents from any computer or device it runs on – given access to a proper internet connection, of course. You could even work with it on a smartphone when you’re on a train – for instance. So if you cherish to work at different places, or you have to, Lightroom will probably be just what you were looking for.
Here is a little video by Julianne Kost, principal digital imaging evangelist at Adobe, to help you better understand the difference between the two:
But, using the Adobe CC Photography plan, you do not have to decide, which one to use. You can enjoy the freedom of using both at the same time and see how well they interact with one another. Do some image organization and light editing on the go and if you want to use some Lightroom Classic features, you’ll just turn to your local computer. And, just as a reminder: the option to test it for 2 months #ComesWith both, a Wacom Intuos Pro and a Wacom Cintiq Pro.

How do photographers work with the Adobe CC Photography plan?
As you can imagine, there is not one single best way to go about it. Terry White, principal worldwide design & photography evangelist at Adobe, shows you in this video how he exploits the opportunities of the Adobe CC Photography plan, when Adobe started offering it – and the software is improving ever since. For instance, at the Adobe MAX 2019 Terry introduced some new features of Photoshop and Lightroom, that Photography Plan now also #ComesWith.
Don’t want to watch the complete video? Here some of the topics he talks about including the timestamp when he shows you how to handle the software.
Just click to open the overview:
- How to import from other sources (like Aperture or iPhoto)
[@min: ~ 00:46] - How to add new collections
[@min: ~ 02:00] - Hot to process high dynamic range (HDR) images
[@min: ~ 03:14] - How to create a panoramic image
[@min: ~ 05:31] - How to share/publish a collection
[@min: ~ 07:45] - How to create new collections in a browser with an adobe ID
[@min: ~ 08:33] - How to speed up the performance (e.g. take advantage of available graphics processing unit)
[@min: ~ 10:00] - How to do non-destructive editing (e.g. exposure, vibrance, cropping)
[@min: ~ 12:00] - How to open an image in Photoshop (e.g. use clone-stamp, liquify, history-brush)
[@min: ~ 13:00] - How to use face recognition to identify people
[@min: ~ 16:00] - How to tell a story with a slideshow adding multiple songs and videos (with different file formats)
[@min: ~ 21:28] - An excursion to Adobe Slate (has been replaced by Adobe Spark)
[@min: ~ 24:27]
How about some tutorials?
Actually, there are plenty of tutorials out there showing us how to do stuff – remember our post on our top 5 learning resources? You could go to Youtube or any other learning resource and type in your keywords, e.g. “Photoshop tutorial” or “Lightroom tutorial” and you will find a lot of videos to check out. The examples we give every now and then may not be the best, or most extensive or most recent, but they give you an idea and some point to start from.
Photoshop tutorial
As Photoshop provides most options photographers will need in post-production, mastering this software is key. Jeremy Shuback is a great guy who used Photoshop a lot in his days as a background painter. He even created a udemy class to give a Photoshop crash course, which he decided to publish on Youtube for free after a couple of years. Yes, this video is long, but he covers a lot of the basics in a very easy to follow manner, you will not even notice the time running. For your convenience we have added the topics he covered with the respective timestamps in the overview below.
Click to open the overview:
- Intro
[@min: ~ 00:00]
Part 1 – Understanding the Basics
Click to open
- 1.1 Simplifying the Workspace
[@min: ~ 03:03] - 1.2 Major Shortcut Keys
[@min: ~ 05:37] - 1.3 Adding Text
[@min: ~ 11:17] - 1.4 Adding an Image and Using the Transform Tool
[@min: ~ 16:48] - 1.5 Auto Select Check Box
[@min: ~ 20:08]
Part 2 – Layers
Click to open
- 2.1 Understanding Layers
[@min: ~ 21:23] - 2.2 Aligning Layers
[@min: ~ 25:40] - 2.3 Multiple Undos with the History Panel (& Without it in CC)
[@min: ~ 29:58] - 2.4 Smart Objects v. Normal Layers
[@min: ~ 30:48] - 2.5 Canvas Size v. Image Size
[@min: ~ 36:59] - 2.6 Duplicate with Alt
[@min: ~ 39:34] - 2.7 Flipping Layers
[@min: ~ 42:15] - 2.8 Transform Tool Modifiers
[@min: ~ 44:44] - 2.9 Linking Layers
[@min: ~ 46:28] - 2.10 Grouping Layers
[@min: ~ 48:11] - 2.11 Linking Groups
[@min: ~ 48:39] - 2.12 Unmerge Layers
[@min: ~ 50:00] - 2.13 Split an Image in Half
[@min: ~ 54:41] - 2.14 Adding Color Squares
[@min: ~ 57:32] - 2.15 – Layers Wrap Up
[@min: ~ 1:03:49]
Part 3 – Selection
Click to open
- 3.1 Magic Wand Basics
[@min: ~ 1:04:22] - 3.2 Lasso Tool Basics
[@min: ~ 1:08:48] - 3.3 Problem Solving
[@min: ~ 1:12:33] - 3.4 Advanced Magic Wand
[@min: ~ 1:14:41] - 3.5 Tweaking Selections
[@min: ~ 1:19:09] - 3.6 Polygonal Lasso Tool
[@min: ~ 1:23:59] - 3.7 Magnetic Lasso Tool
[@min: ~ 1:25:35] - 3.8 Quick Selection Tool
[@min: ~ 1:28:08] - 3.9 Advanced Tweaking Selections
[@min: ~ 1:29:03] - 3.10 Background Layer
[@min: ~ 1:31:01] - 3.11 Using the Selection
[@min: ~ 1:31:34] - 3.12 Color Range
[@min: ~ 1:34:12] - 3.13 Refining the Hair Selection
[@min: ~ 1:37:53] - 3.14 An Image Sandwich
[@min: ~ 1:39:58] - 3.15 CC Auto Selection Feature
[@min: ~ 1:43:34]
Part 4 – Color Correction
Click to open
- 4.1 Basic Color Correction
[@min: ~ 1:44:05] - 4.2 The Three Dimensions of Color
[@min: ~ 1:48:26] - 4.3 Curves Basics
[@min: ~ 1:51:43] - 4.4 Beyond Curves Auto
[@min: ~ 1:55:49] - 4.5 Curves Advanced
[@min: ~ 1:59:30] - 4.6 Shifting A Selections Color
[@min: ~ 2:11:09] - 4.7 Painting in the Color
[@min: ~ 2:15:09] - 4.8 Painting in More Color
[@min: ~ 2:21:56] - 4.9 Black and White
[@min: ~ 2:26:35] - 4.10 Color Correction Wrap Up
[@min: ~ 2:29:47]
Part 5 – Object Removal
Click to open
- 5.1 The Clone Stamp
[@min: ~ 2:31:56] - 5.2 Dust and Scratches
[@min: ~ 2:36:37] - 5.3 Brush Hotkeys
[@min: ~ 2:39:40] - 5.4 Healing Brush
[@min: ~ 2:41:28] - 5.5 Good Edges
[@min: ~ 2:44:53] - 5.6 Difficult Edges
[@min: ~ 2:48:05] - 5.7 Beyond Cloning
[@min: ~ 2:53:05] - 5.8 Spot Healing Brush
[@min: ~ 2:55:34] - 5.9 Saving
[@min: ~ 2:59:49] - 5.10 Image Size
[@min: ~ 3:02:34]
Part 6 – Beauty Retouching
Click to open
- 6.1 Removing Wrinkles
[@min: ~ 3:07:23] - 6.2 Resizing Body Parts
[@min: ~ 3:14:41] - 6.3 Smoothing Skin
[@min: ~ 3:21:25] - 6.4 Original Fix
[@min: ~ 3:25:14] - 6.5 Fixing Bloodshot Eyes
[@min: ~ 3:26:32] - 6.6 The Crop Tool
[@min: ~ 3:28:56]
Part 7 – Compositing
Click to open
- 7.1 Isolate Objects
[@min: ~ 3:30:45] - 7.2 Combine Objects
[@min: ~ 3:39:39] - 7.3 Zipping up the Ideas
[@min: ~ 3:42:06] - 7.4 Removing a Person
[@min: ~ 3:46:53] - 7.5 Adding in a Person
[@min: ~ 3:55:03]
Part 8 – Conclusion
Click to open
- 8.1 What’s Next?
[@min: ~ 4:04:20]
Lightroom Editing with Wacom – how to set it up?
Thomas Heaton is a passionate photographer and image editor, who tries to capture the feelings certain moments give us. Thus, he also has a lot of experience with Adobe Lightroom. To improve his workflow, he got himself a Wacom Intuos Pro. About 24 hours later, he had to make a video for his followers to share his enthusiasm and give some advice, because he was so thrilled. This is not a typical tutorial, but it shows us just perfectly how you can use Wacom hardware with Lightroom.
Adobe Creative Cloud Photography Plan in action
In case you know Adobe CC’s live sessions on Youtube, you might take a look at this one, if you think the adobe Photography plan is just the right subscription for you:


