

Vivienne Le is a designer and artist based in Berlin, Germany. In this video and guest post, she designs a bookmark in both Adobe and Affinity software to compare and contrast them.
Did you know that every purchase of a Wacom One pen display or drawing tablet comes with a free trial of the Affinity Suite? If you want to know more about the differences between Affinity and Adobe software, you can also check out Viv’s previous guest posts and videos with Wacom: How to get the most out of Affinity Designer with your Wacom tablet, or Adobe Illustrator vs. Affinity Designer for graphic design: A software comparison.
Introduction
Today, I’ll be designing a bookmark with Adobe InDesign and Affinity Publisher to compare and contrast the key features of each program. I’ll first digitize a physical drawing I made using the Wacom One tablet, then walk you through my process of laying out text and preparing the files to be printed.
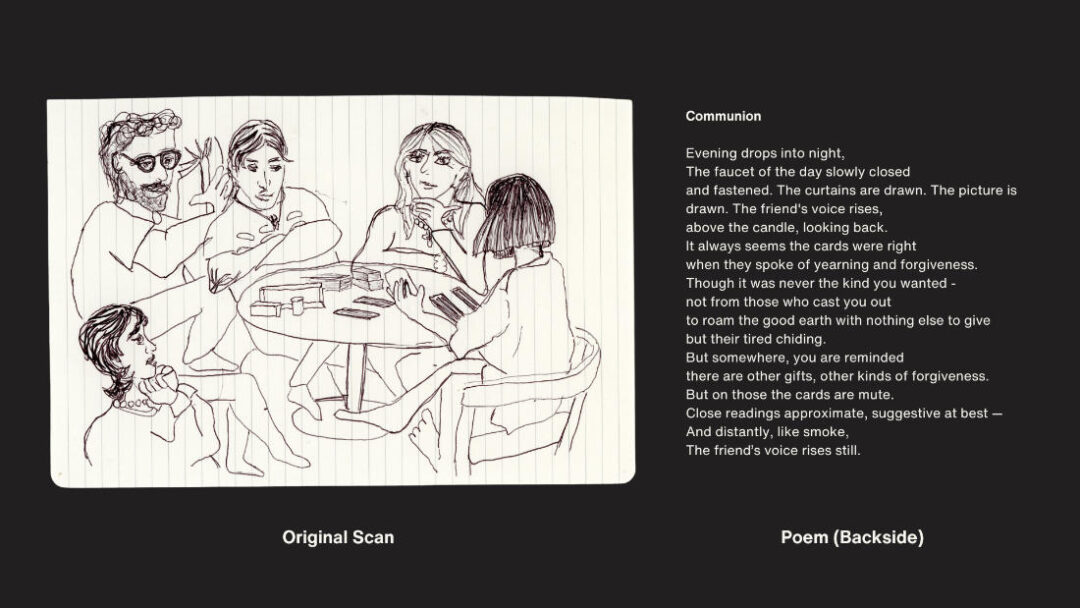
Just to give you some context, the bookmark combines a 2D illustration and a short poem written by my friend on the backside. As you can see from this original scan, I want to erase the paper lines. I’ll do that first by importing the file into Adobe Lightroom, which is the program I think has the best generative eraser tool for the job.
Digitizing the Physical Drawing
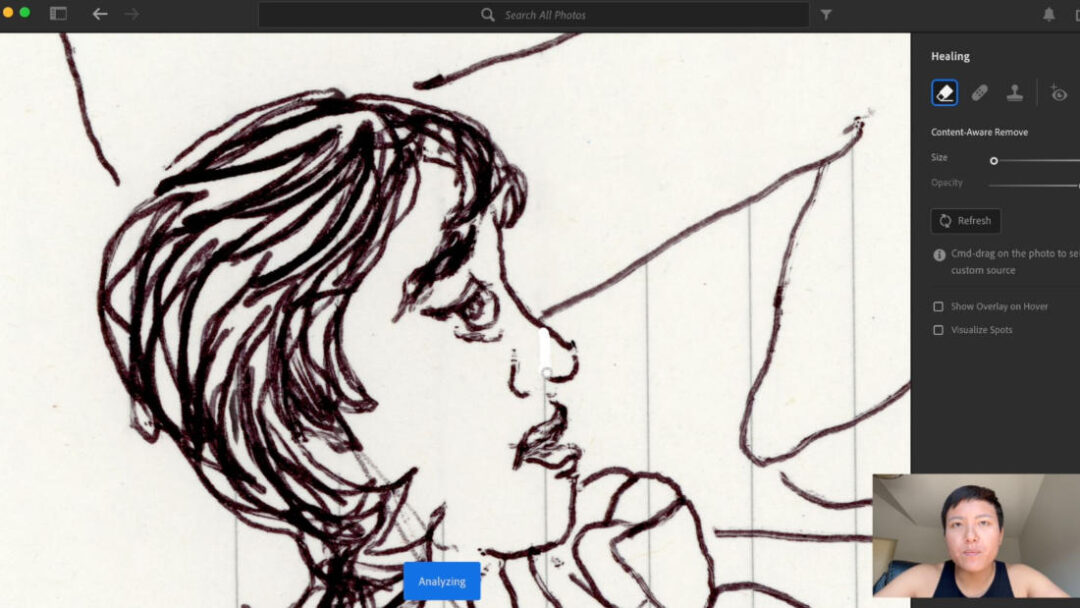
In Lightroom, I am using a tool called Generative Remove. This is a new tool released by Adobe as of 2024 and I think it’s the best for clean up jobs like this. I pair it with my Wacom One tablet to make straight selections that easily remove the lines. I’ll go ahead and finish cleaning this up. There is some artistry to this process, as I am making decisions on what elements to keep and which to erase.
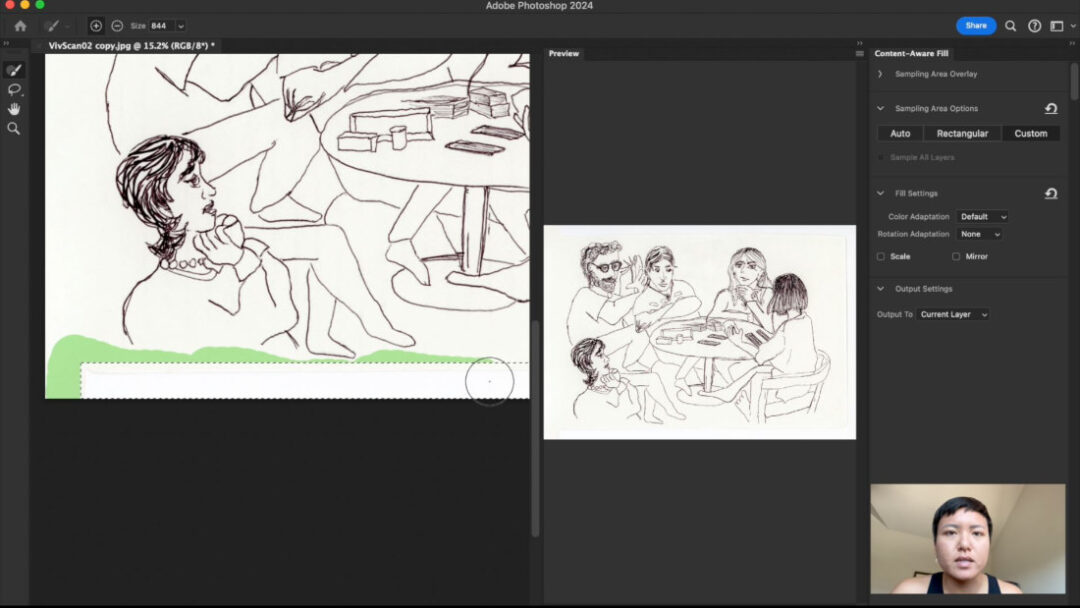
Then, I extended the paper background of the scan using Adobe Photoshop. First I select the space I want to fill, then I right click and select “Content Aware Fill.” Then I select the areas I want the tool to sample and fill in with more paper.
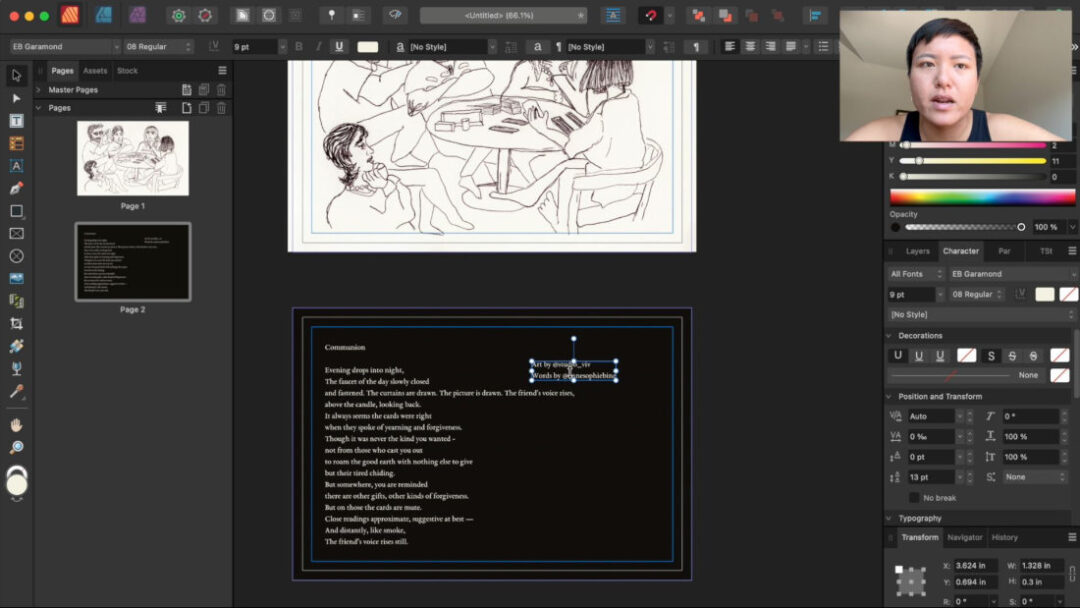
Laying Out the Bookmark in Adobe InDesign
Now let’s put the drawing into Adobe InDesign. Although I am calling this a bookmark, I am actually sizing my design to be the size of a standard postcard, 4 by 6 inches. As an avid reader, I prefer this size for my bookmarks instead of the traditional long and narrow bookmark format.
I begin by setting up my document to the bookmark dimensions. It’s important to add bleed and margins. The standard for both is 0.15 inches. Bleed means you have to extend the background by 0.15 inches to make sure the printers cut the print correctly. If you don’t include bleed, there’s a chance your prints could be cut with white borders around it. Margins are important to make sure that all text you layout stays inside them, because it’s possible the printers can cut each page slightly off-center and cut off your text.
InDesign makes it easy to customize layouts with its robust tools. Everything feels very professional and precise, which is great for larger and more complex documents.
Then, I bring in the 2D illustration. InDesign handles imported files well – whether they’re vectors or raster images. It’s easy to adjust the size and position without losing quality. Next, I add the poem. InDesign’s typography tools are highly detailed. From character styles to advanced kerning, I have complete control over the text appearance.
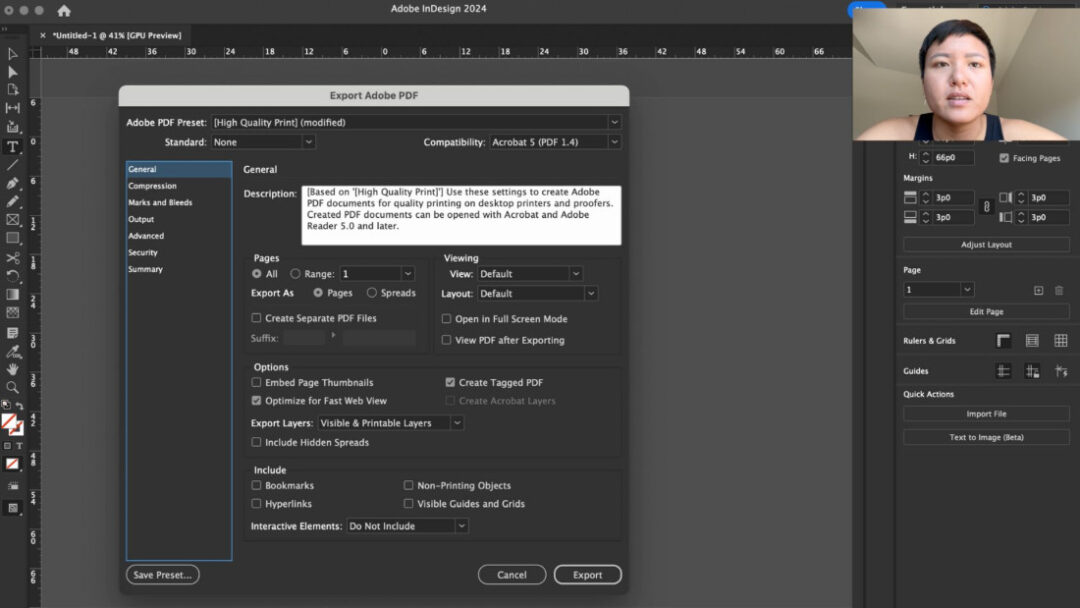
When it comes to preparing for print, InDesign gives a lot of options for setting color profiles, like CMYK for print. The export options for PDFs are extensive, and you can check for any preflight issues to make sure your design is ready for professional printing.
Laying Out the Bookmark in Affinity Publisher
Now, let’s move over to Affinity Publisher. Setting up the document in Publisher is similar – you can adjust dimensions, margins, and guides easily. One thing I love about Affinity is the interface – it feels slightly more user-friendly for beginners, with many tools clearly labeled.
Bringing in the illustration is simple here too. One advantage Publisher has is its ‘StudioLink’ feature. If I need to make adjustments to the illustration, I can jump directly into Affinity Designer or Affinity Photo without leaving Publisher.
Adding text is straightforward, and Publisher has a good range of typography tools, although not as many advanced options as InDesign. For simpler projects like this bookmark, it’s perfectly adequate.
Affinity Publisher also offers print preparation tools, letting you set up your design in CMYK and export directly to print-ready PDFs. It doesn’t have all the preflight options that InDesign does, but for smaller-scale print projects, the workflow is pretty smooth.
Direct Comparison
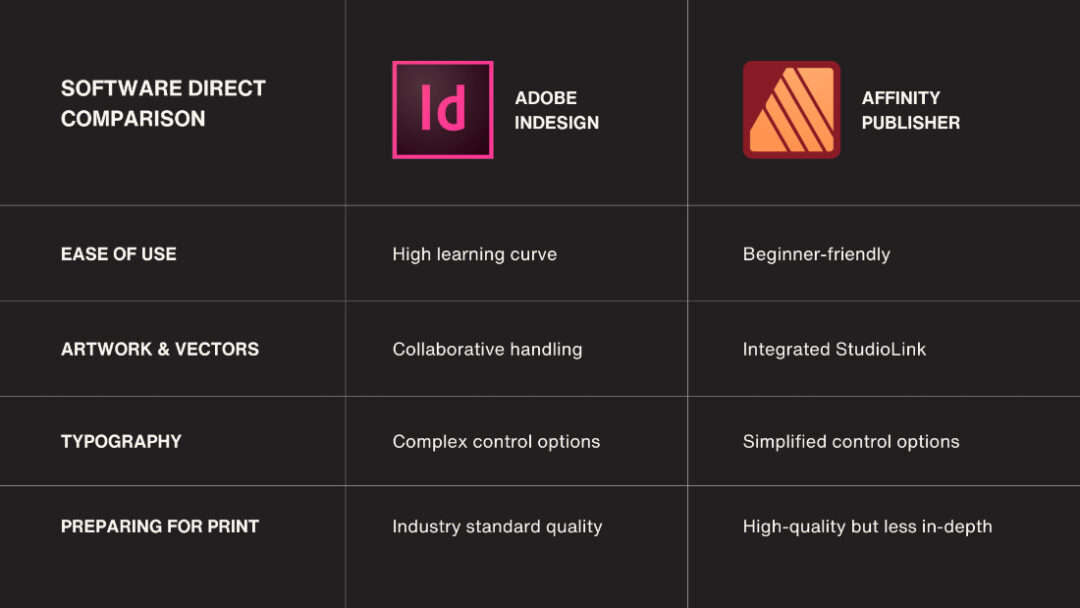
So, how do these two programs compare when it comes to designing a bookmark? Let’s break it down:
Ease of Use:
InDesign has a steeper learning curve but is incredibly powerful once you master it. Affinity Publisher, on the other hand, feels more approachable and streamlined – perfect for someone looking to quickly create professional designs without a steep learning curve.
Artwork & Vectors:
InDesign’s vector handling is top-notch but often requires jumping into Illustrator for detailed edits. Affinity Publisher’s integrated approach with StudioLink lets you tweak vectors directly within the program, which can be a big time-saver.
Typography:
If you need high-level text control for complex layouts, InDesign is the way to go. But for simpler, smaller-scale designs like a bookmark, Affinity Publisher’s tools are more than capable.
Preparing for Print:
InDesign excels with detailed checks and advanced export settings, making it ideal for professional print work. Publisher simplifies this process without sacrificing quality, so for most print projects, it’ll get the job done without the extra steps.
Conclusion
So, which software is right for you? If you’re a professional designer working on large, complex projects, Adobe InDesign’s powerful tools and extensive options are unbeatable. However, if you’re looking for an affordable, versatile, and easy-to-learn program for simpler designs, Affinity Publisher is a fantastic option, especially since you pay once instead of subscribing.
For this specific bookmark design, both tools worked well. Affinity Publisher felt a little quicker to navigate for a simple layout, while InDesign gave me a few extra features to finesse the final look. As you can see below, the results were pretty much identical, which goes to show the strength of both programs for designers at any level.
Thanks for watching! If you’ve used either of these programs, I’d love to hear your thoughts and experiences in the comments — I’m on Instagram at @studio_viv. Don’t forget to subscribe to Wacom’s Youtube and sign up for the Creative eNewsletter for more design tips and comparisons. See you in the next video!


