

![]() Whether you’re planning some DIY, crafting, or decorating, Michael’s is your go-to. Now, level up your design skills as you prep for your next project by using a Wacom tablet! Whether you’re ideating a pattern for sewing, designing a card for an upcoming holiday, or creating assets for other crafters to utilize, Wacom is a great partner — and Wacom products are now available at Michaels.com.
Whether you’re planning some DIY, crafting, or decorating, Michael’s is your go-to. Now, level up your design skills as you prep for your next project by using a Wacom tablet! Whether you’re ideating a pattern for sewing, designing a card for an upcoming holiday, or creating assets for other crafters to utilize, Wacom is a great partner — and Wacom products are now available at Michaels.com.
In the video below, crafter and creator Heather Cash continues her Wacom + Cricut series by showing you how you can use a Wacom One pen display and Affinity Photo software — included with every Wacom One purchase — to create clip art that you can sell to other creators! Check out the video below, or read on for a text-based explanation.
In this tutorial, I’m going to show you how to use Affinity Photo software to create digital assets you can sell online.
Where can I sell clipart and what is it for?
When creating clip art to sell online, you want to make your creations as useful as possible for people who are going to use them to create some kind of graphic design. You’re going to create some main elements that can be the main subject of the clip art, and then you’re going to make some smaller, more decorative elements, like flowers or leaves, that can tie in to the design and be used for things like borders, dividers, or little bullet points. Just cute little elements that the designer cna use in their layout. You will get more sales if you make things that can be useful in a variety of ways for graphic design layouts. There are a lot of different websites on which you can sell your creations online. Some of the most popular ones include Etsy, Creative Market, Creative Fabrica, Envato Elements, and Shutterstock.
Recommended settings
I recommend creating a sheet that is 16 by 20 inches and 300 DPI, which is the standard high-resolution DPI for printing. That way, you can have your elements laid out on that sheet and then your bigger elements are probably going to be about half the size of that sheet so maybe like 8 to 10 inches high and that would be good because it can be used for a poster or anything really big and it’s going to be big enough.
What should I make?
There are many ways to brainstorm what kinds of elements you should make. One way is to think of what holidays are coming up and to do that kind of theme, or you could just base it around a general theme, like a kind of animal or a hobby. For our project today, I’m going to do an upcoming holiday which is Mother’s Day. I do find that there are a lot of images used for Mother’s Day featuring animals with their babies, so I’m going to do a less popular animal — a toucan. I’m gonna do a mama toucan and her baby, and then I also want to think of other elements that I can include, so I’ll make some leaves and foliage and then I’ll also include some small insects that can be used in different places, and then maybe a Vine that can be used for like a divider.
How to create clipart
Once you’ve decided on your idea, it’s time to get started.
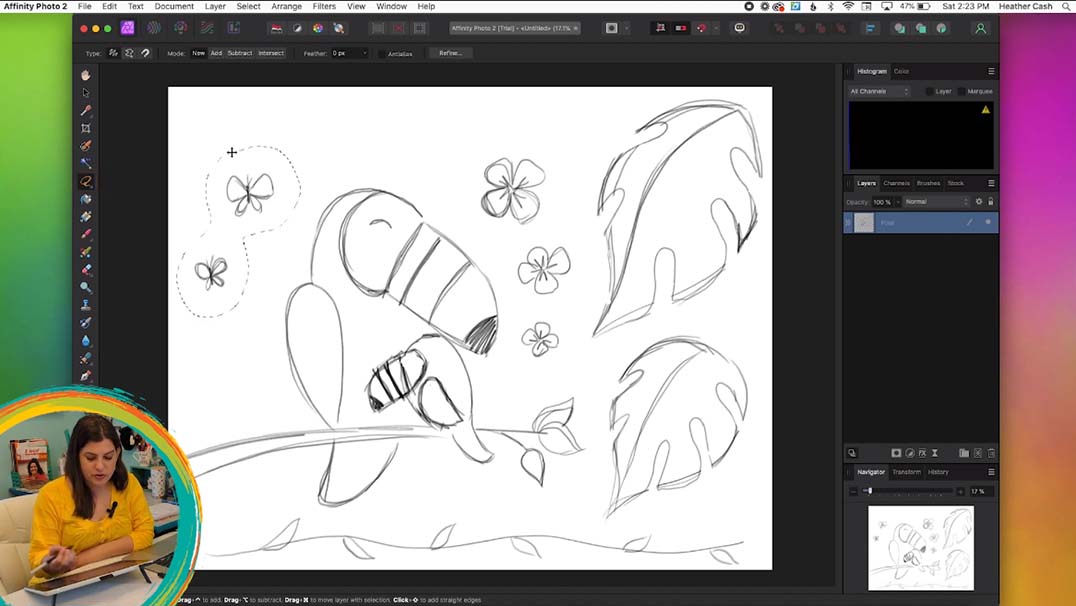
Sketch
In Affinity Photo, I’m going to start by just sketching out my toucan and her baby. Once I have a sketch, I can set this layer on a lower opacity, and then just trace over it to have a more definitive sketch. Then I’ll delete the lower layer. I’ll add some of the other elements, too. Here’s a tip: I sketched the items but ended up having some extra space. So I’m going to grab my Lasso Tool here, and grab these and make them bigger.
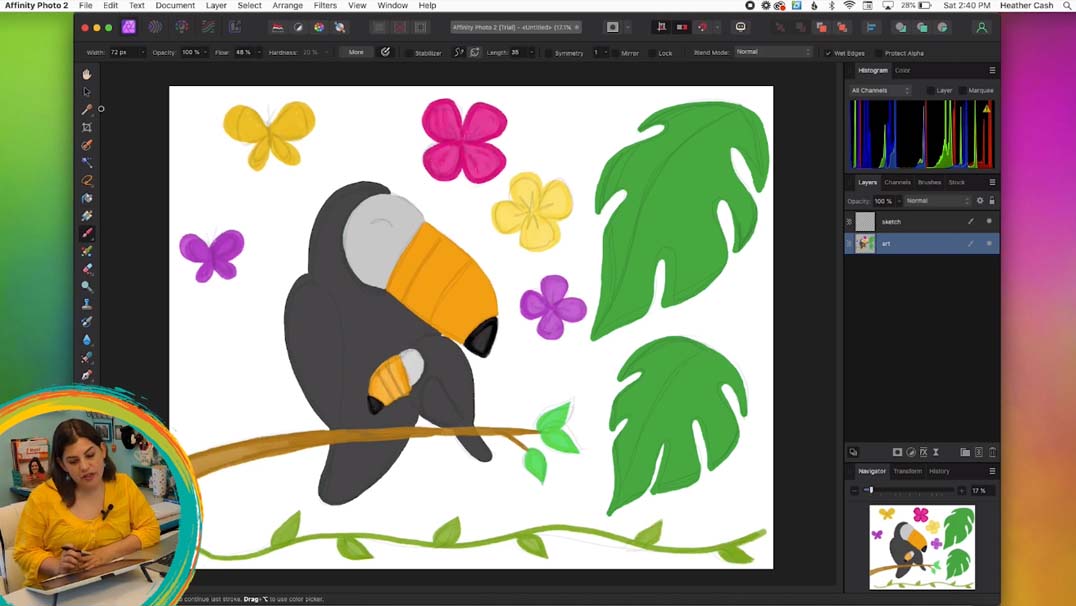
Coloring
Next: color. I’ll turn down the Opacity of the sketch layer and set it to Multiply, so when I draw underneath it I’ll still be able to see everything. Then I’ll create a new pixel layer. There are many brushes to choose from; pick the one you like best. It’s best to color in the basic colors first and do shading later.
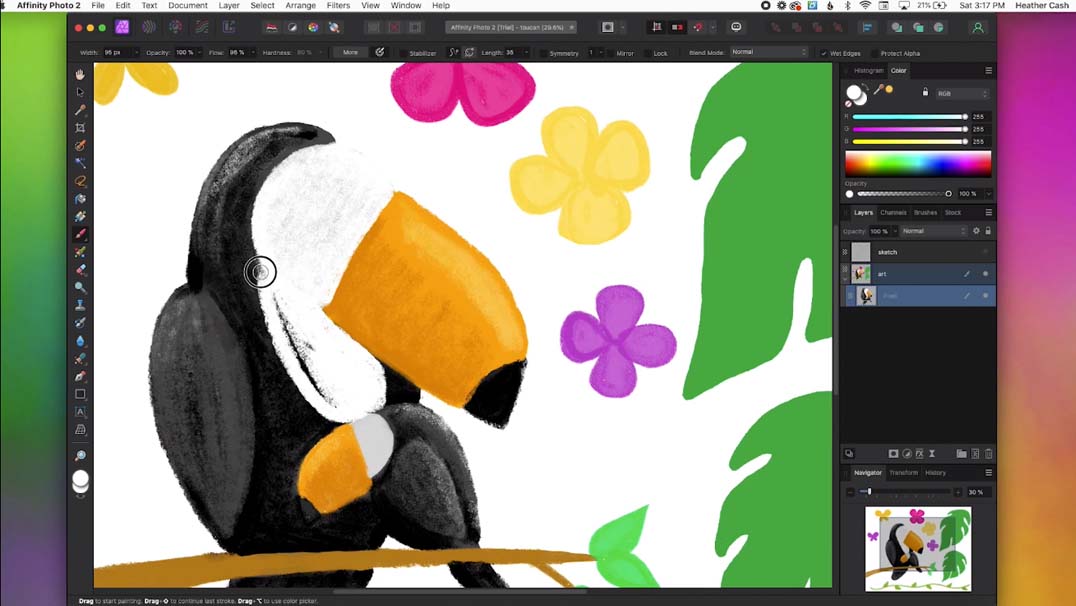
Shading
Once you’ve colored everything with your basic colors, create a new layer for shading. Drag it on top of the previous layer, and if you’ll open it, you’ll see it’s inside the other layer. This creates a Clipping Mask, so anything that you color on that layer will be restricted to only where there are colored pixels on the layer above it.
Exporting your clip art
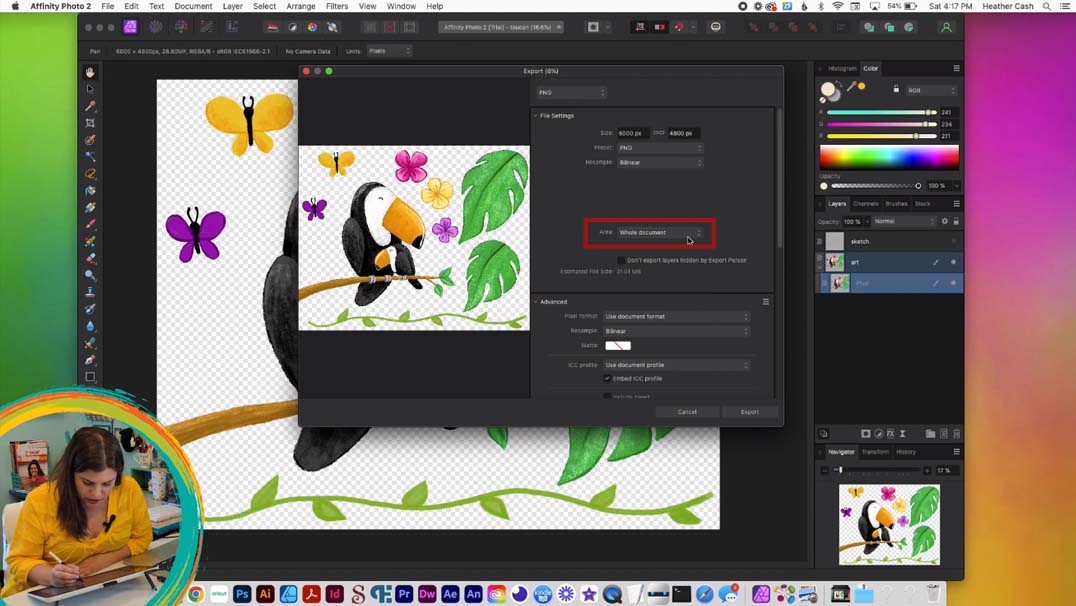
Once you’re done, you can go ahead and export. First, you’ll want to export as a single image with transparency, so it’s easier for the designer to use. Go to File > Export, choose PNG, keep it at the original size, choose Whole Document, and export.
Then, you can export each individual element as its own file, in case someone wants to easily use just individual elements. Open the PNG you just made in the last step. Then select the Lasso Tool, and draw a circle with it around one element. Then select Edit > Cut and then Edit > Paste. This will create a new layer with just that element. Repeat this for each different element of your design.
Select one of the layers, and go to File > Export, and this time, select Selection Only. Export it, name it descriptively, and then repeat this process for each different element.
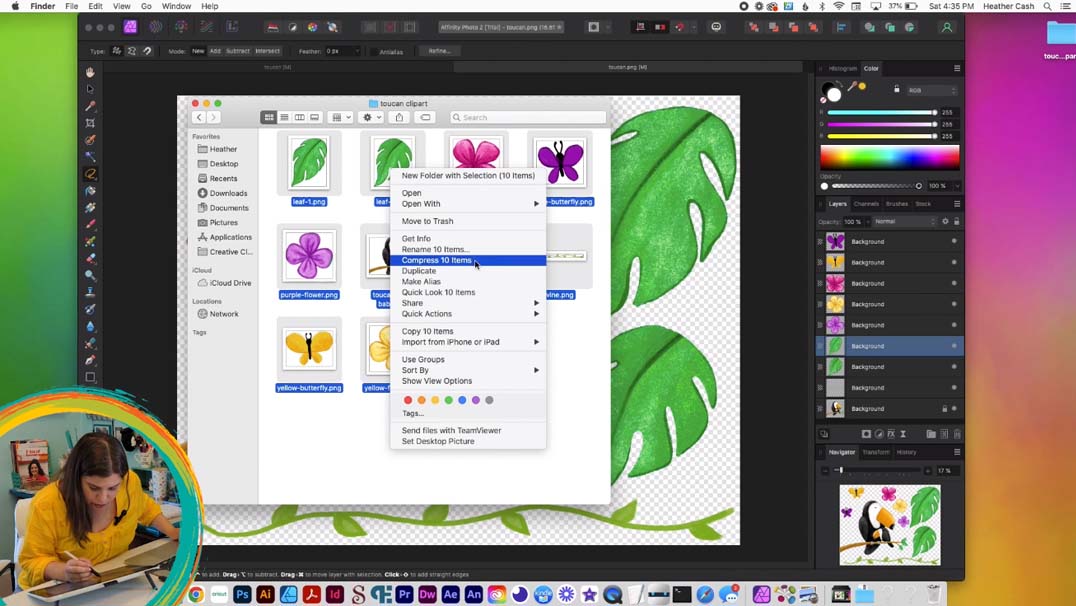
Compress the files
Once you’ve exported everything into one folder, you can compress it all for easy upload. On a Mac, you’ll find the Compress command, and on a windows, the Zip command. Then rename the zipped file. When you upload the file to sell on one of the websites mentioned earlier, typically you’ll sell this compressed file with all of the elements contained within it.


