

![]() Whether you’re planning some DIY, crafting, or decorating, Michael’s is your go-to. Now, level up your design skills as you prep for your next project by using a Wacom tablet! Whether you’re ideating a pattern for sewing, designing a card for an upcoming holiday, or creating assets for other crafters to utilize, Wacom is a great partner — and Wacom products are now available at Michaels.com. In the video below, crafter and creator Heather Cash shows you how you can get started on some papercraft by using her Wacom One to design a single-color SVG for use with a Cricut cutting machine!
Whether you’re planning some DIY, crafting, or decorating, Michael’s is your go-to. Now, level up your design skills as you prep for your next project by using a Wacom tablet! Whether you’re ideating a pattern for sewing, designing a card for an upcoming holiday, or creating assets for other crafters to utilize, Wacom is a great partner — and Wacom products are now available at Michaels.com. In the video below, crafter and creator Heather Cash shows you how you can get started on some papercraft by using her Wacom One to design a single-color SVG for use with a Cricut cutting machine!
Check out the video or read on for a text-based explanation. And stay tuned; this is the first in a series of videos and posts exploring how Wacom, Cricut, and Michaels can work together to make your papercraft the best its ever been!
Hi, my name is Heather, and today I’m going to show you how to create a single color “SVG” file for Cricut, in Affinity Designer software, using a Wacom One pen display.
Being able to create your own SVGs for the Cricut is a great skill to have. When you create your own drawings, you own the copyright — so you can use them for your projects, or sell them online, without having to worry about copyright infringement. Keep in mind that this only applies to your own original artwork & characters — in other words, you can’t draw a Disney character, for example, and put it up for sale.
For our first tutorial, I’ll be showing you how to create a single-color SVG.
What is an SVG?
SVG stands for Scalable Vector Graphics. The basic benefit of them is you can scale them as big or as small as you’d like without ever losing detail or getting a pixelated image. These are the type of files you’ll be working with if you’re using a Cricut cutting machine, which is why we’re creating them in this tutorial.
Setup & Software
I have my Wacom tablet all set up here, and if you’d like to see how I connected it to my MacBook Pro, check out my unboxing & setup video. I’m going to be using Affinity Designer, because the Wacom One pen display comes with a 90-day free trial of the software. I love Affinity Designer because it’s like Adobe Illustrator, but rather than having to pay every single month, you just pay for it once and then you always have it!
Create document
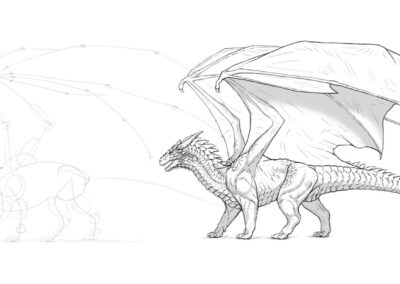
First we’ll create a new document. Size doesn’t really matter, because vector files can be scaled to any size. You can just choose Letter, for example, and click Create. Next we’ll drop in our sketch. I drew mine on paper and then took a picture with my phone. If you’d like to follow along, here’s a link to the sketch. Next choose File → Place, and click Open, then click and drag to make the sketch whatever size you’d like.
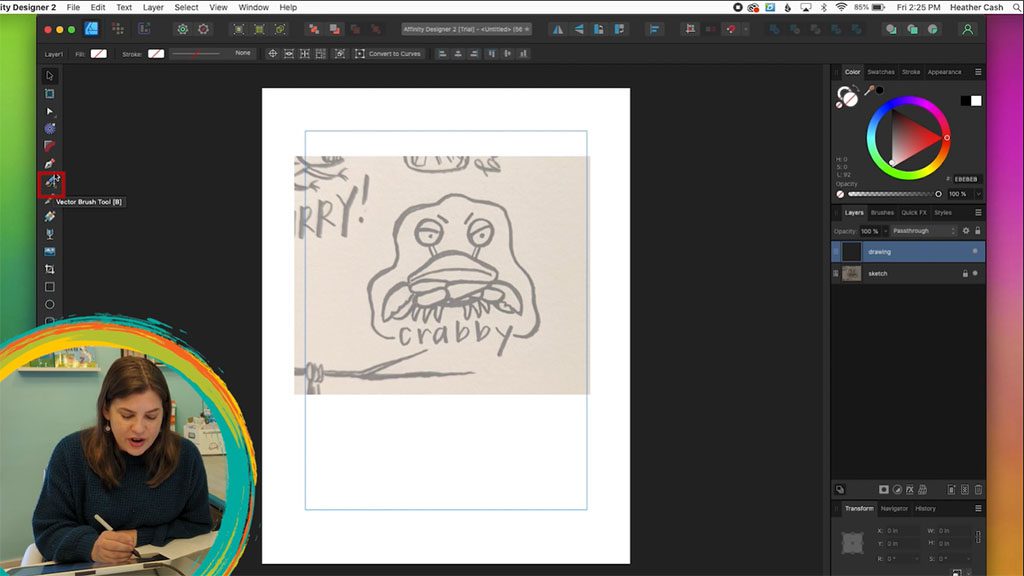
Layers Panel
In the layers panel, you’ll find all of the different parts that make up your drawing. So whenever you draw something, you’ll be able to see it in this panel.
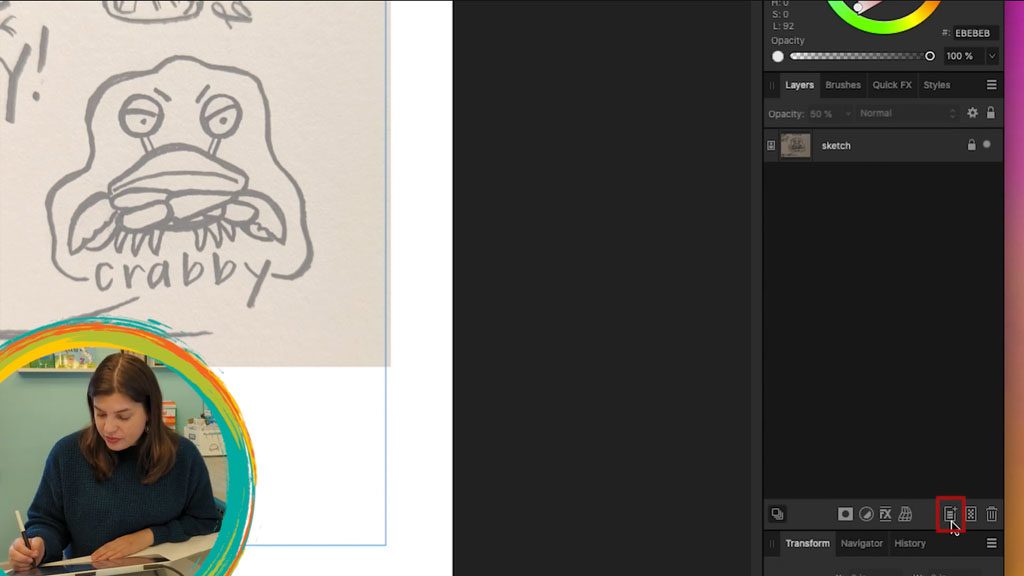
First, we’ll rename the layer with the sketch on it. Double click on the layer, and type “Sketch.” Then, we’ll lower the opacity so we’ll be able to see better when we draw over the sketch.
Next, we’ll lock the sketch layer, so we don’t accidentally move it around. Just hover over the right side of the layer and you’ll see the lock icon appear – click on it. Now it is locked and you can’t move it around anymore.
The final step for this part is to create a new layer to draw on. Click the Add Layer button at the bottom of the layers panel. Then you can double click on it and rename it to Drawing.
Drawing
For drawing, we have the Pencil Tool and the Vector Brush Tool. The Pencil Tool is always going to draw the same width. If you like this style for your artwork, you can use the pencil tool.
Personally, I love the brush tool, because you get variable-width lines that are based on your pen pressure. This works great with a Wacom pen tablet or display — the pen is very pressure-sensitive, so you can have complete control over your line width. Just make sure you go to Controller, and choose Pressure. Then, if you test out the pen, you’ll see that when you press harder, the line will get thicker, and when you press lighter, the line will be thinner.
Now, you can start drawing over your sketch.
Touching Up
If there are any parts that you’d like to touch up, you can click on the Node Tool or press the letter A on your keyboard. Using this tool, you can move the nodes and the handles around to modify the curves. To delete a node, just click on a node and press Delete on your keyboard. To add a node, just click on the line wherever you want to add a new node.
Formatting for Cricut
Once you are done with your drawing, you can delete the sketch layer.
Now we just have to put everything in the right format for the Cricut. Right now, it’s all “strokes,” and we need it to be “shapes.” I usually save the original file before converting to shapes, because the original file before converting to shapes is easier to edit.
So go ahead and save the current file as [name-of-sketch]-original. Then, select Save As, and you can name it [name-of-sketch]-cricut.
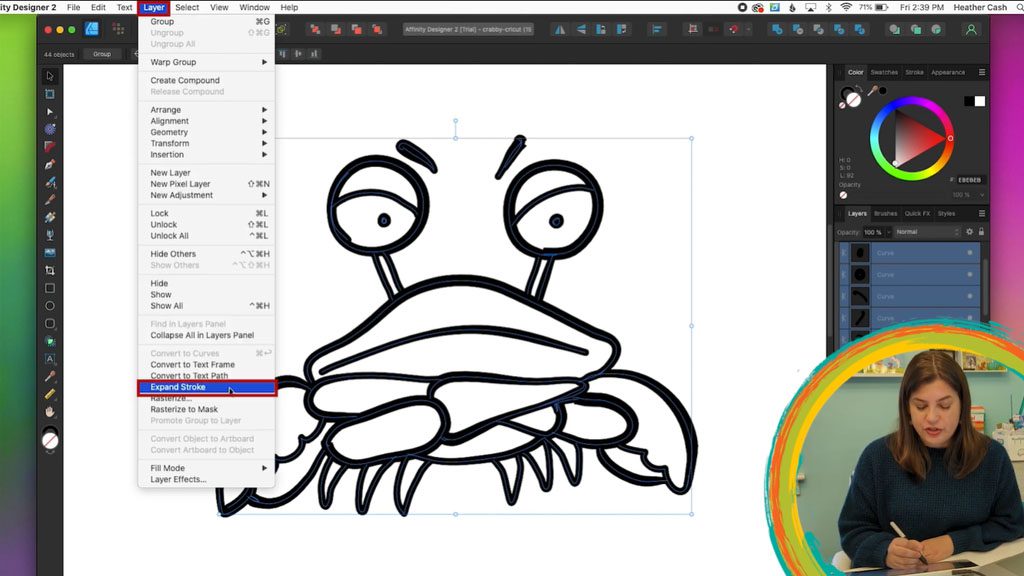
Now, we are ready to convert our drawing into a shape. Grab your Select Tool (or press the letter V on your keyboard), and select everything. Then select Layer → Expand Stroke.
Now you can see that everything is shapes instead of strokes, because you can see the blue line around everything. But where the shapes overlap, the blue lines cross over each other. If you’ve ever used the Cricut, you know that the Cricut would actually cut these pieces out and basically cut apart your design. Therefore, we need this all to be one solid shape. To do that, find the shape functions at the top of the screen, and click Add. This is going to combine everything into one shape.
Export
And that’s it! Now you can save your file (File → Save), and then you’re ready to export it as an SVG to bring into Cricut Design Space. To do that, just go to File → Export, Select SVG, you can leave all of the options as-is, and click Export.
Check Your Work
The last step is checking your work in Cricut Design Space. This is very important, especially if you’re going to be selling your digital assets online. Sometimes you might not realize that there’s a weird invisible shape you hadn’t noticed, or that things didn’t combine correctly, or maybe you forgot a step, you just never know!
So just open up Cricut Design Space and upload your SVG. Then, look over in the layers panel and make sure everything is on one layer and there are no weird pieces missing or added to the shape, and everything looks correct. If it all looks good, then you’re ready to share your file with others!
Conclusion
That’s it for this tutorial. Stay tuned for my next video in this series, where I’ll show you how to add color to your SVG.


