

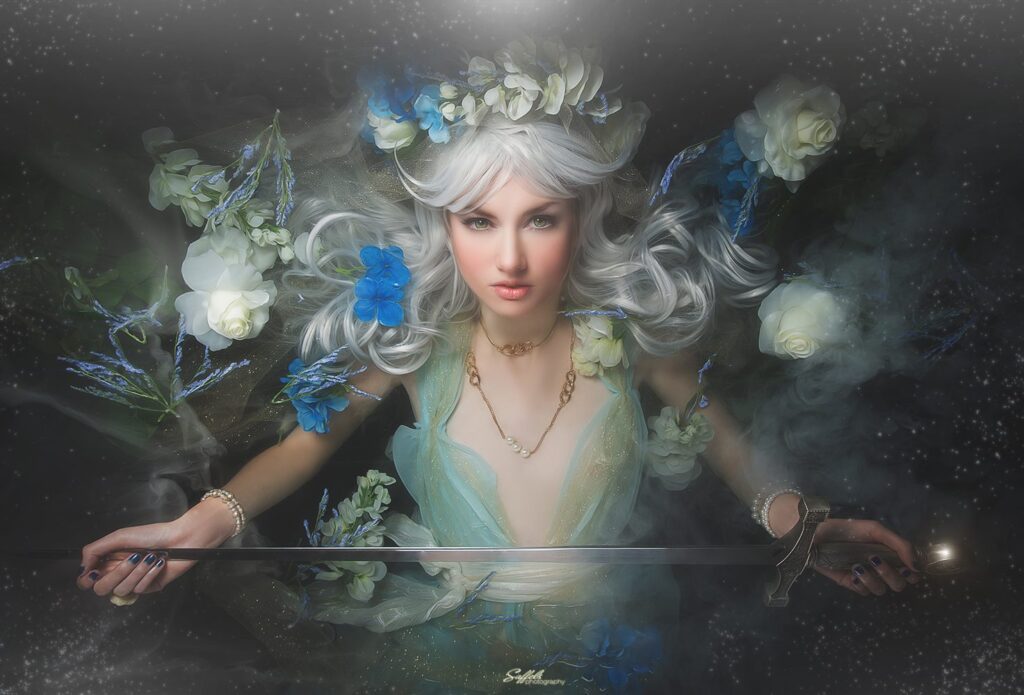
Header: Princess Anastasia by Mike Saffels. All finished costume images are from artists who will be participating in our upcoming cosplay zoom class: Saffels, CutiePieSensei, and Hoku Props. Details at the end of the article.
On the Venn diagram of con-goers, it may seem like there’s little overlap between cosplayers and visual artists. You rarely see them mix aside from the occasional vendor who dresses up at their table. But there are plenty of ways to blend digital art and real life crafting, especially now that 3d printing’s mainstream.
Designing your outfits digitally can give you a level of finesse you might not be able to achieve doing everything by hand. Your patterns will be smoother and your fabric colors better-coordinated, and you can even practice prop painting in Photoshop before doing it traditionally.
So for any digital artists considering cosplay, or cosplayers considering digital art, here are some ways you can integrate the two—and incorporate a Wacom tablet—to both save you a ton of time and take your designs to the next level.
Planning
Reference Collection
…OK, I should explain.
Like any art project, the first step to not biffing it is finding sufficient reference. PureRef is a donationware program that allows you to collect all your images in one window, preventing you from having to flip between thirty Chrome tabs at a time. You can group them, resize them, rotate them, flip them, sort them: anything you need. And although there’s no difference between using it with a mouse and a tablet, dragging and dropping images directly from your browser with one flick of a Wacom pen is a lot of fun.
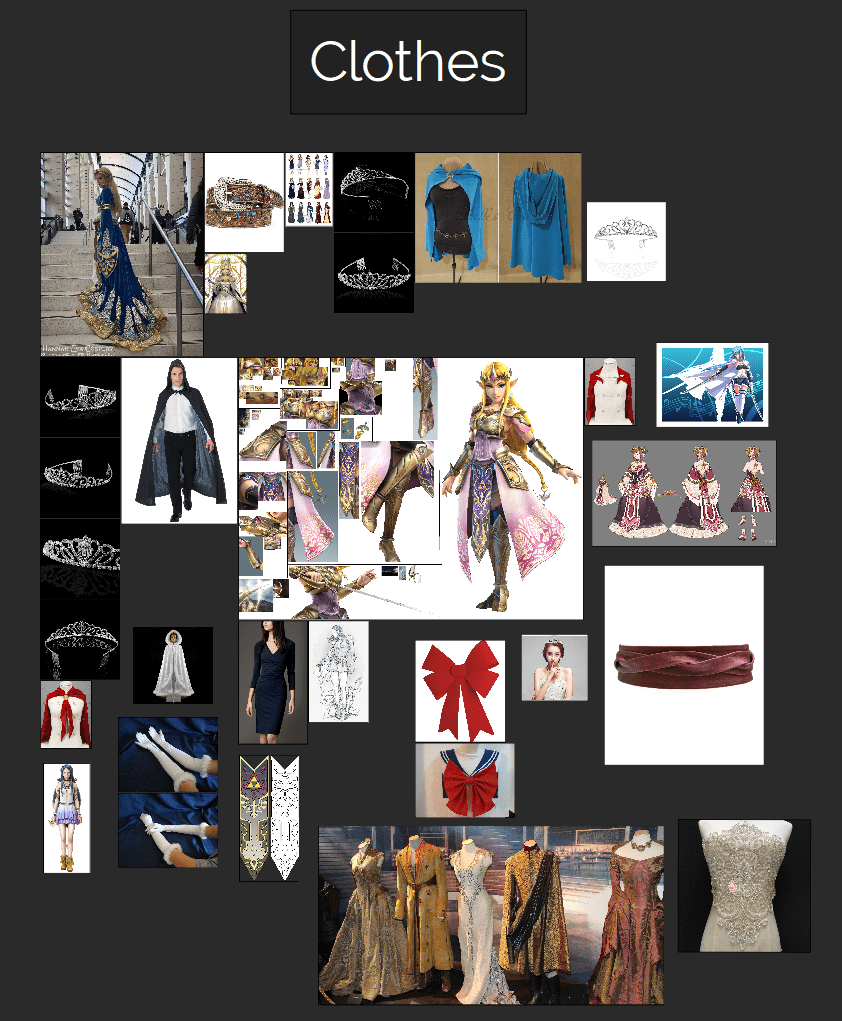
My own PureRef window for a magical girl character design. (For an illustration, but the idea is the same.)
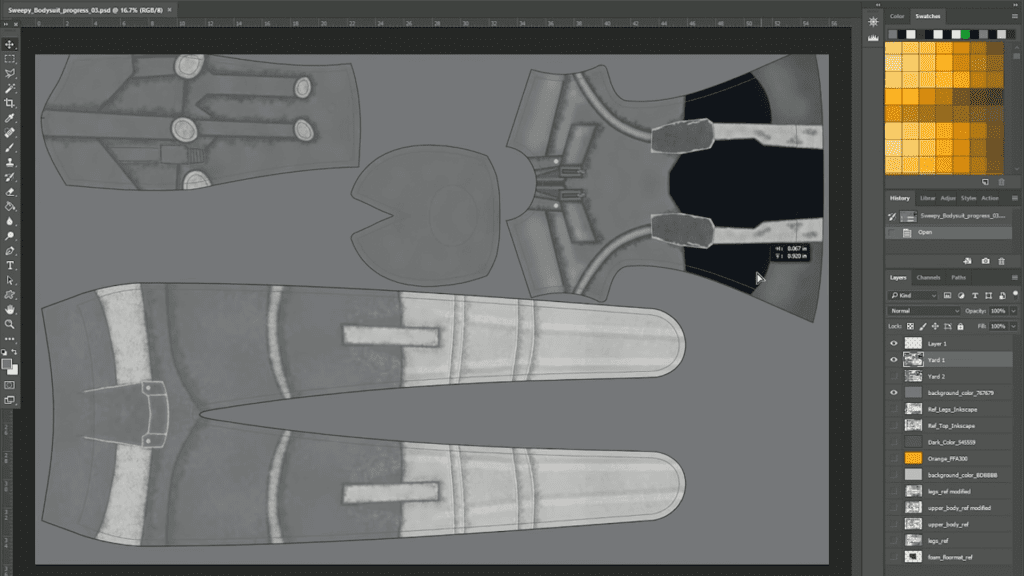
Measuring
With a simple DPI conversion, Photoshop’s ruler tool can be used to measure the real height and width of anything in a picture, provided you’re viewing it straight on. Here’s the easiest way:
- Crop the image to the borders of an object you know the height or width of in real life. Make sure “Delete Cropped Pixels” is unchecked.
- Open the scale window. Type in the length or width of the object—in inches—into the Document Size panel with “Resample Image” unchecked. Click OK.
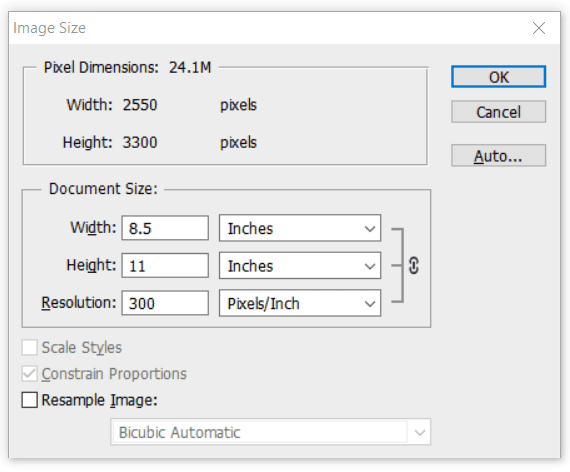
- Go back to the crop tool, and drag the window back out to the full image.
- Go to the ruler tool, nested under the eyedropper. If it’s set to inches (which can be done through Preferences > Units and Rulers), it will now be measuring in real size.
Vermilion Fire of the podcast Cosplay Stitch and Seam likes to use Photoshop to scale her prop plans to the same size relative to her as the weapon is to the character. If she has a picture of them holding a sword, for example: “I’ll [take] a picture of myself … then I can take front, side, and back views of the character and paste it over the top to get an idea of what the height should be … and now I know that their sword will be so long.”
Sketching and Note Taking
Even if you’re lucky enough to have high-res reference of the character from every angle, being able to draw their clothing yourself and figure out its proportions will give you a new understanding of it.
It’s often necessary to make notes and draw dimensions on your images as well, and the Wacom One, with its lightweight pen and paper-textured surface, is excellent for taking notes by hand. You may even want to draw assembly diagrams for more complicated pieces.
Concepting
Being able to draw will give you a lot more freedom with costume details. If you’re working on an adaptive costume—i.e., any that isn’t an exact replica of a character’s canon outfit—or even just cosplaying a character drawn in a simplified art style, you may have to make up small details like fasteners yourself, or even invent whole new alternate outfits. Having to do all that by hand is no small feat unless you’re familiar with drafting.
And if you can find, or draw, lineart of a character, you can use it to preview specific outfit colors. If you’re buying supplies online, websites like JoAnn Fabrics offer swatches of all their options, so if you’re torn between seafoam and teal blue, you can screenshot their list, use the eyedropper to sample your potential different colors, and A-B test them.
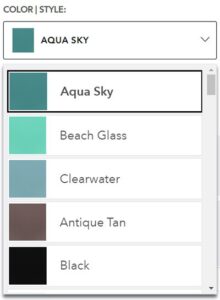
From JoAnn’s costumes section
Blueprints
Complicated props often need blueprints, and doing them digitally offers way more precision than trying to work everything out in pencil.
If you’re not familiar with the process, it usually means taking a side view of the item and vector-tracing it in Adobe Illustrator, Inkscape, or an equivalent program. This is simple enough to do with a mouse and the pen tool.
…If you have a clean side view, that is. That might be easy to get if you’re working from a video game model, but what if your outfit is from a pixel art game or an obscure TV show from the 80’s? You might have to draw it yourself from a completely different reference. And guess what makes that easier. (Was it a Wacom tablet? Because that’s the right answer.)
Printing, 2d and 3d
Some knowledge of cosplay terminology will be needed for this section.
CLOTHING
Print perfect Patterns
When I say “patterns” here, I mean the patterns on the fabric.
Drawing ornate or repeating designs by hand is tedious and takes a long time to learn, not to mention how tricky it can be to ensure symmetry and smooth curves. So why not skip some steps?
If you just want to add a simple decal with fabric paint, digital is by far the most convenient way to make stencils for that. You can do it with whatever paper you can tape to your fabric, but there’s a method I learned from making clothing patches that can easily be adapted to cosplay:
- Get a box of sticker paper. You can get them at most big-box office supply stores.
- Print your lineart on it.
- Lay it on a cutting sheet and use a sharp X-Acto knife to cut along the lines.
- Carefully peel it up and stick it to your garment.
- Gently paint over it, wait for it to fully dry, then pull up the sticker paper.
I found that if you were patient with the knife (and had a sharp blade; that part was important) you could make patterns more intricate than I thought possible.
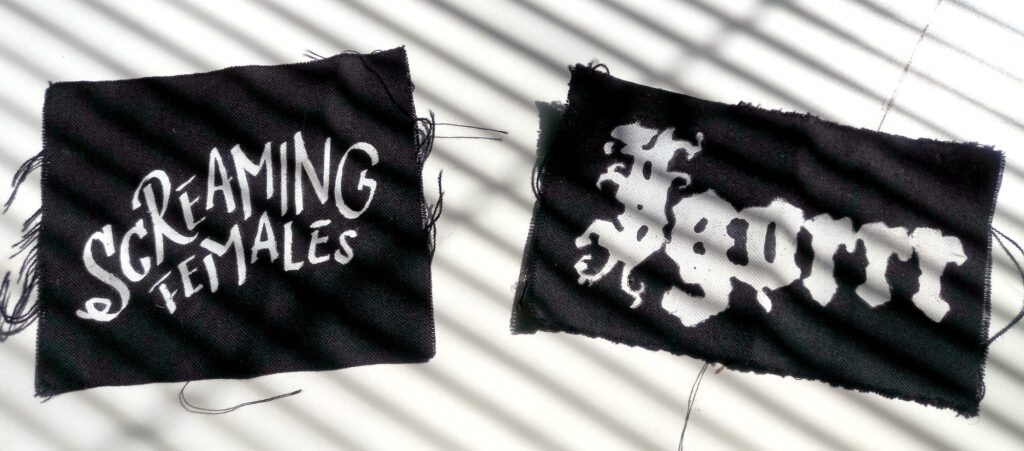
A couple unused ones. Pardon the wrinkles, they’ve been in a drawer for two years.
If you can splash out the money to send your design to a fabric printer, you can skip a lot of work and still get fully professional results. Some companies like Spoonflower let you order fabric printed with either a single image or a tiled one, and you can either include cut lines in your design or add them later.
Punished Props Academy’s layout for a costume assembly to be sent to Spoonflower
Cut perfect patterns
And when I say “patterns” here, I mean the patterns you cut out of the fabric to make clothes.
If you want to share patterns online, they have to be digitized, and drawing them with a tablet is a hell of a lot more fun than doing it with the pen tool. Or, if you download one from someone else but it doesn’t fit your body type, you can simply vector trace and modify it.
Finally, there’s a fashion design program called Clo3D that not only lets you design garments and pick fabrics, but simulate folds and motion so you can see how your choice of material will drape when it’s cut to its intended shape. When you’re done, you can export your plans to PDF blueprints with exact dimensions. It’s $50 a month, but it has a 30-day free trial if you just want to use it for one project and then dip. (I don’t know if I should advocate that.)
There are also open-source alternatives with fewer features like Valentina and Seamly2d, but I didn’t have time to research them.
Side note: Die and Laser-Cutting
If you’re considering getting heavily into fabric cutting, you might want to invest in a Cricut—an electronic die cutter that connects to your computer or phone and can cut designs out of anything from paper to leather, depending on what size model you get. “I use [Illustrator] and my Cricut to make life easier when doing small iron-on details,” says cosplayer and fashion designer Tiffa Alter.
And for those of you with the budget for metal accessories—like clasps and faux military medals—vector images or line drawings can be sent to a laser cutting service. (Don’t make any weapon props out of metal. They won’t let you into cons with them.)
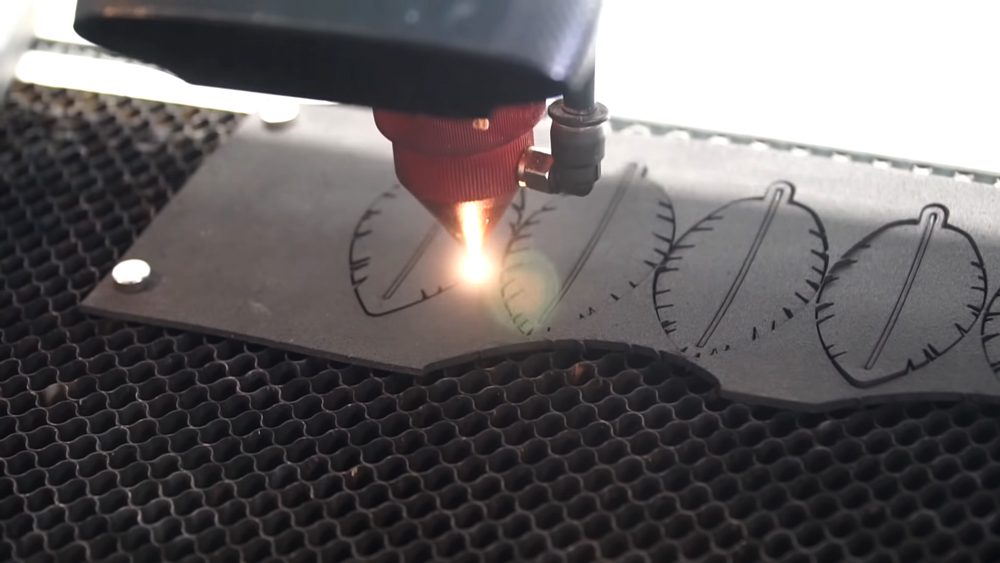
Hoku Props laser-cuts feathers for a Mabinogi cosplay. From Youtube
PROPS
Digital tools can be used to make your props look more professional at every step, from modeling them to making sure your cuts are straight to previewing the paint job.
Modeling
I did a full article on 3d tools for artists back when I first started with Wacom.
Many different types and tiers of 3d modeling can be used in cosplay, all of which work with a Wacom.
First there are drafting programs: CAD and its offshoots can be used for both blueprint making and direct export to 3d printers. Sketchup can too, although it has a caveat I’ll cover later.
In plain ol’ 3d modeling, you have all the traditional paid programs, but if you want a free option, there’s Autodesk’s Fusion360 and the omnipresent Blender. (Is there anything that program can’t do?)
Then there’s 3d sculpting, which is covered in more detail in the linked article: MeshMixer, Zbrush, or its abandonware program Sculptris can be used to model foam helmets or other things that involve a lot of complicated and organic shapes.
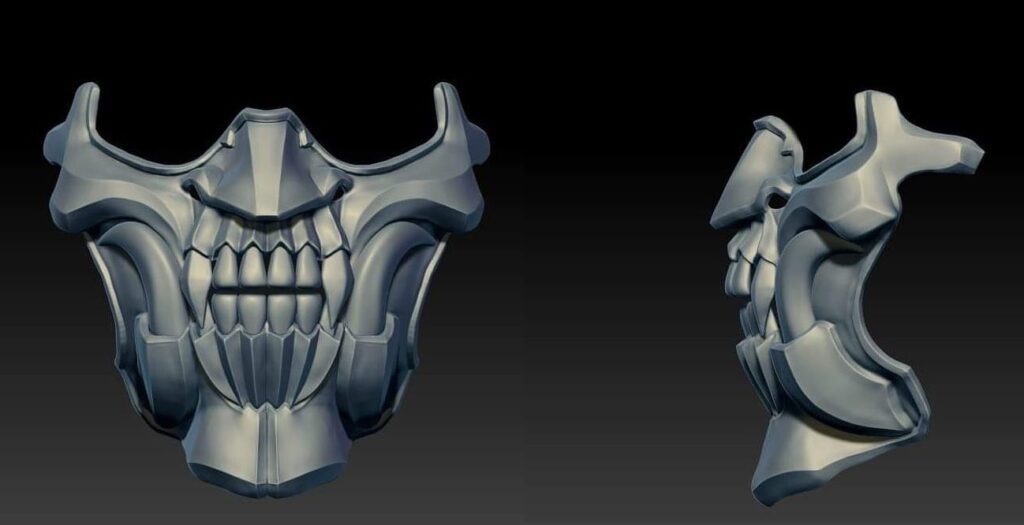
Mask for World of Warcraft‘s Bloodfang, 3d sculpted by Hoku Props. From Instagram
Once you have your model, you can either export and trace over it as was mentioned before, or the freeware program Pepakura Designer can also be used to turn 3d models directly into blueprints.
Side note: Printing prop patterns
For patterns larger than 8.5 x 11—you know, the vast majority of them—FedEx Office will do architectural prints for $1.25 per square foot (or at least, they will when they reopen.) but they’ll be on very thin paper.
If you just want to use your home printer, there’s a solution in Photoshop’s slice tool, which can be used to divide your image into letter-sized pieces that you can print out, tape together, and fill in the gaps at the margins with a black marker. There’s also a website (giggling allowed) that will do the same thing with any large image, automatically accounting for margins.
3d printing
Printing’s final form. 3d might be the best solution for making small, intricate props like medallions that would be too fiddly to cut out of foam, and it’s probably the most obvious crossover between digital art and old-school crafting.
There are plenty of 3d printing services you can hire, makerspaces often have 3d printers if there’s one where you live, or if you want your own, Benni Quindt of Kamui Cosplay says that virtually any unit will do the job, the only difference between cheap and expensive ones being speed and “roughness.” A rougher model means you’ll have to sand it more before it’s smooth enough to paint, “But the results will be the same,” he insists.
The printers take STL and VRML formats, which CAD and many other 3d programs can export to. Sketchup, my go-to first program suggestion for people who know jack squat about 3d modeling, can be used to make props, but it doesn’t natively export to these formats, requiring a plugin.
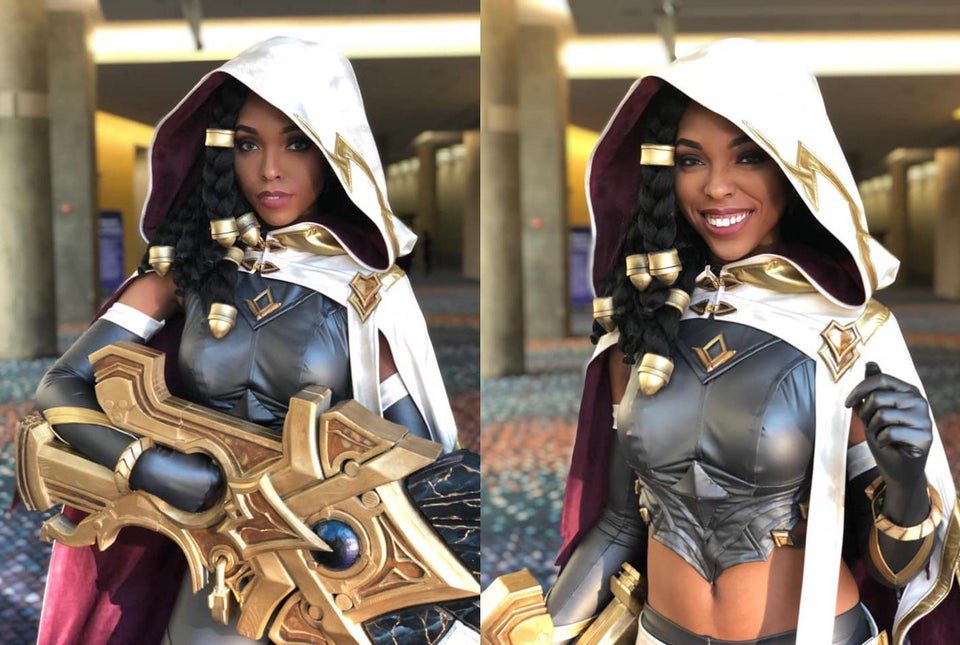
CutiePieSensei’s League of Legends cosplay with a 3d-printed weapon
Painting
Digital painting can be used to preview the colors and strokes you’ll need to paint a prop in real life. For example, if you’re not sure how to paint a convincing wooden gun stock, you can practice in Photoshop using imitation-acrylic brushes, comparing it against reference, before you waste materials doing it through trial and error in real life.
Photomanipulation
Saffels is a master at editing photos to give them a hyperreal and painterly quality. From his website
If you won’t just be wearing your costume to the con but doing on-location photoshoots with it, editing knowledge is a must. From applying bokeh and color filtering to shooting on greenscreen and using an entire replacement background, you can learn it all on Youtube, and it’ll take the realism of your cosplay to the next level. Going even further, photobashing and overpainting, two techniques concept artists use to integrate photography into their workflows, are great skills to learn for cosplayers with an artistic bent.
Finally…
If you’re stuck on whether any of these programs and gadgets are worth the price, bear in mind that all of these are practical skills that can land you jobs too.
On a less tangible level, the skills you’ll learn cosplaying will cross over to digital art. Illustrator Ellen Havasy says cosplaying has given her a “better understanding of how clothing and fabric drapes and flows,” helped her in “remembering to include details such as seams, trims, and beading, in pieces for added realism,” and given her the “ability to discern what materials are appropriate for different social classes, climates, and time periods when designing character outfits.”
Be warned that it might ruin other artists’ work, though. “I’m eternally furious about bad costume design choices in popular media,” she says. “Lack of seams on video game textures, boob socks, chainmail spandex, corsets with nothing on under them, kimonos being folded the wrong way…”
—
Wacom has a cosplay Zoom panel coming up on June 24th at noon PST, 3 PM EST. Click here to register. It’s free!

WoW’s Uthar Lightbringer—costume by Hoku Props, photography by Saffels
—
About the Author
![]() CS Jones is a Philadelphia-based writer and illustrator. The former is best seen at thecsjones.com, and the latter at @thecsjones on Instagram. He’s only cosplayed once, so unlike, say, his Twitch streaming article, this one was put together from secondhand accounts and research—if there are any interesting uses of digital art in costume-making he missed, feel free to @ him on Twitter.
CS Jones is a Philadelphia-based writer and illustrator. The former is best seen at thecsjones.com, and the latter at @thecsjones on Instagram. He’s only cosplayed once, so unlike, say, his Twitch streaming article, this one was put together from secondhand accounts and research—if there are any interesting uses of digital art in costume-making he missed, feel free to @ him on Twitter.


