

Inspired by trailer for the new live-action A Little Mermaid film starring Halle Bailey and want to learn how to draw your own mermaid or even a “mersona?”
In this tutorial, Michelle Hoefener walks us through how to paint a captivating mermaid with composition, color, lightingm, and finishing touches. She uses a Wacom Intuos tablet with Adobe Photoshop CS5 on a laptop.
How to draw a magical mermaid


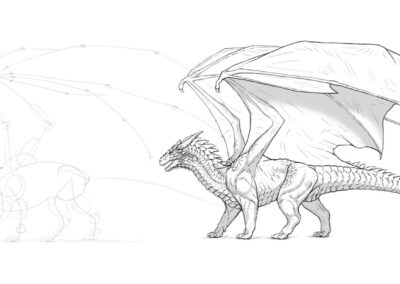
Step 1: Sketch
In this step, I will be sketching a magical mermaid delicately swimming in the warm waters near the surface, with the sunlight glistening down onto her from the water surface above.
I start with the thumbnail sketch, which is a simple low detail rough drawing showing the grayscale idea of how the overall artwork will look, emphasizing the layout of the scene. In this artwork, I want to allow the mermaid girl to come towards the viewer from the ocean deep through the bubbles with her hair flowing around her. That is what I have laid out in this thumbnail sketch.
Using references to get the right body positioning might be useful during this step. It’s also important to decide how “fishy” you want your mermaid to look. Some look like normal human beings from the waist up, others have fishier “ears,” gills, or other elements.
I then clean up the thumbnail sketch with line art by creating a new layer on top of the thumbnail sketch to add in the line art on top, tracing over the thumbnail sketch with clean detail of the mermaid.
I decide to keep only the edge definition that outlines the mermaid accurately, removing anything that would cause her to be out of proportion or lacking in detail or correct anatomy or feeling.
Once the detail is finished, I then erase out the sketch from behind the mermaid (or just hide the sketch layer). Now the the line art is ready for color.
Get creative inspiration direct to your inbox
Sign up for the Wacom Creative Newsletter for tips, tricks, news, and offers that will excite your imagination.


Step 2: Color
Next, I add in the overall colors for the scene. Color is very important in art, because it helps to lead the eye of the viewer and set a mood and feeling as well as help to describe what is happening and where the scene is taking place.
First, I start with some flat colors and basic shading to get the “values” right. “Value” in drawing just means how light or dark an object or area is. For more on value, click here.
Getting the value set first really helps with choosing colors — your general palette matters, but choosing colors that work well also depends on how they look when contrasted against each other and how light or dark they are. It will also help when you’re shading and adding lighting effects later!
I decided to go with soft pearlescent pastels, which are light pale colors like pink, peach, lavender, sky blue, and mint green, for a delicate aquatic feel which I observe from pearls, seashells, and sea life.
I choose a warmer peach/pink color for the mermaid’s hair and a pinkish lavender purple for her dress and tail, which are warmer colors on the color wheel to keep the main focus on her. This contrasts with the cool blue and green environment which, since it’s cool on the color wheel, softly recedes visually from the viewer’s eyes.
This is because hot or warm colors like reds, oranges and yellows pop out when set on top of cold or cool colors like blues and greens in color theory.


Step 3: Lighting
In this step, I add the lighting and shadows to accentuate the forms of the mermaid and to show the light shining down onto her from the water surface above.
I paint on top of the previous layer with a lighter color to add light as though it’s about noon, as this type of lighting comes from the sun straight above, which will fall onto the mermaid from straight above and create interesting shadows.
I then use the mixer tool to smooth the lines into the painting by creating a new layer above the previous layer, and check the “sample all layers” box in the Options menu. I also use the airbrush with the mixer tool for smooth blending.
Once the artwork is nice and polished with the mixer tool, I then add further highlights and rendering on top with the airbrush because this brush can quickly add detail without the need to further polish, because it is already a soft smooth brush.


Shop Wacom Products
Visit the Wacom eStore to find the perfect tools for your next project.

")
Step 4: Finalizing
In this final step, I add the final bits and pieces to add character to the illustration.
I use a glitter brush, which is a brush that has detailed scattering affects that can make the artwork look like it has textured detail like glitter or scales. I use this brush to bring out my mermaid’s fish scales and to add extra bubbles into the scene. I then finalize the image with the sharpen and motion blur filters.
To sharpen the artwork, I go to the Filter drop down menu and select Sharpen and then I select Smart Sharpen. To use the Motion Blur filter, I go to the Filter drop down menu and select Motion Blur.
At the final stage, I adjust the colors by going to the Image drop down menu, and then I select Adjustments, and then I select Hue and Saturation. Here I choose to add saturation to the focal points of the artwork.
Finally, I add finishing touches by hand with the airbrush, like eyelashes, detailed scales, etc. I decide a piece is finished based on what the goal of the artwork is; some artwork requires a lot of realistic detail, while other artwork is more stylized and requires less detail.
Once I have decided I have achieved the goal of the artwork, I decide that it is complete! That being said, sometimes after the artwork is complete, I will come back to it later and make a few more revisions — it can help to take some time away from a piece to get a fresh perspective and see it with new eyes.
The process … in GIF form!

Need more mermaid content? Check out How to draw a chibi mermaid from Bitsy Tandem, another mermaid tutorial from Tom Bancroft, or check out our #MerMay content from 2021!

About the author:
Michelle Hoefener is an illustrator and concept artist based in the USA who works as a freelancer. She went to the Illinois Institute of Art: Chicago, studied Game Art and Design, and has worked for companies like Riot Games, Midway Games, ImagineFX, Zenescope, Soda Pop Miniatures, and Dynamite Entertainment.
Characters are her favorite subject to illustrate and design, and she is always creating new and inspiring characters to depict in fantasy, comics, paintings and game design.


