

Let’s face it, post production is time-consuming and dreaded by most photographers. Sure, once in a while you get that perfect shot where you can’t wait to get to the PC to edit and post it. But 9 out of 10 times you’re stuck at the desk trying to hit deadlines, so you’re either staying up all night or sacrificing your art to get the client their images on time. It doesn’t have to be this way. Here’s how I achieve professional-grade edits using Photoshop in less than 15 minutes per photo.
Workstation
Working like a nomad, balancing a 13-inch laptop on your lap in the airport is like trying to clean the snow in your driveway with a shovel that’s missing its handle. You’ll eventually get it done, but you’ll be half dead and swearing you’ll never do it again. To combat this, it is essential to build the perfect workstation that will make you look forward to sitting at it. I’ve reached the point where I shoot to edit — that’s how much I enjoy sitting at my workstation. Personally, there are 3 things I suggest to be happy at your workstation:
- Invest in a chair made to support the back. Even the most expensive chair on the market will still be cheaper than a visit to the doctor. As photographers, we spend a decent amount of time at our desks and on our feet. You don’t want to be shooting with your back on fire after sitting at a desk for a day.
- Mount your Wacom tablet so there is no stress on the wrist. The wrist should be perfectly in line with your tablet, leaving no room for it to be at an awkward angle.
- Most importantly, get a sound system that shakes your pants off. Your favorite tunes will make editing so much more enjoyable and fun!
Organizing & Culling
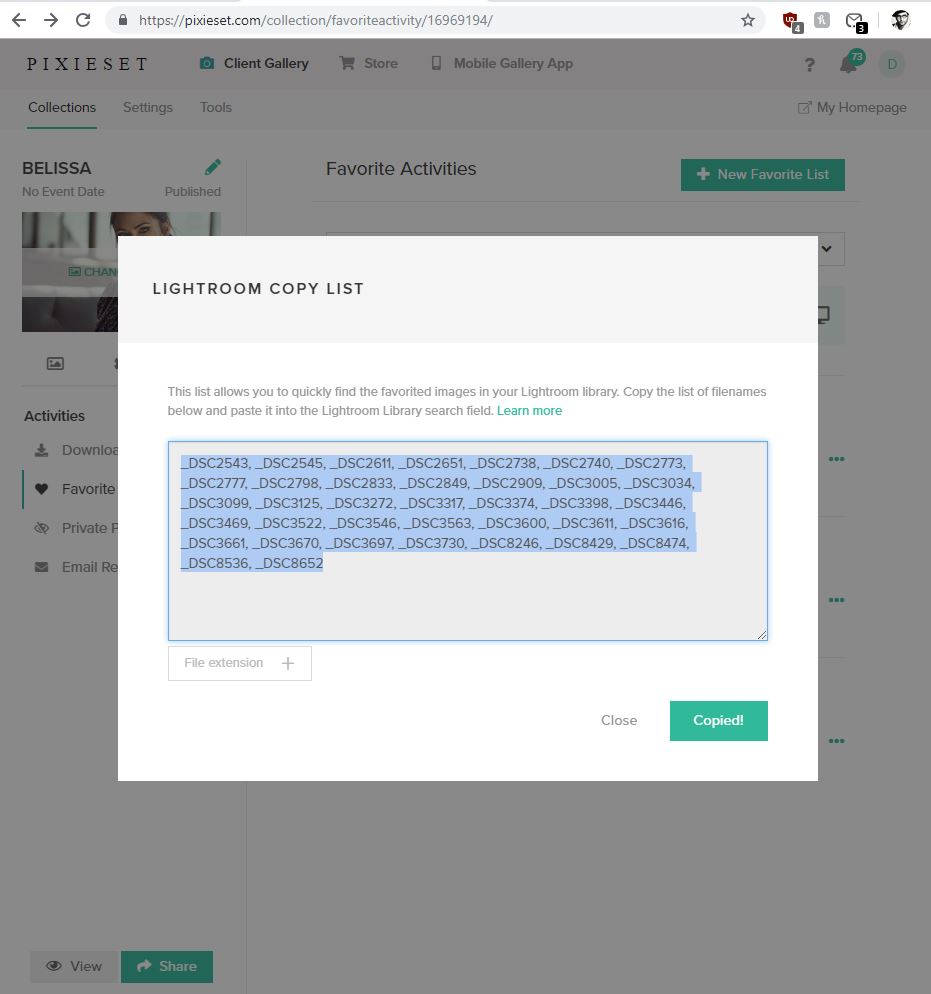
I recently started using Pixieset to organize my images and share them with my clients. It is, by far, the best option on the market and costs about $100 per year. Once images are uploaded into Lightroom, create a collection with the Pixieset plugin and hit the publish button. The images get thrown onto a personalized Pixieset website and after inputting a clients email there, they get notified. It has a gorgeous interface and the client can make sets of favorite images which can be imported back into Lightroom in about 15 seconds. The days of reading file names, finding them and rating them manually are gone. This is a huge time saver!
Ergonomic Logistics
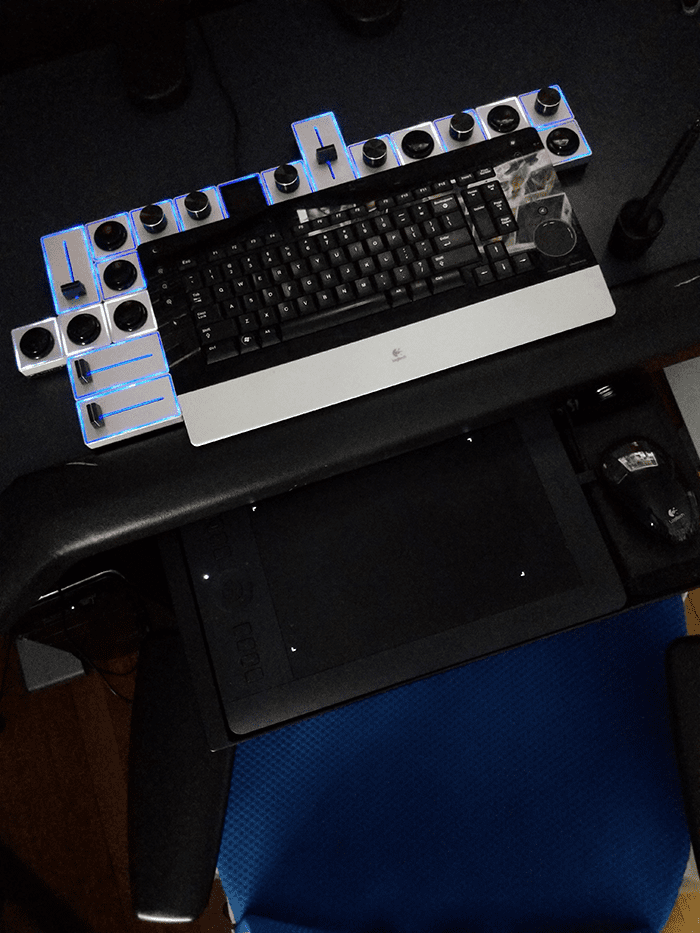
Mastering the perfect placement of a keyboard, mouse, Wacom Intuos Pro tablet and Palette Gear is crucial. I never have to look down while I edit and can keep my eyes on my monitor. When buttons, dials and the tablet pen are all placed with thoughtful calculation there is never a moment of hesitation. Those few seconds spent scrambling for the right shortcut or button can add up to years (no joke!) I hold my tablet pen with my right hand, and my left hand is either placed on the keyboard or on the Palette Gear. Further, my left armrest is slightly higher and on the same level as the desk which holds my keyboard and Palette Gear. My right armrest is lower and on the same level as the keyboard tray which houses my Wacom tablet.
Shortcuts
Shortcuts are one of those things that can be overwhelming to set up. I remember having no idea where to start or what shortcuts I would use frequently. I was lazy and thought it was easier to just go through the menus or stretch my hand uncomfortably across the keyboard to hit ALT + CTRL + SHIFT + F4 while eating a feta cheese wrap. Here’s a basic list of shortcuts I use that will save enough time to go to the Bahamas and back within a year.
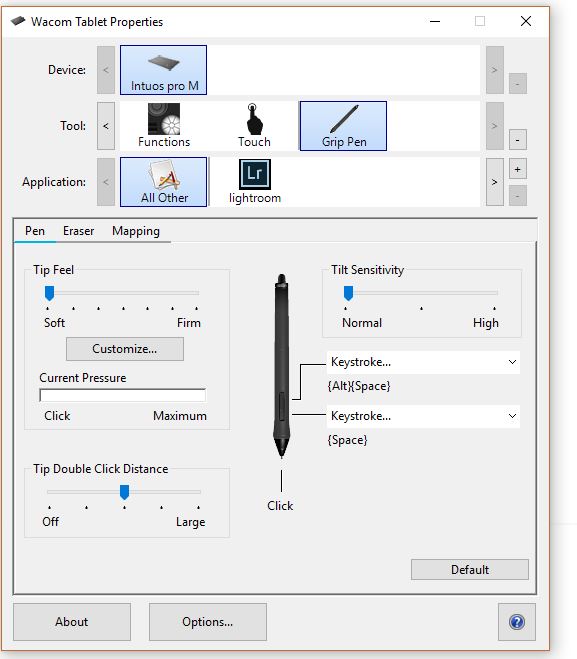
Remap the two buttons on your Wacom pen to do the following:
- Set one button to zoom in and out of your image in Photoshop (keyboard shortcut ALT+SPACE).
- Set the other button to pan the image (keyboard shortcut SPACE). By just holding the button while panning the pen on the tablet you instantly pan or zoom into your image.
Actions Actions Actions
Hit the Record button in your action panel and record yourself saving an image in full resolution to your client’s final edit folder, resize to 2048 pixels on the larger edge, change the color profile to sRGB and save again to a “Use for Social media folder”. Hit the Stop Recording button. Map one of your buttons on Palette Gear to play this action. If you only use your Palette Gear buttons to play shortcuts you’ve already made that purchase worth it, trust me. You can do the same to your ExpressKeys on the Wacom tablet, but there’s nothing like those huge color-coded Palette Gear buttons.
Set your Palette Gear to control things like volume, skip track on Spotify etc. You can even make the entire Palette Gear change its buttons functions as you change through programs automatically (Lightroom, Spotify, Photoshop, Chrome). This makes a kit of 5 buttons virtually 1 million. The colors for each button change automatically so you don’t get confused.
Shortcuts are limited only to your creativity.
Workflow
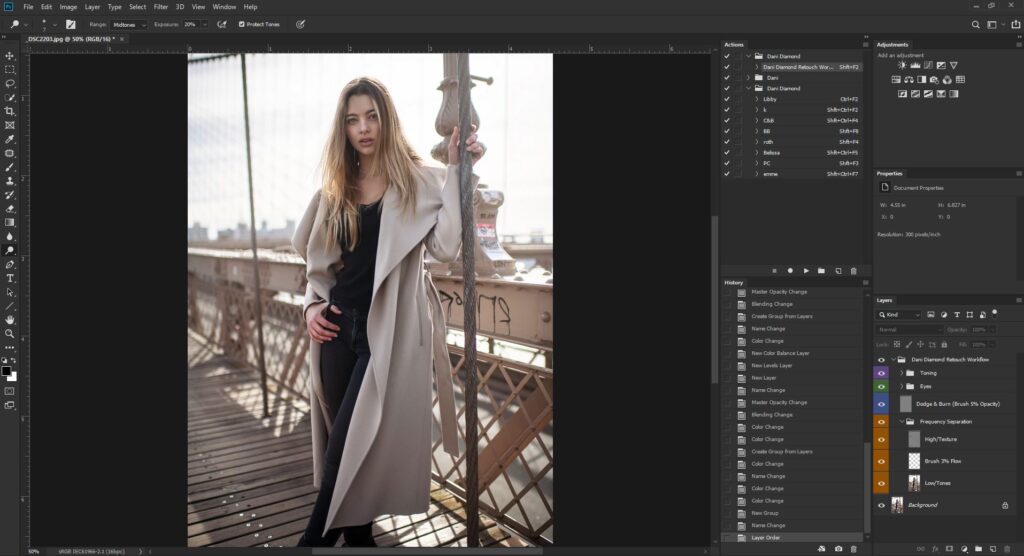
If you made it this far down the list, then I bet this is what you were waiting for. The key to efficiency is mastering a consistent workflow when retouching. When you are consistent, it becomes muscle memory and you can retouch in your sleep. Not only is the work faster but the output is uniform and a set of images will all have the same toning and look. Here’s what I did. I watched every retouching tutorial on YouTube for a 2 year period. I found the best, but quickest method for each of the 4 steps to retouching an image. I turned these 4 steps into an action and as soon as the image is in Photoshop I hit my shortcut button to play that action. This action does not edit the images. It’s sole purpose is to prepare my layers panel so I don’t need to do the hard work like setting up my panel for frequency separation, etc. I have a tutorial that includes the action and how I use it but you can easily set it up yourself after watching tutorials like I did. My 4 steps are: Frequency separation, Dodge & Burn, Eyes, and Toning. I retouch in that order. At first this process will take 45 minutes for an edit. But after doing 1 edit per day for one month I guarantee editing times can be cut in half. Within a year of doing one edit per day, not only will editing get quicker but the quality of the edits will improve.
If you found these tips helpful feel free to follow me on Instagram where I share the little that I know on portrait photography.
About Dani Diamond
Dani Diamond is an East Coast photographer whose breathtaking portraits and signature style have taken over all forms of social media, from Facebook to Fstoppers.
Dani’s gear of choice is his Nikon D850 and his favorite lens the 85 1.4g. He uses the 85 to allow him to be close to his subject but also allow for nice compression and blur. The “blur” is what got Dani interested in portraits in the first place, his curiosity pushed him to find out how he could create that, too. The rest is all in the details, and as Dani delved into the world of photography, he made a new path.
The process of creating such gripping photos comes with something every artist needs. A workstation. Dani’s workstation is like no other, equipped with a Wacom Intuos Pro tablet, Palette Gear, and a surround sound to so Dani can work in harmony while retouching. He has created a Facebook group for music retouching (Epic Remixes For Retouching), where other photographers and editors share their work jams and share retouching secrets.
Dani believes that you don’t need to be talented to be successful, but you need to be ambitious. He hopes to continue his career in fashion and portraits for the rest of his life.


