Vivienne Le es una diseñadora y artista afincada en Berlín, Alemania. En este vídeo y post invitado, diseña un marcapáginas tanto en el software de Adobe como en el de Affinity para compararlos y contrastarlos.
¿Sabías que cada compra de una Wacom One lápiz o tableta de dibujo incluye una versión de prueba gratuita de la Suite Affinity? Si quieres saber más sobre las diferencias entre los programas Affinity y Adobe, también puedes consultar los anteriores artículos y vídeos de Viv con Wacom: Cómo sacar el máximo partido a Affinity Designer con tu pen tablet Wacom, o Adobe Illustrator vs. Affinity Designer para diseño gráfico: Una comparación de software.
Introducción
Hoy diseñaré un marcapáginas con Adobe InDesign y Affinity Publisher para comparar y contrastar las características clave de cada programa. Primero digitalizaré un dibujo físico que hice con la pen tablet Wacom One, y luego te guiaré por mi proceso de maquetación del texto y preparación de los archivos para imprimirlos.
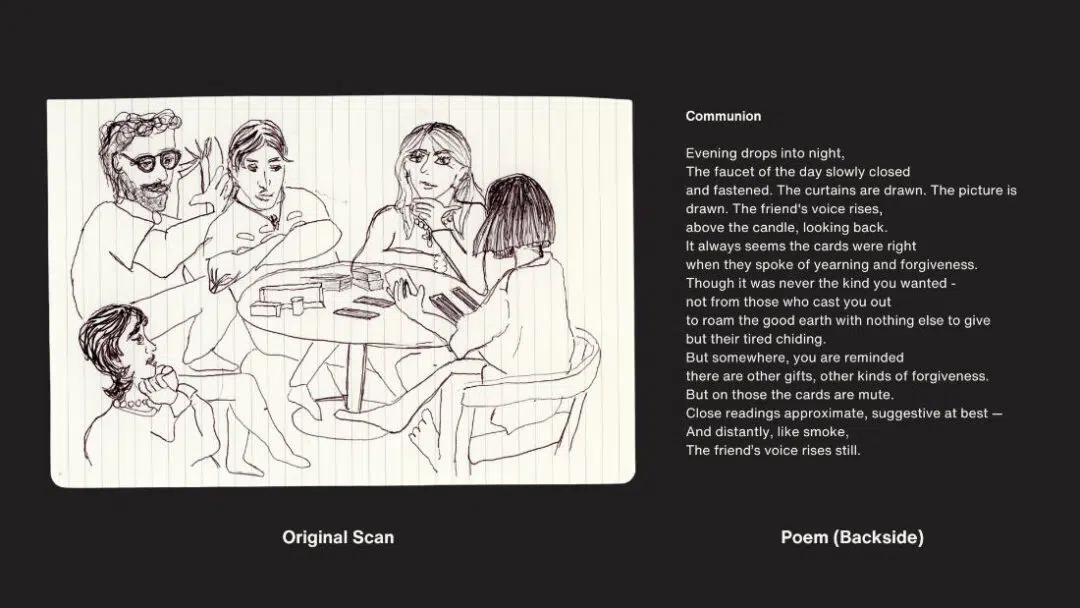
Para que te hagas una idea, el marcapáginas combina una ilustración en 2D y un breve poema escrito por mi amigo en la parte trasera. Como puedes ver en este escaneado original, quiero borrar las líneas del papel. Primero lo haré importando el archivo a Adobe Lightroom, que es el programa que creo que tiene la mejor herramienta de borrador generativo para el trabajo.
Digitalizar el dibujo físico
En Lightroom, utilizo una herramienta llamada Eliminación Generativa. Esta es una nueva herramienta lanzada por Adobe a partir de 2024 y creo que es la mejor para trabajos de limpieza como este. Lo emparejo con mi pen tablet Wacom One para hacer selecciones rectas que eliminan fácilmente las líneas. Voy a terminar de limpiar esto. Hay algo de arte en este proceso, ya que voy tomando decisiones sobre qué elementos conservar y cuáles borrar.
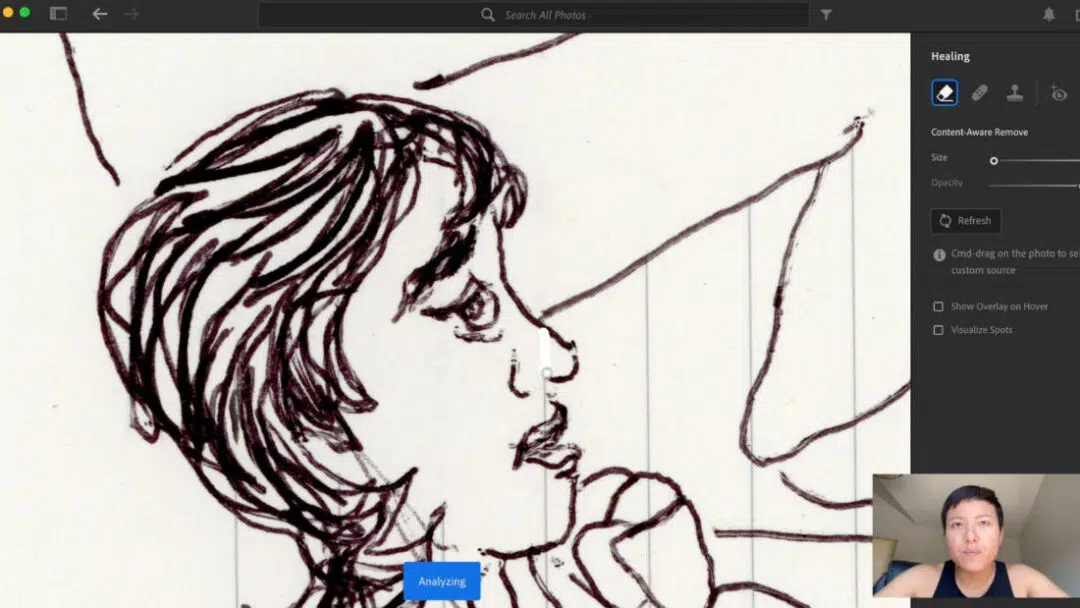
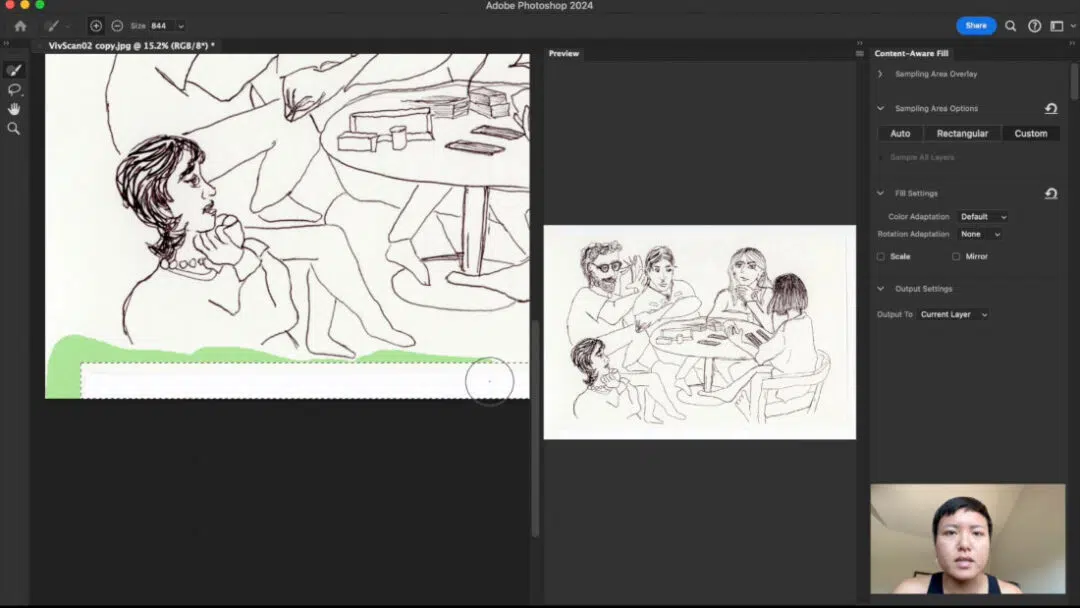
Después, amplié el fondo de papel del escaneado utilizando Adobe Photoshop. Primero selecciono el espacio que quiero rellenar, luego hago clic con el botón derecho y selecciono "Relleno consciente del contenido". Luego selecciono las zonas que quiero que la herramienta muestree y relleno con más papel.
Diseño del marcador en Adobe InDesign
Ahora vamos a poner el dibujo en Adobe InDesign. Aunque lo llamo marcapáginas, en realidad mi diseño tiene el tamaño de una tarjeta postal estándar, de 10 por 15 cm. Como ávida lectora, prefiero este tamaño para mis marcapáginas en lugar del formato tradicional de marcapáginas largo y estrecho.
Empiezo configurando mi documento con las dimensiones del marcador. Es importante añadir sangrado y márgenes. La norma para ambos es de 0,15 pulgadas. El sangrado significa que tienes que extender el fondo 0,15 pulgadas para asegurarte de que las impresoras cortan la impresión correctamente. Si no incluyes el sangrado, existe la posibilidad de que tus impresiones se corten con bordes blancos alrededor. Los márgenes son importantes para asegurarte de que todo el texto que maquetes permanece dentro de ellos, porque es posible que las impresoras corten cada página ligeramente descentrada y corten tu texto.
InDesign facilita la personalización de los diseños gracias a sus sólidas herramientas. Todo resulta muy profesional y preciso, lo que es estupendo para los documentos más grandes y complejos.
A continuación, introduzco la ilustración 2D. InDesign maneja bien los archivos importados, ya sean vectores o imágenes rasterizadas. Es fácil ajustar el tamaño y la posición sin perder calidad. A continuación, añado el poema. Las herramientas tipográficas de InDesign son muy detalladas. Desde los estilos de caracteres hasta el interletraje avanzado, tengo un control total sobre el aspecto del texto.
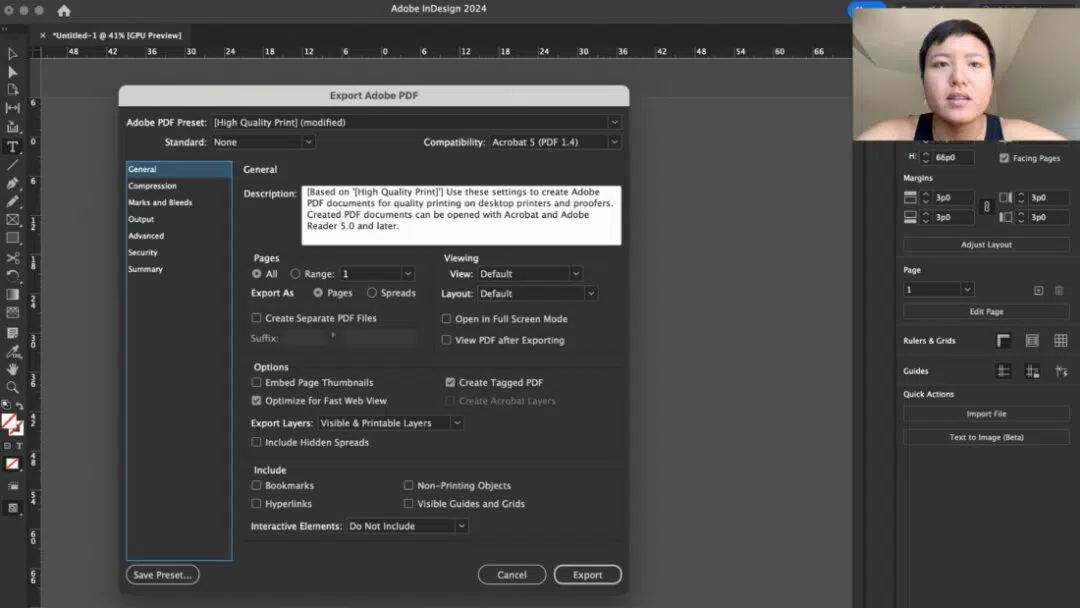
Cuando se trata de preparar la impresión, InDesign ofrece muchas opciones para configurar perfiles de color, como CMYK para impresión. Las opciones de exportación de PDF son amplias, y puedes comprobar cualquier problema de verificación previa para asegurarte de que tu diseño está listo para una impresión profesional.
Disposición del marcador en Affinity Publisher
Ahora, pasemos a Affinity Publisher. La configuración del documento en Publisher es similar: puedes ajustar las dimensiones, los márgenes y las guías fácilmente. Una cosa que me encanta de Affinity es la interfaz: parece algo más fácil de usar para los principiantes, con muchas herramientas claramente etiquetadas.
Introducir la ilustración también es sencillo en este caso. Una ventaja de Publisher es su función "StudioLink". Si necesito hacer ajustes en la ilustración, puedo saltar directamente a Affinity Designer o Affinity Photo sin salir de Publisher.
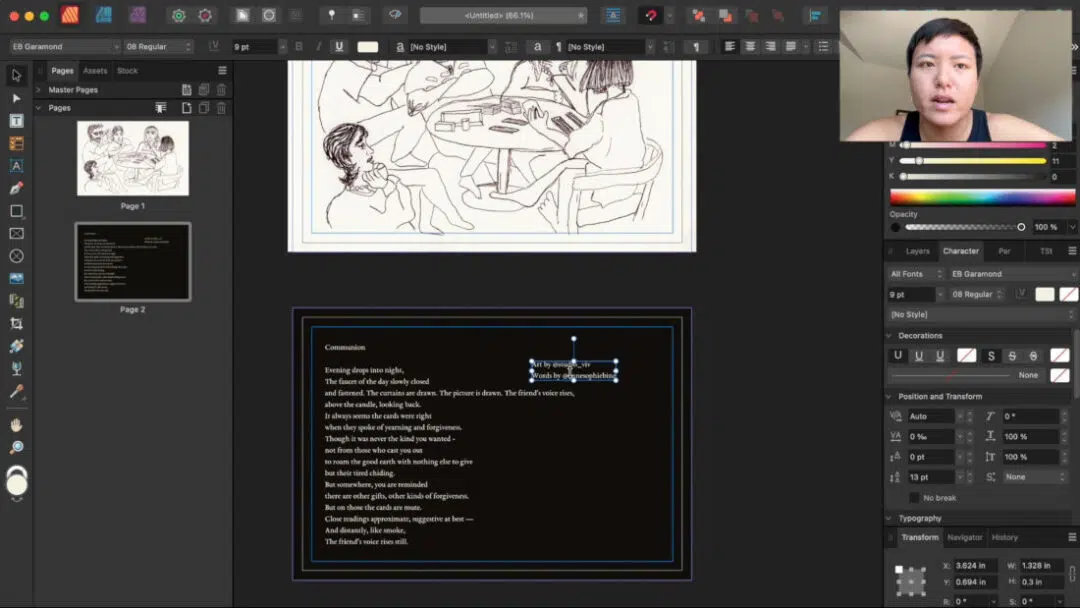
Añadir texto es sencillo, y Publisher tiene una buena gama de herramientas tipográficas, aunque no tantas opciones avanzadas como InDesign. Para proyectos más sencillos como este marcapáginas, es perfectamente adecuado.
Affinity Publisher también ofrece herramientas de preparación para la impresión, que te permiten configurar tu diseño en CMYK y exportarlo directamente a PDF listos para imprimir. No tiene todas las opciones de verificación previa que tiene InDesign, pero para proyectos de impresión a pequeña escala, el flujo de trabajo es bastante fluido.
Comparación directa
Entonces, ¿cómo se comparan estos dos programas a la hora de diseñar un marcapáginas? Vamos a desglosarlo:
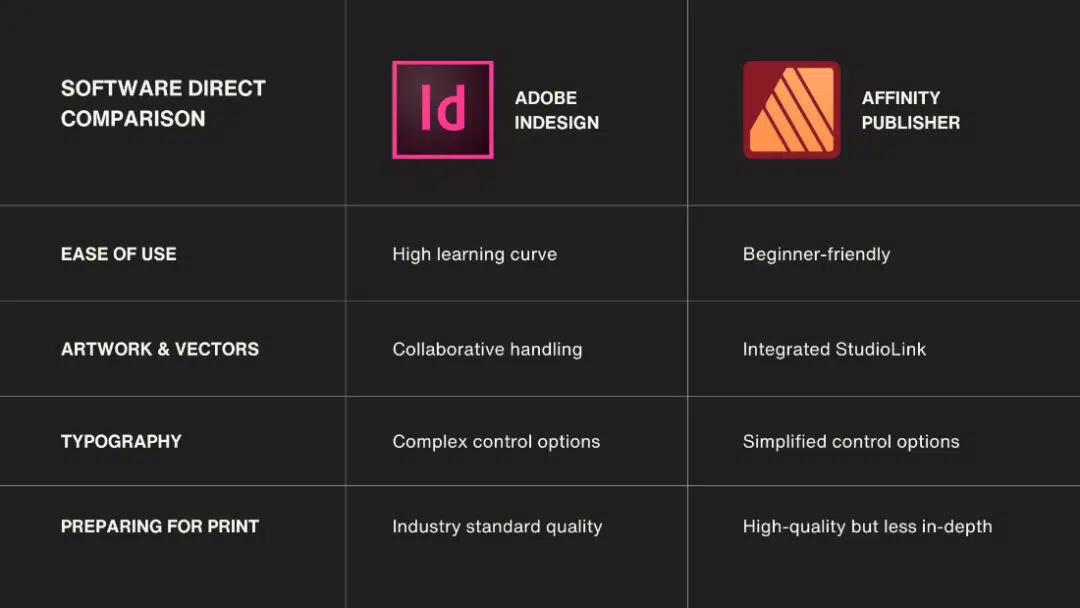
Facilidad de uso:
InDesign tiene una curva de aprendizaje más pronunciada, pero es increíblemente potente una vez que lo dominas. Affinity Publisher, por otro lado, es más accesible y ágil, perfecto para alguien que quiera crear diseños profesionales rápidamente sin una curva de aprendizaje pronunciada.
Artwork & Vectores:
El manejo de vectores de InDesign es de primera categoría, pero a menudo requiere pasar a Illustrator para ediciones detalladas. El enfoque integrado de Affinity Publisher con StudioLink te permite ajustar los vectores directamente dentro del programa, lo que puede suponer un gran ahorro de tiempo.
Tipografía:
Si necesitas un control de texto de alto nivel para maquetaciones complejas, InDesign es el camino a seguir. Pero para diseños más sencillos y a menor escala, como un marcapáginas, las herramientas de Affinity Publisher son más que capaces.
Preparación para la impresión:
InDesign destaca con controles detallados y ajustes de exportación avanzados, por lo que es ideal para trabajos de impresión profesionales. Publisher simplifica este proceso sin sacrificar la calidad, por lo que para la mayoría de los proyectos de impresión, realizará el trabajo sin los pasos adicionales.
Conclusión
Entonces, ¿qué software es el adecuado para ti? Si eres un diseñador profesional que trabaja en proyectos grandes y complejos, las potentes herramientas y las amplias opciones de Adobe InDesign son insuperables. Sin embargo, si buscas un programa asequible, versátil y fácil de aprender para diseños más sencillos, Affinity Publisher es una opción fantástica, sobre todo porque pagas una vez en lugar de suscribirte.
Para este diseño concreto de marcapáginas, ambas herramientas funcionaron bien. Affinity Publisher me pareció un poco más rápido de navegar para una maquetación sencilla, mientras que InDesign me dio unas cuantas funciones extra para perfeccionar el aspecto final. Como puedes ver a continuación, los resultados fueron prácticamente idénticos, lo que demuestra la solidez de ambos programas para diseñadores de cualquier nivel.
¡Gracias por vernos! Si has utilizado alguno de estos programas, me encantaría conocer tus opiniones y experiencias en los comentarios; estoy en Instagram en @studio_viv. No olvides suscribirte al Youtube de Wacom y suscribirte al boletín electrónico de Creative para obtener más consejos de diseño y comparaciones. ¡Nos vemos en el próximo vídeo!
