PiXimperfect Day Into Night imagen principal

Cómo convertir el día en noche en Adobe Photoshop, con PiXimperfect

12 de abril de 2023

Quizá lleves un tiempo utilizando Adobe Photoshop, o quizá estés empezando. Hay muchas formas de hacer cualquier tipo de edición en el software, así como todo tipo de consejos, trucos y hacks para hacer las cosas de forma más sencilla y fácil.

En este tutorial, Unmesh Dinda, de PiXimperfect, muestra cómo modificar la iluminación de una fotografía en Adobe Photoshop, ¡convirtiendo literalmente una foto del día a la noche! Mira el vídeo de abajo para ver el tutorial de Adobe Photoshop, o sigue leyendo para ver un resumen de cómo conseguir el efecto.


La iluminación es una de las habilidades más importantes para la fotomanipulación, junto con la perspectiva básica. Saber adaptar la luz y la gradación de color a una escena existente, o crear un esquema de iluminación completamente nuevo sobre los objetos que has photoshopeado, es esencial para la edición fotográfica.

Esta clase magistral de 21 minutos sobre el uso de la capa de ajuste creativo, impartida por Unmesh Dinda, de Piximperfect, profundiza en el desarrollo de esta habilidad. Abarca todo el proceso de alterar la iluminación de una foto realizando el cambio más drástico posible: convertir el día en noche. A continuación, él mismo pinta una luz extra sobre el sujeto con un truco ingenioso que utiliza la herramienta Curvas... y una tableta de tinta Wacom.

1. Crear la base

Antes de empezar a pintar los detalles a mano, tienes que volver a iluminar y colorear toda la imagen. Una cosa que debes recordar con la fotomanipulación es que, aunque algunos cambios pueden ser muy complicados, cualquier ajuste de luz y color es tan sencillo como añadir unas cuantas capas de ajuste y retocar los controles deslizantes, así que no tengas miedo de experimentar con diversos escenarios de iluminación.

Aunque hay innumerables formas de hacerlo en Adobe Photoshop, Dinda confía en la capa de ajuste para realizar los cambios de forma no destructiva. En concreto, utiliza Tablas de Búsqueda de Color junto con la función "Mezclar si". Haciéndolo unas cuantas veces y ajustando la configuración, puedes conseguir el efecto exacto que buscas.

Day Into Light tutorial image 1

2. Pintar la luz

El método de Dinda para pintar las zonas claras es tan sencillo que te preguntarás por qué no se te ocurrió a ti: primero, crea una capa de Ajuste de Curvas y sube el brillo hasta que la imagen esté sobreexpuesta. A continuación, añade una máscara de capa, límpiala para que no se vea nada del efecto y pinta sólo las partes en las que debe haber reflejos. Como si estuviera pintando, utiliza la presión del lápiz para controlar el flujo, así como su impresionante conocimiento de la iluminación y la forma para definir el rostro del elefante con la colocación de luces y sombras. Y al final, hace lo mismo, sólo que con las curvas hacia abajo, para las sombras.

Day Into Light tutorial image 2

3. Añadir más brillo y sombra

En la sección siguiente, hace lo mismo con el fondo, creando una capa de ajuste de Curvas sobre él con el elefante enmascarado, y luego utilizando pinceles grandes y suaves para pintar con luz franjas de la hierba que hay detrás.

Day Into Light tutorial image 3

4. Superposiciones de calibración

Esto es una condición elegante para "más capa de ajuste". Para este paso, Dinda nos muestra otro truco de capa de ajuste utilizado habitualmente para crear luz ambiental: crea un degradado de blanco a transparente en una nueva capa, y luego mueve la parte superior por encima del encuadre para que parezca que la luz de la luna desciende desde fuera de la cámara.

Day Into Light tutorial image 4

5. Cepillo de niebla dramática

Por último, nos muestra cómo pintar niebla con un uso muy juicioso de un pincel de niebla de un pack de Envato Elements. El uso eficaz de este tipo de pinceles sutiles y transparentes es una habilidad crucial para los usuarios expertos de Photoshop Adobe, pero él demuestra lo sencillo que puede ser, ampliando el tamaño de pincel hasta el tamaño del propio lienzo, y haciendo clic una sola vez para añadir una nube de vapor sobre toda la imagen.

Day Into Light tutorial image 6

Palabras finales

Al final de este proceso, Dinda ha convertido una toma diurna con luz neutra en una dramática noche de luna con niebla. Siendo ésta una de las transformaciones generales de la iluminación más dramáticas posibles, cada una de las técnicas individuales que enseña aquí también será útil para realizar pequeños ajustes en otras fotografías. Sólo recuerda cuánto pueden manejar por sí solas las Curvas de iluminación y la capa de Ajuste de color.

Key tip:

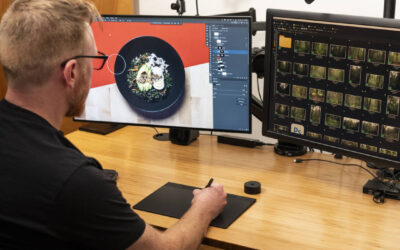
Aunque es posible hacer ediciones de este tipo con un ratón o un trackpad, es mucho más difícil; utilizar una pen tablet Wacom lo hará todo mucho más factible. Los pinceles de Adobe Photoshop son muy sensibles, por lo que el mejor ajuste de Flujo para la pintura digital es sólo del 5 al 10%, dependiendo de lo rápido que quieras aplicar el color. La presión del lápiz también puede configurarse para que controle la Opacidad y el Flujo a la vez, de modo que cuando lo presiones ligeramente sobre la tableta, el trazo resultante será aún más tenue y sutil que si sólo controlara uno.

Antes:

antes de

¡Después!

Del día a la noche Después

Entradas relacionadas:

Conecta con Wacom en las redes sociales

“You’re not thinking about the tool ... it just feels good.”⁣ @joiceesketch on the new #WacomIntuosPro⁣ ⁣ Designer and illustrator Joyce Liu creates dynamic, expressive artwork that transports viewers to a vibrant, futuristic world where shapes and colors blend and flow beautifully. ⁣ ⁣ From the ExpressKeys to the customizable Pro Pen 3 to the lightweight form factor to the seamless connectivity, Everything about it helps her get into the flow of her work. “It just feels natural,” she says. ✍️😍⁣ ⁣ #WacomIntuosPro #IntuosPro #PenTablet #WacomTablet
105 0
Ever wondered how a digital tablet can elevate your tattoo game? Check out @amy.innocenzi's process for creating stunning botanical designs. 🌿🐛🌾🎋 Amy is an Italian artist deeply inspired by nature and her family’s roots in art. Watch as she reveals how Wacom gear like the Wacom One helps her achieve the unmatched detail and precision that makes her work stand out. But it’s not just about technique. Amy shares her experiences navigating the challenges of being a woman in a male-dominated industry and how she’s built a supportive network of artists along the way. She also opens up about the highs and lows of the creative process—overcoming artist's block, connecting with clients, and pushing boundaries in her work. Head to YouTube or to our stories to watch the full video. ☝️ #madewithwacom #botanicalart #creativeprofessionals #tattooart #WacomTips #wacomone #artistlife
180 18
Artists on Valentine's Day according to @lplucas ❤️🤣🎻💌 #ValentinesDayArt #valentinesday #artistlife #madewithwacom
489 6
🎉 The NEW Wacom Intuos Pro is here! 🎨⁣ ⁣ Creative work is all about balance—part technique, part flow.⁣ ⁣ The new Intuos Pro is designed to help you stay in that sweet spot where ideas come to life effortlessly. 🪁⁣ ⁣ Featuring the Wacom Pro Pen 3, customizable ExpressKeys, and an intuitive physical dial, the new Intuos Pro tool redefines how a pen tablet enhances your creative process.⁣ ⁣ Whether you’re editing, designing, or animating, Wacom Intuos Pro is designed to speed up your workflow so you can dive deeper into your art.⁣ ⁣ Are you ready to level up your creative game? 🚀⁣ ⁣ Learn more through the link in our bio. ⁣ ⁣ #WacomNews #WacomIntuosPro #IntuosPro #PenTablet #WacomTablet
690 37
Who's hungry? 🍣✍️⁣ Why would an art director choose illustrated food over photographed food? 🤔 Share your thoughts in the comments! ⁣ #FoodArt #DigitalArt #DigitalIllustration #FoodPhotography #MadeWithWacom
188 0
Remember when @thebunbunshopofficial made us a sweet Valentine's postcard on her Wacom Cintiq 🐇🎈🩷 🌹💘 This Valentine’s Day, skip the store-bought and get creative! Whether it's a hand-drawn sketch, a digital masterpiece, or a heartfelt design, crafting something unique shows how much you truly care. Not only will you save money, but you’ll also prove that artists are the ultimate romantics. 💖✨ So, what are you creating for someone special this year? Share your creations with us! #madewithwacom #ValentinesDayArt #WacomLove
230 1
Kicking off Black History Month with @imjoshualeonard 🙏 Check out his full character design tutorial on YouTube. (Head to our stories 👆) Joshua is an incredible character designer, 2D animator, and concept artist on a mission to create diverse, inclusive, and impactful characters that challenge stereotypes. This month, let's come together to celebrate and uplift Black artists worldwide, shining a light on their talent, creativity, and contributions. 🥊❤️‍🔥 #blackhistorymonth #blackartist #blackartmatters #madewithwacom
192 40
Sometimes a little change of scenery is all you need to get creative. ⁣ Gather your things (don't forget that tablet 😉) and step outside 🎒⁣ What do you carry in your bag when when you're whipping up magic on the move? ⁣ #CreativesOnTheGo #WacomMovink #CreativeProfessionals ⁣
148 1
Picture the café you ducked into after an art show,⁣ or the library where you dove into research.⁣ Maybe it's the bed you sank into to take a breather.⁣ Then, in a moment of inspiration, you grab your Wacom #Movink and make it happen, the idea flowing before it slips away. 🍂🌬️🪁📕✍️⁣ ⁣ #CreativesOnTheGo #WacomMovink #CreativeProfessionals
158 1
Get lost in the details like @danidiamondphotography 📷☕🔍 Experience color like never before with the Wacom Cintiq Pro 27! With 99% Adobe RGB, 98% DCI-P3, and over 1 billion colors, your photos will pop with incredible accuracy. 🎨 Plus, with HDR Gamma support, stunning 4K resolution, and a smooth 120Hz refresh rate, your photo editing sessions will feel more immersive than ever. 😍 And with its ergonomic design, it’s the most comfortable way to edit for long hours without any strain. #wacomworkspace #CintiqPro27 #wacomcintiqpro #photoediting #retouching #photography
744 6