PiXimperfect Day Into Night imagen principal

Cómo convertir el día en noche en Adobe Photoshop, con PiXimperfect

12 de abril de 2023

Quizá lleves un tiempo utilizando Adobe Photoshop, o quizá estés empezando. Hay muchas formas de hacer cualquier tipo de edición en el software, así como todo tipo de consejos, trucos y hacks para hacer las cosas de forma más sencilla y fácil.

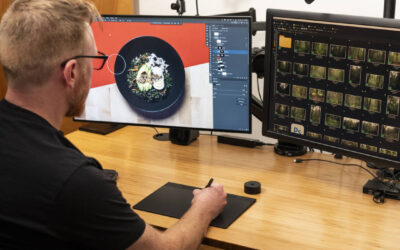
En este tutorial, Unmesh Dinda, de PiXimperfect, muestra cómo modificar la iluminación de una fotografía en Adobe Photoshop, ¡convirtiendo literalmente una foto del día a la noche! Mira el vídeo de abajo para ver el tutorial de Adobe Photoshop, o sigue leyendo para ver un resumen de cómo conseguir el efecto.


La iluminación es una de las habilidades más importantes para la fotomanipulación, junto con la perspectiva básica. Saber adaptar la luz y la gradación de color a una escena existente, o crear un esquema de iluminación completamente nuevo sobre los objetos que has photoshopeado, es esencial para la edición fotográfica.

Esta clase magistral de 21 minutos sobre el uso de la capa de ajuste creativo, impartida por Unmesh Dinda, de Piximperfect, profundiza en el desarrollo de esta habilidad. Abarca todo el proceso de alterar la iluminación de una foto realizando el cambio más drástico posible: convertir el día en noche. A continuación, él mismo pinta una luz extra sobre el sujeto con un truco ingenioso que utiliza la herramienta Curvas... y una tableta de tinta Wacom.

1. Crear la base

Antes de empezar a pintar los detalles a mano, tienes que volver a iluminar y colorear toda la imagen. Una cosa que debes recordar con la fotomanipulación es que, aunque algunos cambios pueden ser muy complicados, cualquier ajuste de luz y color es tan sencillo como añadir unas cuantas capas de ajuste y retocar los controles deslizantes, así que no tengas miedo de experimentar con diversos escenarios de iluminación.

Aunque hay innumerables formas de hacerlo en Adobe Photoshop, Dinda confía en la capa de ajuste para realizar los cambios de forma no destructiva. En concreto, utiliza Tablas de Búsqueda de Color junto con la función "Mezclar si". Haciéndolo unas cuantas veces y ajustando la configuración, puedes conseguir el efecto exacto que buscas.

Day Into Light tutorial image 1

2. Pintar la luz

El método de Dinda para pintar las zonas claras es tan sencillo que te preguntarás por qué no se te ocurrió a ti: primero, crea una capa de Ajuste de Curvas y sube el brillo hasta que la imagen esté sobreexpuesta. A continuación, añade una máscara de capa, límpiala para que no se vea nada del efecto y pinta sólo las partes en las que debe haber reflejos. Como si estuviera pintando, utiliza la presión del lápiz para controlar el flujo, así como su impresionante conocimiento de la iluminación y la forma para definir el rostro del elefante con la colocación de luces y sombras. Y al final, hace lo mismo, sólo que con las curvas hacia abajo, para las sombras.

Day Into Light tutorial image 2

3. Añadir más brillo y sombra

En la sección siguiente, hace lo mismo con el fondo, creando una capa de ajuste de Curvas sobre él con el elefante enmascarado, y luego utilizando pinceles grandes y suaves para pintar con luz franjas de la hierba que hay detrás.

Day Into Light tutorial image 3

4. Superposiciones de calibración

Esto es una condición elegante para "más capa de ajuste". Para este paso, Dinda nos muestra otro truco de capa de ajuste utilizado habitualmente para crear luz ambiental: crea un degradado de blanco a transparente en una nueva capa, y luego mueve la parte superior por encima del encuadre para que parezca que la luz de la luna desciende desde fuera de la cámara.

Day Into Light tutorial image 4

5. Cepillo de niebla dramática

Por último, nos muestra cómo pintar niebla con un uso muy juicioso de un pincel de niebla de un pack de Envato Elements. El uso eficaz de este tipo de pinceles sutiles y transparentes es una habilidad crucial para los usuarios expertos de Photoshop Adobe, pero él demuestra lo sencillo que puede ser, ampliando el tamaño de pincel hasta el tamaño del propio lienzo, y haciendo clic una sola vez para añadir una nube de vapor sobre toda la imagen.

Day Into Light tutorial image 6

Palabras finales

Al final de este proceso, Dinda ha convertido una toma diurna con luz neutra en una dramática noche de luna con niebla. Siendo ésta una de las transformaciones generales de la iluminación más dramáticas posibles, cada una de las técnicas individuales que enseña aquí también será útil para realizar pequeños ajustes en otras fotografías. Sólo recuerda cuánto pueden manejar por sí solas las Curvas de iluminación y la capa de Ajuste de color.

Key tip:

Aunque es posible hacer ediciones de este tipo con un ratón o un trackpad, es mucho más difícil; utilizar una pen tablet Wacom lo hará todo mucho más factible. Los pinceles de Adobe Photoshop son muy sensibles, por lo que el mejor ajuste de Flujo para la pintura digital es sólo del 5 al 10%, dependiendo de lo rápido que quieras aplicar el color. La presión del lápiz también puede configurarse para que controle la Opacidad y el Flujo a la vez, de modo que cuando lo presiones ligeramente sobre la tableta, el trazo resultante será aún más tenue y sutil que si sólo controlara uno.

Antes:

antes de

¡Después!

Del día a la noche Después

Entradas relacionadas:

Flexiona tu creatividad - ¡Flexiona tu Movink! Editar fotos sobre la marcha con Amyboyy

Flexiona tu creatividad - ¡Flexiona tu Movink! Editar fotos sobre la marcha con Amyboyy

Comparación entre Affinity y Adobe para diseñar un marcapáginas, con Vivienne Le

Comparación entre Affinity y Adobe para diseñar un marcapáginas, con Vivienne Le

Cómo sacar el máximo partido a Affinity Designer con tu pen tablet Wacom, con Vivienne Le

Cómo sacar el máximo partido a Affinity Designer con tu pen tablet Wacom, con Vivienne Le

Los mejores tutoriales gratuitos para iniciarse en la manipulación fotográfica con Adobe Photoshop

Los mejores tutoriales gratuitos para iniciarse en la manipulación fotográfica con Adobe Photoshop

Conecta con Wacom en las redes sociales

🎉✨ December of Giveaways is HERE! ✨🎉 The holiday magic is upon us and we're ecstatic to bring you weekly giveaways throughout the month of December! 🎁 Come back every Friday for your chance to unwrap something amazing! ✨ This week, we're giving away a Wacom Movink! 🎨 Here's how to enter: 🎅 Follow @wacom and @wacomedu ❤️ Like this post 🌟 Tag a friend + your favorite creator! This week's giveaway ends 12/27 at 9 am PST. Winner will be tagged in this post and ONLY contacted through official Wacom accounts. Please be extra cautious if contacted via DM – make sure the sender is @wacom or @wacomedu before sharing any personal info. 📩 We’ll only ask for your shipping details if you win! Good luck 🍀 #Wacom #WacomForEducation #WacomGiveaway
85 55
Have you ever tried masking out a person using a mouse? 🫢 @ruthiesmagicalcamera did and it really sucked. 🤷🏻‍♀️ Ruthie likes to have full control over every single detail on her photo composites, and editing with a Wacom pen allows her to get really deep in the details, with razor sharp precision, as if she were painting over her photos 💃✍️📸🌾 Check her out trying out the new #WacomMovink! PS. The Wacom Movink is now on sale! #photoediting #photoretouch #madewithwacom #creativeprofessionals #creativesonthego #digitalphotography
217 6
Jake aka @killerrabbitmedia prefers working on a Wacom Intuos because it's easy to carry and super durable. He also loves pixel art and Asperite because it blends artistry with technical skill. There's a long tutorial video on our YouTube explaining how Jake achieved this look. Go check it out! #madewithwacom #wqcomintuos #intuos #wacomtablet #pixelart #artistsoninstagram
347 6
Enjoy this stylized illustration created by @bonehaus inspired by his recent trip to Amsterdam. ⁣ ⁣ He goes full circle, collecting inspiration and reference, sketching in #AdobePhotoshop, illustrating in #AdobeIllustrator, and then right back to #photoshop for finalizing color and texture 🔄✌️⁣ ⁣ Once in Illustrator, Kirk outlines and traces the major shapes of his sketch, then removes the lines and focuses instead on shapes and shadows. ⁣ ⁣ "I start building in more shadows and more details to help separate any of the shapes that are struggling without that outline. I like my art without a ton of outline, so I prefer the challenge of using some shadows and highlights and stuff to separate them.”⁣ - @bonehaus⁣ Head to the #WacomBlog to read the full interview! ⁣ #MadeWithWacom #WacomCintiqPro #DigitalIllustration #adobeillustrator #Photoshop
321 1
El óleo perfecto para tus ideas es tan delgado como un espejo. 🪞🌾 Descubre la magia de Wacom Movink, nuestro primer lienzo digital OLED. Video creado por la maravillosa @martinab.illustrations 🌹 #WacomMovink #creativeprofessionals #creativesonthego #tabletadigital #artedigital
445 4
#WacomSale⁣ The festive season is upon us, and adventure calls! 🏁✈️🌎⁣ Unleash your creativity anywhere with a #WacomMovink.⁣ Shop now through the link in our bio!⁣
119 2
📝 Managing license requests and agreements is an essential part of protecting your work as a professional artist. And in this tutorial we show you how to do it easily. Wacom Yuify allows you to easily view, approve, or reject requests, ensuring your creative rights are secured. Streamlining the process means more control over your art and less hassle. 🔒 Ready to simplify your license management? Register for free at yuify.com *Yuify Licensing is only available in selected regions and may require additional agreements for specific cases not covered by the License Builder. #WacomYuify #Yuify #CreativeRights #DigitalRightsManagement
77 2
This week's giveaway is closed now. ✌️✌️✌️ Congratulations @dumartrigali, you're the lucky winner. Thanks to everyone who participated. Stay tuned for this week's giveaway coming up soon! 🎉✨ December of Giveaways is HERE! ✨🎉 The holiday magic is upon us and we're ecstatic to bring you weekly giveaways throughout the month of December! 🎁 Come back every Friday for your chance to unwrap something amazing! ✨ This week, we're giving away a Wacom Cintiq 16! 🎨 Here's how to enter: 🎅 Follow @wacom and @wacomedu ❤️ Like this post 🌟 Tag a friend + your favorite creator! This week's giveaway ends 12/20 at 9 am PST. Winner will be tagged in this post and ONLY contacted through official Wacom accounts. Please be extra cautious if contacted via DM – make sure the sender is @wacom or @wacomedu before sharing any personal info. 📩 We’ll only ask for your shipping details if you win! Good luck 🍀 #Wacom #WacomForEducation #WacomGiveaway
913 581
Therapeutic break! Let's draw some Winnie stickers with @konistudio on a #WacomOne 13. 🧣❄️🌲 #Wacomworkspace #madewithwacom #artistsoninstagram #artistlife
678 13
How to draw fire without burning yourself 🧯🔥 @lplucas thank you for this important service. Stay cozy and stay safe out there friends ✌️ #madewithwacom #drawingtips #digitalartist #digitalart #wacomtips
139460 104
How do you keep inspired during ordinary days? @buttersketch shares a glimpse into her creative process, full of graphic novels, picture books, music, journaling and art materials. "“I really love bribing myself with new materials,” she confesses with a smile. “I think it helps my brain bypass the anxiety of starting, because now I’m focused on just playing.” - @buttersketch✌️ #Wacomworkspace #WacomMovink #creativeprofessional #artistlife #artistsoninstagram #creativeinspiration
231 2
As an artist, protecting your work can feel impossible. Watermarks distort your art, and even then, they can be removed. Many have felt the frustration of seeing creations copied without credit - and that’s why Wacom Yuify exists ✨ —it adds an invisible mark to your work, keeping it safe and traceable without compromising its beauty. 🔒 Ready to protect your art? Visit Yuify.com for more info. Now available for @escapemotions #WacomYuify #Yuify #CreativeRights #DigitalRightsManagement
150 2
Este mensaje de error sólo es visible para los administradores de WordPress
Error: No hay ninguna cuenta conectada para el usuario 17841445048021802.