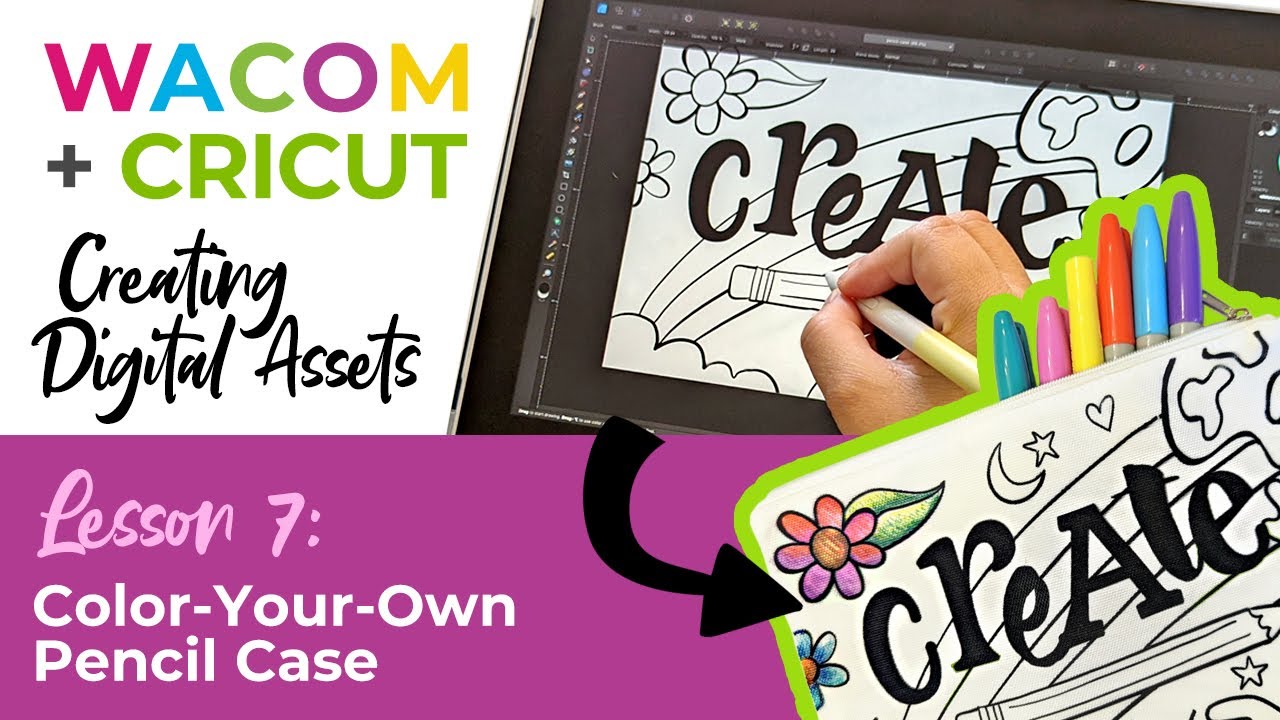
En el post invitado y el vídeo que aparecen a continuación, la creadora y crafter Heather Cash continúa su serie Wacom + Cricut mostrándote cómo puedes utilizar una pantalla de lápiz Wacom One y el software Affinity Designer que se incluye con cada compra de Wacom One , para crear un portalápices para colorear como proyecto divertido o como regalo.
Mira el vídeo a continuación, o sigue leyendo para obtener una explicación basada en texto.
Hola, me llamo Heather, y bienvenidos a otro episodio de Wacom + Cricut, mi serie en la que te enseño a crear activos digitales para la Cricut, utilizando tu pen tablet Wacom. Y, por supuesto, me gustaría dar las gracias a Wacom por enviarme esta pen tablet y patrocinar esta serie.
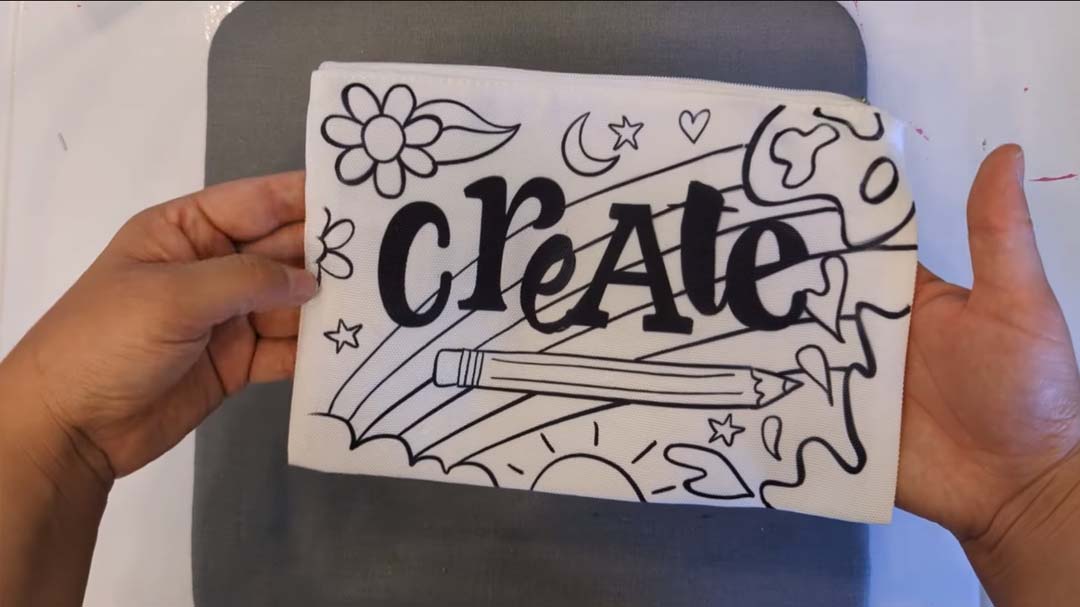
Hoy vamos a crear un lápiz o estuche para colorear. Me parece una idea estupenda para la vuelta al cole, o incluso como regalo para cualquier persona creativa. Esta parte del lápiz tiene contornos negros que se pueden colorear con un Sharpie u otro rotulador permanente. Conseguí parte del lápiz en blanco de la marca Cricut en Michael's, así como tinta infusible negra de Cricut. La cinta resistente al calor de Cricut añade algo al proyecto, ¡pero es opcional!
Primero, consigue tus suministros:
Paso 1: Crea tu esquema artístico
El primer paso es crear tu archivo en Affinity Designer.
Crea tu archivo
En primer lugar, mide la anchura y la altura de tu bolsa con una regla.
Crea un nuevo archivo en Affinity Designer seleccionando Archivo → Nuevo. Introduce las dimensiones de tu bolsa (las mías son 8,75 x 6) y asegúrate de seleccionar Pulgadas en Unidades de documento. Ajusta los PPP a 72 (así te asegurarás de que en Cricut Design Space aparezca con el tamaño correcto). Ahora haz clic en Crear.
Escribe algún texto - si quieres
Este paso es opcional. Si quieres texto en tu diseño, puedes coger la Herramienta Texto Artístico de la barra de herramientas de la izquierda, y hacer clic y arrastrar el tamaño que quieras que tenga el texto. A continuación, puedes escribir tu texto.
Voy a hacer la palabra "crear", y voy a poner cada letra en un tipo de letra diferente. Para que tenga un aspecto más cohesionado, seleccionaré fuentes con grosores similares.
Después de escribir el texto, puedes coger la Herramienta Mover de la barra de herramientas y redimensionarlo si lo necesitas (mantén pulsada la tecla Mayús para restringir las proporciones).
Convierte tu texto en formas
Cuando hayas terminado con tu texto, tendrás que convertirlo de elemento de texto a forma vectorial. Para ello, asegúrate de que tienes el texto seleccionado y luego ve a capa en el menú superior, y luego a Convertir en curvas. Ahora, puedes mirar en el panel capa y verás que todo tu texto aparece ahora como Curvas.
A continuación, tendremos que combinar todas las letras en una sola forma, así que con todo el texto seleccionado puedes hacer clic en Añadir arriba en la barra de herramientas.
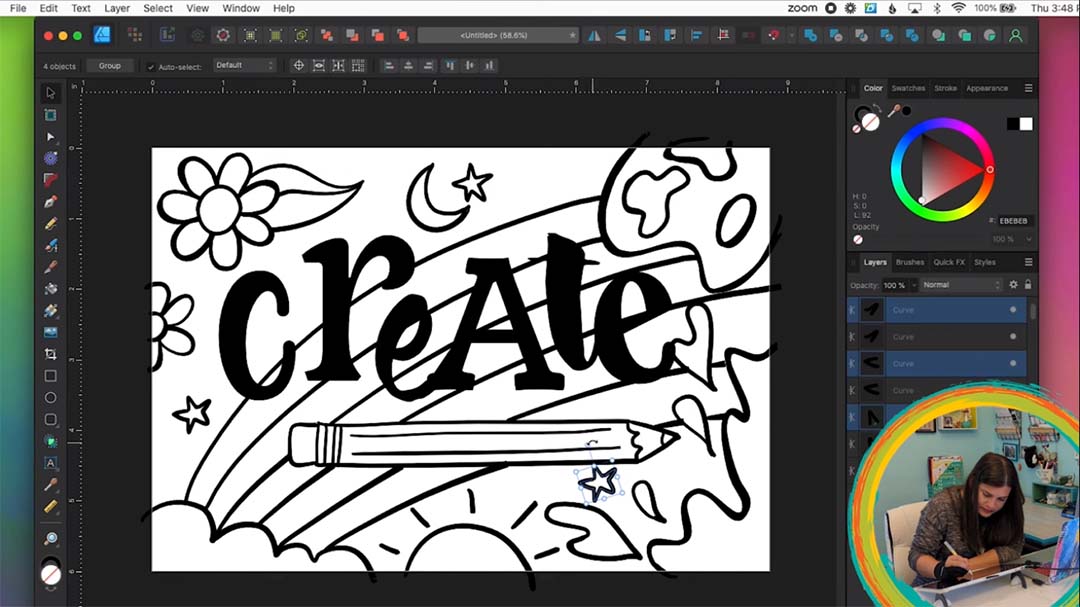
¡Empieza a dibujar!
Coge tu Herramienta Pincel de la barra de herramientas de la izquierda, luego ve a tu Panel de Pinceles (Si no lo ves, ve a Ventana → Pinceles), y elige el pincel más básico. Elegí Lápiz macizo con presión. También debes comprobar en las opciones de la parte superior, que tienes Controlador ajustado a Presión.
Ahora puedes probar tu pincel trazando algunas pinceladas de prueba. Si el pincel es demasiado grande o pequeño, puedes cambiar el tamaño en la barra de herramientas superior, junto a Anchura.
Puedes dibujar todo tipo de garabatos alrededor de tu texto que serán geniales para colorear con un Sharpie.
Si necesitas ajustar algo las formas, puedes coger la Herramienta Nodos de la barra de herramientas y seleccionar nodos individuales para moverlos.
Paso 2: Formatear para Cricut Design Space
Cuando hayas terminado de diseñar tu portalápices, tendrás que formatearlo todo en formas para Cricut Design Space. Para ello, coge tu Herramienta Mover, selecciona todo y elige capa → Expandir trazo. Esto convertirá todas tus líneas en formas. Después, puedes combinarlo todo en una sola forma haciendo clic en el botón Añadir de la barra de herramientas: tiene el aspecto de dos formas y un signo más.
Si tu dibujo se sale del lienzo, tendrás que cortar los trozos sobrantes. Puedes coger tu Herramienta Rectángulo y hacer un rectángulo del mismo tamaño que el lienzo. Selecciona todo y haz clic en el botón Intersección de la barra de herramientas. Esto eliminará todo lo que se salga del rectángulo.
Exportar para Cricut Design Space
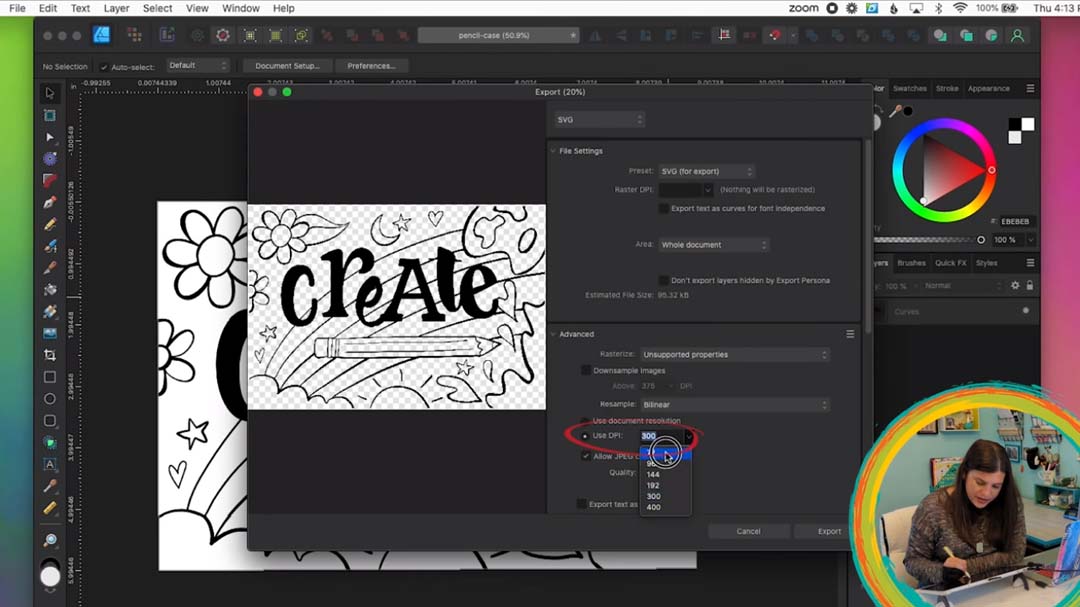
En primer lugar, querrás guardar tu diseño como un archivo de Affinity Designer seleccionando Archivo → Guardar. Luego, puedes exportarlo como SVG para Cricut Design Space. Para ello, selecciona Archivo → Exportar. Elige las siguientes opciones:
- SVG
- Preestablecido: SVG (para exportar)
- Establece Usar PPP en 72
- Desmarca "Establecer cuadro de vista"
- Luego haz clic en Exportar.
Paso 3: Introducir en Cricut Design Space
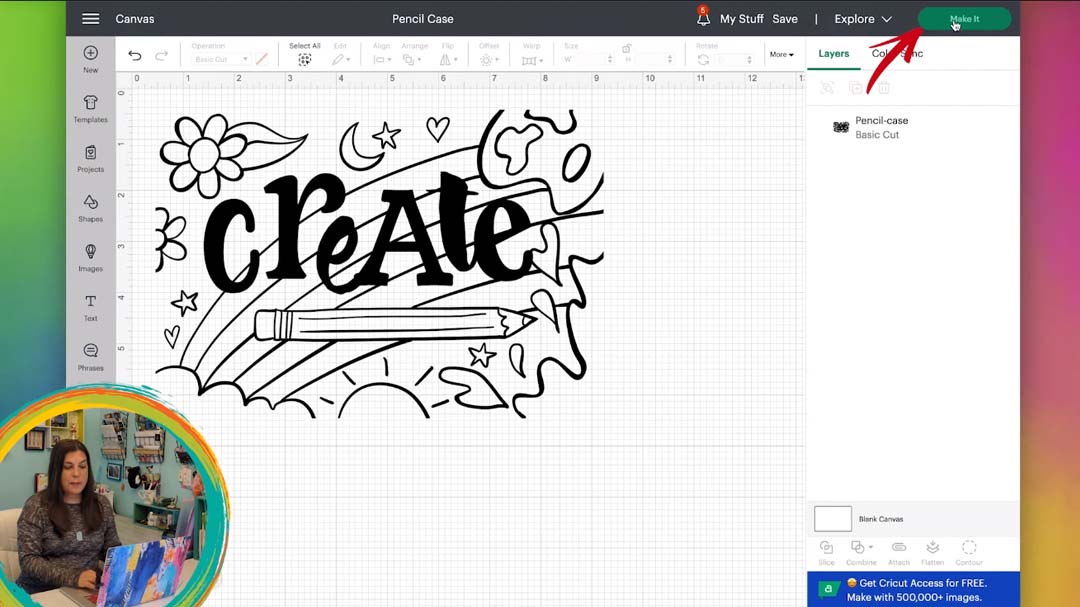
¡Ahora podemos crear nuestra cartuchera! En Cricut Design Space, sube tu nuevo diseño. Ve a Subir, Subir Imagen, Examinar, selecciona tu archivo SVG, haz clic en Abrir y Subir. Haz clic en tu diseño y selecciona Añadir al lienzo.
A continuación, haz clic en Hazlo. Asegúrate de activar la opción Espejo. Luego, haz clic en Continuar.
Asegúrate de que tu Cricut está conectada y de que tu material está configurado como Personalizado. A continuación, puedes hacer clic en Examinar todos los materiales y buscar Tinta infusible. Haz clic en el botón Marcador para guardarlo y poder acceder a él más tarde. A continuación, haz clic en el material para seleccionarlo y haz clic en Hecho.
Paso 4: Recorta tu diseño
Recorta el material a un tamaño adecuado y colócalo sobre la alfombrilla con la cara coloreada hacia arriba. A continuación, puedes pasarlo por tu Cricut, darle la vuelta a la alfombrilla y retirar el material recortado terminado.
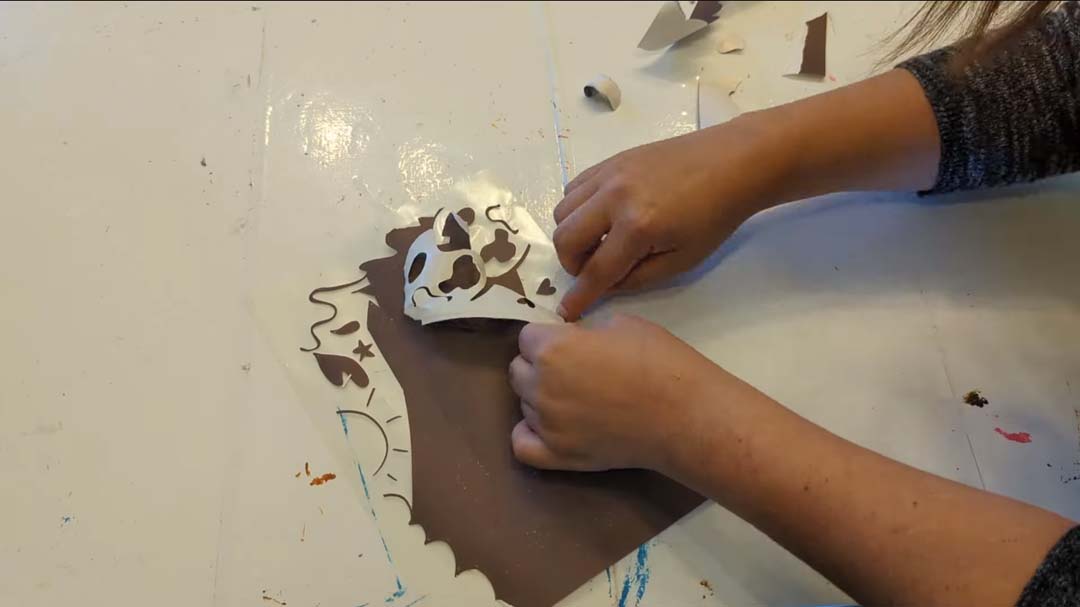
Una vez que tengas la hoja cortada y retirada del tapete, tendrás que enrollar suavemente la hoja entre las manos para que el material se "agriete" y se rompa en los lugares donde se cortó.
A continuación, tendrás que "desbrozar" tu diseño. Deshierbar la tinta infusible es diferente de deshierbar otros materiales. Obtendrás los mejores resultados si no utilizas el gancho escardador tradicional, y en su lugar utilizas los dedos y/o unas pinzas para agarrar el material sobrante y despegarlo; el uso del gancho escardador puede transferir la tinta a tu hoja portadora, extendiendo la tinta a las partes negativas de tu diseño.
Paso 5: Plancha tu diseño
Antes de planchar tu diseño, puedes colocar un trozo de cartulina dentro de la parte del lápiz para proteger la parte posterior de la funda de la transferencia de tinta. También puedes utilizar la Cinta termorresistente Cricut para fijar tu diseño a la parte del lápiz, asegurándote de que no se desplace accidentalmente. También me gusta utilizar el papel de carnicero que viene con la tinta infusible para ponerlo encima del diseño y proteger el material del calor de la plancha.
A continuación, ajusta la temperatura de la plancha. La temperatura recomendada es de 400º durante 40 segundos. Si tu plancha no puede alcanzar esa temperatura (por ejemplo, si tienes la Cricut EasyPress original), puedes obtener buenos resultados si planchas a 360° durante 2 minutos. Asegúrate de que no mueves la plancha de un lado a otro mientras está sobre el diseño: deberás mantenerla en el mismo sitio todo el tiempo que estés planchando.
Paso 6: ¡Disfruta!
Ahora, ¡tu caso está terminado! Puedes colorearlo con Sharpies o cualquier otro rotulador permanente, ¡o regalárselo a un amigo para una divertida actividad artística!

