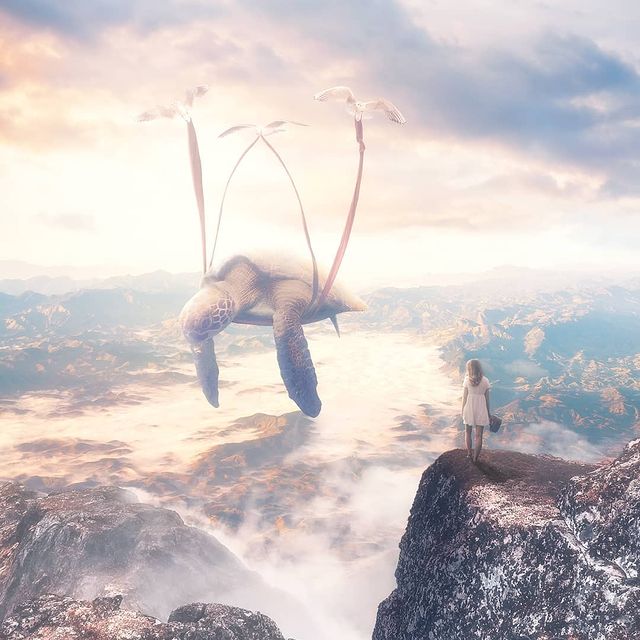
Hey there! I’m Anttoni Salminen from Finland, also known as Phanttoni on social media and i’m a fantasy artist and i’m here to share a few little tips with you.

What i do is i use stock photos for composition and paint over them to add some style and what this does, is it gives me full control of what i want the image to look like, using photos only is super limiting and that’s what you don’t want in your creative process and a nice brush can help you with comfortability.
I’ve been using a Wacom tablet since the first Wacom Bamboo was released and immediately noticed my workflow speed skyrocket.
Another tool i couldn’t live without is Adobe Photoshop, i’ve been using Photoshop for 12 years and i’m still learning something new every day, that’s what keeps me hooked to art, you can never learn enough!

I used the first Wacom Bamboo for years without even changing the pen nib, after i felt like this might be something i want to make a living with,
i invested in to a Wacom Intuos Pro Medium and that was even more ergonomic to work with, everything worked perfectly and my art was getting better every day.
When i started seeing some success with my journey, i decided to go all in and got myself a Wacom Cintiq 16, that’s when i realized how fast and precise i actually am.

I’ve always used a Wacom tablet because the tablets are designed so well, they are consistent and most importantly; the pen is the best thing you can hold in your hand.
If you do any kind of art on your computer, a Wacom tablet is a must if you want to get to the top with your art!
Today i’ll share some tips about brushes; how i make them, what settings i use and how important it is to find a brush that suits you, most of these are personal preferences but i hope i can give you some insight of how all the brush settings work.
Let’s get this started!
– First i’ll show you how i made the brush i use for most of the brushwork,
– Get yourself a nice picture of a rock, try finding something that has a nice texture on it.
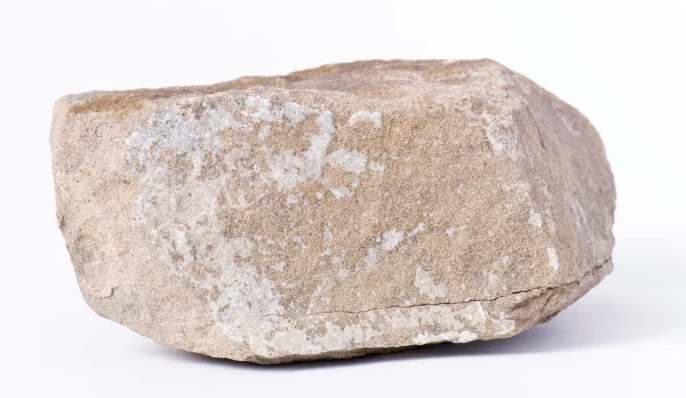
– Then select the Magic Wand on your tool panel and set the tolerance to 10-20.

– Click the rock so it selects an area of the texture, make sure it doesn’t select the whole rock.
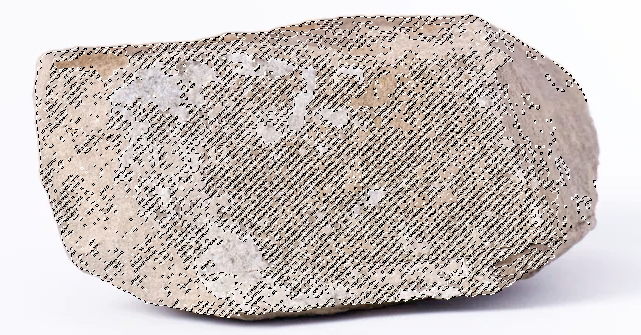
– Click the mask icon below your layer section so it masks the non-selected are of the rock.

– Go to Edit -> Define Brush Preset and click OK.
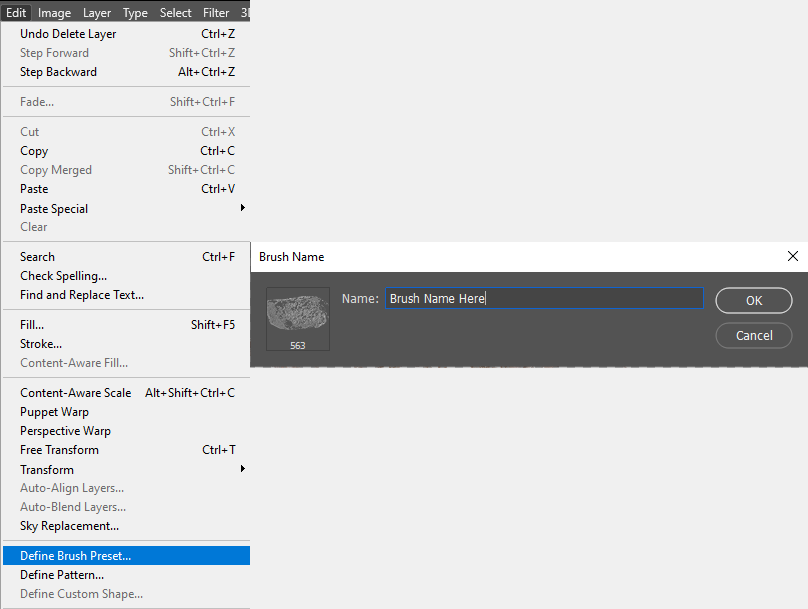
– There we go! Our custom rock brush, let’s play around with the settings a little.
– Open your brush settings by clicking the brush setting icon or pressing F5 on your keyboard.
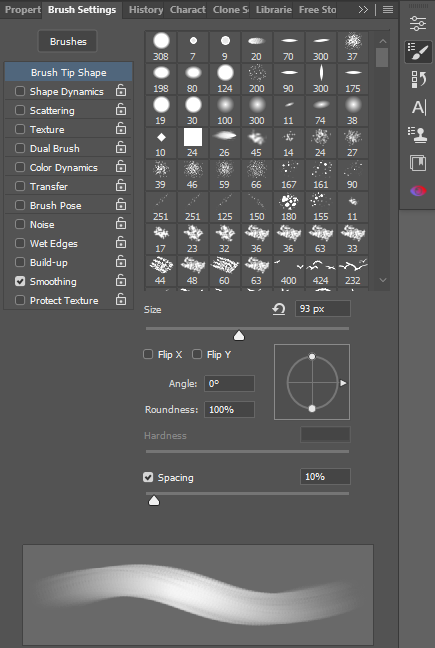
– Personally i like using a 10% spacing so it’s not too smooth for the rock texture, this is completely a personal preference.
– Then check “Transfer”, which allows you to control the opacity of the brush with how much pressure you apply on your tablet. Make sure you have “Pen Pressure” selected on the “Control” section.
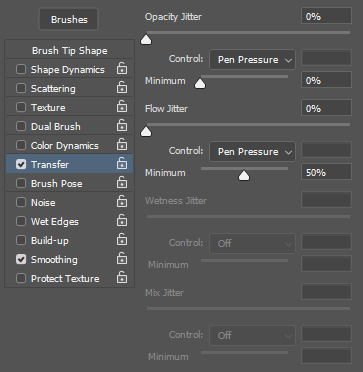
– After this we are going to go Shape Dynamics, what this does is that you can control the brush size with the pressure you apply on your tablet but for this specific brush, we don’t want that.
– Make sure all the three “Control” sections are set to OFF.
– Change the Angle Jitter to 5-10% to add a little fuzziness to the brush.

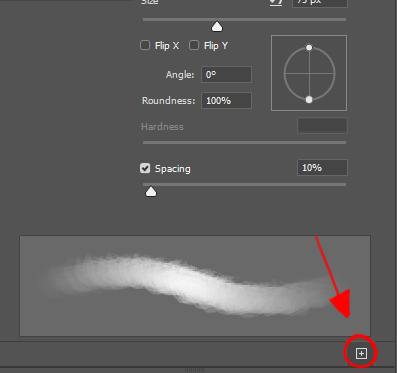
– Click the tiny “new brush” -icon and make another brush of the same brush we just made to save the settings!
There we go, a nice simple brush that works perfectly for painting.
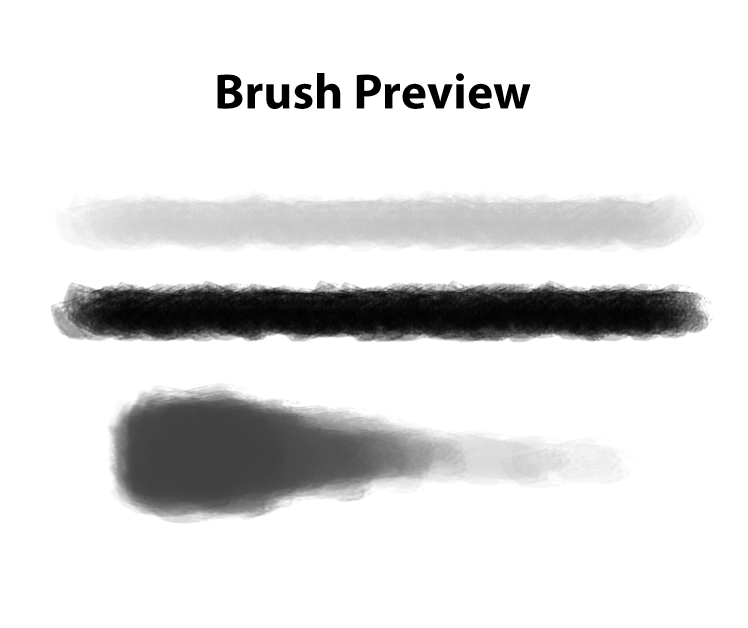
Remember, these are the settings i used to make my own favorite brush, play around with the settings and find the brush that fits you!
Hopefully i helped you with creating a new brush for your next artwork.

Thanks for reading and i’ll see you next time, keep creating!
Twitter: @Phanttoni
Twitch: @Phanttoni
Artstation: @Phanttoni

