

Maybe you’ve been using Adobe Photoshop for a while, or maybe you’re just getting started. There are many ways to do every type of edit in the software, as well as all kinds of tips, tricks, and hacks to do things more simply and easily.
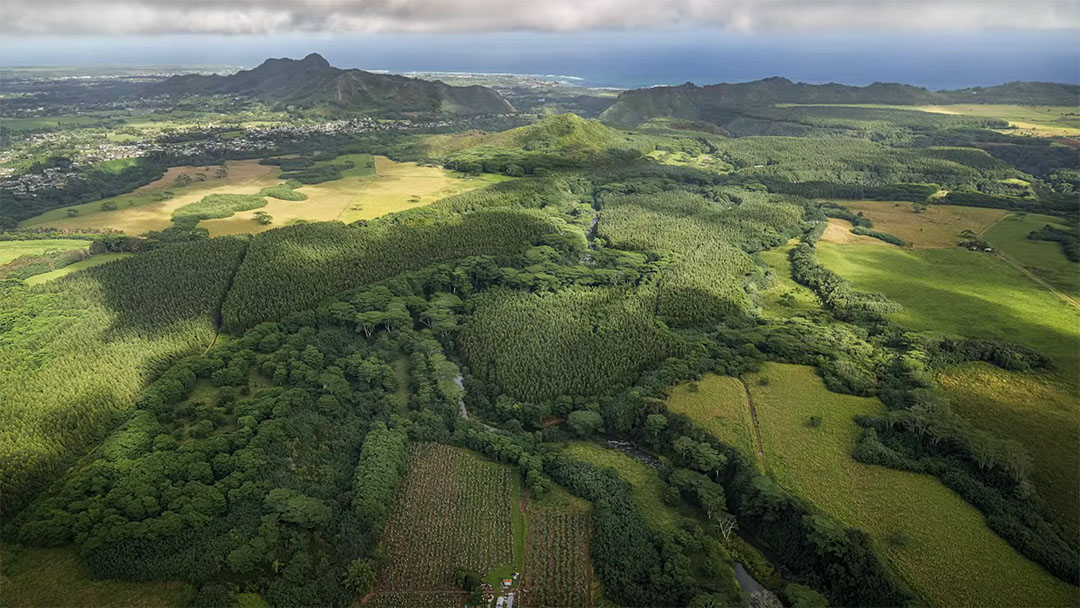
In this tutorial, Colin Smith of Photoshop Café shows you his photo editing workflow to make a dramatic change to your landscape photos. This tutorial will help you quickly make landscape photos look better than ever using your Wacom pen display or pen tablet and Adobe Photoshop software.
Note that references to hotkeys and key commands are Colin’s or are Photoshop defaults; if you have changed your hotkeys or set up your ExpressKeys, some of the instructions might not match your exact workflow setup. Check out the video below, or read on for a step-by-step breakdown of the tutorial.
Getting started
This tutorial assumes that you’re starting with a Raw photo. If your photo is in JPEG or another format, you can skip to the next step.
Camera Raw Adjustments
First, change the profile of your raw photo. It may be set to the default Adobe Color. Click on Browse Presets go to Camera Matching. Select one that has a neutral contrast and colors you prefer.
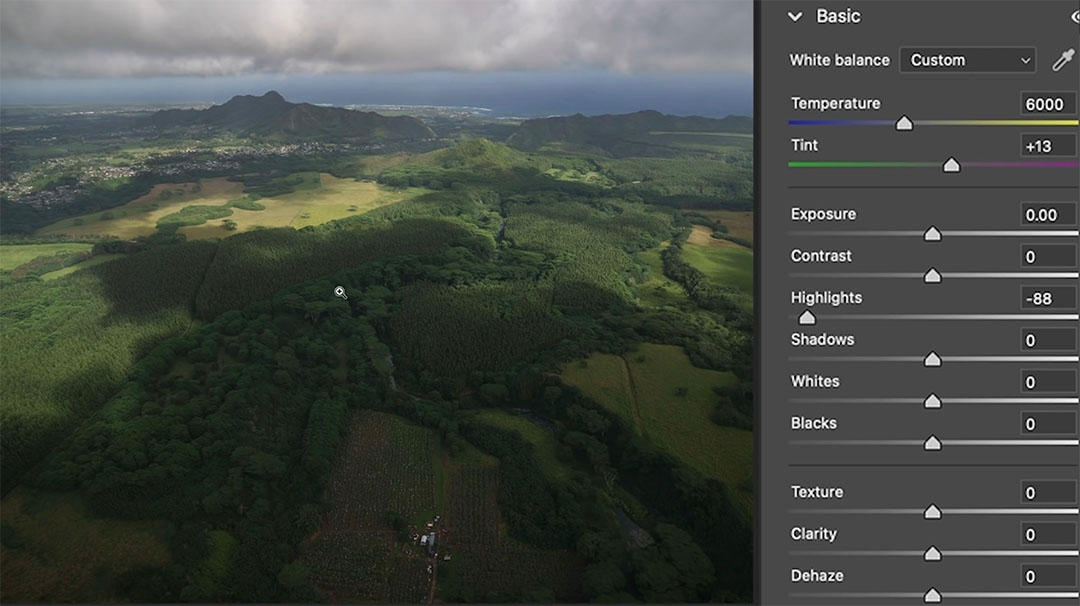
Now let’s make adjustments. First, warm the color temperature. Then adjust highlights and shadows to reveal lost detail. Then do an overall Exposure adjustment, deepening Blacks and pumping up Whites. Notice there’s a little gap there on the histogram on the left hand side: that means that nothing is pure black. You can also use more contrast if you want, it’s essentially the same as using the whites and Blacks together.
Hit the Backslash ( / ) key to see before and after. There’s more detail in the shadows and highlights now.
Clarity makes the photo look sharper, but also more artificial. Texture brings out details in photo textures without giving halos around the edges. Increasing Dehaze can really make these clouds look good. So, let’s just give it just a little touch, and notice as I do that it really clears up the image, but it does darken it a little bit. So when you do that, sometimes you have to roll back off on the blacks. Then go down to Optics, and use profile corrections to remove distortion, vignette and fringing.
Finally, open the image as a Smart Object. Why do we use a smart object? Firstly it is non-destructive, so it protects the pixels. Second is the ability to go back to Camera Raw at any time.
Dodging and burning setup
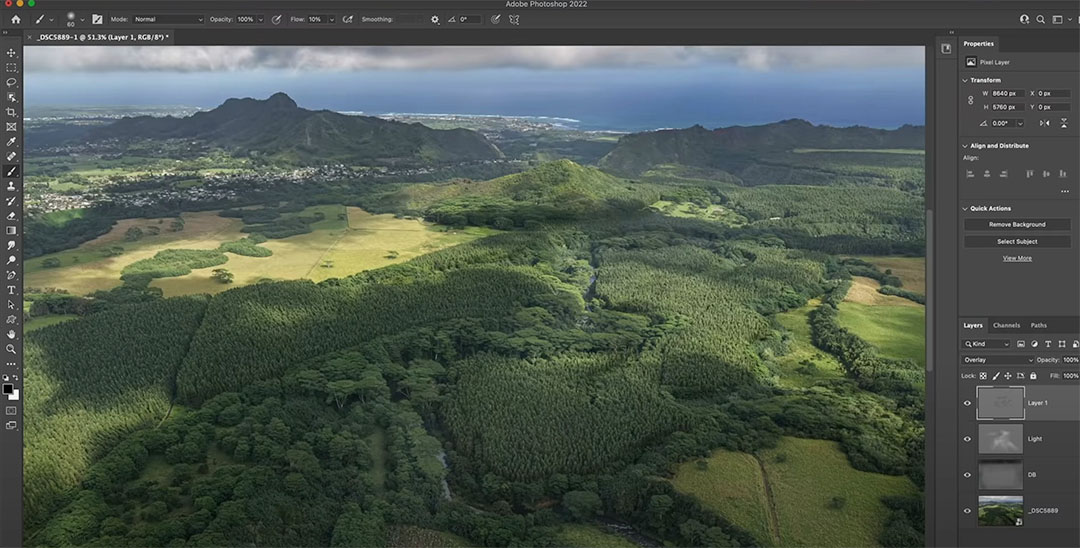
Create a new layer, and call this “DB” for Dodge and Burn, and change the mode to Overlay. When I go into Overlay, it gives me the ability to fill this with a 50% Gray. This isn’t necessary if we’re going to use the brushes, but since we are going to use other tools, such as dodge and burn, then we’ll turn it on. In Overlay mode, you don’t see the gray fill. Some people like to work in a soft light or a hard light, and that’s fine as well.
Duplicate the layer by pressing Cmd/Ctrl+J. Name the copied layer “Lights.” We’re going to do the darker areas, and then we’re going to do the lighter areas by putting them onto separate layers. This gives us the ability to adjust the strength of that later on.
Now start doing basic dodging and burning. Hit the D key, and that resets the foreground and background colors inside of Photoshop. Then grab the brush tool, start with the Soft Round brush, and set hardness to zero.
Pen Pressure Settings
Using pen pressure is essential for getting the most out of your photo editing, which is why most professionals use Wacom pen displays or pen tablets for photo editing. So, make sure make sure Pen Pressure is selected to affect Opacity. Then adjust the Flow. Opacity is how much strength that you get from your brush, while Flow is how fast it comes out. Use a lower flow to build up your effect over time; I set flow to 10%.
Now, the other thing you might want to adjust is the size of your brush on the fly. If you hold down the Ctrl/Cmd (and the Option key on Mac) and drag up or down, you can change the hardness, while dragging left or right will affect brush size.
Dodging and Burning for Composition
Paint with black onto the DB layer, which is “burning.” I’m bringing out more of the detail in the clouds now — see how just the darks are coming out? Burn the horizon, and the corners, to give more of a vignette and draw the viewer’s eye into the image.
Now go to the Lights layer, and then we’re going to hit the X key. This is going to give me the lighter area. I want to emphasize certain areas of sunshine. Paint these lighter tones to give just a feel that there’s a little bit of sunlight kind of coming through. We’re creating the area that we want to focus on. Change the mode to Soft Light so it’s not blowing out the colors or causing us to lose some of that area in the photo.
Dodging and Burning for Dimension
Now I want to create a little bit of shape with dodging and burning. Create a new layer in overlay mode. Fill it 50% Gray. Set Brightness to 50. Hit the D key, reset foreground and background color, and keep working with 10% flow. And I’m just going to show you just a little bit of how I can create some shape and dimension using this Dodge inverter. Paint these shadows to add some dimension to the image.
Do the same thing for the highlights. And this is just going to kiss it with light and just really make the image come to life. So once again, create a new layer, put it into overlay blend mode, hit that 50% Gray. Paint with white as the foreground color. Notice how those lighter areas just tend to lift those parts of the image.
Group these layers together by holding the shift key while selecting all of them, then Cmd/Ctrl+G to create a group folder. Name the folder “DB” for Dodge and Burn. Adjust the opacity of this layer to adjust the strength of the edits you’ve done so far, to your preference.
Before we sharpen this, I’m going to select everything and then I’m going to hold down a keyboard shortcut, which is Option/Alt + Cmd/Ctrl + Shift + E to create a new layer on top that contains everything underneath. It’s just flattened into one layer while preserving everything underneath.
Final Camera Raw Adjustments
Now let’s go into the Camera Raw one more time. Choose Filter and use Camera Raw. The final adjustment will pull everything together to unify it. Warm the temperature and recover the highlights a little more. Deepen shadows and give it a little punch of contrast.
High Pass Sharpening
Now I’m going to do nondestructive sharpening. Press Cmd/Ctrl + J to duplicate that layer, and then we’re going to change it to overlay blend mode. It’s going to look overly contrasting at first, but this is just transitional.
Choose Filter>Other>High Pass. This is what’s known as High Pass Sharpening. Notice right now it looks a little sketched, kind of painterly, so lessen this effect. It’s giving us some more sharpening, which is looking quite nice.
If you didn’t want to sharpen the background, what you can do is create a layer mask, and then choose a gradient. Black will hide that layer and white will leave it untouched. Paint away the sharpening just at the top. Set black as the foreground color there, and then use a linear gradient. Notice the transition will happen just in that area that I’m dragging in, so everything outside of the top will be completely erased on that layer or hidden and then everything in between the transitional area will slowly transition.
If I hold down the Alt + Option keys and I click the areas that are black ahead and the areas of gray are fading so we don’t get an abrupt transition. But see how the sharpening is appearing in the foreground, but in the sky and the background it’s not sharpening. You don’t want to sharpen distance to add atmospheric perspective.
Conclusion
I use this process on every single landscape photo that I process. Sometimes I skip some steps, sometimes I might add some different steps, but this gives an overall feel of how I like to edit my landscape photos. One thing important to note is to keep everything non-destructive, so anything can be changed at any time.
One last tip: when you go away and then come back and look at the photo with fresh eyes, you’ll see things that you don’t necessarily see when you’re working on the image. So make sure to take a break and come back.
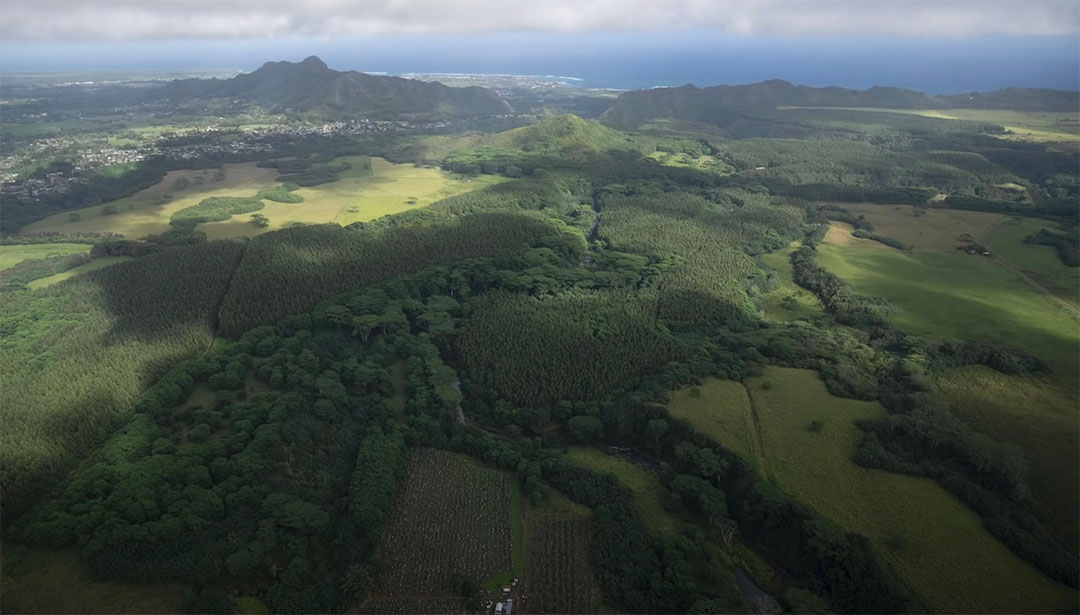
Before:
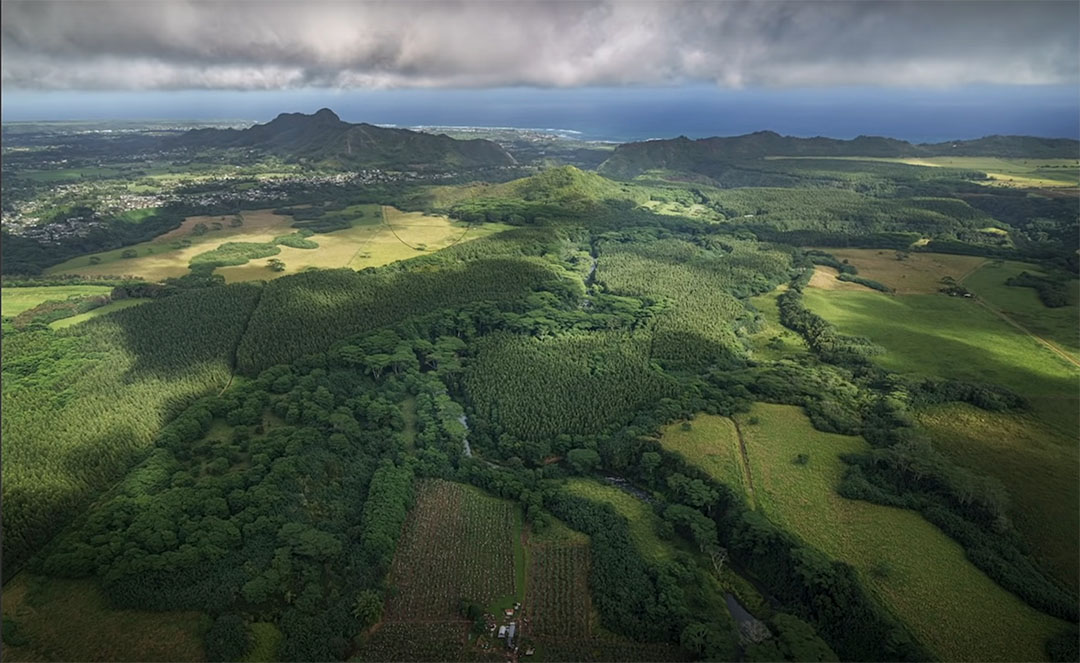
After:
About the presenter:
Colin Smith has been using Adobe Photoshop professionally for 20 years. He does training for Adobe and Apple and has written 20 books. At his YouTube channel, PhotoshopCAFE, he has hundreds of easy to follow Photoshop Tutorials and tips as well as Lightroom tutorials and occasional photography tech or drone videos.
For more information or to see more of Colin’s free Adobe Photoshop resources, check out the Photoshop Cafe website, or check out his premium training library.


