Congratulations on your new Wacom One device! In this guide, we’ll uncover the remarkable creative potential it unlocks when paired with Adobe Photoshop. Have you ever wondered how to seamlessly merge multiple images and incorporate text into your compositions? With your new tool and Adobe Photoshop, this process becomes a breeze. Let’s dive into this step-by-step tutorial.
Step 1: Preparing Your Composite with Generative Fill Tools

Our first task is to prepare the background for our composite and remove the person in the red shirt. We’ll harness the power of Adobe Photoshop 2024’s new generative fill feature.
Here’s how:
- Open your background image in Adobe Photoshop.
- Navigate to the “Select” menu and choose “Subject” to automatically select the subject.
- To expand the selection, go to “Select” > “Modify” > “Expand” and set an appropriate radius, e.g., 30 pixels.
- Click “OK” to confirm.
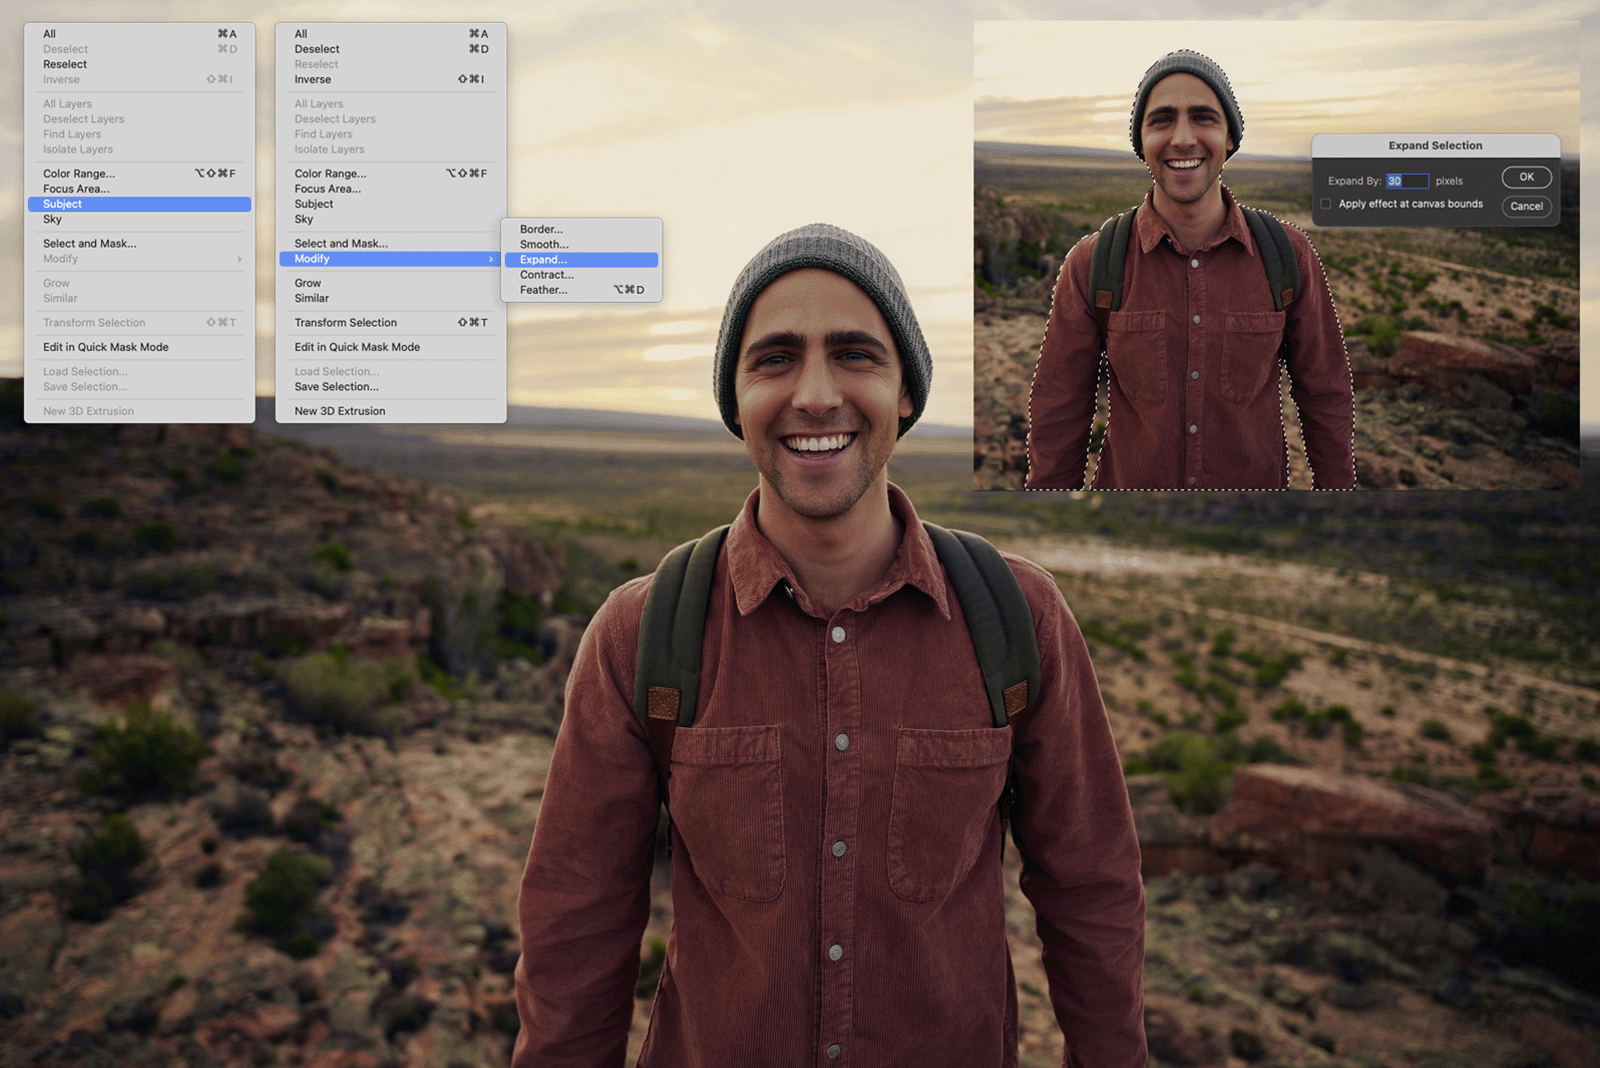
With the selection active, access the “Generative Fill” feature in the new contextual taskbar. Leave the text field blank and click “Generate.” After a few seconds (ensure you’re online), you’ll receive three variant options in the properties window. Select the most suitable one.


Step 2: Placing Your Subject on the New Background
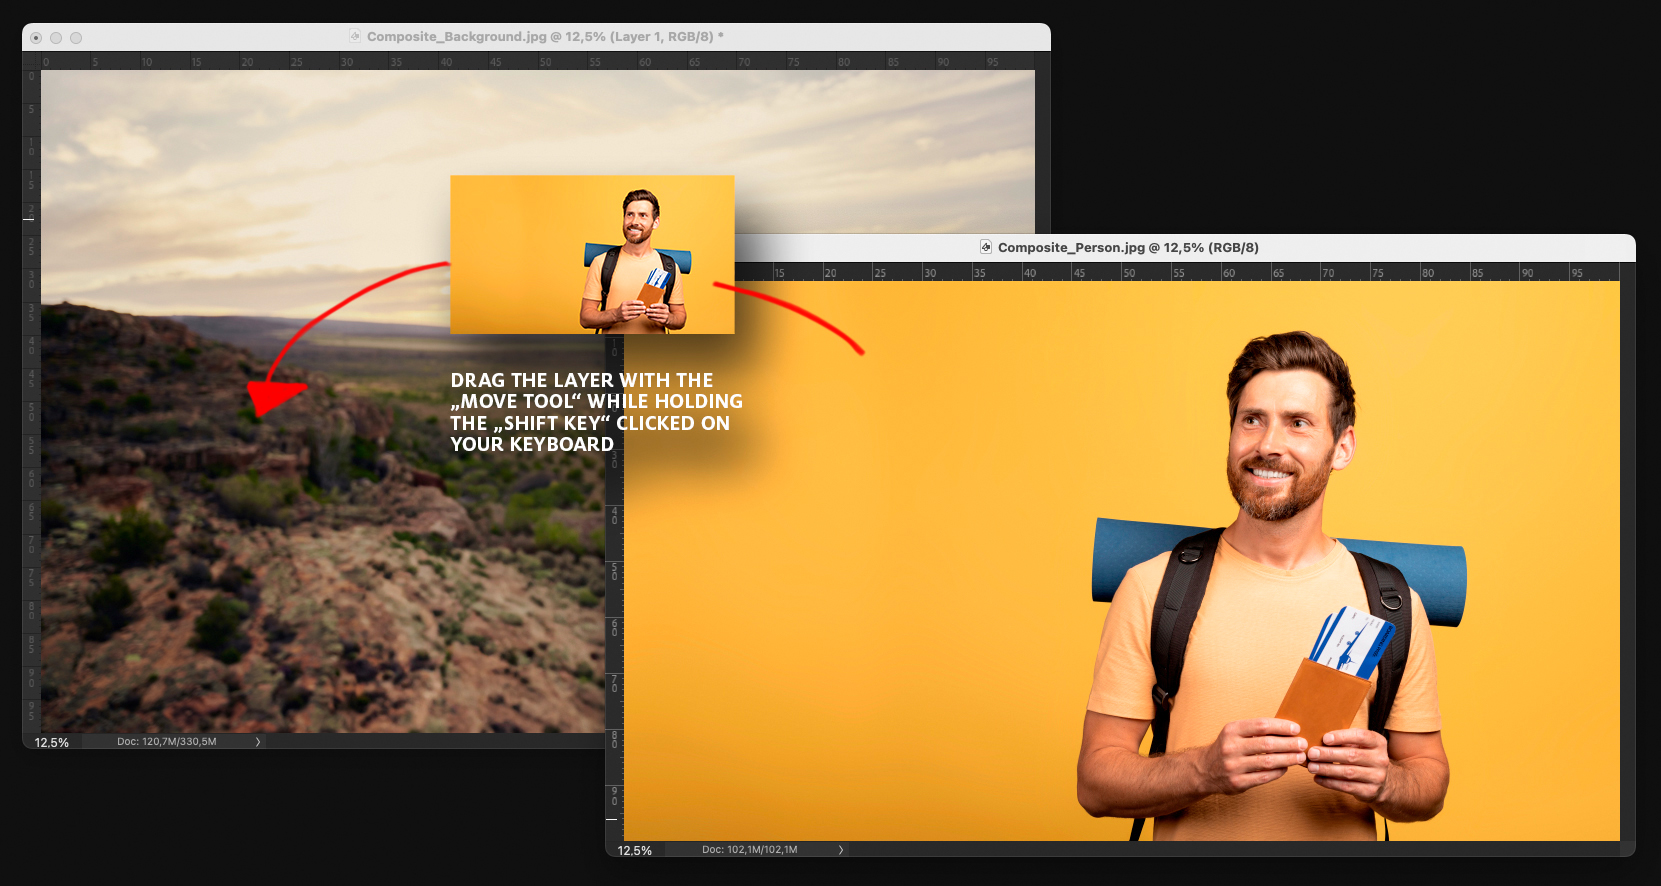
- Choose the background image where you want to place your subject.
- Select the Move Tool in Photoshop.
- Drag the subject image layer onto the destination file while holding the “Shift” key.
- Release the mouse button over your destination file to insert the subject layer.
Step 3: Removing the Subject’s Background
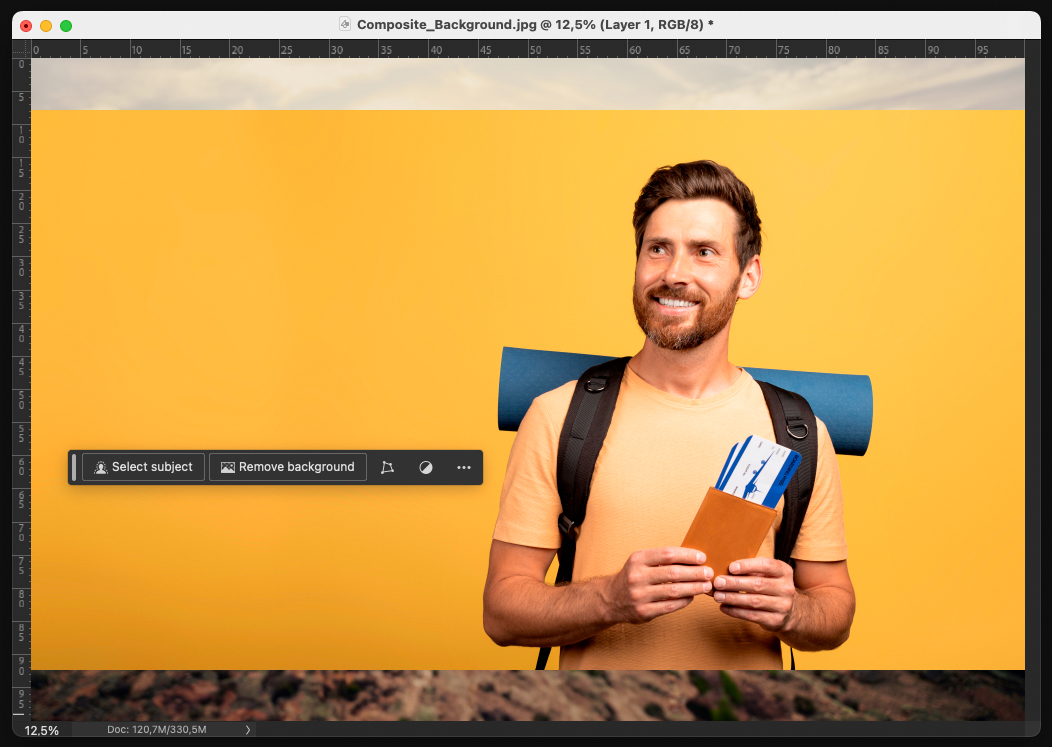
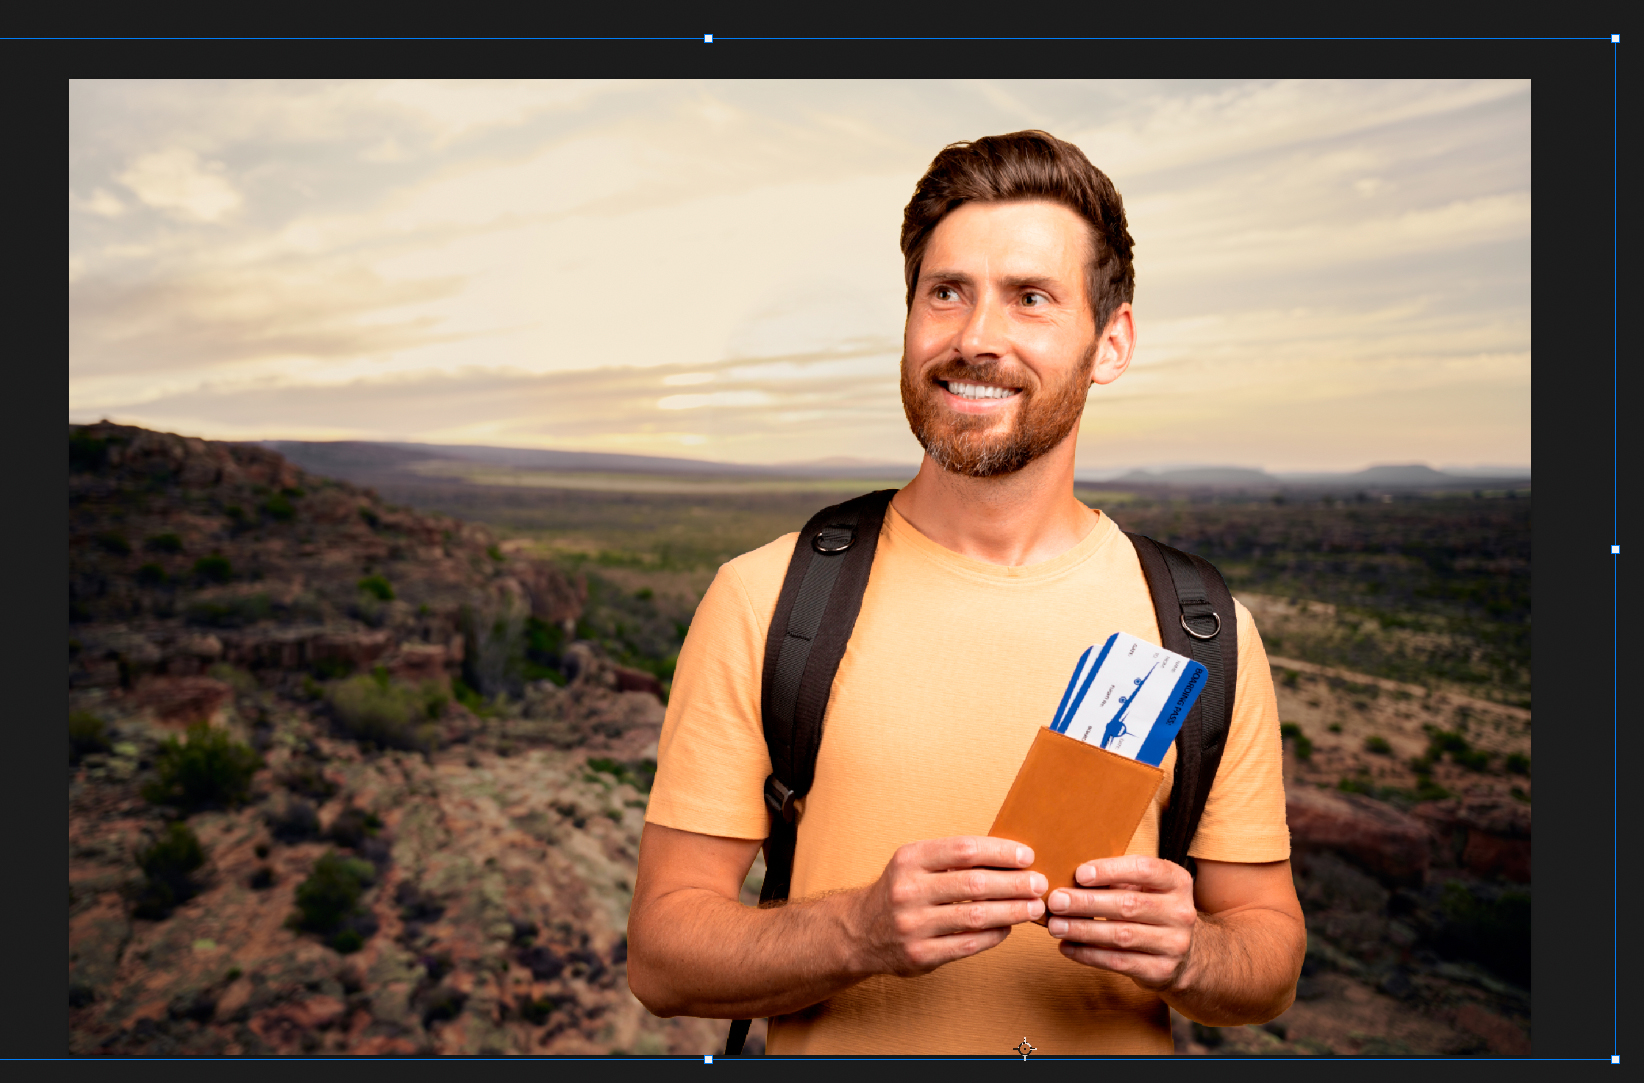
The contextual taskbar now displays the “Remove Background” option. Click it, and Photoshop will handle the background removal, creating a layer mask. Use “Command + T” to resize the subject layer to fit the scene.

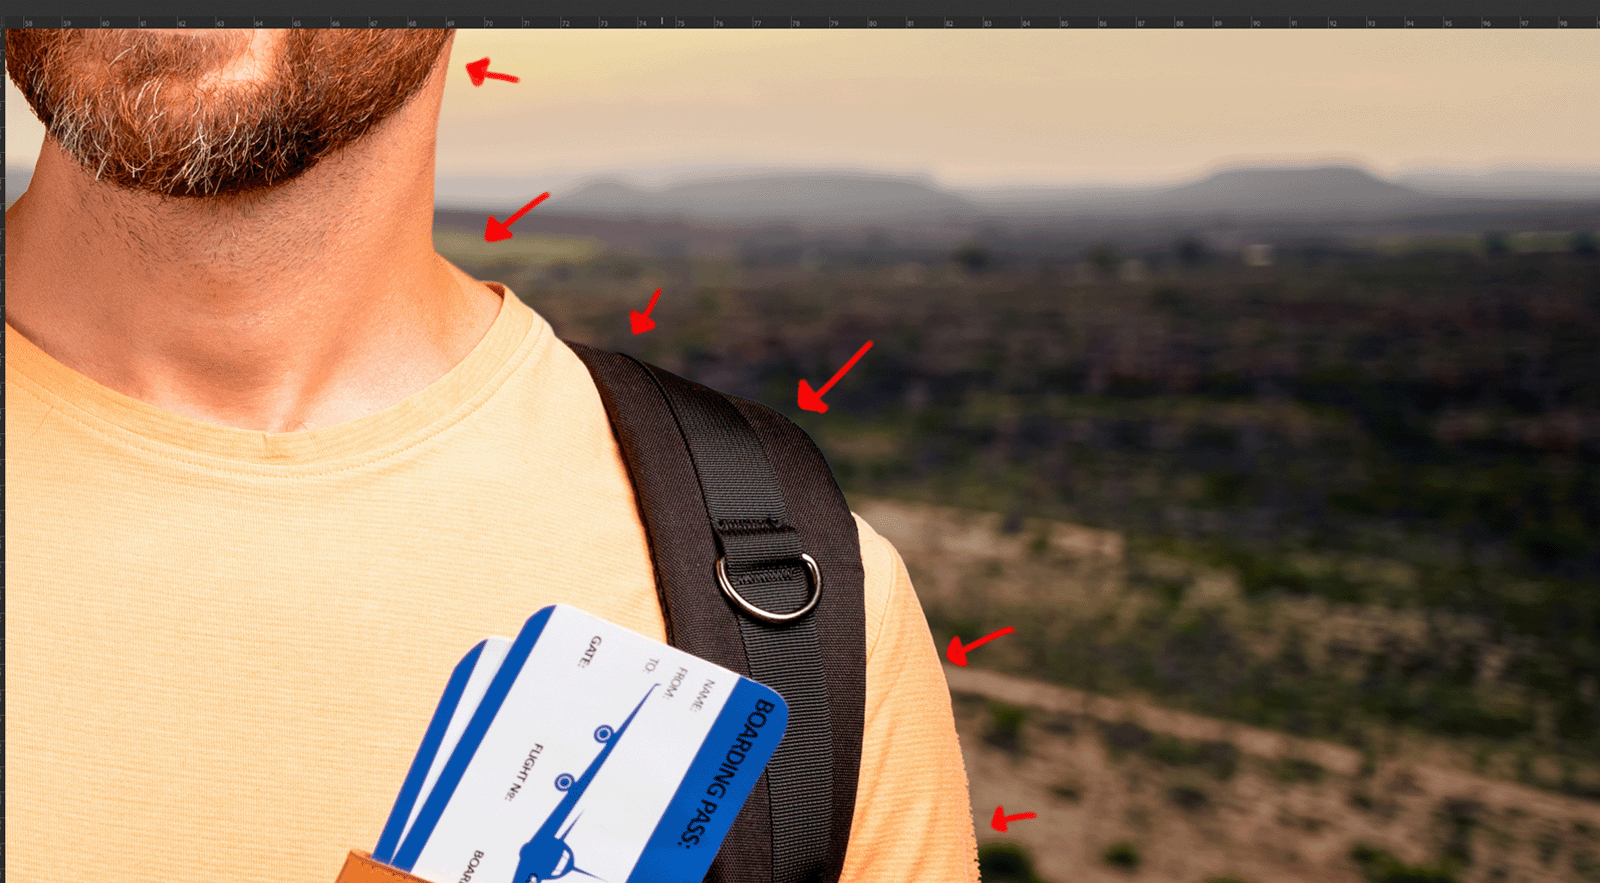
Step 4: Refining the Subject’s Edges with the Smudge Tool
To enhance the edges of the subject mask, utilize the “Smudge Tool” to gently push the mask inwards, ensuring a clean blend.
Step 5: Color Grading and Coherence
For a harmonious composition, match the colors and luminosity of the subject and background:
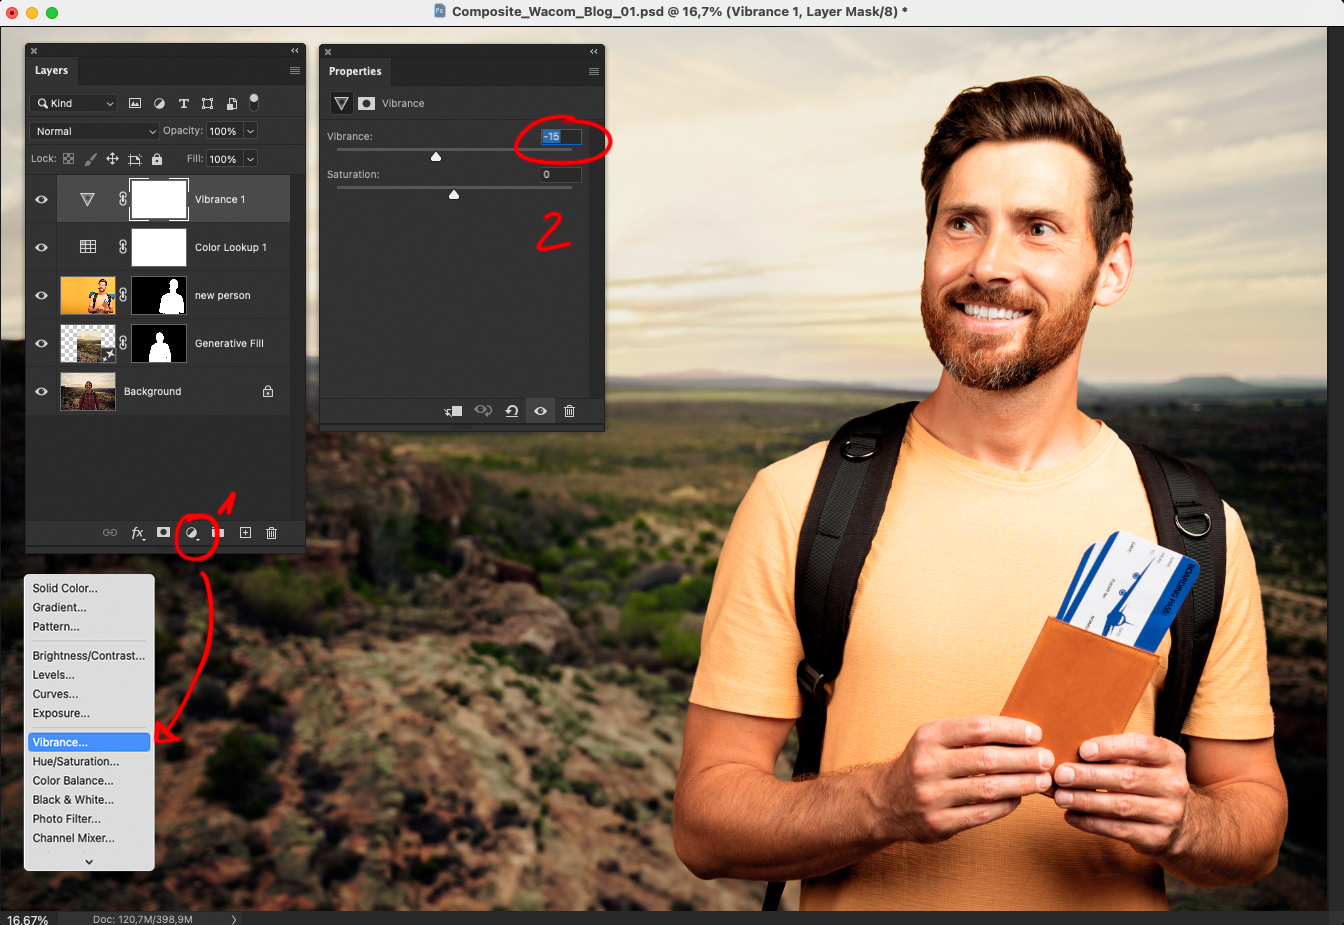
- Create a new adjustment layer by clicking the “New Adjustment Layer” icon and choose “Color Lookup.”
- Set the blending mode to “Soft Light.”
- Pick an appropriate Color Lookup Table from the preinstalled “3DLUT Files” or experiment with different styles. Adjust layer opacity as needed.
- Adjust the layer opacity to around 40% to reduce the overall effect to an appropriate level


Step 6: Adjusting Saturation
To control overall saturation, apply a “Vibrance” adjustment layer:
- Create a new adjustment layer and select “Vibrance.”
- Reduce vibrance by pulling the slider to the left, e.g., -15, for a nuanced result.
Step 7: Adding Text Creatively
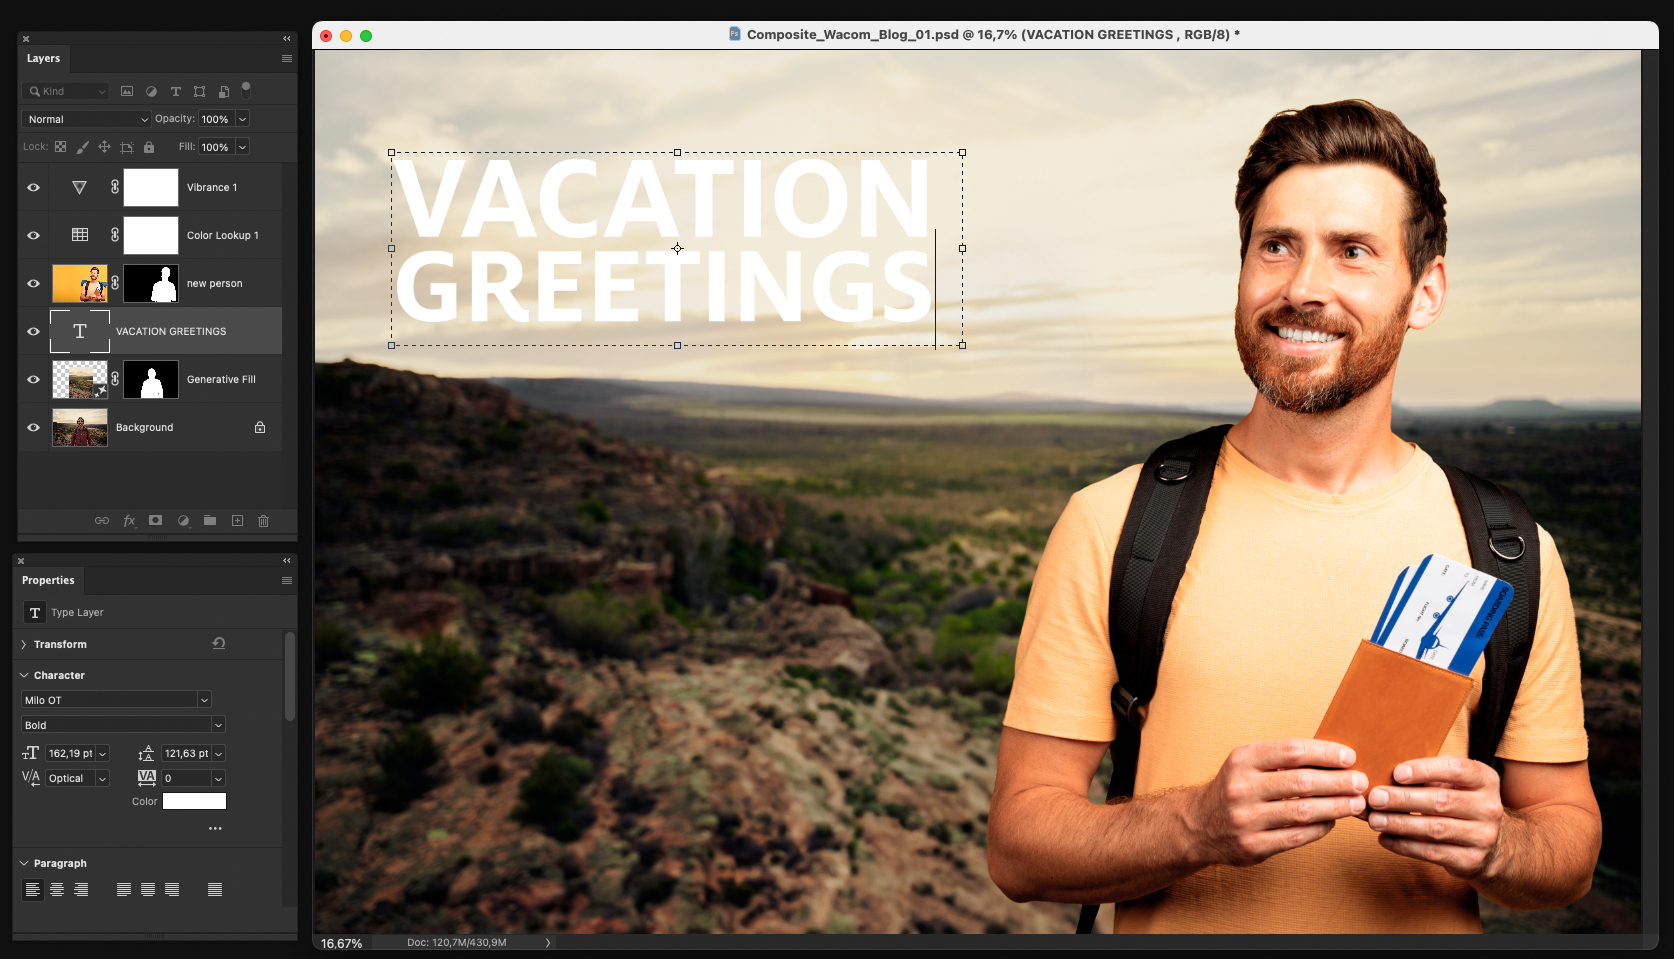
Enhance your holiday greetings with a text layer positioned behind the subject:
- Create a new text layer by clicking the “Text” icon in the toolbar.
- Type your text, e.g., “Vacation Greetings,” and format it to your liking.
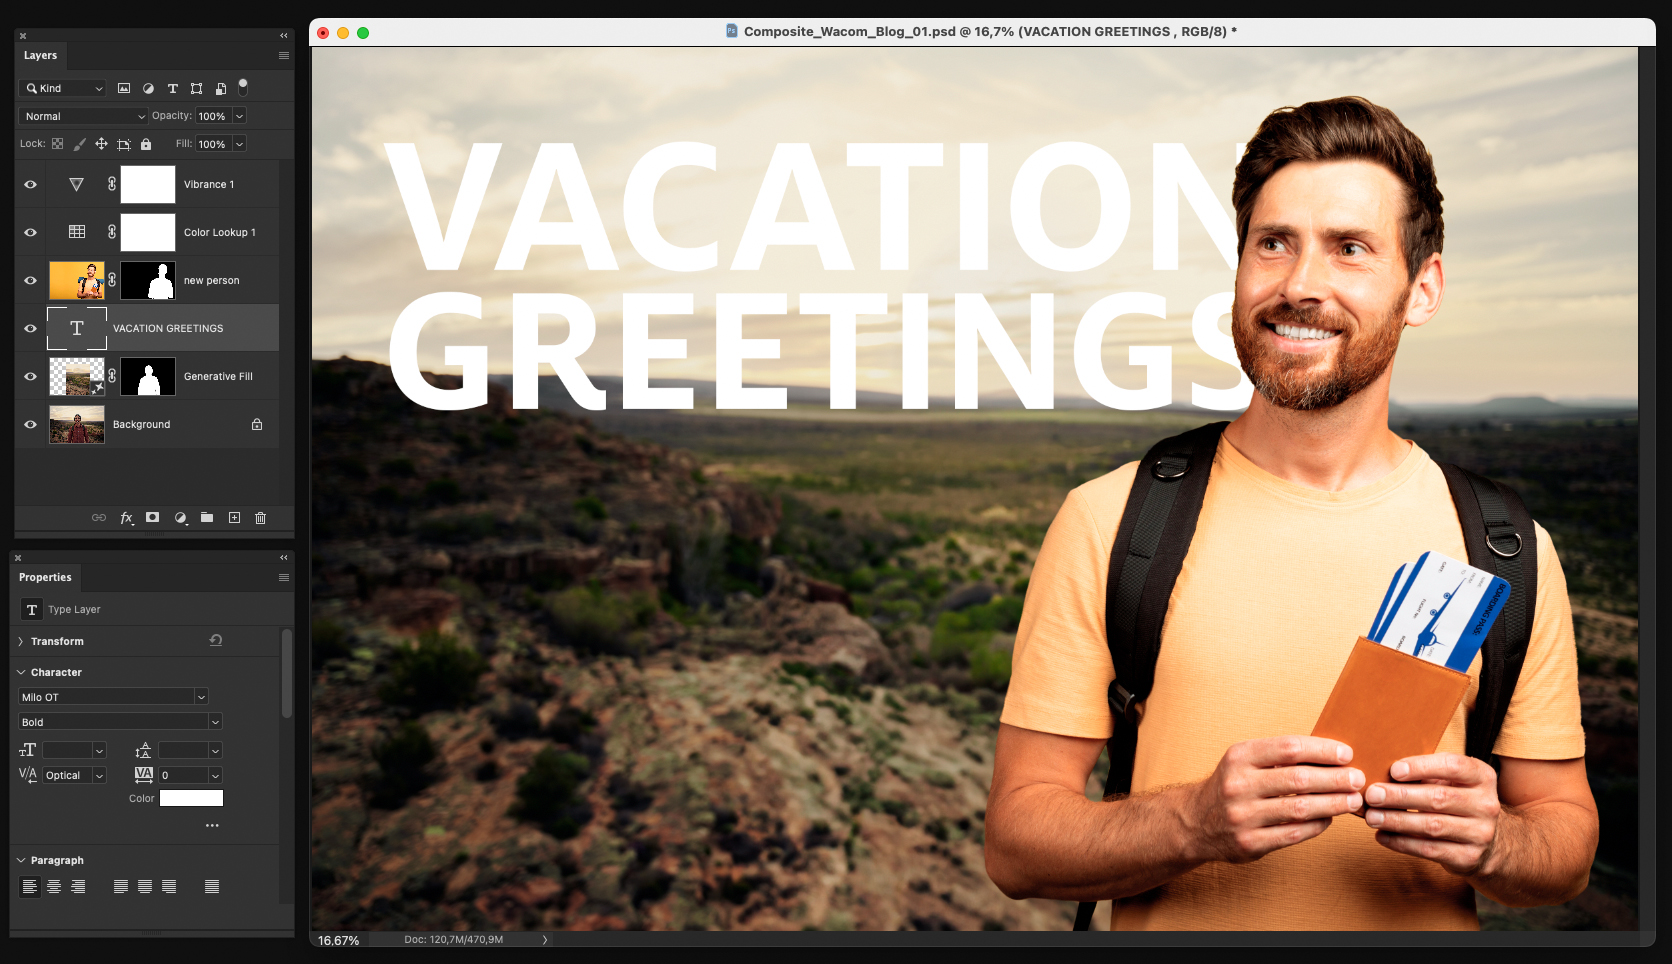
- Scale the text to your desired size and position it beneath the subject layer in the layer stack.
Final Image

Conclusion
As demonstrated in this example, simple yet powerful tools in Photoshop, combined with the precision of a Wacom tablet or pen display, can lead to stunning creations for communication or personal enjoyment. Let this blog post inspire you to embark on your own creative journey and explore the limitless possibilities of image creation in Photoshop. Have fun, and best of luck on your creative adventure!
All the best,
Jan

About Jan Wischermann:
I am a beauty, hair & commercial retouch expert based in Düsseldorf, Germany. Being an art director for many years, I chose to follow my passion and turn into a full time pro retoucher with almost 20 years in the creative industry by today.
I am specialized in beauty, hair and commercial productions with many years of experience in providing high end results to clients like Aldi, Fortuna Düsseldorf, Henkel, Hornbach, Mastercard, Schwarzkopf, Stabilo and Syoss among many others. I am working on projects for well-known international advertising agencies, photographers and magazines.


