Looking for a straightforward way to record video lessons? Feeling stressed with the move to virtual teaching? Take a look at Loom. It’s a simple video recorder you can use to create lessons for online learning.
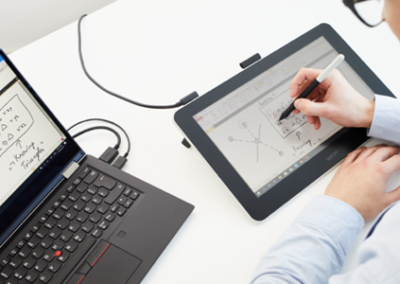
These videos are perfect for emailing home, adding to collaborative platforms, and keeping as a lesson resource to use in the future. And your Wacom pen tablet is the perfect tool to get the most out of Loom.
We’ll show you:
- How to get started with Loom
- How to use your Wacom pen tablet whilst recording
- Loom’s clever pen tool
How to use Loom
Loom is free with paid upgrade options, but if you verify your teaching email address, there are a host of extras you get for free. It only takes a few days to verify, and it’s worth doing for the pen tool and extra recording time you’ll receive.
Once you’ve set up an account, choose how you want to use Loom:
- Chrome extension
- Desktop app
- Mobile app
If you want a small camera bubble on your screen so students can see you, you’ll need to use the desktop app. Alternatively display a photo, or just share screen share.
Loom has produced a range of simple resources to get you started and created a guide especially for educators. They explain how to record, trim, and publish your videos with no need for your students to sign up.
So how can you use your Wacom pen tablet to enhance lessons recorded with Loom? Let’s look at how it works.

Using a Wacom pen tablet whilst recording with Loom
Loom records your screen, so you can display presentations, documents, and websites whilst creating a voiceover.
PowerPoint
As a teacher, you’re probably most used to using PowerPoint for teaching. But it’s hard to explain and demonstrate ideas when students aren’t with you. That’s why having a pen tablet is useful. You draw, annotate, and highlight whilst you teach, and Loom records it all.
When you prepare your presentation, there’s no need to stick with stock images found off the internet. Leave plenty of space on the slide to write and draw when you record. Instead of breaking copyright laws, now you’re producing images, graphs, and diagrams that exactly meet the needs of your learners.
Pen tools
You’ll find the pen tools at the bottom of your screen when in PowerPoint’s presenter mode. Touch them with your Wacom pen to select the option you want.
You can choose:
- Pen
- Laser pointer
- Erasure tool
- Choice of colour
- Line weight
Now you can demonstrate difficult concepts, provide whole class feedback, and model useful strategies writing directly onto the slides. Students can easily pause, rewind, and re-watch your videos until they feel secure.
Other presenting tools
Sometimes you don’t need a presentation. You simply want a blank space to record key notes and ideas whilst you speak as you would on a classroom whiteboard.
Wacom is helpfully compatible with all your favourite programs. Two you may be less familiar with are the Windows Ink Workspace and Wacom’s own Bamboo Paper. Both are available as an easy download and give you the ability to make notes and visuals whilst you record your lesson.
You’ll love the range of tools available. Choose crayon, pen, and pencil options and a wide range of colours and styles. It lets you create accurate drawings and clear-to-read handwriting on the screen.
You don’t have to stick with just one program. Loom will keep recording as you flick between a whiteboard space and PowerPoint slides. It offers you the flexibility you need to record great lessons.
Using the Loom pen tool
A feature you’ll love using is Loom’s special pen tool. You’ll need to use the desktop app and have a verified education account. It works perfectly with your Wacom pen too.
Unlike other drawing tools, with the Loom pen your writing disappears after 5 seconds. It keeps your screen clutter-free and lets you add temporary highlights, diagrams, and annotations to accompany your lesson. It’s a fantastic way to avoid cognitive overload.
To use Loom’s drawing pen, start recording as usual. Hover over the ‘start-stop’ icon and you’ll spot the pen tool in the menu. Select your colour and thickness then start drawing. It really is that easy. Switch between permanent annotations and this temporary pen whilst teaching to suit your needs.
The benefits of using a Wacom pen tablet on Loom
We’ve all tried drawing with a mouse or tracker pad, it’s hard work! Your diagrams are hard to read, and it can often prevent learning rather than support it.
Using a pen tablet gives you a real pen to use. It’s easy to draw straight lines and curves. You can draw and write quickly with legible handwriting and it keeps up with the pace of your lesson.
It’s hard to keep your student’s attention when teaching online, you don’t need anything to slow you down. Using a pen tablet whilst recording makes your lessons engaging, clear, and useful for your learners.
In summary
We think Loom is an amazing, free tool that’s perfect for teachers. You can quickly record lessons and edit them to remove any mistakes. It’s easy to add your finished video to emails or add them to a collaborative platform.
Wacom pen tablets are the perfect tool to support you using Loom. A real pen is comfortable. No more trying to draw and write with a mouse. You can use the pen tools on familiar programs like PowerPoint to create great drawings, notes, and annotations.
At Wacom, we know teaching is changing rapidly as you learn to move online. Check out our helpful eLearning information page full of handy guides, useful blogs, and information you can use for virtual teaching.


