1. Tablet Position – aka, Where to Put Your Tablet
Where you place a tablet on your work surface can be a huge factor in getting up to speed with it. As a tablet physically resembles a mouse pad, you may be compelled to place it the right or left of your keyboard. And that’s ok, but this position may actually slow your getting used to the way a tablet functions. Instead, for now, place the tablet in front of your keyboard, directly in line with your display. Once you get used to it, you can certainly reposition it, but this set up will help you as you get started.
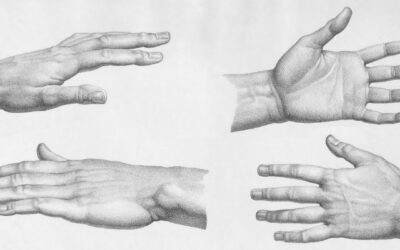
 2. How to Hold a Pen
This may sound ridiculously obvious, but you want to hold the pen, just like a pen. (Don’t laugh, I’ve seen people struggle with this more times than you’d believe!) Grip the pen between your index finger and your thumb, lining the button on the side of the pen between them. When the pen is comfortably in your hand, rest the palm of your hand on the tablet. With the pen tip approximately ¼ inch or a couple of millimeters above the tablet’s surface, you will use both your fingers and your hand to move the cursor. Note: You don’t place the pen tip on the tablet to move your cursor. We’ll discuss navigation more thoroughly in just a bit. For now, move on to the next tip.
3. Pen Mode vs. Mouse Mode
A pen is kind of like a mouse, but different. Like a mouse, a pen enables you to move your cursor around a screen, navigate and select items. But the way that the pen enables you to do these things is a bit different.
A pen works in what is referred to as “pen mode” or “absolute mode”. Without getting too technical, this means that the position of your pen over the tablet places your cursor in a corresponding position on your screen. For example, if you were to place your pen in the upper left-hand corner of the tablet, your cursor would appear in the upper left-hand corner of your screen. Placing your pen in the lower right-hand corner of the tablet would make your cursor appear in the lower right-hand corner of your screen. Essentially your tablet’s active area, or surface is in a 1 to 1 ratio with your screen or desktop. This makes locating and navigating your cursor much easier than mouse!
2. How to Hold a Pen
This may sound ridiculously obvious, but you want to hold the pen, just like a pen. (Don’t laugh, I’ve seen people struggle with this more times than you’d believe!) Grip the pen between your index finger and your thumb, lining the button on the side of the pen between them. When the pen is comfortably in your hand, rest the palm of your hand on the tablet. With the pen tip approximately ¼ inch or a couple of millimeters above the tablet’s surface, you will use both your fingers and your hand to move the cursor. Note: You don’t place the pen tip on the tablet to move your cursor. We’ll discuss navigation more thoroughly in just a bit. For now, move on to the next tip.
3. Pen Mode vs. Mouse Mode
A pen is kind of like a mouse, but different. Like a mouse, a pen enables you to move your cursor around a screen, navigate and select items. But the way that the pen enables you to do these things is a bit different.
A pen works in what is referred to as “pen mode” or “absolute mode”. Without getting too technical, this means that the position of your pen over the tablet places your cursor in a corresponding position on your screen. For example, if you were to place your pen in the upper left-hand corner of the tablet, your cursor would appear in the upper left-hand corner of your screen. Placing your pen in the lower right-hand corner of the tablet would make your cursor appear in the lower right-hand corner of your screen. Essentially your tablet’s active area, or surface is in a 1 to 1 ratio with your screen or desktop. This makes locating and navigating your cursor much easier than mouse!
 4. Navigation and Selection
With your tablet in place, the pen in your hand and a general understanding of pen mode (vs. mouse mode), its time to start moving that cursor and selecting items on your desktop. To move your cursor around the screen, rest the palm of your hand on the tablet and move the pen tip over the tablet using your fingers and hand movement. When the pen tip is approximately ¼ inch or a couple of millimeters over the tablet, you will see the cursor move. Notice the position of the cursor on the screen in relation to the position of the pen tip over the tablet. Watch the two as you move the pen from left to right. This is “pen mode” in play!
To select an item, whereas you would typically click or left-click with a mouse, with a pen, you tap the item with your pen tip. Think of the pen tip as a left mouse click. If you want to move an item, such as a folder, you would tap and hold your pen to that folder and then drag it to the position of your choosing. To release the item, simply pull the pen away from the tablet. If you wanted to open the folder, you would double-tap it. Finally, to select multiple items, on your desktop or within a folder, you would tap and hold your to the tablet as you drag over the items that you wish to select. Again, pulling your pen away from the tablet when you are through.
Navigation can take some getting used to at first. Coming from a mouse, the natural tendency is to pick up and scoot the pen on the tablet to move your cursor. Instead, you want to just keep on moving your hand, following your cursor where you want it to go. I like to say that getting used to the pen is more of an unlearning process than a learning process. Once you get used to navigating with a pen, you will likely feel that what seemed natural with a mouse was actually a hindrance!
5. Pressure Sensitivity
If moving your cursor around a screen is like learning to walk. It’s time to learn how to run! You most likely got a tablet for something other than a mouse-alternative. And that something was probably “pressure-sensitivity”. Pressure enable’s you to vary a tool’s function based on how hard you press the pen to the tablet. This is the primary reason why people use tablets vs. a mouse. Pressure sensitivity simply gives you more control when using brushes, pencils and other drawing and retouching tools. A pen is also ideal for marking up and annotating documents. Basically, any function that requires a drawing or writing type movement.
Enabling control by pen pressure is accomplished differently in every application. In most cases via checkbox, button or drop down menu. The typical function is to use pressure to control the size or width of a brush, and/or it’s opacity. For example, a light touch of the pen to the tablet with an increasingly heavier touch will widen a brush stroke, or make it darker. Pressure sensitivity is amazingly helpful for anyone wishing to draw and paint digitally or enhance photos.
Like everything in life, practice makes perfect. Few activities are mastered in minutes. Pick up the pen and put your self to task. Go through your email with your pen in hand. (We could all use a little clean up of the inbox!) Do some housekeeping with your folders. Open up your favorite creative app and doodle. The more you put the pen through its paces, the easier it will become.
4. Navigation and Selection
With your tablet in place, the pen in your hand and a general understanding of pen mode (vs. mouse mode), its time to start moving that cursor and selecting items on your desktop. To move your cursor around the screen, rest the palm of your hand on the tablet and move the pen tip over the tablet using your fingers and hand movement. When the pen tip is approximately ¼ inch or a couple of millimeters over the tablet, you will see the cursor move. Notice the position of the cursor on the screen in relation to the position of the pen tip over the tablet. Watch the two as you move the pen from left to right. This is “pen mode” in play!
To select an item, whereas you would typically click or left-click with a mouse, with a pen, you tap the item with your pen tip. Think of the pen tip as a left mouse click. If you want to move an item, such as a folder, you would tap and hold your pen to that folder and then drag it to the position of your choosing. To release the item, simply pull the pen away from the tablet. If you wanted to open the folder, you would double-tap it. Finally, to select multiple items, on your desktop or within a folder, you would tap and hold your to the tablet as you drag over the items that you wish to select. Again, pulling your pen away from the tablet when you are through.
Navigation can take some getting used to at first. Coming from a mouse, the natural tendency is to pick up and scoot the pen on the tablet to move your cursor. Instead, you want to just keep on moving your hand, following your cursor where you want it to go. I like to say that getting used to the pen is more of an unlearning process than a learning process. Once you get used to navigating with a pen, you will likely feel that what seemed natural with a mouse was actually a hindrance!
5. Pressure Sensitivity
If moving your cursor around a screen is like learning to walk. It’s time to learn how to run! You most likely got a tablet for something other than a mouse-alternative. And that something was probably “pressure-sensitivity”. Pressure enable’s you to vary a tool’s function based on how hard you press the pen to the tablet. This is the primary reason why people use tablets vs. a mouse. Pressure sensitivity simply gives you more control when using brushes, pencils and other drawing and retouching tools. A pen is also ideal for marking up and annotating documents. Basically, any function that requires a drawing or writing type movement.
Enabling control by pen pressure is accomplished differently in every application. In most cases via checkbox, button or drop down menu. The typical function is to use pressure to control the size or width of a brush, and/or it’s opacity. For example, a light touch of the pen to the tablet with an increasingly heavier touch will widen a brush stroke, or make it darker. Pressure sensitivity is amazingly helpful for anyone wishing to draw and paint digitally or enhance photos.
Like everything in life, practice makes perfect. Few activities are mastered in minutes. Pick up the pen and put your self to task. Go through your email with your pen in hand. (We could all use a little clean up of the inbox!) Do some housekeeping with your folders. Open up your favorite creative app and doodle. The more you put the pen through its paces, the easier it will become.
2. How to Hold a Pen
This may sound ridiculously obvious, but you want to hold the pen, just like a pen. (Don’t laugh, I’ve seen people struggle with this more times than you’d believe!) Grip the pen between your index finger and your thumb, lining the button on the side of the pen between them. When the pen is comfortably in your hand, rest the palm of your hand on the tablet. With the pen tip approximately ¼ inch or a couple of millimeters above the tablet’s surface, you will use both your fingers and your hand to move the cursor. Note: You don’t place the pen tip on the tablet to move your cursor. We’ll discuss navigation more thoroughly in just a bit. For now, move on to the next tip.
3. Pen Mode vs. Mouse Mode
A pen is kind of like a mouse, but different. Like a mouse, a pen enables you to move your cursor around a screen, navigate and select items. But the way that the pen enables you to do these things is a bit different.
A pen works in what is referred to as “pen mode” or “absolute mode”. Without getting too technical, this means that the position of your pen over the tablet places your cursor in a corresponding position on your screen. For example, if you were to place your pen in the upper left-hand corner of the tablet, your cursor would appear in the upper left-hand corner of your screen. Placing your pen in the lower right-hand corner of the tablet would make your cursor appear in the lower right-hand corner of your screen. Essentially your tablet’s active area, or surface is in a 1 to 1 ratio with your screen or desktop. This makes locating and navigating your cursor much easier than mouse!
4. Navigation and Selection
With your tablet in place, the pen in your hand and a general understanding of pen mode (vs. mouse mode), its time to start moving that cursor and selecting items on your desktop. To move your cursor around the screen, rest the palm of your hand on the tablet and move the pen tip over the tablet using your fingers and hand movement. When the pen tip is approximately ¼ inch or a couple of millimeters over the tablet, you will see the cursor move. Notice the position of the cursor on the screen in relation to the position of the pen tip over the tablet. Watch the two as you move the pen from left to right. This is “pen mode” in play!
To select an item, whereas you would typically click or left-click with a mouse, with a pen, you tap the item with your pen tip. Think of the pen tip as a left mouse click. If you want to move an item, such as a folder, you would tap and hold your pen to that folder and then drag it to the position of your choosing. To release the item, simply pull the pen away from the tablet. If you wanted to open the folder, you would double-tap it. Finally, to select multiple items, on your desktop or within a folder, you would tap and hold your to the tablet as you drag over the items that you wish to select. Again, pulling your pen away from the tablet when you are through.
Navigation can take some getting used to at first. Coming from a mouse, the natural tendency is to pick up and scoot the pen on the tablet to move your cursor. Instead, you want to just keep on moving your hand, following your cursor where you want it to go. I like to say that getting used to the pen is more of an unlearning process than a learning process. Once you get used to navigating with a pen, you will likely feel that what seemed natural with a mouse was actually a hindrance!
5. Pressure Sensitivity
If moving your cursor around a screen is like learning to walk. It’s time to learn how to run! You most likely got a tablet for something other than a mouse-alternative. And that something was probably “pressure-sensitivity”. Pressure enable’s you to vary a tool’s function based on how hard you press the pen to the tablet. This is the primary reason why people use tablets vs. a mouse. Pressure sensitivity simply gives you more control when using brushes, pencils and other drawing and retouching tools. A pen is also ideal for marking up and annotating documents. Basically, any function that requires a drawing or writing type movement.
Enabling control by pen pressure is accomplished differently in every application. In most cases via checkbox, button or drop down menu. The typical function is to use pressure to control the size or width of a brush, and/or it’s opacity. For example, a light touch of the pen to the tablet with an increasingly heavier touch will widen a brush stroke, or make it darker. Pressure sensitivity is amazingly helpful for anyone wishing to draw and paint digitally or enhance photos.
Like everything in life, practice makes perfect. Few activities are mastered in minutes. Pick up the pen and put your self to task. Go through your email with your pen in hand. (We could all use a little clean up of the inbox!) Do some housekeeping with your folders. Open up your favorite creative app and doodle. The more you put the pen through its paces, the easier it will become.