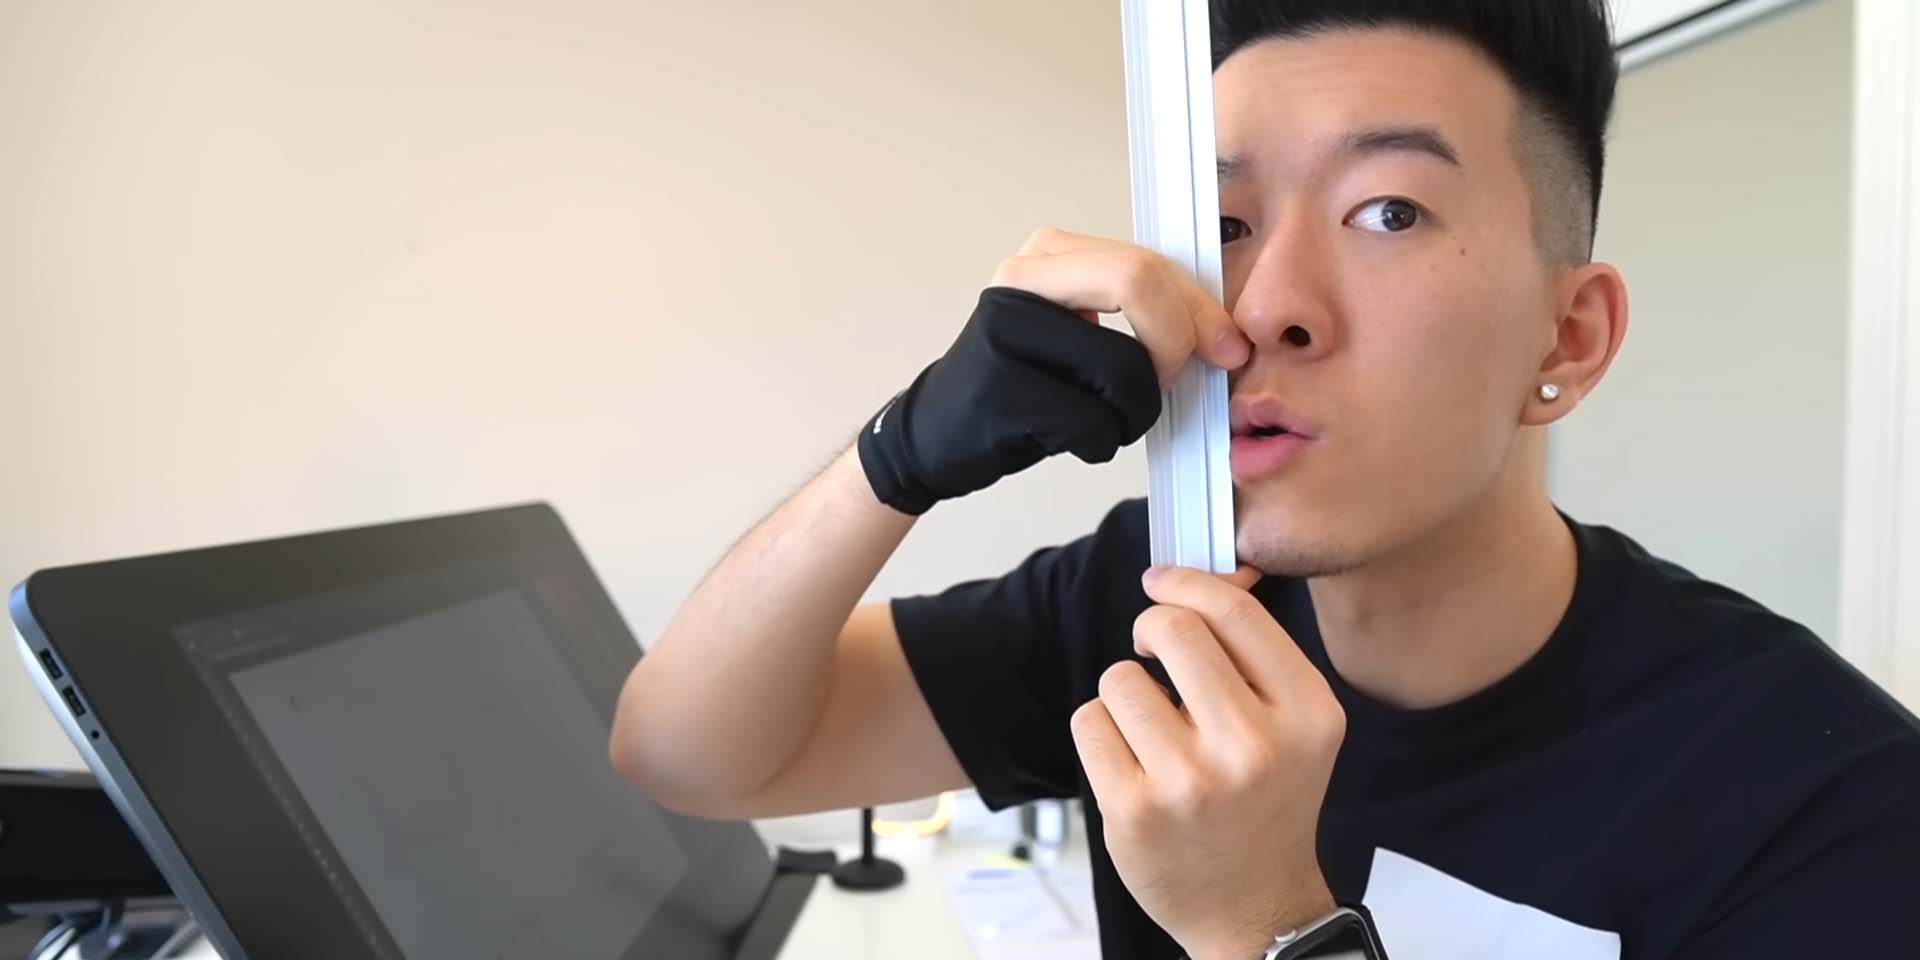
Sam “DoesArts” Yang is a Canada-based illustrator with an inspiring backstory. He went to an art-focused high school, but in college, opted for the more pragmatic field of design – until his mid twenties, when he picked digital painting back up as a hobby and started posting fanart to Instagram. Since then, he’s risen to social media stardom with a signature anime-adjacent style defined by sunlit ladies and impeccable color palettes.
His YouTube channel is a gift to aspiring artists. He does a mixture of tutorials on everything from the fundamentals to advanced rendering techniques, critiques of his fans’ work, challenges, art games, and more – all with an ever-present sense of humor that keeps his content from getting boring even when it’s technical.
The following two tutorials aren’t technical; they instead go almost as far back to the basics as possible: expressing faces in lines. Simplicity is the name of the game here; as the titles promise, he breaks it down straightforwardly enough for a total beginner to grasp. He might disclaim up front that he’s “not a certified art teacher,” but as quite a few commenters attest to, his lessons are more helpful than many that cost money.
Tutorial 1: How to draw faces
This first video focuses on the structure of a face itself. Yang uses a simplified version of the Loomis Method, a face construction process invented in the 1940s that’s been the gold standard in art training for decades. He divides the process into eight steps.
For Step One, he draws a circle for the cranium, then a vertical centerline that extends below it, and a shield shape around the line to form a simplified base. The rest of the video will be devoted to mapping out the proportions of the “average” face over it.
For Step Two, he finds the horizontal center of the cranium, then draws what will become the brow line across it.
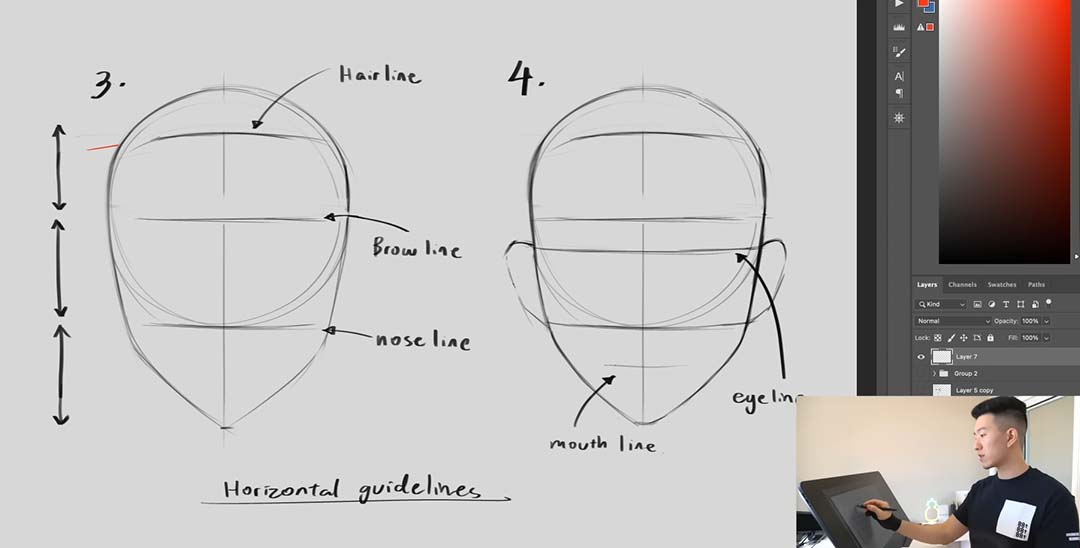
For Steps Three and Four, he sets up the rest of the horizontal guidelines, dividing the face into even thirds: chin to nose, nose to brow, and brow to hairline, a staple of classical proportions. Although in real life, these ratios vary from person to person, and changing the ratios is a fundamental part of stylization, this basic ratio is considered a standard model to work off of.
Steps Five and Six are the vertical guides: the eyes are spaced one eye width apart, with the nose spanning the same distance in the middle of the face. And for a bonus horizontal, the ears extend from the bottom of the nose to the middle of the eyes. These, too, are classic proportions, but it’s rare that you’ll find them all so neatly summarized at once.
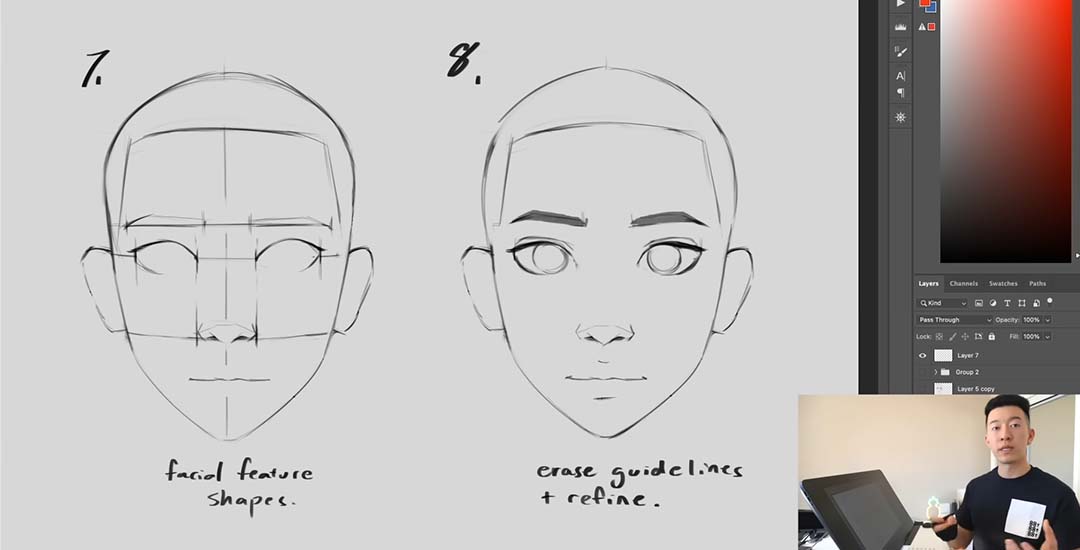
Finally, for Steps Seven and Eight, Sam draws the actual features in over the guidelines. This might seem like way too much to condense into one step – but this is where the artist’s individual style and creativity come in, which is the starting point for the rest of your journey.
Once you’ve gone through the basics, it’s time to practice. And that’s where Sam’s next video comes in.
Tutorial 2: How to practice drawing faces
If the last video was on how to start drawing the face, this one is on how to keep drawing it. And where the last demonstration was done on a Cintiq, here Sam Yang breaks out the sketchbook to return to his traditional roots. As he told 3dtotal in an interview last year, “Even though all [my] work that people see nowadays is digital, there’s so much value in just holding a pencil and drawing on a sheet of paper, and not being able to just undo every brushstroke.”
He warms up with a page of skulls. From experience, these can be one of the most complex and detail-intensive body parts to draw – but only if you let them. To set the precedent for the rest of the session, he keeps them breezy. “Very nice and rough,” as he puts it. “Not very detailed at all. There are a lot of lines that are more gestural.”
Sam’s known for his fast pace, finishing most of his paintings in under two hours, and this practice technique is how he builds up to that speed. Instead of meticulously thinking about how you’re going to capture every feature of the face, he stresses that you just need to fill the book. Set a timer, he advises, and don’t be too precious with any single sketch.
For his second warmup, he does a page of contour drawings, another standard exercise where you draw the entire picture in one long, winding line without lifting your pencil from the page.
Once he’s nice and limbered up, he moves on to the meat of the lesson, finished faces. Where he’s most known on social media for his portraits of cute girls, in this video he flexes his range with subjects of all ages, races, and sizes, using various amounts of exaggeration to style each one in a unique way. And he also makes sure to pick references shot from as many angles as possible, as artists might have to use unusual or extreme ones in their finished pieces, and you don’t want to risk being caught unprepared.
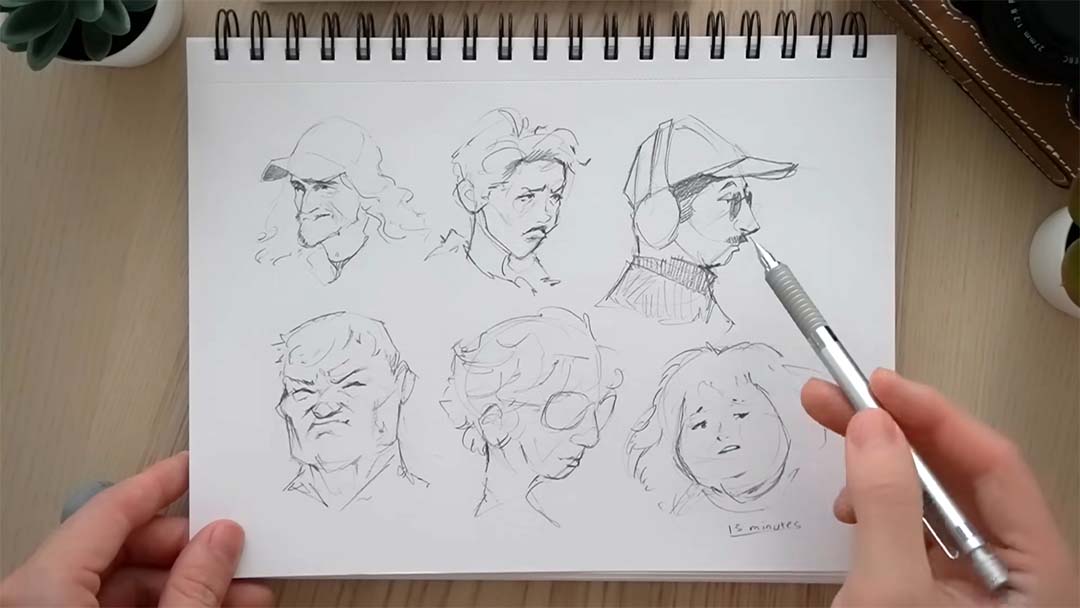
You have to make yourself uncomfortable to grow, he says, pushing yourself to accomplish more than you might have thought possible per sitting. It’s “kind of like getting your reps in at the gym. Each one of these pages is one of your sets, and every single drawing is a rep – and through these repetitions in these sets, this is how you grow your artistic muscles. That’s how you get huge!”
You can follow Sam Yang on X (Twitter), Instagram, Youtube, TikTok – or visit his Linktree, which connects to those and all his other social presences. And why not check out our last article on one of his sketching tutorials here?

About the Author
Cameron “C.S.” Jones is a West-Philly-based writer and illustrator who’s been contributing to Wacom for four years now. You can see more of his work, including most of his contributions to this blog, at thecsjones.com, or follow him on Instagram or Twitter.

