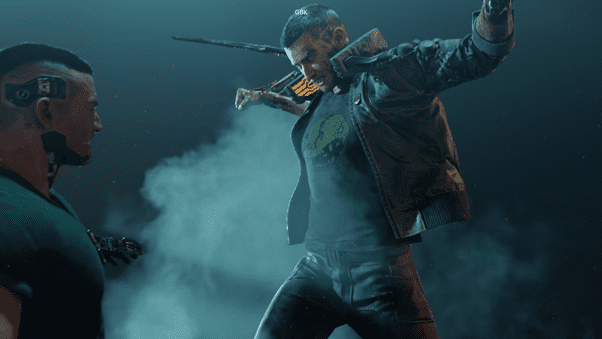
In this case study, Jonas Skoog from Goodbye Kansas Studios shares insights into the character work for Cyberpunk 2077 and how they get the most out of the Wacom Cintiq Pro 24 within their pipeline
By Jonas Skoog
Goodbye Kansas Studios creates award-winning visual effects, digital animation and motion capture for movies, games and commercials. It was founded back in 2017, when four studios merged, with a long history of cinematics, feature film work, motion capture, and 3D scanning in their backpacks. Today the studio has well over 250 employees and is part of the wider Goodbye Kansas Group, with studios and offices in Stockholm, London, Helsinki, Vilnius, Hamburg, Belgrade, Los Angeles & Manila. The headquarters are situated in Stockholm where Goodbye Kansas Studios have the main bulk of artists, their own Performance capture studio as well as our Body and Face scanners.
Goodbye Kansas might be mostly known for its game cinematics but they are also well versed in creating shots for feature films and big TV series such as Carnival Row, Hellboy, A Discovery of Witches and The Walking Dead. If that’s not enough there is also lots of work being done within the realm of real-time utilizing engines such as Unreal and Unity at the office.
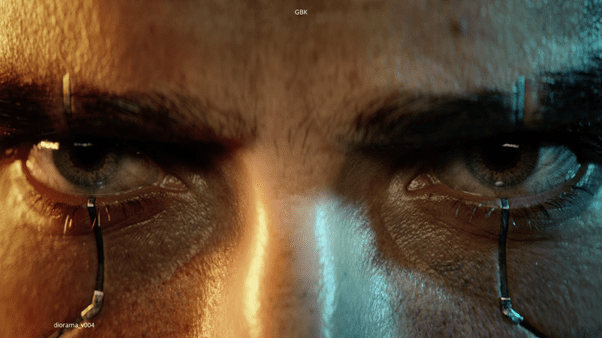
My name is Jonas Skoog and I am a Lead Character Artist at Goodbye Kansas Studios. My role here is to lead the team of artists on our cinematic trailers when it comes to modeling, texturing, lookdev and groom. He started his career around 15 years ago and worked on several big cinematics for titles such as Conan Exiles, The Walking Dead, Assassins Creed, Warhammer, Battlefield and Cyberpunk 2077 to name a few. In this article, he will take you through some of the work Goodbye Kansas Studios did on the Cyberpunk 2077 E3 Trailer along with some tips and tricks on working from home!
How Wacom is an integral part of the studio and workflow
All of the artists at Goodbye Kansas make use of one Wacom product or another depending on their role. This ranges from Intuos Pro tablets to Cintiq Pro pen displays.
Every artist is entitled to their own Wacom tablet, dual 27” Dell monitors and an NVIDIA GeForce RTX graphics card. The specs on the workstations can of course vary depending on the needs of the department where simulation for example can be very heavy and require more power whereas animation is often not as demanding. But regardless of department it would be hard to find a single desk in our office not accompanied with a Wacom tablet/display to get the job done.
Tools and typical flow in the character pipeline
The character pipeline is ever-evolving at Goodbye Kansas. We always try to stay in the forefront of the business in regards to new workflows, techniques, and hard/softwares. But some parts usually stay the same in a linear fashion.
Concepts are done either in-house with our art department or are sent from the client.
Once those are approved we move on to blocking out the 3d using ZBrush/Maya/Blender to get approval on shape and bigger volumes.
All clothes are created in Marvelous Designer with final pass in Zbrush.
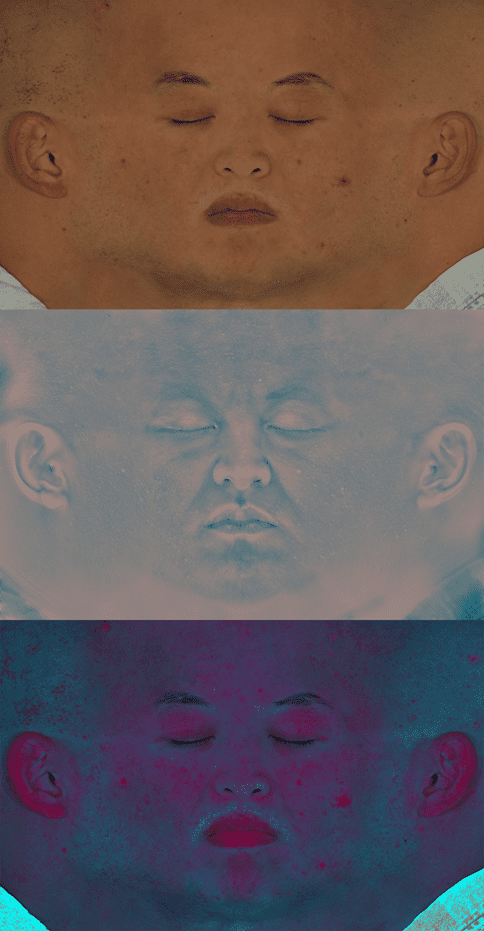
For most heads we rely either on scans, Texturing XYZ displacements or a combination to get fast and pleasing results.
The texturing is done mostly in Substance Painter which is also the choice of almost all our clients making it easy to collaborate.
To make sure we have good performance within the texturing process we rely on NVIDIA cards such as GeForce RTX 2080 Super and Titan RTX.
When it comes to Grooming we rely mostly on the native tools and Groom Bear in Houdini.
Final step is Lookdev and is done using Chaos Group V-Ray renderer.
To make sure all artists have a smooth ride working with 3D Texturing and Frame Buffer rendering all artists at Goodbye Kansas use NVIDIA GeForce RTX Super, Titan RTX, and Quadro RTX GPUs in their day to day work!
Working from home in complex workflows
During the Covid pandemic being able to work from home has been crucial and is something Goodbye Kansas Studios adopted early on, right at the beginning of March 2020 and continued doing so during the entire year and beyond. This meant all of the artists had to either bring their office set-up home or if possible, use their own equipment to create a workable home office to continue our projects and meet the deadlines. Before the pandemic, remote work by artists was mostly used as a means to check on renders and do some lookdev work due to the poor connection so this had to be changed quickly.
With a new firewall put in place, the performance over the remote connection was greatly increased. Next up was finding the best remote desktop protocol to connect to the workstations at the office. We are using both Windows and Linux workstations, so finding a solution to suit both was key.
As a Windows user, I found the best solution for me was Teradici® Cloud Access Software. I am accessing my office workstation from home with this software and the design experience with my Wacom tablet is seamless. This is the setup I will go through here in a few easy steps
The benefits of a multiple display set up
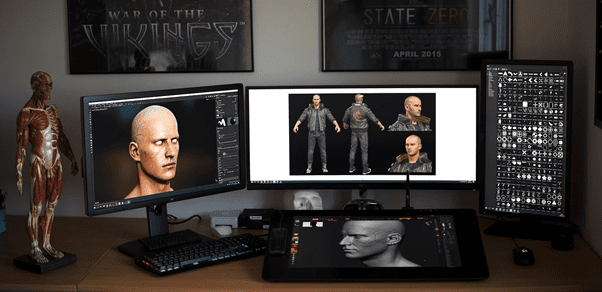
Having several monitors makes life so much easier! Creativity on one, mail, and chats on the other.
By utilizing the 4k Display that comes built with the Cintiq Pro 24” you have enough canvas for all artistic tasks at hand while having your spare monitor free for other tasks such as displaying references, leading video chats or answering a few emails. The optional Wacom Ergo Stand or Flex Arm make the workspace fully adjustable for extra comfort even during long hours. Setting it up is easy!
The first important step is to make sure you are running Teradici PCoIP Client version 20.10.2 with some bug fixes against cursor stretching.
Next we need to activate “show full screen all monitors” from the Teradici menu.
Finally let’s activate both screens from within NVIDIA Control Panel (and also double check both screens are active in Windows Display Properties)
I have also had some instances where my display drivers have crashed on my host machine due to having higher resolution on the Local monitors in relation to the Host monitors. If this happens to you then you might need to decrease the resolution to match your host monitors.
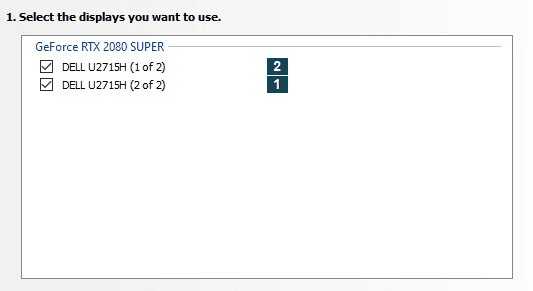
Pressure sensitivity: a must for creative tasks
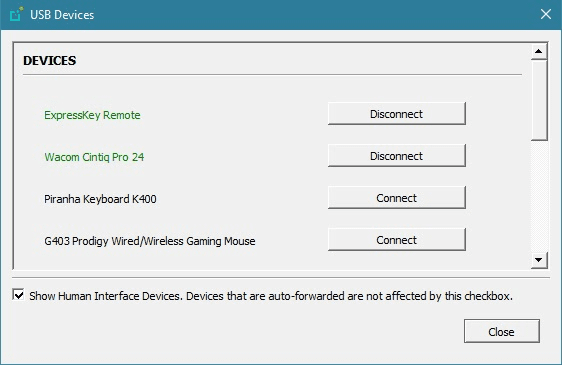
To get pressure sensitivity using your Wacom Pen you need to redirect the USB devices to your host machine. This is simply done from the Teradici menu connection/USB Devices…
Connect to your (in my case) Wacom Cintiq Pro and don’t forget to also connect the EK Remote if you are using it for Radial Menu and Brush Size like I do.
If you are experiencing severe lag while remote it could be the cause of Low Latency from your Internet provider and distance from the host machine.
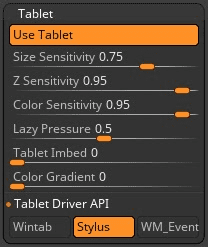
Another tip for a smoother ride inside ZBrush is to choose the correct Tablet API while remoting in. Found under Preferences/Tablet/Tablet Driver API.
Wintab (default mode): Will not handle Windows Ink. This will operate like it did in ZBrush 2019.
Stylus: Handles Windows Ink the same way it did in 2020.1.4.
WM_Event: Handles Windows Ink the same way it did in 2021.
One of these three modes should resolve any issues with pressure sensitivity.
The process of creating a Cyberpunk 2077 cinematic character
When doing cinematic work for a AAA game studio such as CD Projekt Red we often start the collaboration in a very early stage of the game. This means we get to dive right into their game world long before it is released to the public which of course is lots of fun.
The first step usually involves collecting as much as we can from the client to speed up production and stay true to the game. High poly assets get new Topology and UVs to fit our VFX requirements along with polish where needed to hold up usually much closer than what you see in-game. When the model is approved both internally and by the client we move on to texturing.
This is mainly done within Substance Painter using the client work-files as a starting point.
With Substance Painter being a procedural software we can retain all work done by the client by simply reworking the masks to fit our UDIM workflow and continue to push the quality.
Hair is almost always done from scratch by our artists since the difference between in-game hair cards and vfx strands are too big at the moment but with all the new developments on real-time strand based grooming lately that might soon change!
The advantages of using a Wacom Cintiq Pro for sculpting
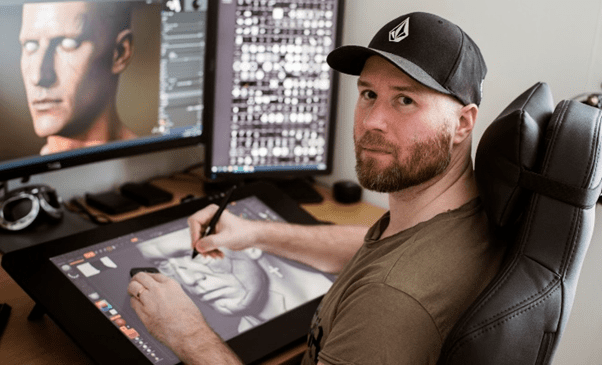
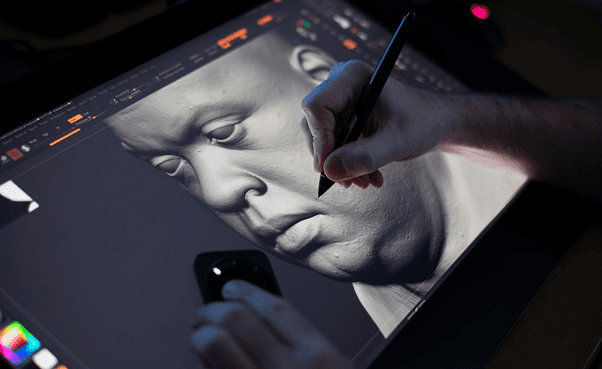
Spending full days hunched over your desk sculpting everything from the smallest wrinkle on a face to concepting up full characters at a quick pace makes it really important to have an organized way of working both for the sake of speed but also from an ergonomic standpoint.
With the Wacom Cintiq Pro I get a big canvas to work with both in terms of 4k resolution but also having a good amount of swipe area across the 24″ display. The obvious perk with the Cintiq is of course the ability to draw directly on screen which feels very natural in comparison to the regular tablets.
Another benefit is the Express Key Remote (which can be placed anywhere on the screen) with its 17 customizable keys leaves the standard keyboard somewhat redundant. Being able to map all of your most often used menus and shortcuts really speeds up the workflow. I have for example besides Alt/Ctrl/Shift mapped brush libraries, polyframe, perspective and brush size to name a few.
Creating face details
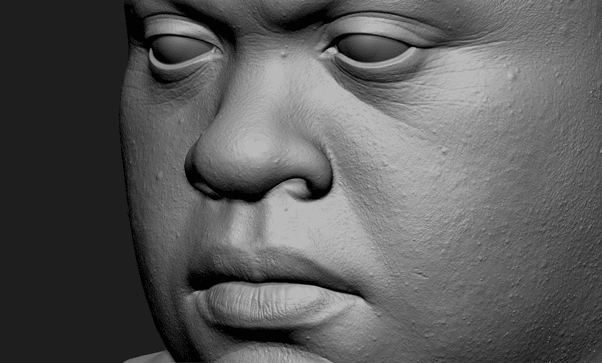
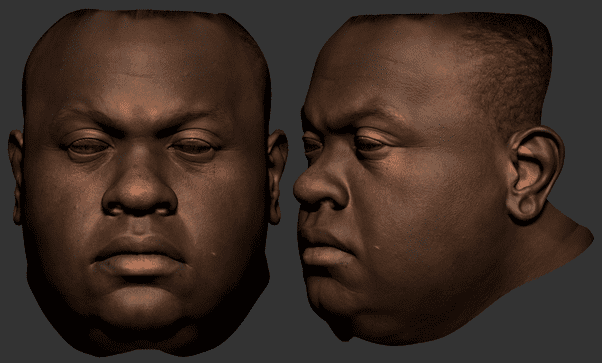
In our cinematic productions we need to be fast and effective but still keep the highest quality. Therefore we try to utilize all nifty tools out there to speed up the pipeline. How we create skin details is one of those. By using scanned surface displacements from Texturing.xyz we can build those details a lot faster than by traditional means.
There are a few different ways to get the skin detail onto your character by either displacing them directly onto the sculpture or by building them up in the shader at render time. For our Cyberpunk 2077 cinematic we chose a hybrid path where we left some of the bigger details in the mesh and topped it up in the shader for extra fidelity.
Also how to get the actual displacements onto the head differs a lot as well. Some people like to paint them on in their preferred texturing tool while others might warp them into place on top of the flat uvs. The method we use is wrapping/projecting the displacements onto the sculpt directly in Zbrush using a subdivided plane and then transferring those details over to the actual head mesh.
There are pros and cons with all workflows and lots of tutorials on all of them so pick the one that fits your pipeline the best:
https://texturing.xyz/pages/tutorials
VFX Texturing
Texturing is a highly creative process similar to regular painting and concept work mixed with technical knowledge such as defining material properties and structure. The technical part can be quite procedural and is often following set physical rules and values.
The creative part on the other hand is very free and is where having a Wacom Cintiq really comes in handy for stable and sweeping brush strokes across the display. Adding to that the .ABR support in Substance Painter we also have all those favorite Photoshop brushes to our disposal!
UDIMs
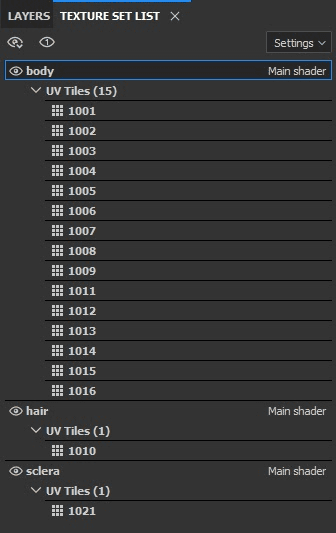
When doing texture work within the VFX industry we rely heavily on UDIMs to get the most out of our textures at render time. A character in our trailers can easily consist of 30 UV tiles at 4096 pixels each. With the release of Substance Painters UDIM workflow we no longer have to do tedious workarounds using texture sets anymore.
It might be worth highlighting that you can still use the texture set workflow while using udims to apply different shaders to objects and group sections of your udims! For it to work just make sure you apply different materials to your selections before exporting the FBX.
LUT
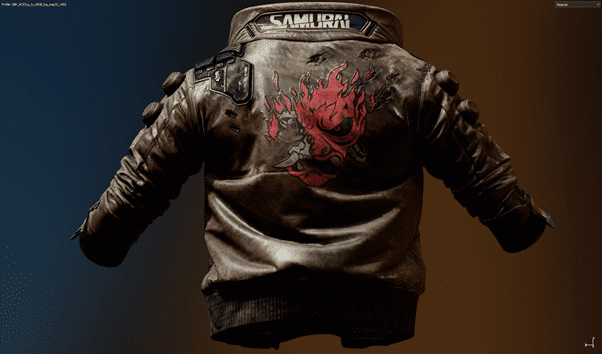
To make sure your color values match between texturing app and render output it important to use the same color profile in both applications. Since we are using an ACEScg config in V-Ray it was really important to have a representative LUT in Substance Painter to get accurate results. This is basically achieved with a LUT texture placed in the color profile slot under camera settings. There are already a few tutorials out there on how to set this up yourself so I will not dive too deep.
Getting accurate colors is of course not all about LUTs. Being able to display them correctly is equally important. The Cintiq Pro IPS Display handles color very well with its 99% Adobe RGB Color Gamut and Teradici Cloud Access Software ensures image colors are presented precisely as intended by the application.
To make sure all these colors are displayed correctly it is important to calibrate them on a regular basis. This can easily be done using for example the Wacom Color Manager solution.

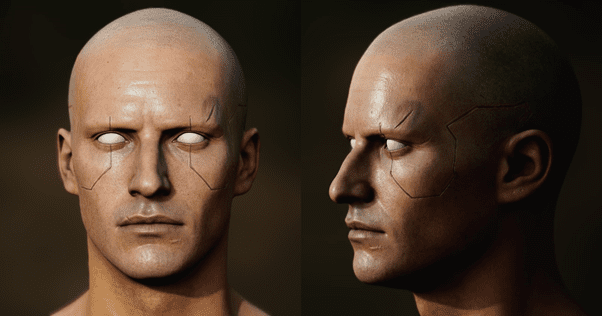
Notice the blown out highlights in the left image in comparison to the one on the right!
Tips and tricks for working with a Wacom Cintiq Pro 24”
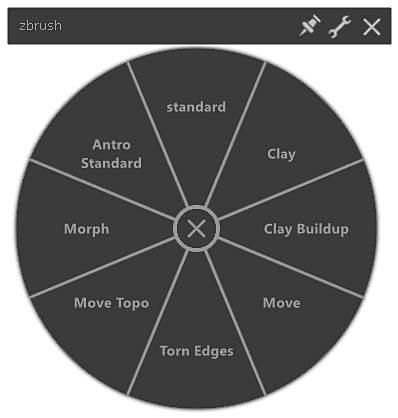
For as long as I have used Wacom products I have always been a fan of the Radial Menu and being able to program it to my needs. I have for example all my favorite brushes in Zbrush easily accessible in the Radial Menu along with brush size mapped to the Touch Ring.
Maybe not revolutionary but also making sure you backup your settings either to the cloud or locally. This can save you some frustration setting it up all over again after forced reinstalls or simply wanting the same setup at home as in the office.

I hope this article has shed some light on the work we do at Goodbye Kansas Studios and perhaps a few tips on how to speed up your workflows both at the office and from home.
If you would like to see more of my work or the stuff we do at Goodbye Kansas Studios just follow the links below!
If you want to discover what the Wacom Cintiq Pro 24 could bring to your creative workflow click here.
Learn more about Jonas Skoog, Goodbye Kansas, Teradici, NVIDIA and Substance
Jonas Skoog
Goodbye Kansas Studios
● Web https://goodbyekansasstudios.com/
● Instagram https://www.instagram.com/goodbyekansas/
● Twitter https://twitter.com/GoodbyeKansas
● LinkedIn https://www.linkedin.com/company/goodbye-kansas-studios/
Teradici
● Web https://www.teradici.com/
● Instagram https://twitter.com/Teradici
● LinkedIn https://www.linkedin.com/company/teradici/
NVIDIA
● Web https://www.nvidia.com/
● Instagram https://www.instagram.com/nvidiacreators/
● Twitter https://twitter.com/NVIDIADesign
● LinkedIn https://www.linkedin.com/showcase/nvidia-design-and-visualization/
Substance
● Web https://www.substance3d.com/
● Instagram https://www.instagram.com/substance3d/
● Twitter https://twitter.com/Substance3D


