

Want to add a little pizazz to your next social media post? Try adding some simple animation! School of Motion has an excellent tutorial to make it happen. This post is based on the below video by School of Motion, was written by Frank Suarez, and originally appeared on School of Motion's blog. School of Motion is an online animation school that offers a wide variety of courses for anyone who wants to take their creative goals to the next level. Check out their website to see all their offerings.
If you want your social media posts to stand out, you need to learn how to add animation. In just a few minutes, you can take a so-so picture and transform it into internet gold. We all understand that maintaining a presence on these platforms is critical to building both a business and a brand, but the time commitment can turn many new artists off. We’re here to show you a better way.
Graphic designers are being asked to create more content for social media these days, and you know what's better than an eye-catching design? An eye-catching design that moves. If you’ve been working in Adobe Photoshop for a while, you’re closer than you think to adding animation. Today, we will fire up After Effects so you can see just how familiar the interface can be. We will take some designs and add some subtle movements in After Effects.
1. Prep your image in Photoshop

We will be working with Photoshop CC 2022 and After Effects CC 2022, for this tutorial, but these techniques should work in other versions as well. We are keeping it very simple for this one. Now you could animate in Photoshop, but that can be quite challenging. Instead, it’s easier to prep your files so they’ll work better in After Effects.
How to pick the right image to animate
To start, you need to pick the right images. Look for something that has good contrast between the foreground and background elements. That will help us cleanly separate the images. And if you’re still having trouble cutting out pictures, we have an entire tutorial showing you all the tips and tricks.

We’ve selected an image of a skateboarder, and we want to animate the background. This is pretty similar to a lot of work you’ll get as a freelance designer and animator. Your client will want some element pulled from the foreground and either placed somewhere new or animated in some way.
So looking at the image above, how should we make them move? Well, we’re going to use an old trick. Instead of the subject moving, the background will cycle from left to right, giving the impression of movement.

You also need to pay attention to the lighting. While a distinct light source looks great for a still image, it is going to appear off when you start moving it against a different background, or one in which the lighting no longer matches. Your viewer might not know exactly what is wrong, but they’ll get distracted from the effect. Like a drunk magician, it really kills the illusion.

Separate your layers (and name them)
As you can see in the video above, we’re using masks (preferably non-destructive) to separate out the subject, the board, the shadow, and the background. This allows us to make subtle fixes if we notice an issue down the road. If we’d just deleted pixels, they’re gone forever (once you’re past CTRL/CMD+Z range).
Make sure to name each layer as you go. Nothing is worse than trying to find that one image in a list of Layer 1 - 100.
The background needs a little polish, as it isn’t quite lined up with our intended perspective.

It’s our intention to loop the background, but you can see the two sides don’t quite match up. Since the left side is more aligned with our guides, let's copy that side, flip it, and drop it over the right. Once we have it lined up, use CTRL/CMD+E to merge the layers.
Check your image size
Before we bring the image into After Effects, we need to check our image size. After Effects can handle some pretty huge files…but your computer might not be so powerful. There are a number of ways to change your image size, but we’re going to start by changing our canvas. This changes our canvas without messing with any pixels, and then we can resize our images to fit.

We adjusted our canvas (Image > Canvas Size…) to 1920x1080. Now our images were WAY bigger, so we’ll have to adjust them to fit.

There are still some imperfections, but we can fix those in After Effects with a little motion blur. You’ll notice that there are a few pixels hanging outside the edge of the canvas. Sometimes you might want those to stay, but we’re not going to need them in AE. Use the Crop tool (C) to quickly trim your images to fit the canvas. Now it’s time to bring our image into After Effects and start animating.
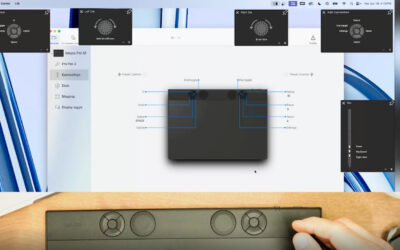
Importing Photoshop files into After Effects
Check your layer names and then save your work (we recommend adding something like “to_AE” so you can easily find your file. If you need help getting over to After Effects, we’ve got you covered. You can go check out that video, or use this quick method.
How to import a file from Photoshop into After Effects
- Open After Effects
- Go to File > Import > Files
- Select your file
- Click Import
Now check out the comparison between Photoshop and After Effects.

Looks pretty similar? Adobe made an effort to keep things familiar between various software, making it even easier to move between apps in Creative Cloud. You’ll notice our layers down in the timeline, although they look slightly different. This is why naming your layers was such an important step.
With this new composition (comp to us pros) you’ll be able to set your FPS or frames-per-second. In general, animation is done at 24 fps (24 frames equal 1 second of footage), but there may be situations where you need more or less. It all depends on the project and your client’s needs.
Set up your composition
We hope you’ve had your coffee, because we’re about to go fast (the name of the game is an animated social media post in no time at all, right?)
Now, the easiest way to animate this skateboarder is to move the background, right? When we move it out of the way, it almost seems like the skater lunges forward.

All we’ll need to do is duplicate the background, much like they do in cartoons. Grab the layer, then go to Edit > Duplicate (CMD/CTRL + D) and you’ll get a brand new layer. We could theoretically make dozens of copies and animate them flying by, but there’s an easier method: Motion Tile.
Animating in After Effects
Motion Tile
On the right side of your screen, go to Effects and Presets, then search Motion Tile. Drag and drop that onto your layer (be careful not to drop it on the wrong layer, although that can create some cool effects).
On the left you’ll see your effects controls, with two key options: Output Width and Output Height. When we put “200” in Output Width…

Now we have a little bit more of our background on the left and right. We’ve effectively duplicated the image by a small amount. Now if you try to click on the duplicated area, you won’t be able to. Only your original layer can be moved.
Of course, simple duplication or tiling creates small artifacts. If we look at the ground or the background, there are lines that don’t quite look right. And finally, don’t overdo it with the Output number. You’ll crash your computer.
To animate this, let’s first adjust our composition length. Go to Composition > Composition Settings.

We can also change our FPS, as we discussed above. Set this for 5 seconds, and it’s time to animate this image.
Animating With Keyframes
Twirl down on your clean plate layer and you’ll see your Transform options.

Make sure your Playhead is all the way at the beginning of your timeline, then click the Stopwatch next to Position. This marks the x and y axis of your layer at that moment on the timeline. You just created your first Keyframe on the timeline. These are the basic building blocks of animation in After Effects.
Move the Playhead to the end of your timeline and you’ll create another Keyframe. Now go back to Transform and adjust the Position so the background has moved from left to right (or right to left, if you’re aiming to have this Tony Hawk wannabe flipping a gnarly 360 to Boneless).
When you press play, After Effects interpolates how the layer needs to move in order to exist at the first and last keyframes within the allotted time.
GIF
If we want our skateboarder to move faster, we just need to move further down the plate in the allotted time. To move slower, cover less ground. But there is one thing we’re noticing that’s not so thrifty. The seam where our duplicated tile comes together is a little janky. Luckily, we can cover that up with some motion blur.
Add Motion Blur
Motion blur is the streaking or smearing of images caused by an object moving during the exposure of the lens. In video motion blur is usually caused by the lens focusing on one object while out-of-focus items move in the background. In our case, that’s the effect we want to use.

Hit the Motion Blur control (three circles close together). You’ll see boxes appear next to your layers. Only select your clean plate, and watch the motion blur hide the imperfections. Just like that, we have some great animation without breaking a sweat. But we can always touch things up even more.
Adding realistic shadows
You might notice that the shadow under the skateboard still has a line from the original ground.

We’re not trying to make an okay social image. We’re trying to make something that’s worth sharing around. Let’s fix that quickly. Now, we could have simply fixed this in Photoshop before bringing it over, but we forgot (or rather, we skipped that step so we could show you here! See, we knew what we were doing the whole time).
First, create a new layer by going to Layer > New (CMD/CTRL + Y) and select a black fill. This creates a black solid the size of our composition. Using the Pen tool (P), we’re going to draw a simple shape. It doesn’t have to be perfect, just the basic idea of a shadow.

Once we close off the mask we’ll see the created shape over our image. It’s…fine. But we can make it work. Using the points and Bezier Handles, adjust the shape until it fits underneath the skateboard. If you’d made masks in Photoshop, this should feel familiar.
With a little work, we have something that fits underneath the skateboard.

Now toggle off the original shadow layer and rename our new layer Shadow (or Shadow 2, or Darkwing Duck, or whatever works for you). Just like in Photoshop, we have Blending Modes. If you don’t see them, hit F4. Switch your new Shadow to Multiply.
This looks a little harsh, so let’s feather the edges. Twirl open the Mask menu and you’ll see more options.

Adjust the Feathering and voila! When we play back, we now have a slick animated image, and it honestly took us no time at all.
Render in the render queue
Of course, this image isn’t doing anything for you if it sits in After Effects forever. Let’s see if we can fix that.
If you’re unfamiliar with the term, Rendering just tells After Effects (or whichever app you using to build a composition) to bake down all the layers into one movie (mp4, mpeg, Quicktime, etc). Quicktime will work for most of your needs, but we also recommend Apple ProRes 422. In this case, let’s use Animation, which will be an uncompressed, high-resolution file. If you have any Audio, make sure it is turned at the bottom of the window.

Hit Okay, and then you need to select where this file will go. Hit Output To and find your desired location.
Guess what? You just made an animation. You took a picture, cut it into neat layers, animated those layers, and turned that composition into a movie. We’re pretty stoked to know you right now.
Of course, if you want to get really fancy, you should head back up to the video so we can teach you a few more tricks.
Want to learn more?
Check out School of Motion for tons more courses, tips, tricks, and tutorials.
Are you ready to take your animation skills to the next level? Check out Animation Bootcamp, School of Motion’s most popular course, which teaches the principles behind great animation. Or try After Effects Kickstart, which will introduce you to the fundamentals of Adobe After Effects in the easiest and most fun way possible. And there are a bunch more on their courses page!