Maybe you’ve been using Adobe Photoshop for a while, or maybe you’re just getting started. There are many ways to do every type of edit in the software, as well as all kinds of tips, tricks, and hacks to do things more simply and easily.
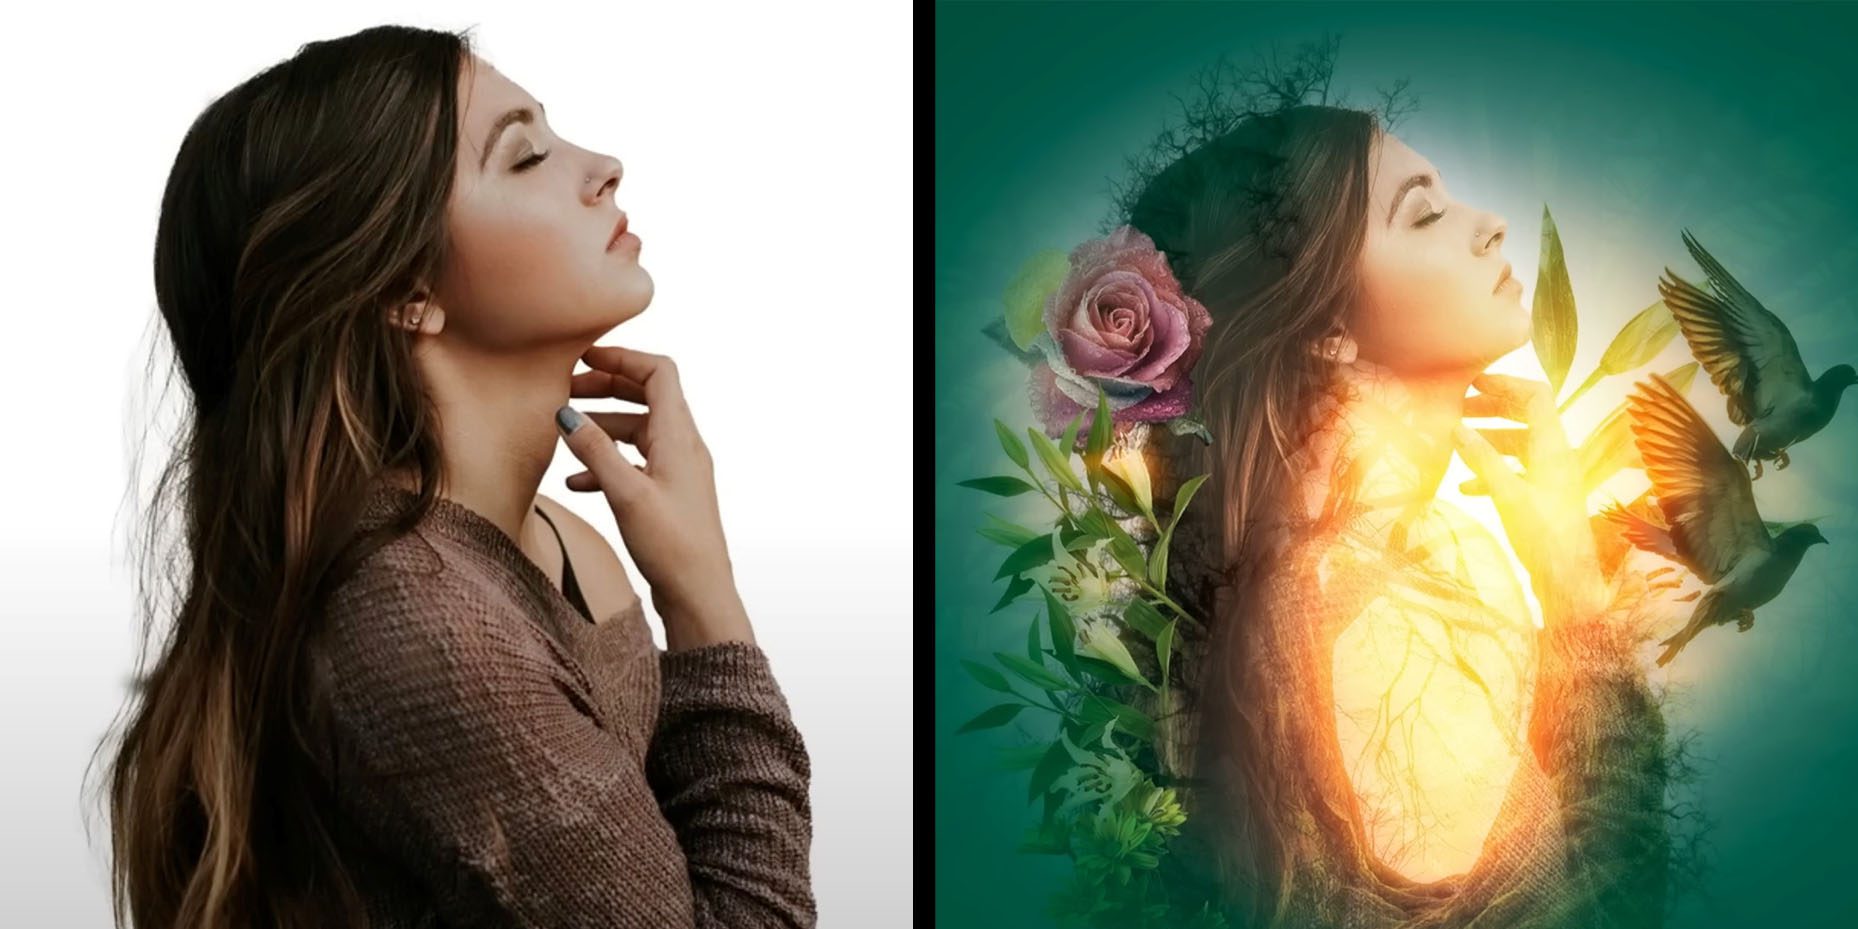
In this tutorial Colin Smith, the creator of PhotoshopCAFE, demonstrates an easy way to a super cool technique — creating a custom brush from a photograph in order to do an impressive “double exposure” effect. Check out the video below for the Adobe Photoshop tutorial, or read on for a summary of the instructions.
In this Photoshop tutorial, we’re going to combine two photos so it seems like one is emerging from inside of another — creating a “double exposure” effect.
Identifying the subjects
The first step is to identify the main subject of your image, and the image you want to blend into it to create the double exposure effect. For the main subject, I recommend using something with clearly defined edges and some contrast between the foreground and background.
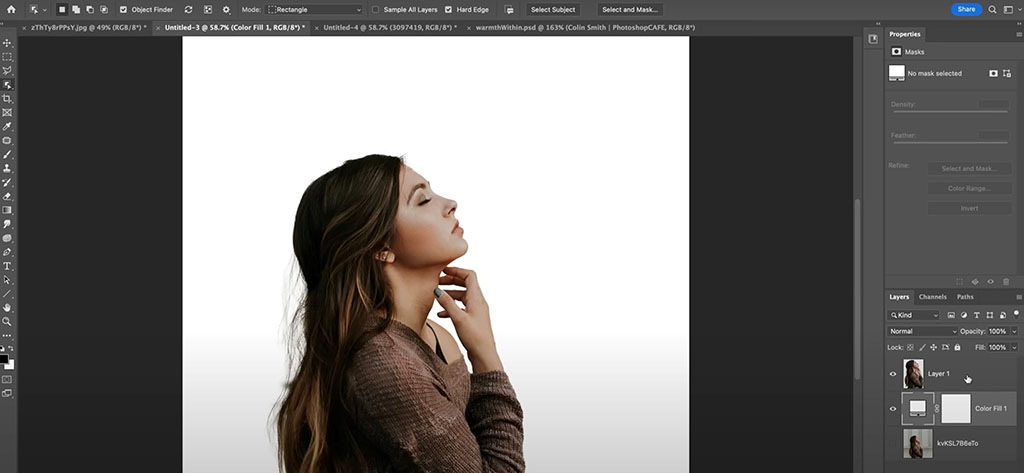
Select the subject of the image by using the Object Selection Tool set to “Select Subject,” and copy the selection to a new layer. To make it easy to follow as we move forward, I’m going to refer to this layer as Silhouette. You can now hide the original layer and focus on the new Silhouette layer.
Add a color fill of a solid color, like white, as a new layer, then drag the Color Fill 1 layer below the Silhouette layer so that your silhouette now appears in front of a solid colored background.
Set up your layers
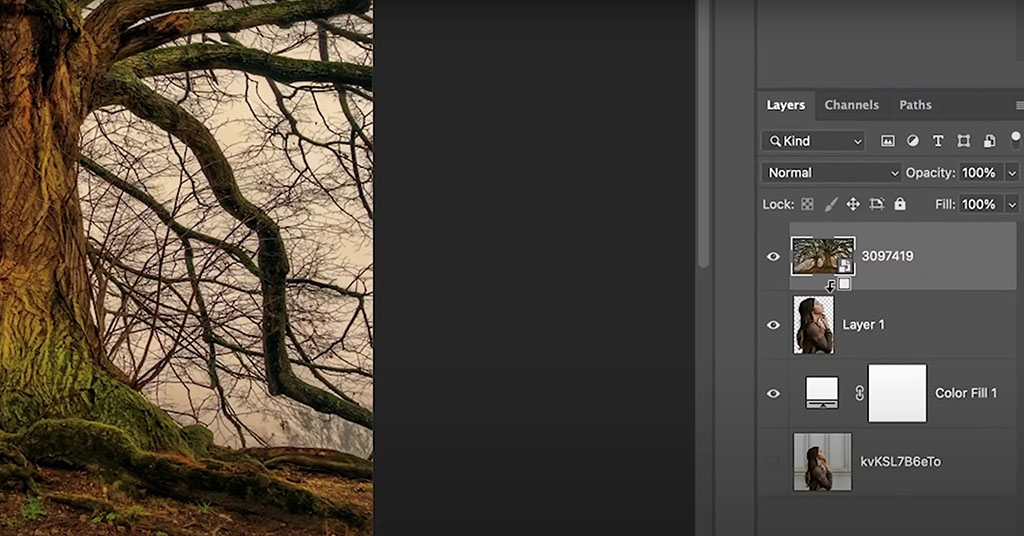
Now, turn your attention to the image you want to blend into the Silhouette layer to make the double exposure effect. Drag and drop the entire image into the image with your silhouette. It will create a new layer, which I am going to refer to as “Background,” so that you can follow along.
Drag this layer to be on top of your Silhouette Layer. Hold down the Alt or Option key, put your mouse over the line in between the two layers, and a square with an arrow will pop up. Click the mouse when you see that image and it will clip the Background layer onto the Silhouette layer.
Start blending
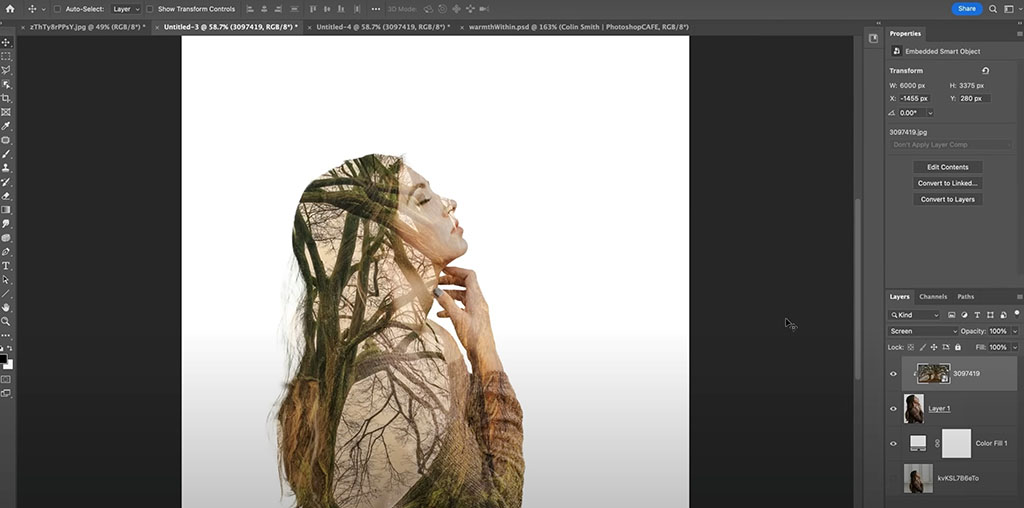
Select the Background layer and use the dropdown menu to change the Blend Mode from Normal to Screen. Now you will see some details from each image coming through. You can play around with the levels, alignment, or other details of the layers until you’re happy with them.
Not done? Try a custom brush
If you’re pleased with the double exposure effect you’ve created you can stop here, but you can also create a custom brush to blend to the edges of the silhouette so that it feels more interesting and natural, without such hard edges.
To do this, head back to the other project tab containing the image you used to create the Background layer. We’re going to use this image to create a brush.
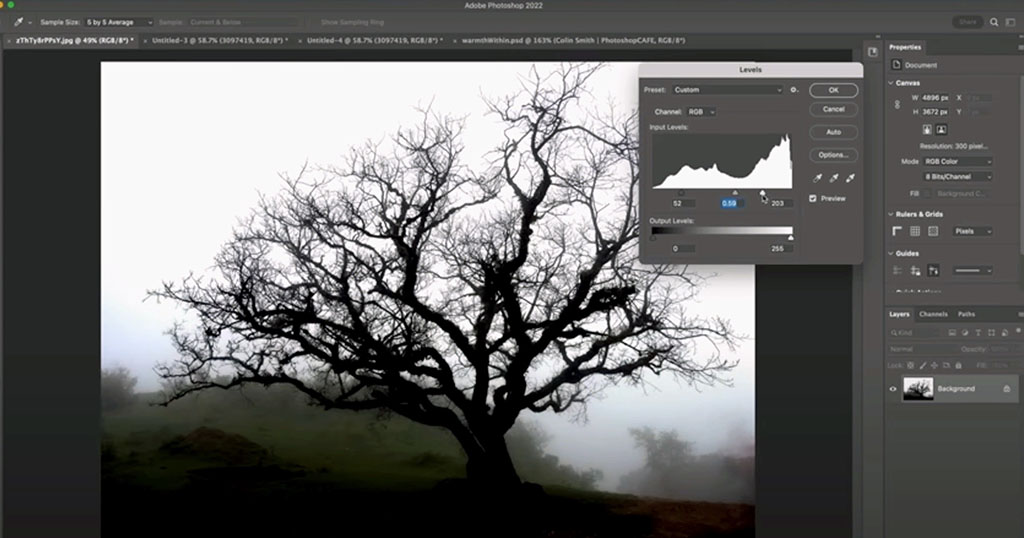
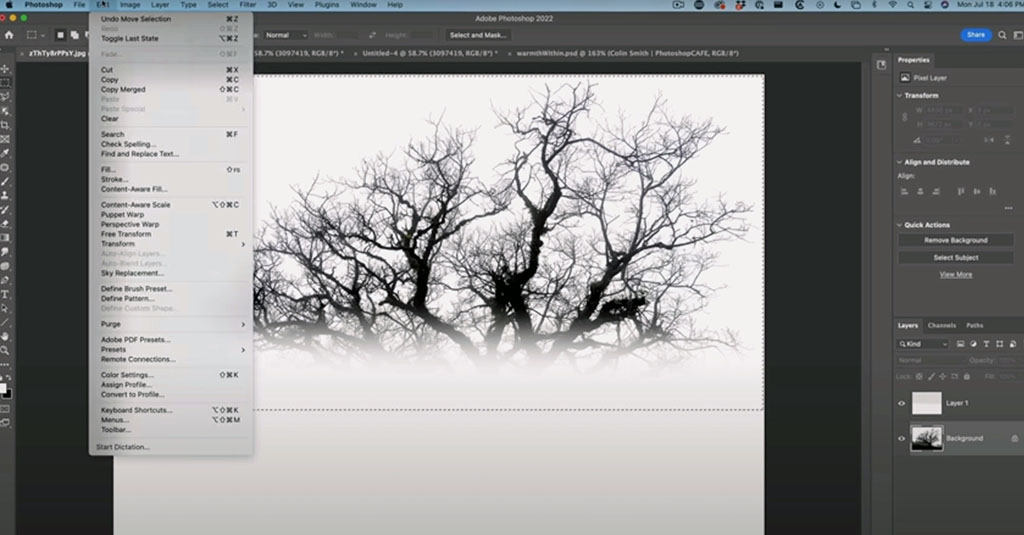
Start by adjusting the levels to create a stronger contrast between the light and dark colors of your image. Smooth out the edges of the photograph and create a softer look for your brush by using the Foreground to Transparent gradient tool.
Creating a custom brush
To create the brush, use the marquee tool to select the area you want to use in the brush, select Edit in the menu, then click on Define Brush Preset. This brush will remain in your library for future use. You can create multiple brushes to capture and combine different textures from the image and make your final result look more varied and natural. Now that you know how to make a new brush you can do it anytime you’d like a custom brush.
Using the custom brush
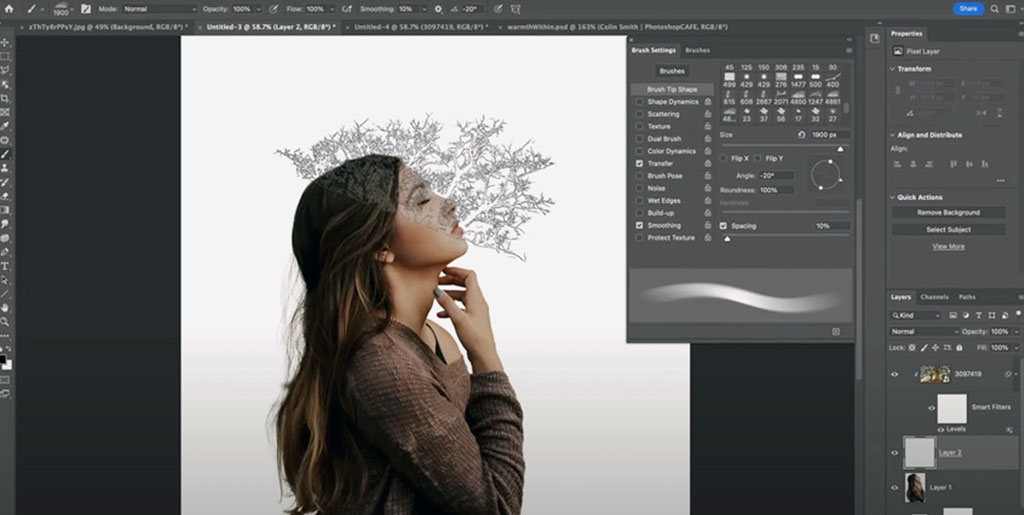
Now it’s time to return to the project where you have combined the two images and use your new brush! First, create a new layer above the Silhouette layer. Unclip the Background layer from the Silhouette layer and instead clip it to the new layer. You should see the silhouette shape without seeing the Background layer. This will make it easy to see what you are doing when you work with the brush.
Select a foreground color that will blend in easily with the double exposure image you’ve created. Use the brush tool to select the brush that you created. Adjust the brush settings like the size and the angle of the brush, and use it to create detail along the edge of the silhouette. The brush will paint the texture from the image you used to create the brush.
Finalizing the effect
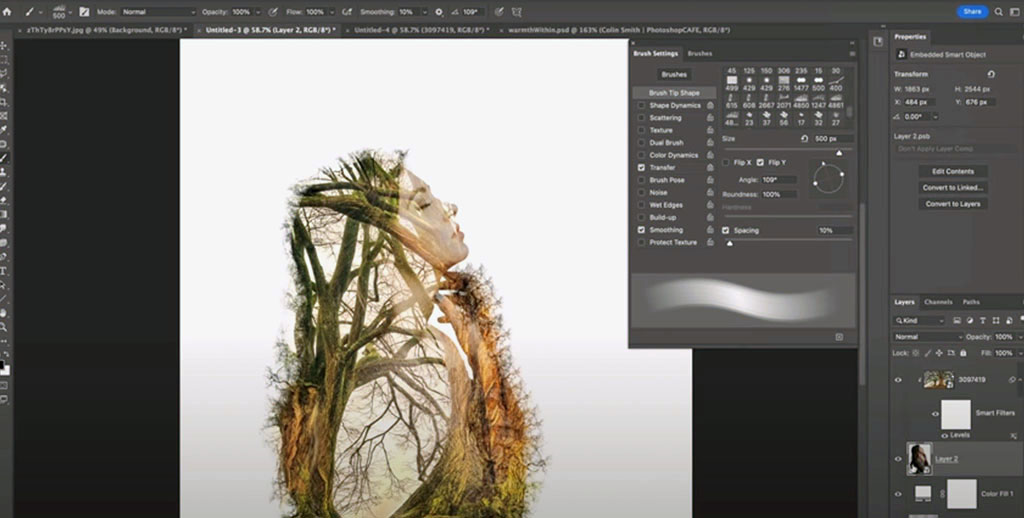
When you’re ready, you can right click the Silhouette layer and the layer where you have been painting with your custom brush and convert it to a smart object. This will give you the full final effect of double exposure with details on the edge of the silhouette from the image, for a cool transition.
Extending the effect
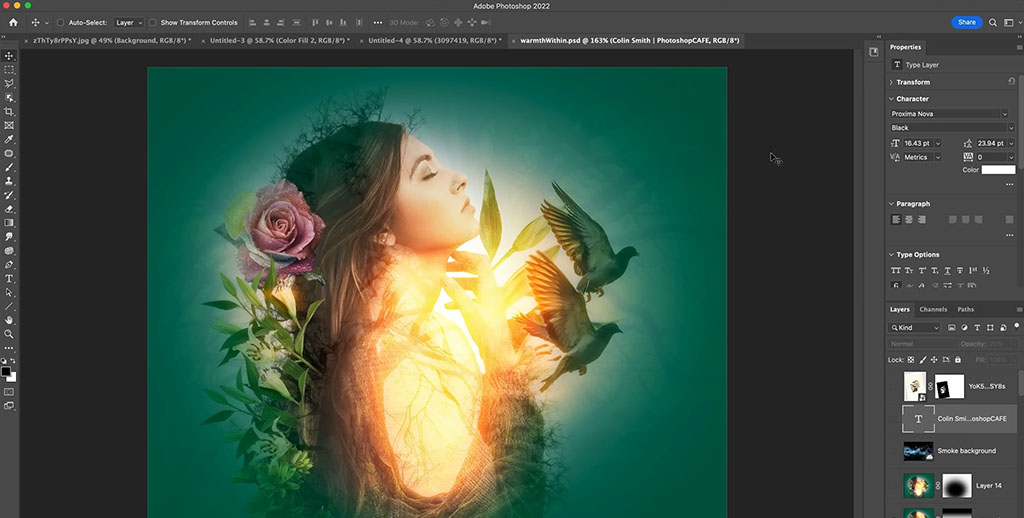
From here, you could keep going with more edits and customizations. You could add a solid Color Fill layer, for example, just as you did earlier, to create the background for the silhouette, and then use the Blend Mode to blend the color with your image.
Keep using the same technique to create composites and double exposures of multiple images to make a really cool effect, as seen below!

Learn this technique and more with a Photoshop Cafe class.
Want to learn all about how to use layers in Adobe Photoshop, like the experts do? Learn this technique and a bunch more in Colin Smith’s Learning Layers in Photoshop course, or any of his Photoshop Cafe courses!

About the creator:
Colin Smith has been using Adobe Photoshop professionally for 20 years. He does training for Adobe and Apple and has written 20 books. At his YouTube channel, PhotoshopCAFE, he has hundreds of easy to follow Photoshop Tutorials and tips as well as Lightroom tutorials and occasional photography tech or drone videos.
For more information or to see more of Colin’s free Adobe Photoshop resources, check out the Photoshop Cafe website, or check out his premium training library.
