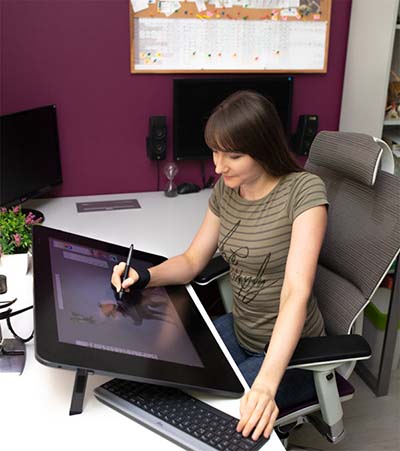
Monika Zagrobelna is a Polish artist with a great passion for creating new things — whether by drawing, digital painting, or photo manipulation. She specializes in creating realistic art, especially of animals, and is a big fan of dragons and feline creatures!
She loves sharing her skills with others, including on her blog and social media accounts. Check her out on X (Twitter), Facebook, LinkedIn, Instagram, or on her website.
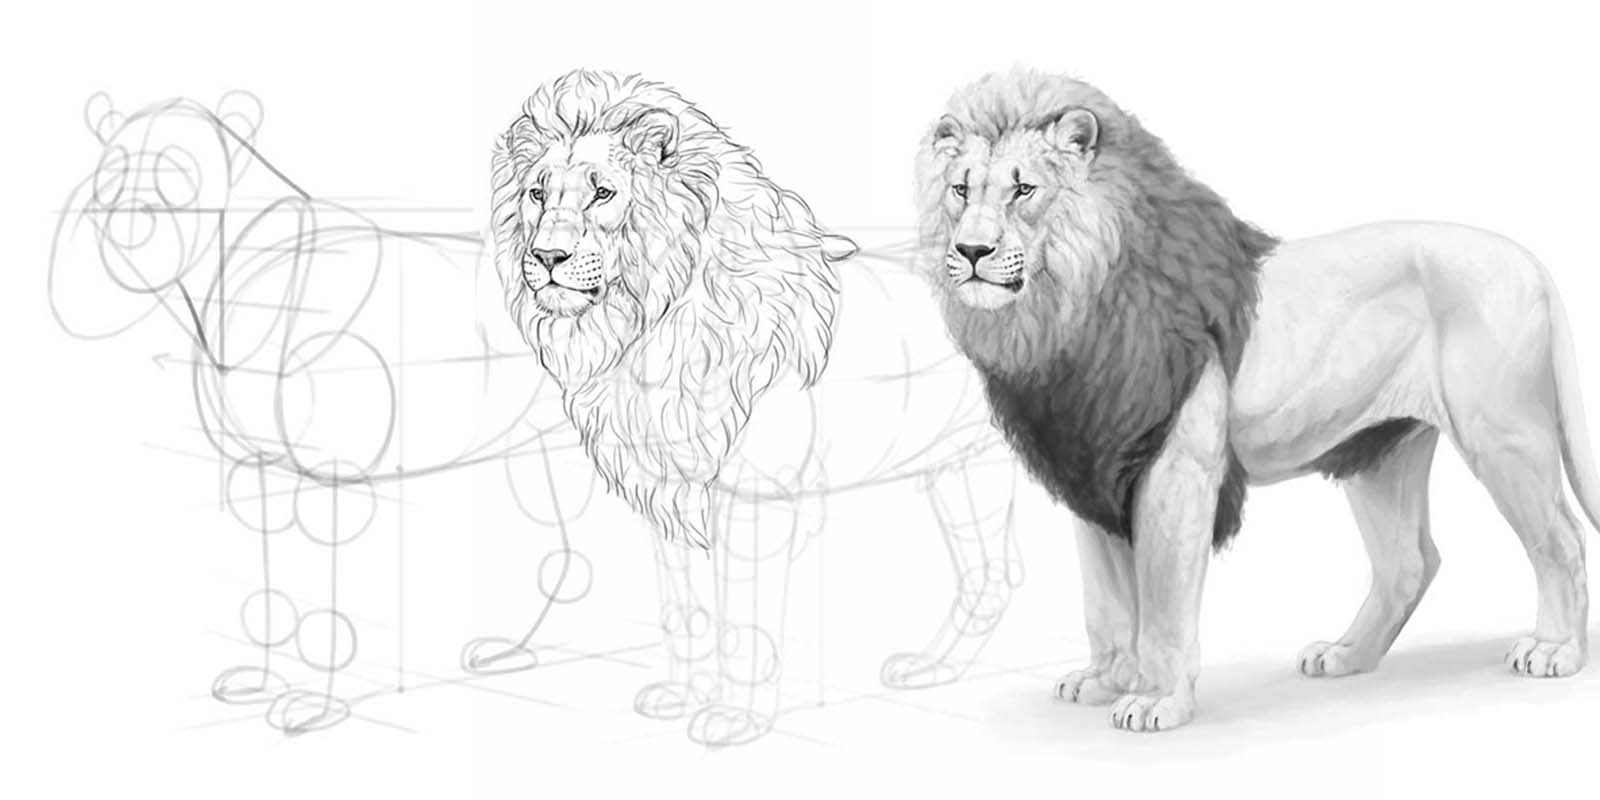
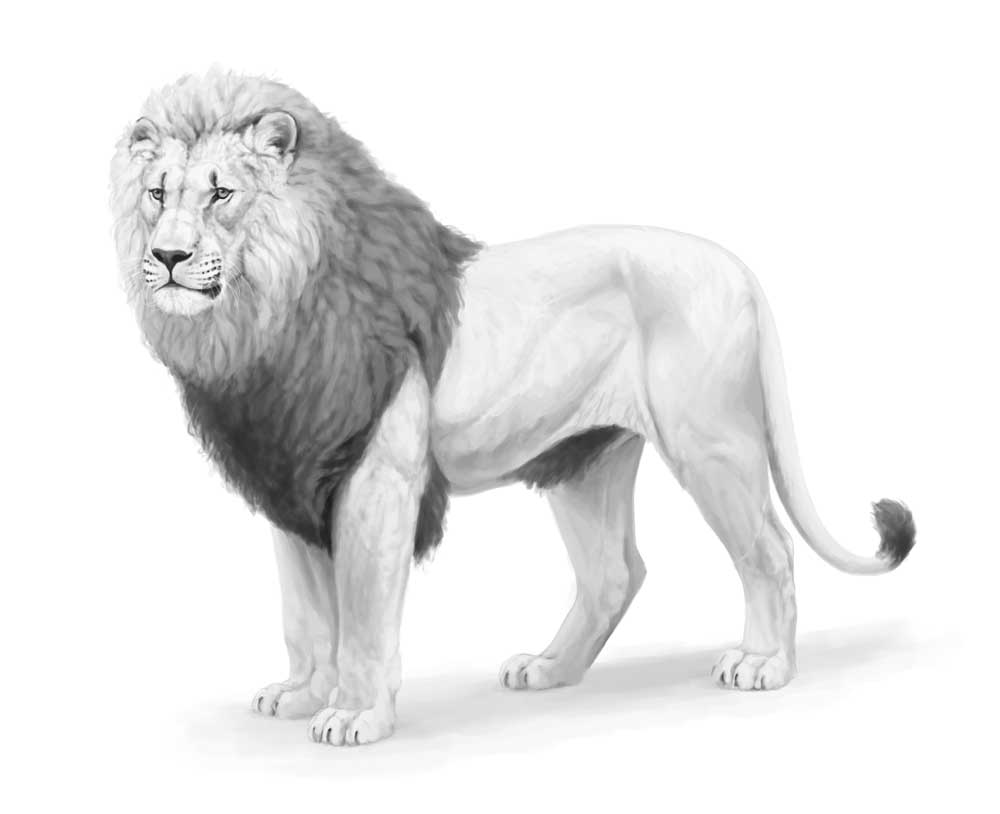
In this extremely detailed tutorial, she walks step-by-step through her process for drawing a realistic lion.
In this tutorial I’ll show you how to draw a lion, but it won’t be your usual step-by-step guide — instead, I’ll show you how to use the basics of perspective to draw an animal body in 3D space. This method will allow you to draw a lion from various angles, expanding beyond the specific view and pose presented in this tutorial.
I’ll also provide a quick overview of the shading method I used for this drawing. Feel free to use any drawing app you like. I will mark the names of the tools in bold, so if you want to find them in your app, just Google “[Tool name ] [Name of the app]” — for example, “clipping mask Sketchbook Pro” — to learn how to use it in your preferred software.
1. How to plan the perspective of the lion’s body
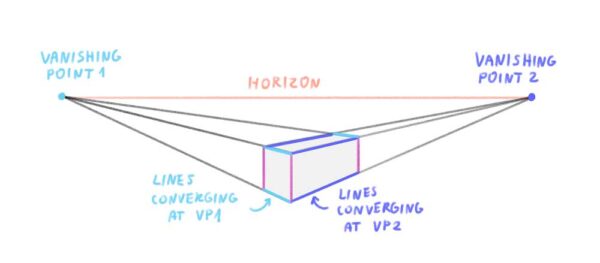
First, we need to define the position of the body in 3D space. We’re going to use 2-point perspective for this. This may sound scary, but without perspective you’ll never be able to draw dynamic, 3D-looking poses — so it’s good to bite the bullet and learn it as soon as possible! To make it simpler, here are the terms I’ll be using when referring to perspective:
Step 1
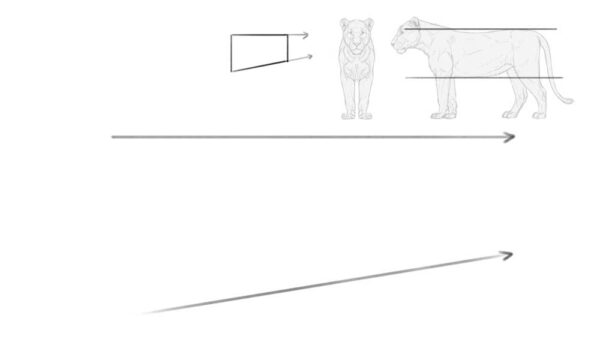
Imagine the torso of a lion as a big, long box. The upper and lower edge of its side rectangle are parallel to each other in the side view, but in perspective, they must converge. Draw the upper one as a simple straight line (the horizon line), and imagine it’s pointing towards something far behind the right edge of the page (a hidden vanishing point, VP2). Then draw a lower line pointing towards that same hidden point.
You can use any sketching brush you want for this part, but it’s best to keep it fairly thick. This way, you won’t have to be too precise, and you’ll have more room for errors. The exact size doesn’t matter — it should just feel like a thick marker when you use it.
Step 2
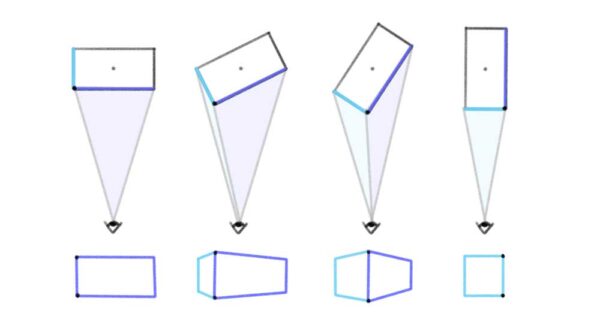
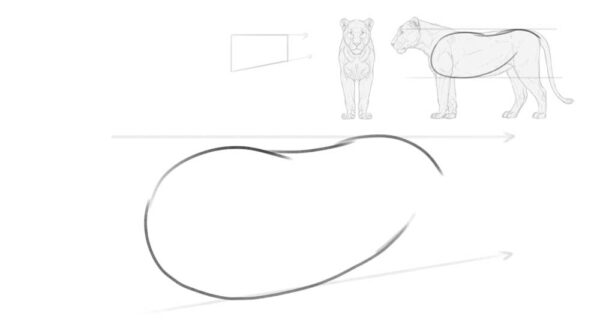
Now sketch a basic shape of the torso between these two lines. Keep in mind that it must be slightly shortened — similar to how a side of a box appears visually shorter when the box is rotated.
Step 3
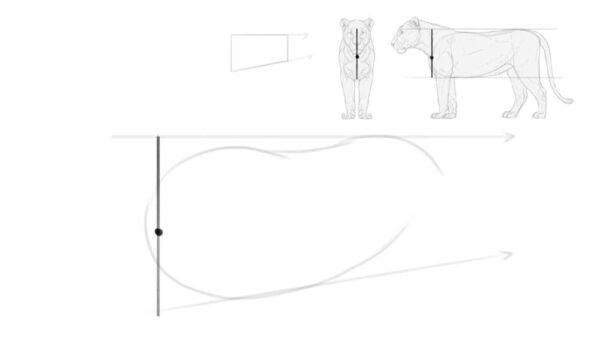
The outline of the torso may appear quite flat at this stage, so let’s enhance its 3D form by adding special perspective marks. Start by defining its front—draw a dot next to the left edge of the torso and cross it with a vertical line.
Notice that this line is positioned at the left edge of the torso outline in the side view and at the center of it in the front view. In perspective, it must be somewhere between these two points—the more you shorten the side, the farther you can move this line. Since we’ve only slightly shortened the side, this line must stay very close to the edge.

Step 4
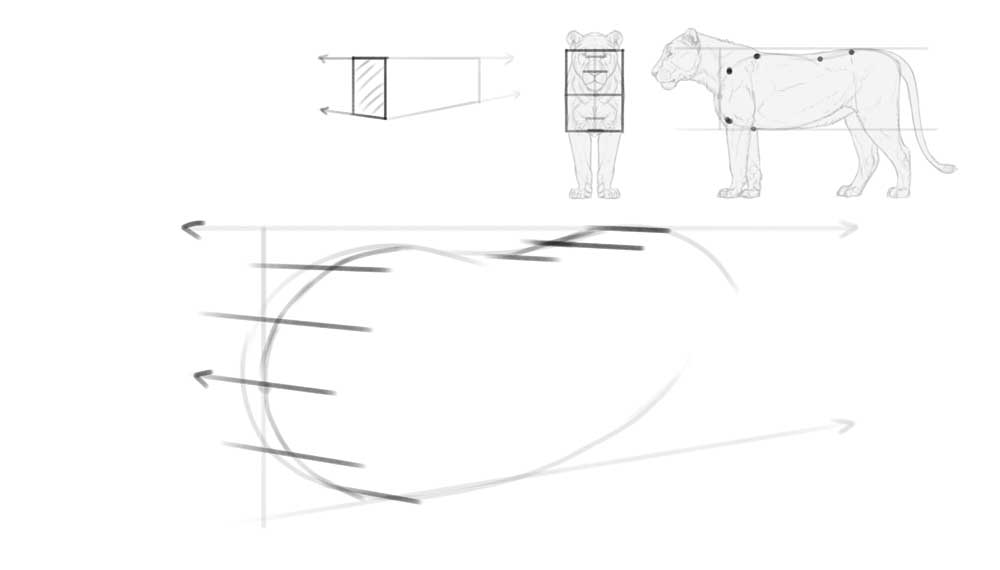
Draw a line crossing our front point. Imagine it’s pointing towards something behind the left edge of the page (this will be our other vanishing point, VP1). Then sketch a few more lines along the surface of the torso, imagining that all of them meet at the same point. This should make the torso look roughly like a bean!
Step 5
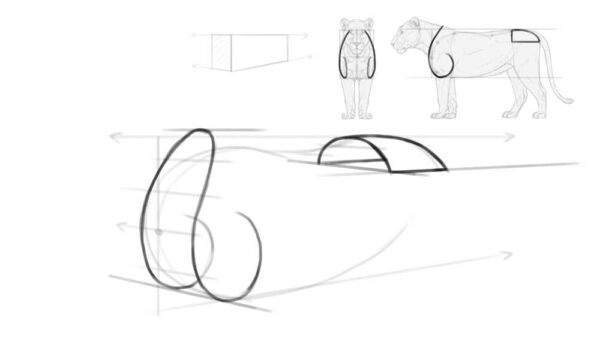
Now that we have both points of the 2-point perspective defined, we can start adding more body parts. Draw the shoulders and hips in the following way, ensuring their sides are aligned to the lines converging at VP1.
Step 6
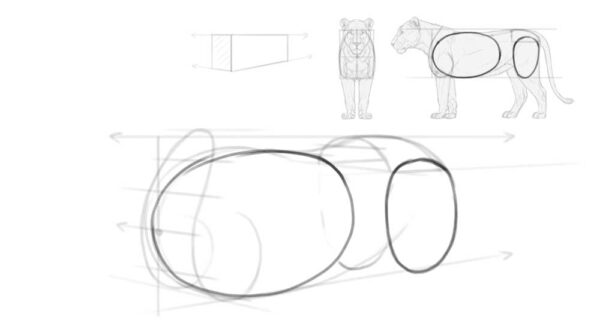
Add the oval for the chest. It should start between the shoulders and end a little before the hips. Make sure to shorten this oval the same way you shortened the whole torso to maintain consistent perspective. Also, include the thighs—a separate oval positioned under the hips.
Step 7
To turn the flat oval of the chest into a real, round rib cage, mark its side with a cross. The horizontal arm of the cross should point at VP2, and the vertical arm should become a part of an imaginary ellipse wrapping around the chest. Just keep in mind that the lion’s torso is not really cylindrical in shape—it’s rather flattened on the sides. That’s why the vertical arm should be pretty straight.

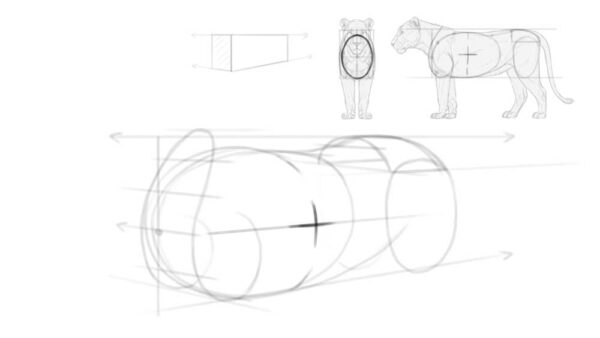
Step 8
For now our torso is floating in space, so let’s add the ground underneath. This is a very important step, because it will define the length of the legs—and getting it right is crucial for keeping the correct proportions.
The distance to the ground is best measured right under the chest. You can compare it to the width of the chest—in big cats the former is slightly smaller than the latter. Keep in mind that the lower edge of the chest outline is not the bottom of the chest—the bottom is actually slightly above that outline, just like in a box.
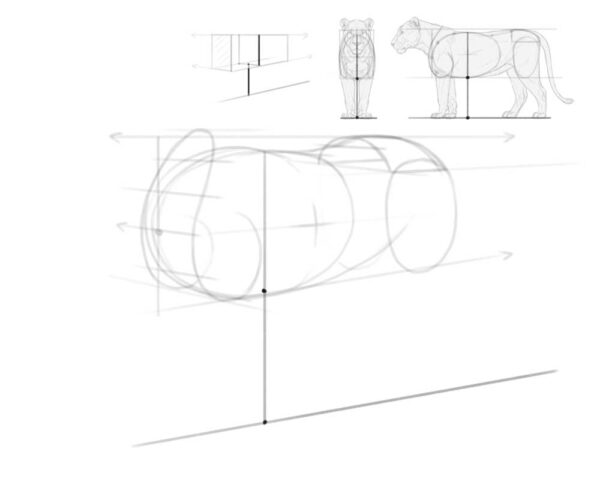
Step 9
To add a plane of the ground, sketch a few lines along the previous line—all converging at VP1. Now the whole scene should look 3D!
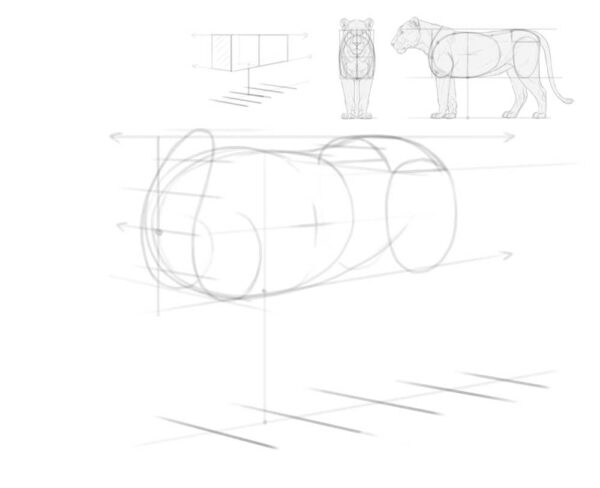
2. How to Add the Body Parts
With the perspective in place, we can now begin constructing the rest of the body. Start with the legs and tail. Here’s another useful rule of perspective — if two lines are not converging, it means they would not be parallel in the side/front view. And that’s exactly what we need to do here, because the front paws of the lion (and the hind ones, to an extent) are rotated slightly outward.
Step 1
So instead of drawing the paws along the lines converging towards VP2, rotate them a little. You can also move one of the hind legs forward by not linking its position to the other hind leg on purpose. If you look at the tail, you’ll notice how you can easily convey movement in 3D space by deviating from the previously established lines.
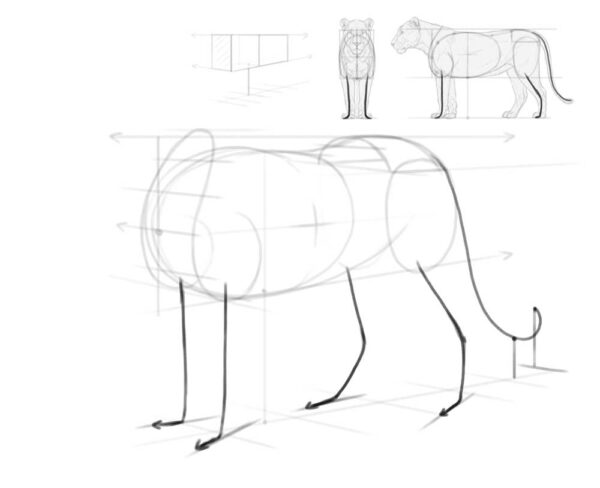
Step 2
Now, let’s add the head. This can be a challenging part, and even with all my experience, I often get it wrong. Fortunately, in digital art, you can easily move and resize the head afterwards—so don’t feel too stressed about it! If you want to experiment with the head without worrying about ruining the body, feel free to create a new layer for it.
In the side view, you can imagine a triangle between the front of the chest and the forehead. Add the same triangle to your drawing, following the perspective and shortening it slightly.
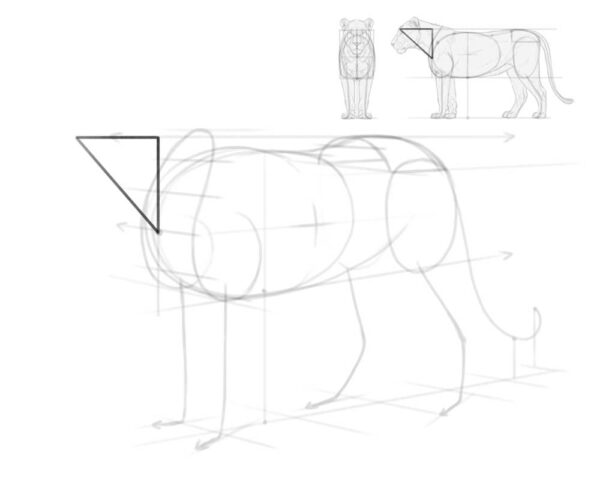
Step 3
Add an oval attached to the tip of that triangle. Mark its front with a cross, to see it as an ellipsoid rather than a flat oval.
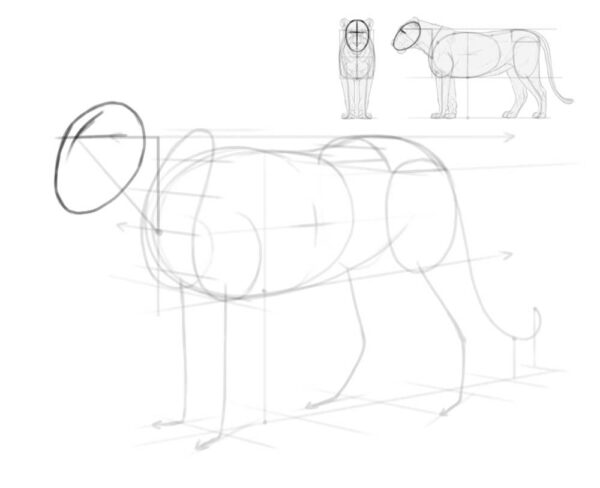
Step 4
You can keep the head in this place, but the thing is, animals rarely stand in a perfect, “linear” pose, with all the parts of the body parallel to each other. Because of this, drawing it this way will make your lion look more like a statue than a real animal. So instead let’s move the head slightly up and rotate it towards the viewer.
To get it right, move the long curve on top of the head closer to the center of the oval.
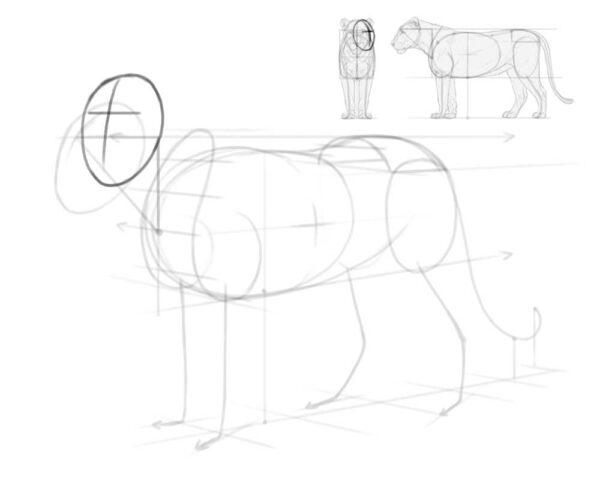
Step 5
Ok, things should be more straightforward from now on! To create the volume of the legs, add ovals for the joints and paws. Draw a curve along the surface of each paw, keeping it parallel to the direction of the paw. Add a muzzle, too.
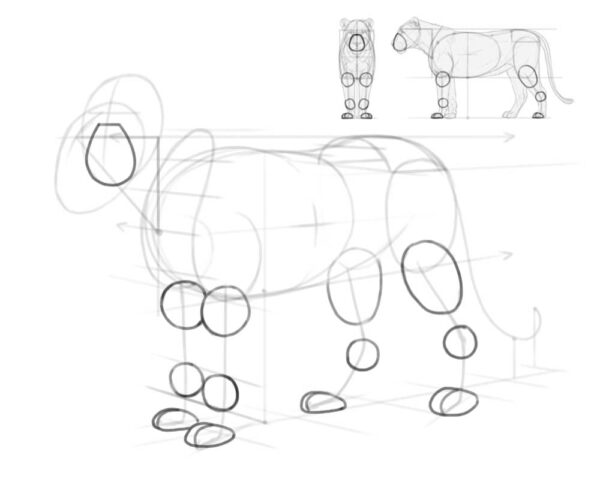
Step 6
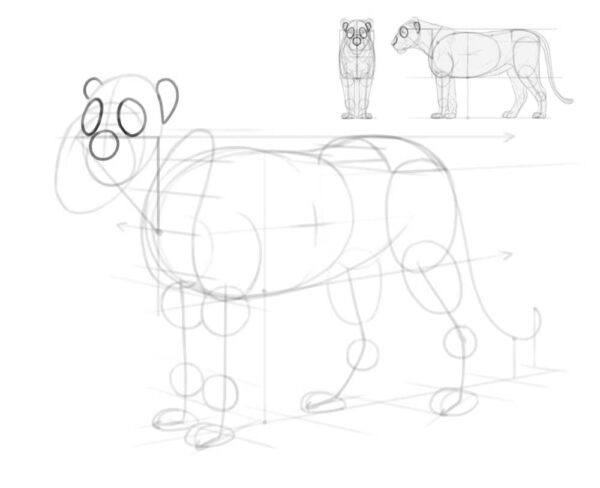
When it comes to the details of the head, it’s best to start with big surfaces that are easier to get right. So add two ovals for the “eye sockets,” one oval for the nose, and two petal shapes for the base of the ears. Keep in mind that the other ear is partially hidden behind the head, like a ship disappearing behind the curve of the horizon.
Step 7
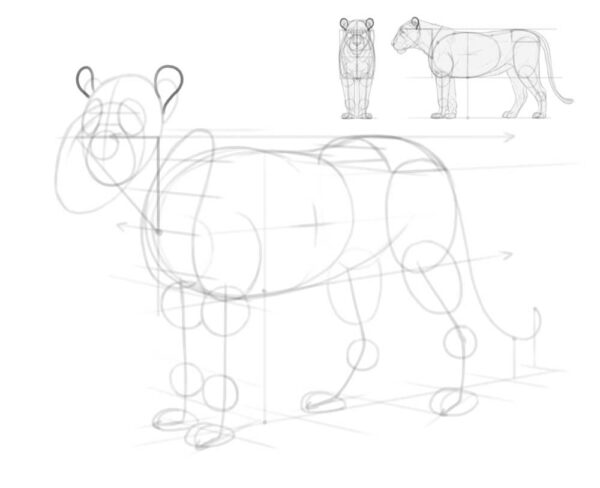
Attach two rounder petals to the base of the ears.
Step 8
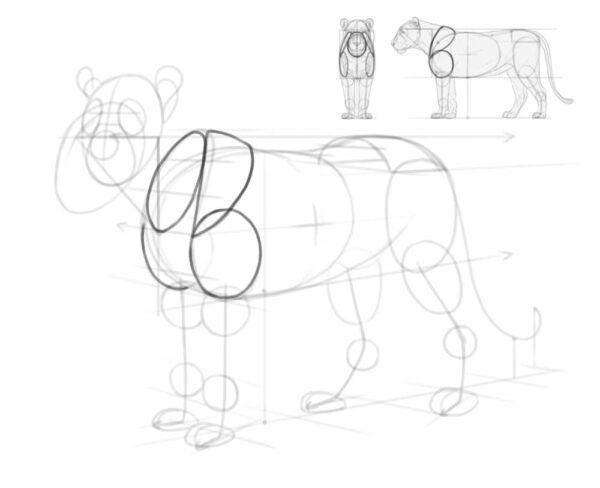
Add a mass of the arm, the shoulder blade, and an “opening” for the neck. Keep in mind that the shoulder blades are tilted towards the top line of the body, so you need to curve them properly.
3. How to Add the Details of the Body
Our drawing already resembles a lion, now we only need to make it more detailed.
Step 1
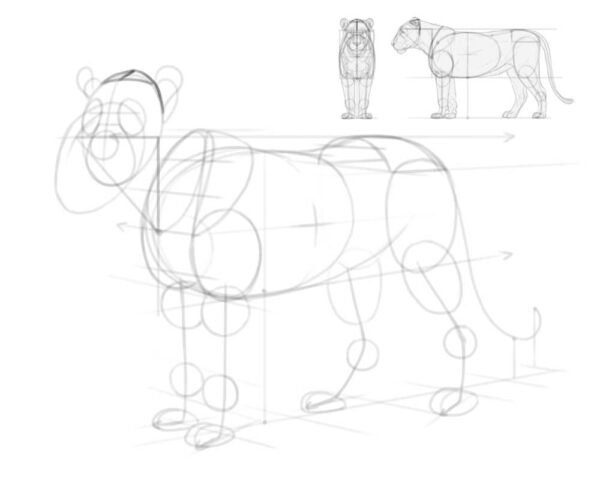
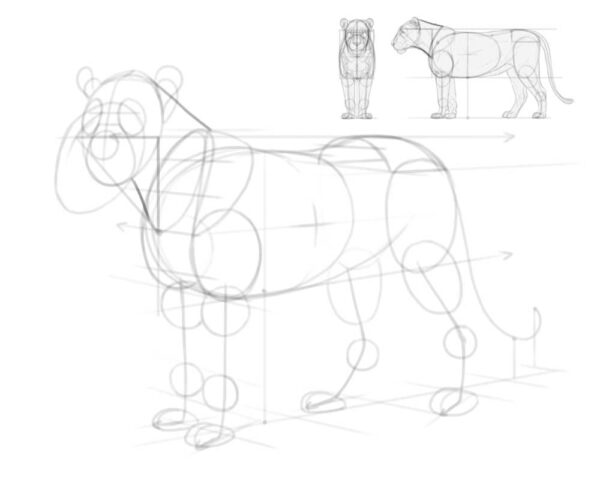
First, curve the back of the head slightly downwards—this is the part of the skull that’s usually hidden between the ears, but we must know where it is to draw the neck properly.
Step 2
Add the outline of the neck. Keep in mind it’s not actually attached to the shoulder blades, but to the spine between them.
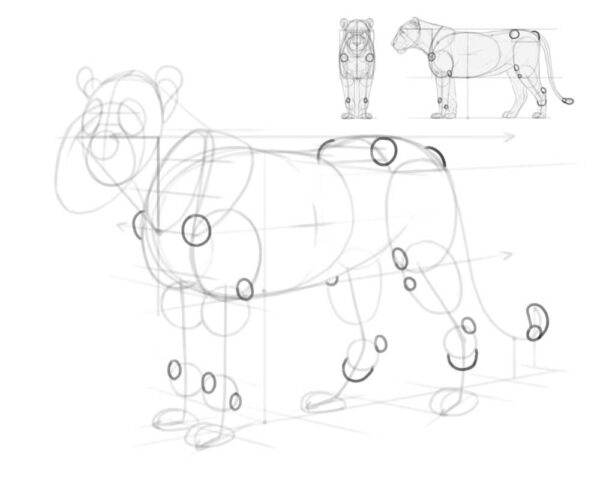
Step 3
There are lots of places where the bones are sticking out a little, affecting the surface look of the body. Add these places now. This is also a good time to add the volume of the tail tuft!
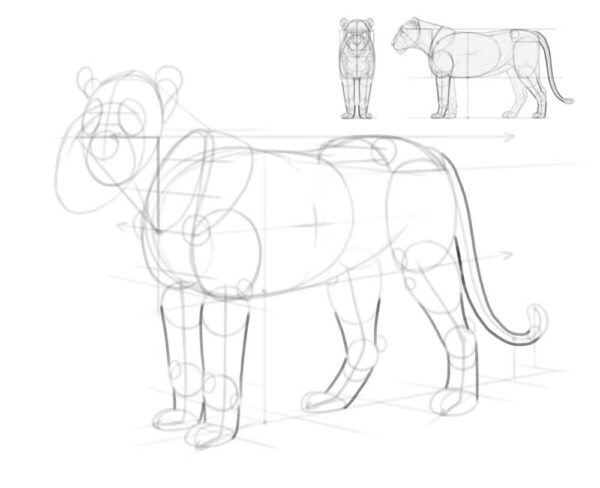
Step 4
You can now connect the joints with gentle, flowing lines to create an outline of the legs and tail.
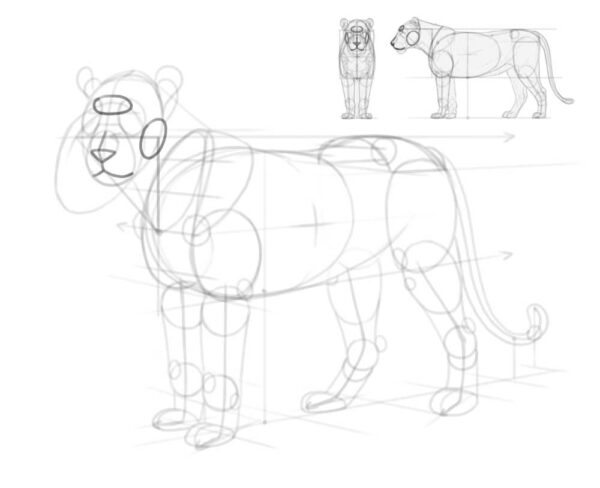
Step 5
Let’s add a few details to the head: the forehead, the cheek, the nose, and the mouth. Notice that the nose is slightly raised above the oval outline of the head.
4. How to Finish the Shape of the Body
Our lion looks pretty good, but there’s still something missing. Before we add these parts, we need to make sure we can see the volume of the whole body.
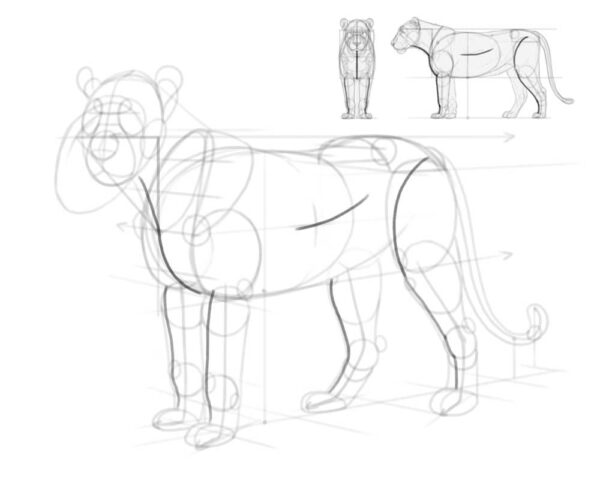
Step 1
First, “cut” through the body parts, marking the front of the legs and chest, the bottom of the neck, and the side of the torso.
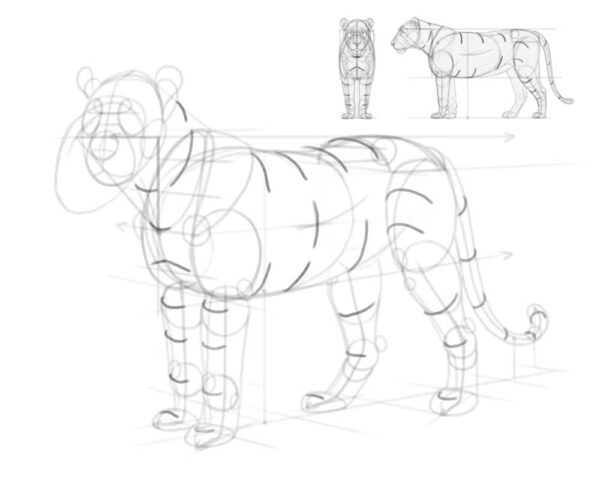
Step 2
Then, cross each of these lines with curves wrapping around these body parts.
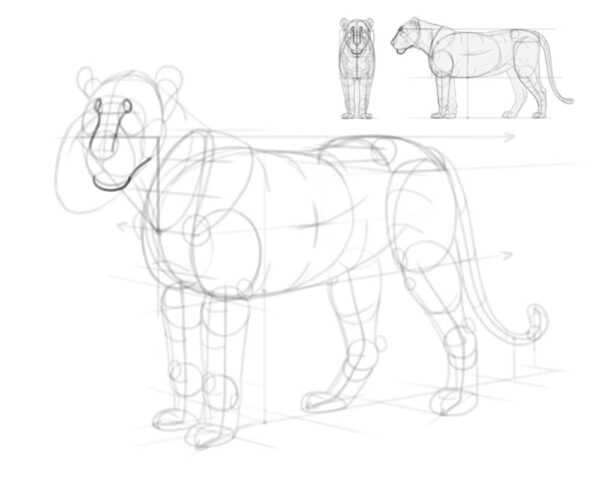
Step 3
Add the bridge of the nose connected to the eyebrows. Finish the outline of the bottom of the head by adding a protruding chin.
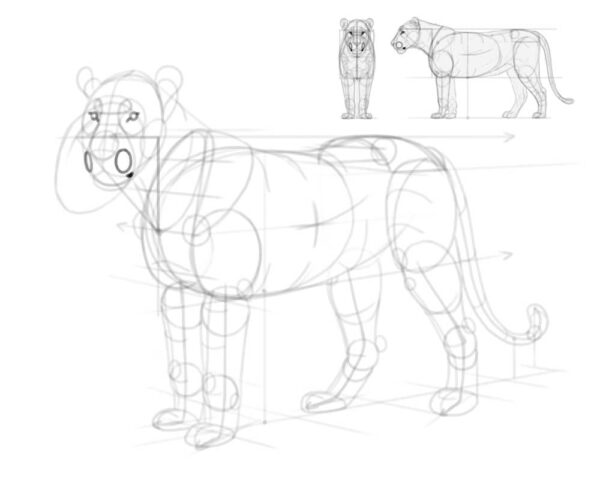
Step 4
Add small circular eyes—make sure not to place them symmetrically on both sides of the nose bridge, because the nose bridge is on a different plane than the eye line. Add the whisker pads and the corner of the mouth, too.
Step 5
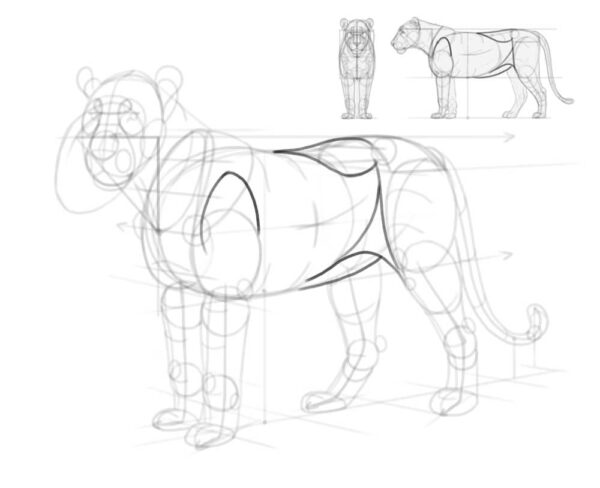
There are other, less obvious parts of anatomy missing, too. Add a volume between the arm and the shoulder blade, a volume between the hips and the chest, a curve under the belly, and a triangle of skin connecting the thigh to the torso.
Step 6
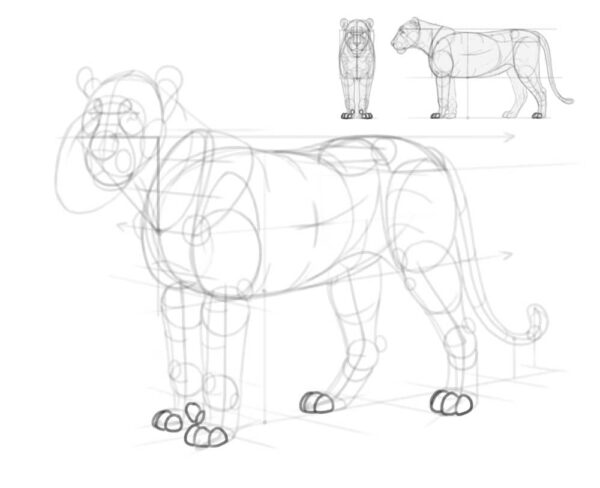
Time to make the paws more detailed, too! Cats have four toes, with two middle ones sticking out farther than the outer ones. In the front paws, there’s also an extra toe called the dew claw, and it hangs on the inner side of the paw, under the wrist—just like a thumb!
Keep in mind that not all toes will be visible in every view. Follow the perspective of each paw to decide if the toes should be pointing towards the viewer (more toes visible), or away from them (fewer toes visible).
Step 7
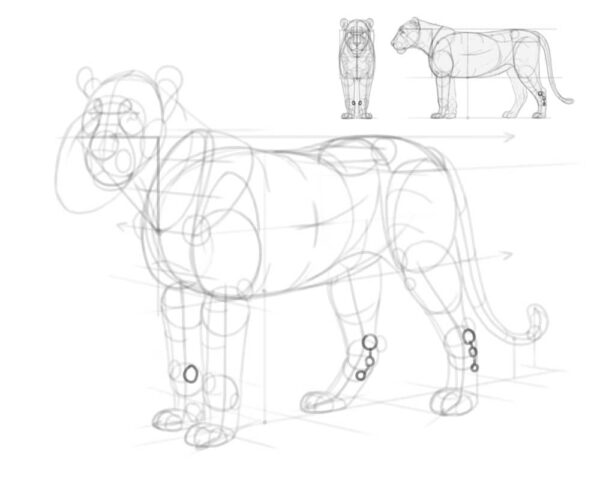
The wrists and ankles are made of complicated bones, and some of these bones stick out a lot. They can be drawn in a simplified way, like this:
Step 8
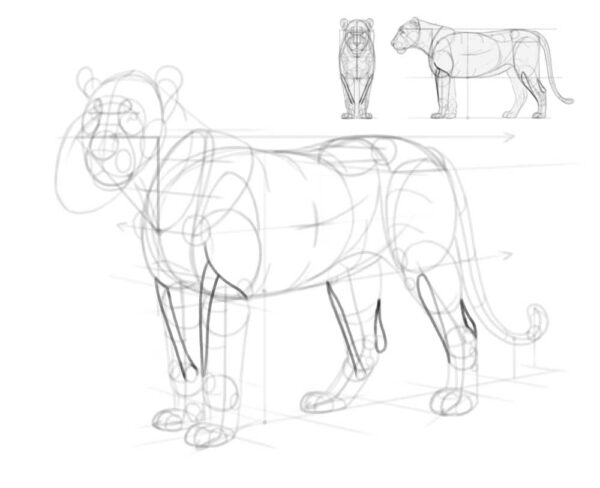
To get the shape of the legs right, add a few extra structures: a long muscle connecting the inside of the wrist to the outer side of the arm bone, a similar muscle on the hind leg, and the Achilles tendon connecting the heel to the calf muscles.
Step 9
If you’re drawing a lioness, you can skip right to the next section. If not, you need to add the mane now! Start by surrounding the head with small tufts: on the forehead, under the ear, on the cheek, and under the throat.
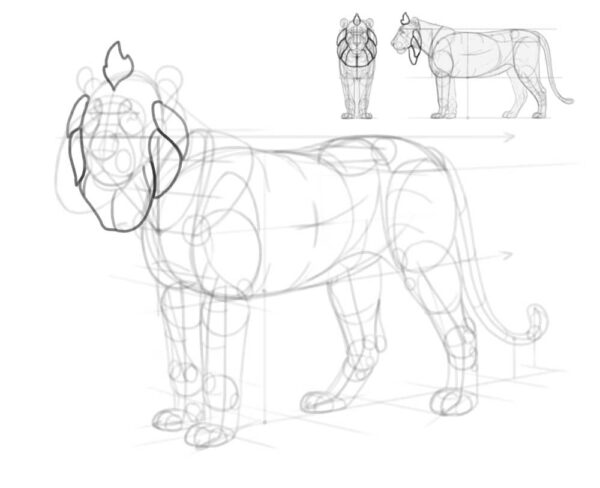
Step 10
Now add the big volume of the mane, high above the neck and in front of the chest.
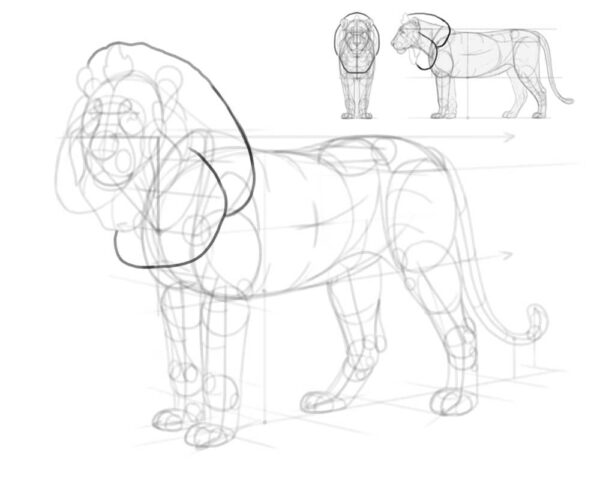
Step 11
Connect the mane with the body with a few flowing shapes, following the gravity.
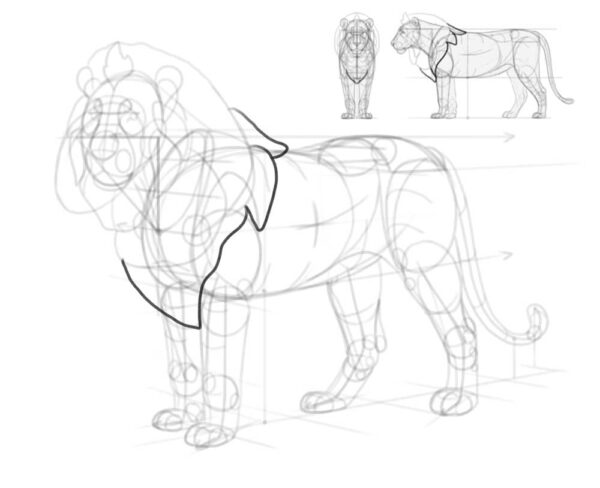
Step 12
Add extra tufts in front and behind the ears, as well as behind the elbow and on the side of the belly.
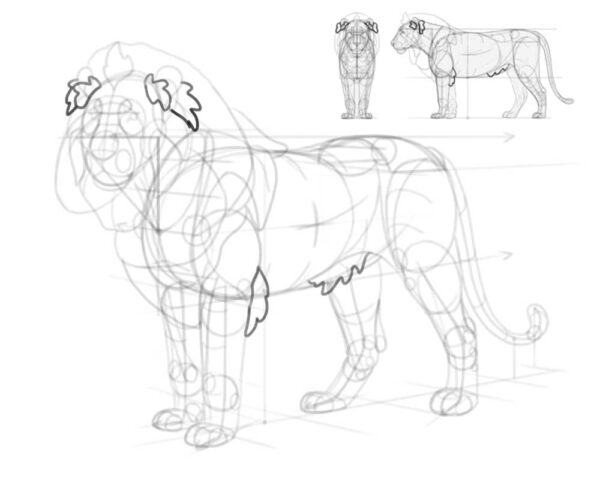
5. How to Finish Your Lion Drawing
Now that you have all the body parts established, you can lower the layer opacity of the sketch layer and create a new layer on top, to draw the final lines with a smaller brush (that feels more like a pencil or a fineliner).
Step 1
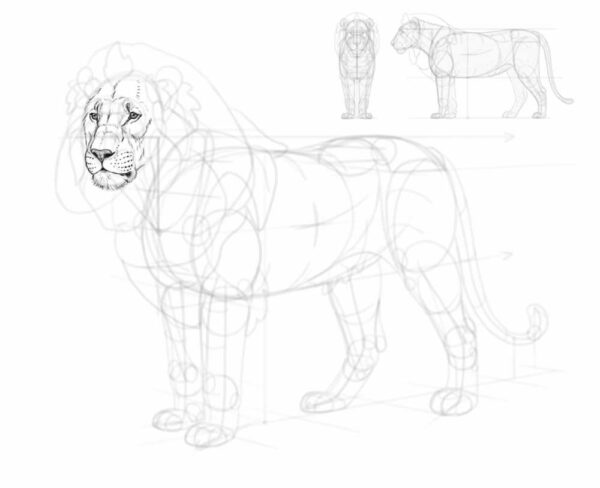
Start with the details of the head, accentuating the curves of the skull with short, non-continuous lines. Make the nose, eyes, and lips darker to capture the proper contrast.
Step 2
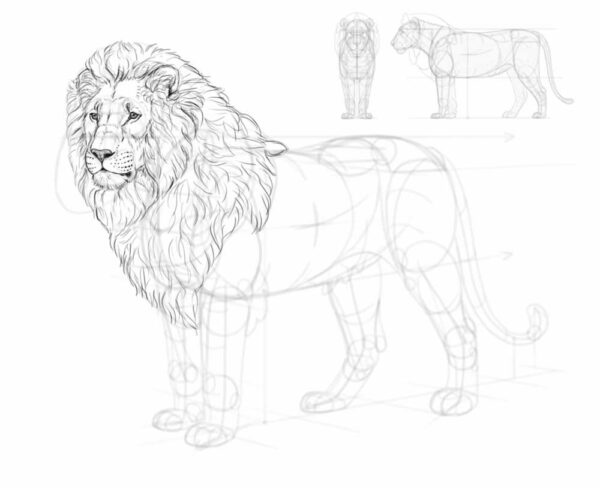
Outline the whole mane, trying to keep the distinct areas we’ve sketches earlier. Keep the edges of the mane light and feathery, and avoid dark, thick lines.
Step 3
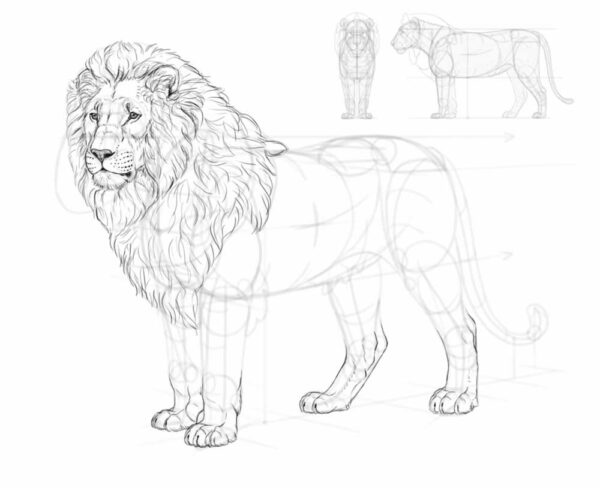
Add the details to the paws. Each toe should have a double hump—one for the main joint, and one for the claw hidden under fur. Mark the presence of the claws with a simple darkened crevice on front of each toe.
Step 4
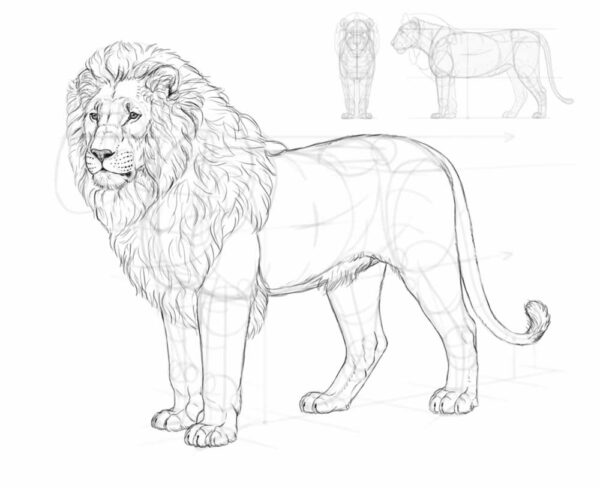
Outline the rest of the body. Avoid keeping your lines continuous for too long—breaking a line and turning it into a series of short lines will create an impression of a slightly fluffy surface.
Step 5
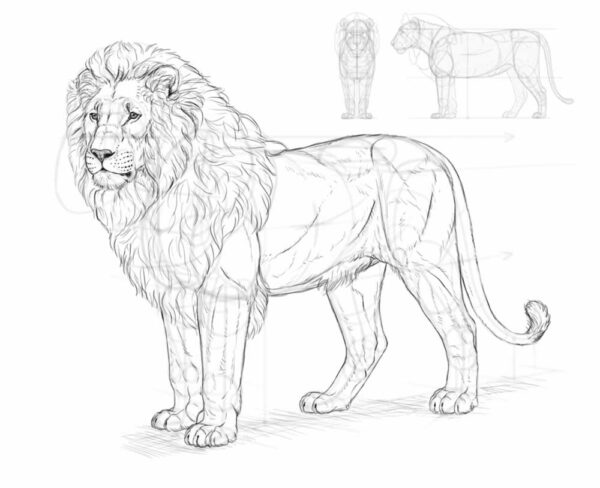
Now, time to fill the area inside the outline with details. You don’t have to include all these lines—in fact, it’s not realistic for a lion to have all its muscles outlines this way. However, they will be helpful if you decide to shade the body later.
Step 6
After you finish the lineart, you can hide the sketch to make only the final lines visible.
6. How to shade your lion
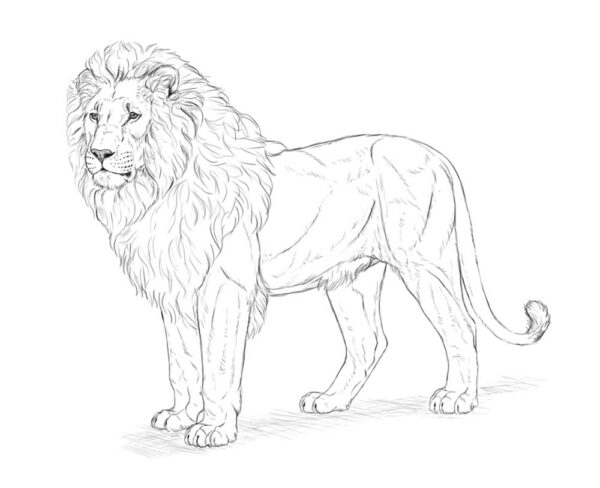
If you want to shade the drawing, I’ll quickly show you one method of doing this. The exact process will depend on your software, but this method should work in every decent drawing program.
Step 1
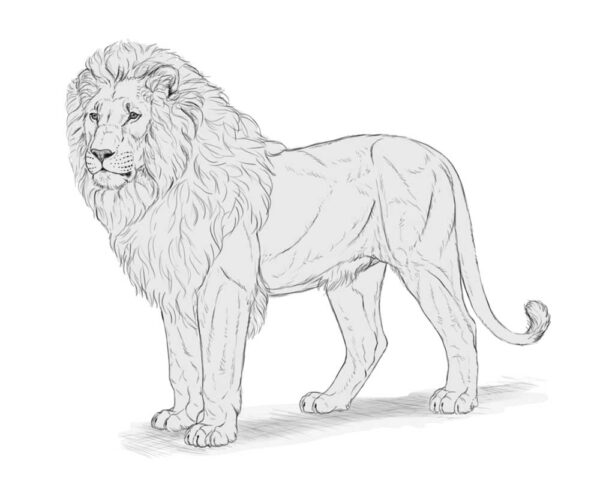
First, create a new layer under the lineart. Draw on it with a hard brush, creating a light gray silhouette within the bounds of the lineart. You can also add a simple shadow under the body, on a separate layer.
Step 2
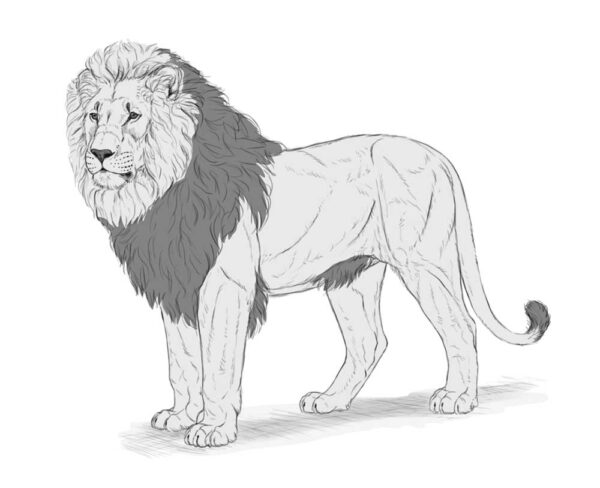
There are certain parts of the body that are darker than the rest, regardless of the lighting. Lock transparent pixels and mark these darker areas using the same brush (or the Lasso Tool + Paint Bucket tool).
Step 3
With the basic values established, we can now add some shading. Create a new layer and clip it to the color layer, creating a Clipping Mask. Set the Blend Mode of this layer to Multiply, and paint with black to mark the shadowed areas. Then lower the layer opacity to modify the darkness of the shadows.
If you find it easer, you can also paint these shadows by choosing the colors manually, without changing the Blend Mode. However, with the Multiply mode you don’t have to adjust the color of the shadow to the colors below, because it’s adjusted automatically.
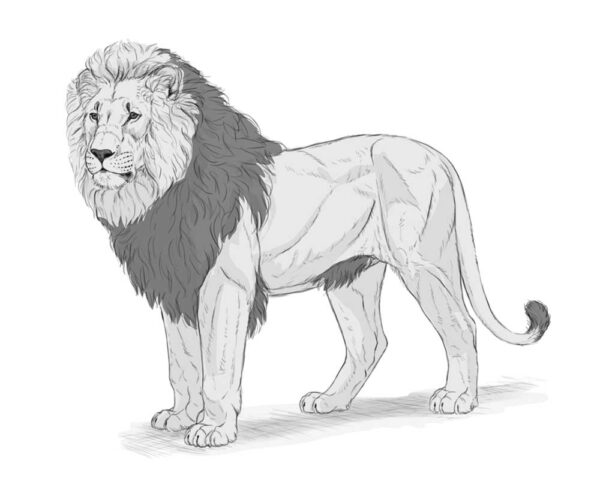
Step 4
Add another clipped layer the same way, and draw smaller shadows inside the previous shadows. Lower the opacity too, but make it slightly higher than in the previous layer.
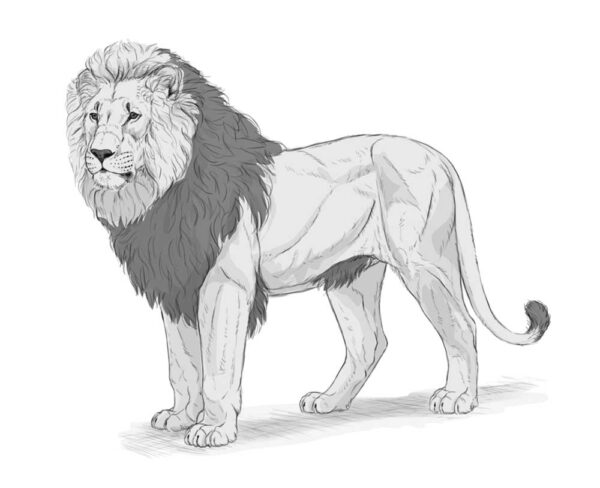
Step 5
Continue doing it this way, until you reach the preferred level of details. Each new area of shadow should be smaller and darker than the previous one. Try to avoid pure black, or leave it for the smallest, tightest areas of shadow.
To quickly darken a whole area even further, you can use a softer brush and make it big enough to cover a big area of the body without having to repeat the strokes. You can easily limit this new shadow, e.g. to the inner side of the leg, by using the Lasso Tool.
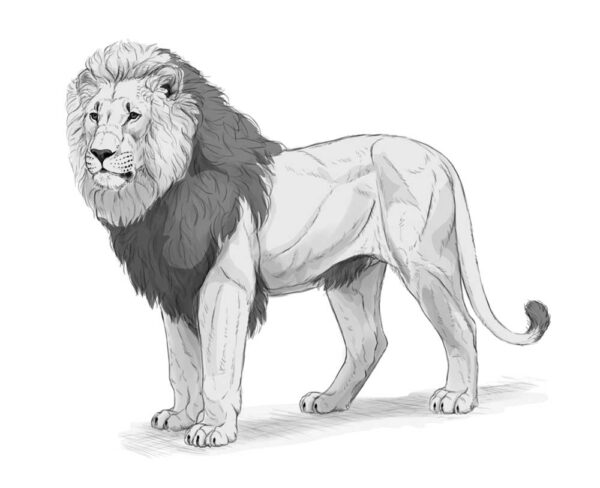
Step 6
Finally, add a new layer on top, clip it too, but this time paint with white to mark the areas that face the imaginary light source on top. Set the Blend Mode to Screen, and use very low opacity to avoid an effect of shine. If you want certain areas to be less bright than others, you can use any other shade of gray—in the Screen mode, any shade will have a brightening effect, and you can control the opacity of that effect by changing the shades of gray.

Step 7
You can leave the drawing as it is, or lower the opacity of the lineart, create a new layer at the very top, and start rendering. Rendering is a whole different skill, so I won’t explain it here, but the basic premise is simple: you need to replace every line with a border between shades.
You don’t need any special brush for it—here I used the same pencil brush that I’d used for creating the whole sketch. You just need to keep it relatively small (it should feel like a pastel stick or a crayon), and use the eyedropper tool to pick the colors from the area you’re painting over. Feel free to use a photo reference every time you’re confused about something—the more realistic you want your drawing to be, the more attention you should pay to your references.
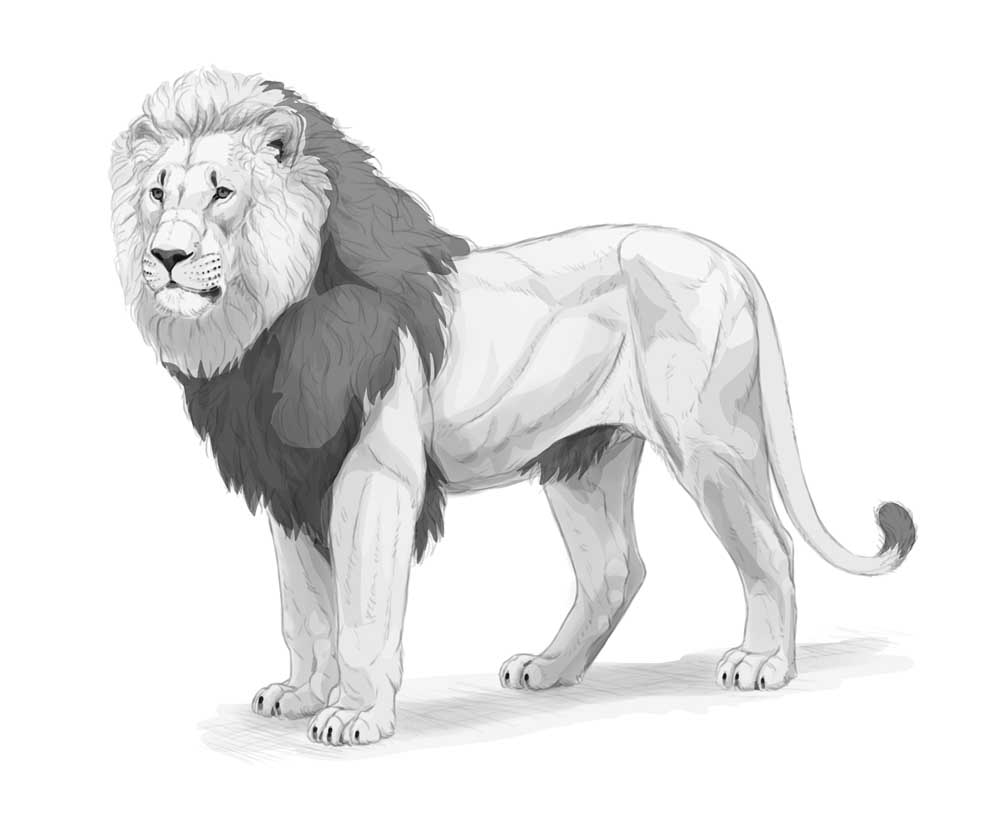
Also, you don’t need to cover the whole lineart. You can simply hide it—by hiding it, you’ll quickly see which areas need to be worked on. Once you don’t see any negative change after hiding the lineart, you’ll know your rendering is finished!

