Monika Zagrobelna is a Polish artist with a great passion for creating new things — whether by drawing, digital painting, or photo manipulation. She specializes in creating realistic art, especially of animals, and is a big fan of dragons and feline creatures!
She loves sharing her skills with others, including on her blog and social media accounts. Check her out on X (Twitter), Facebook, LinkedIn, Instagram, or on her website.
In this extremely detailed tutorial, she walks step-by-step through her process for utilizing three-dimensional perspective in her drawings.
If you don’t want your drawings to look flat, you need to use perspective. It’s a scary word for beginners, and for a good reason — it’s often taught as something mathematical, abstract, and hard to apply to the intuitive process of creating art. So in this tutorial I’ll try to explain it to you in a different way — with less theory and more practice. Let’s get started!
How to Draw a Box
This is a flat shape — a rectangle. A rectangle is 2D, which means it has two dimensions: length (L) and height (H).

If we want to turn this flat rectangle into a 3D box, we need to add the third dimension: width (W).

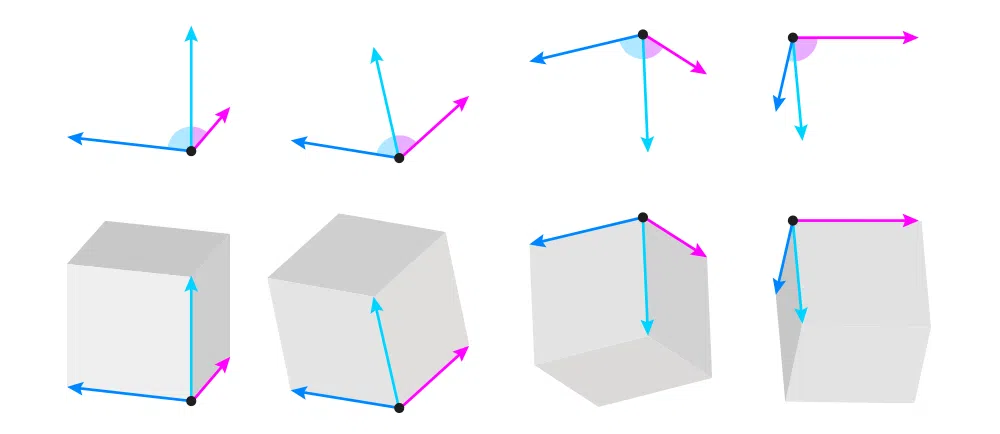
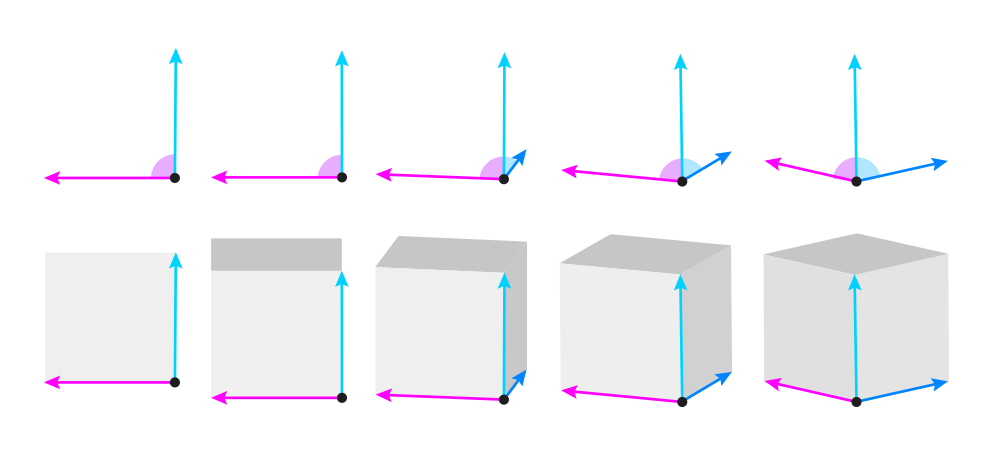
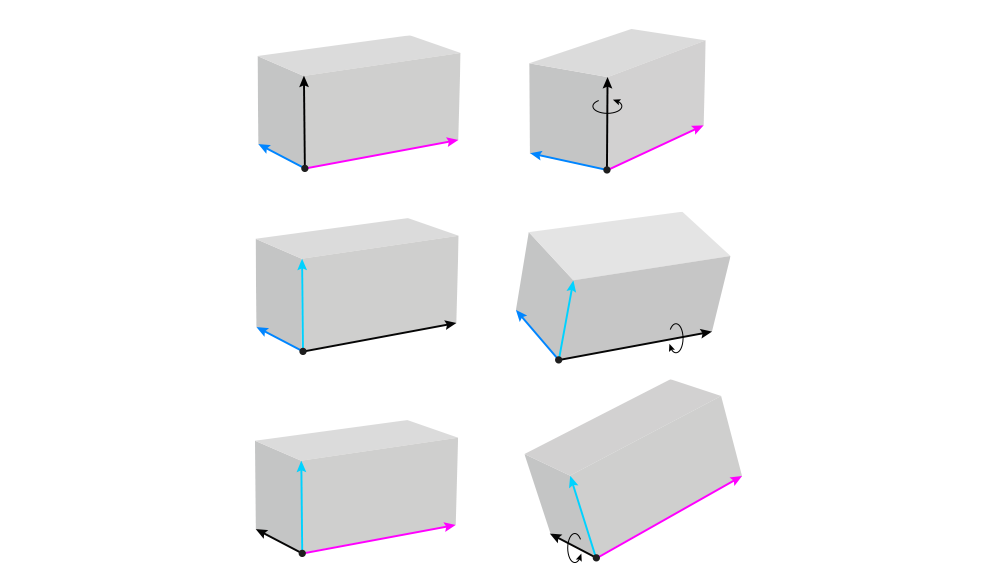
You can control the look of the whole box by manipulating these three lines. First, you can decide whether you want to show the top or the bottom by changing the direction of the width and length:
- Make the width and/or length point up to make the top visible
- Make the width and/or length point down to make the bottom visible
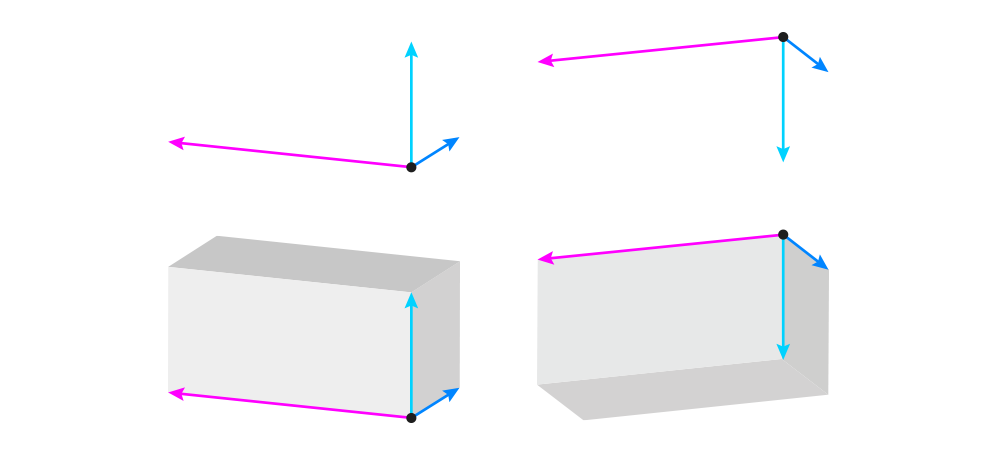
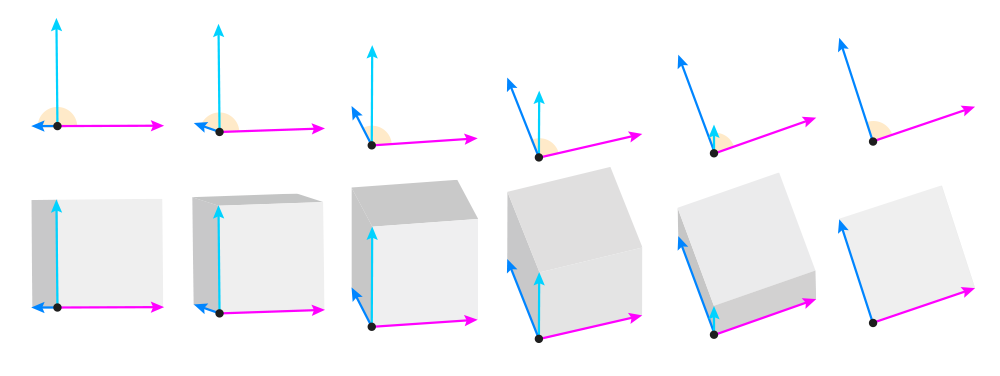
Second, you can control the tilt of the box by changing the direction of the height:
- Make the height vertical to keep the box parallel to the ground
- Make the height not-vertical to tilt the box
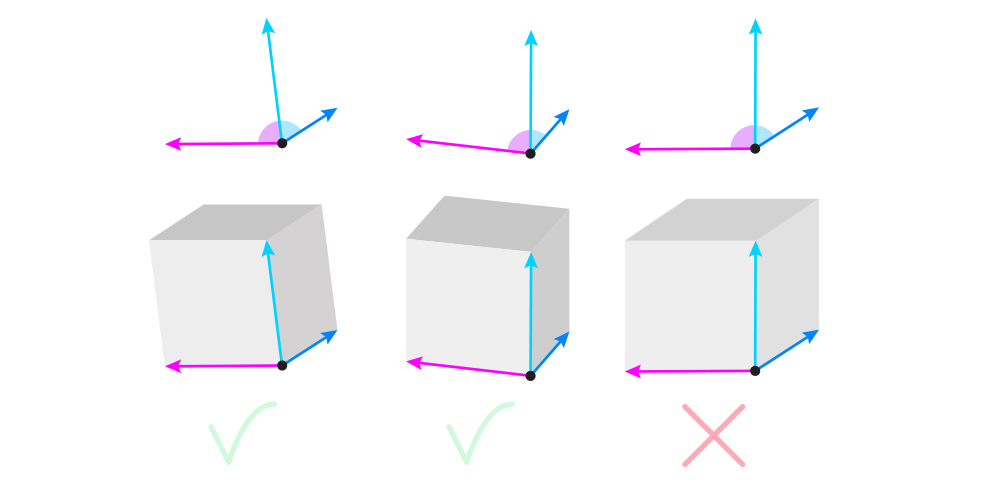
Third, you need to pay attention to the angles between these three lines. The basic rules are pretty simple:
- Both the angle between the width and height, and between the length and height, must be acute — that is, under 90°.
- The sum of the two acute angles can’t be smaller than 90°. The bigger this sum, the closer the box will seem to the eye level of the viewer (making it 180° will place the box directly at eye level).
The right angle (90°) is reserved for 2D figures only. In math textbooks, you can sometimes see a cube with 90° angles, but this is an abstract representation of this shape — in reality, a cube will never look like that.
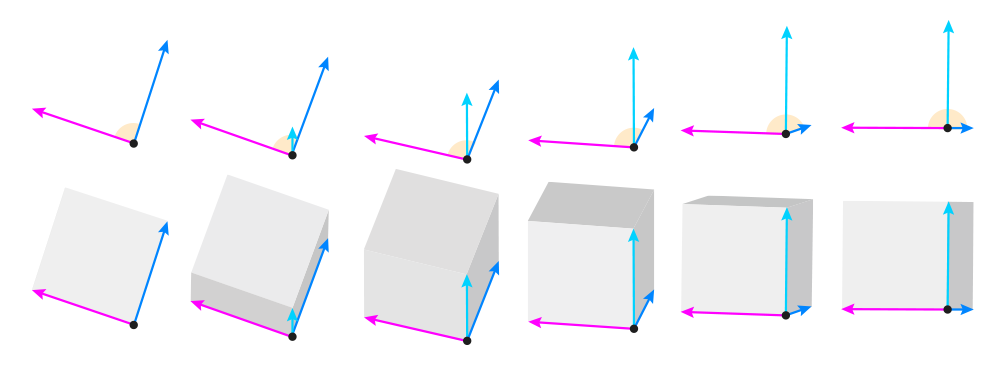
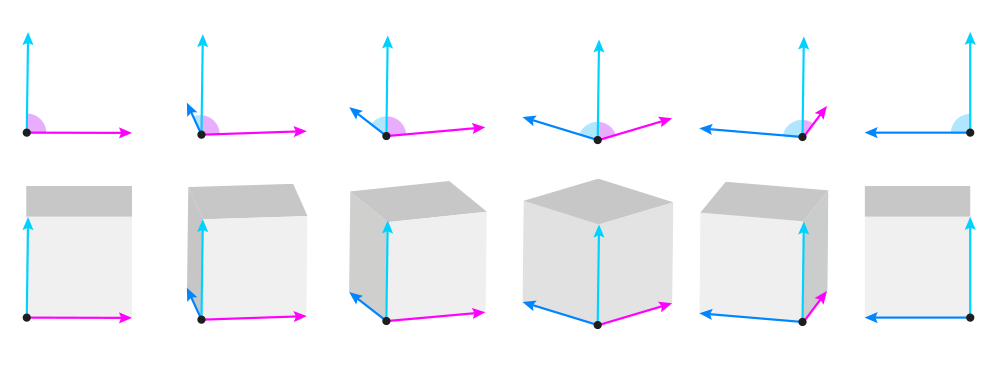
The angles change when the object is rotated, so you can control the view very precisely by adjusting the angles. The general rule is: the bigger one angle, the smaller the other one. 90° is the limit — once you reach it on one angle, the other reaches 0°.
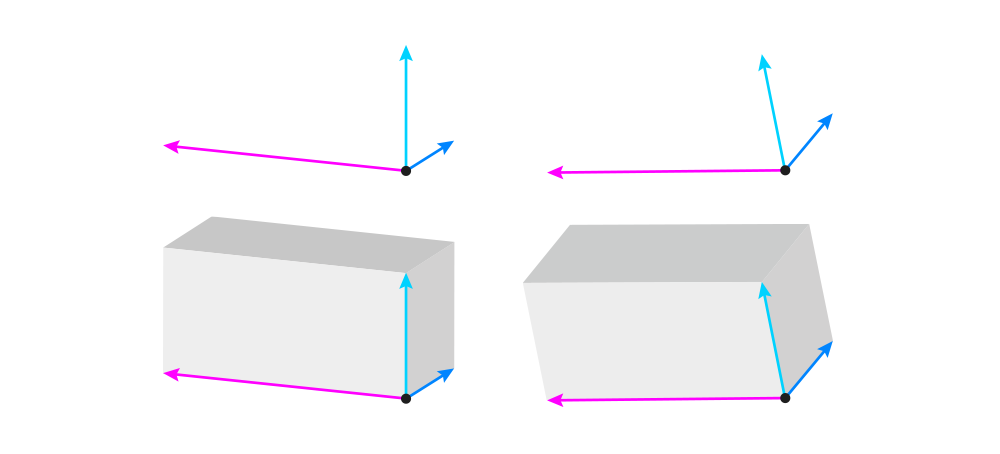
OK, so we’ve got the direction and the angle of these lines. Now we need to establish their length. Each of the lines has its original value that can be seen in full in the 2D view. But once the box is rotated, these values get smaller — we call this foreshortening. Here’s how it works:
- The closer the sum of two angles is to 180°, the closer the height is to its original value. At 90°, the height is diminished to 0.
- For the width/length, the smaller the angle, the more shortened the line. At 90°, the line achieves its full value.
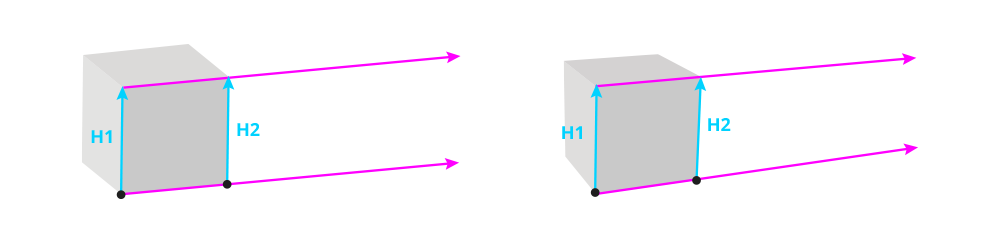
So the three lines are done now, and all we have to do is to draw the other lines. But before we do this, I need to quickly explain this one concept. It’s a well known fact that objects that are farther away appear to be smaller. And this applies to the parts of objects, too. So since in the below image H1 is closer than H2, then H2 must be smaller (shorter). This means that the lower length line and the upper length line are not parallel to each other, but slightly tilted.
The exact degree of this tilt is not important, because in photos it can be exaggerated or decreased just by using a different lens. So you can use any, as long as you keep it consistent across the whole scene.
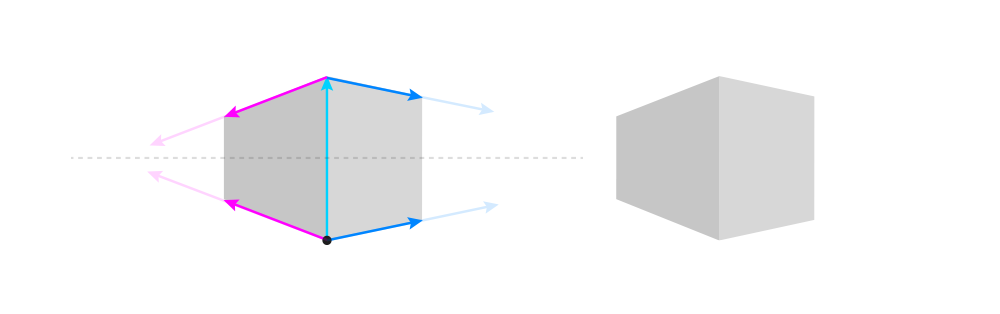
With that out of the way, let’s continue building our box! First, attach the width and length to the tip of the height. It should be slightly tilted towards the original dimensions (slightly below the parallel position). The smaller the angle, the stronger the tilt.
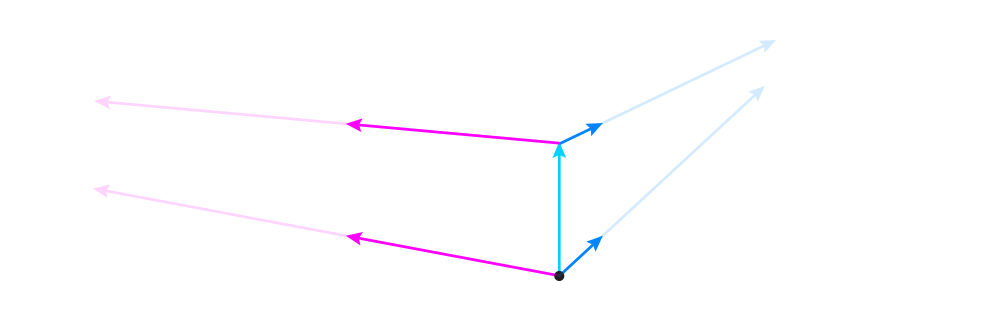
There’s also one more thing you can do at this point. If you don’t want to show the top/bottom, you can make these new lines horizontal, or even pointing towards an imaginary horizontal line crossing the box.
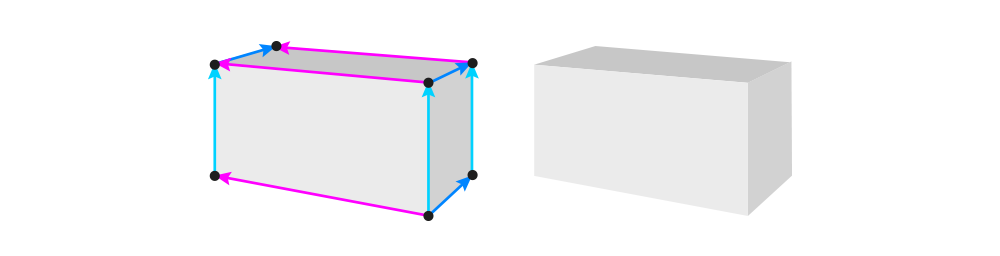
Now you can add the two remaining height lines, properly shortened by the tilt. These lines should usually be parallel to each other, unless your box is supposed to look huge (like a building) — then you can tilt them slightly towards the middle one for a powerful foreshortening effect.

Finally, time to add the remaining width and length lines. Tilt them towards the other ones.
How to Draw an Ellipsoid
A box can be a nice base for many other, more complex forms. Let me show you how to create an ellipsoid this way! An ellipsoid is a 3D version of a 2D ellipse — that is, an oval. It doesn’t have any corners, but it still has all three dimensions — they’re just hidden.
To draw an ellipsoid, first draw a box using the view that you want to use for your ellipsoid.

Then, draw an ellipse inside of it. Its long axis should be parallel to the length of the box, and run right through the middle of the box. This ellipse doesn’t have to fill the box perfectly — just follow its general shape.

Mark the center of the long axis, and draw the three dimensions across it — parallel to the dimensions of the box. The closer the angle to 90°, the closer the lines should be to the outline of the ellipse — but they will only touch it if the angle is 90°.

Now attach two short lines to the tips of the dimension lines — parallel to the lines from the corresponding side of the box. Their length doesn’t matter.

Finally, connect these short lines to each other with partial ellipses wrapped around the whole form. These curves will help you see the volume of the ellipsoid.

How to Draw Multiple Objects In Perspective
Drawing multiple objects together may seem complex, but it’s really not, if only you follow these few rules. First, remember to draw the ground plane before or right after drawing the first object. Then you can place the other objects on this ground plane to keep them on the same level.
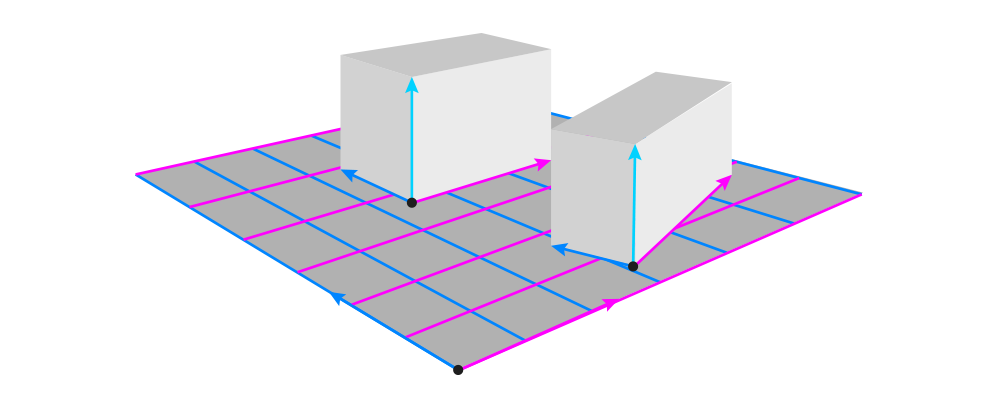
Second, to make the objects appear rotated in relation to each other, all you need to do is to keep one dimension constant. Then it will be recognized as the axis of rotation:
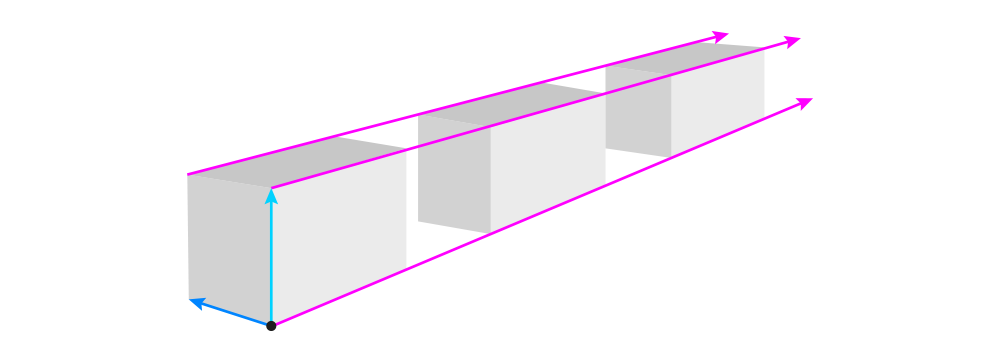
Third, if you draw multiple objects in the same position, for example lying in a row, make sure that their corresponding dimension lines are all tilted towards the same imaginary point. Doing this will also help you adjust the size properly.
And fourth, when drawing combined objects, always draw the middle line across the surface of the objects. These middle lines should be aligned to each other to keep everything symmetrical.

How to Draw in Perspective: a Practical Example
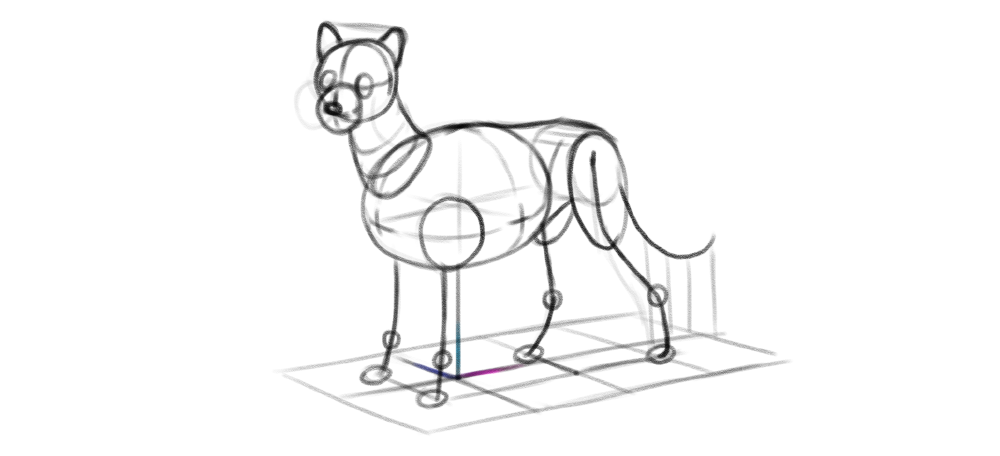
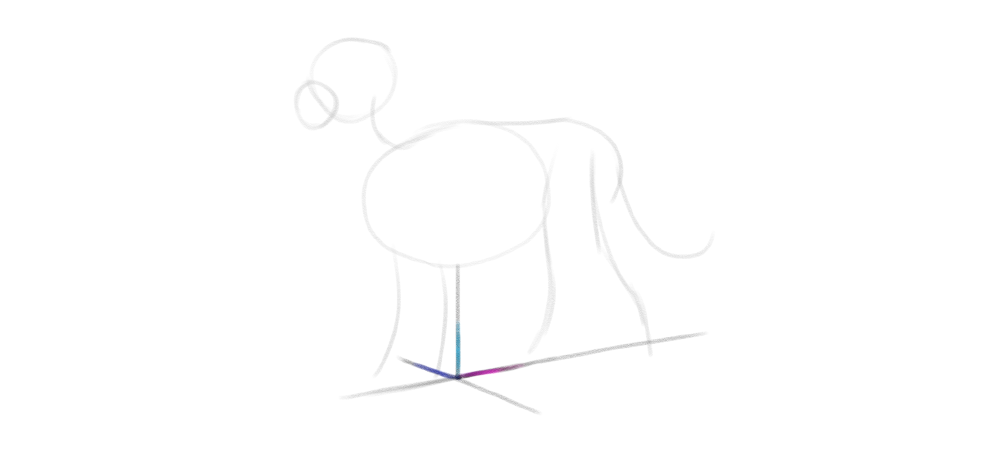
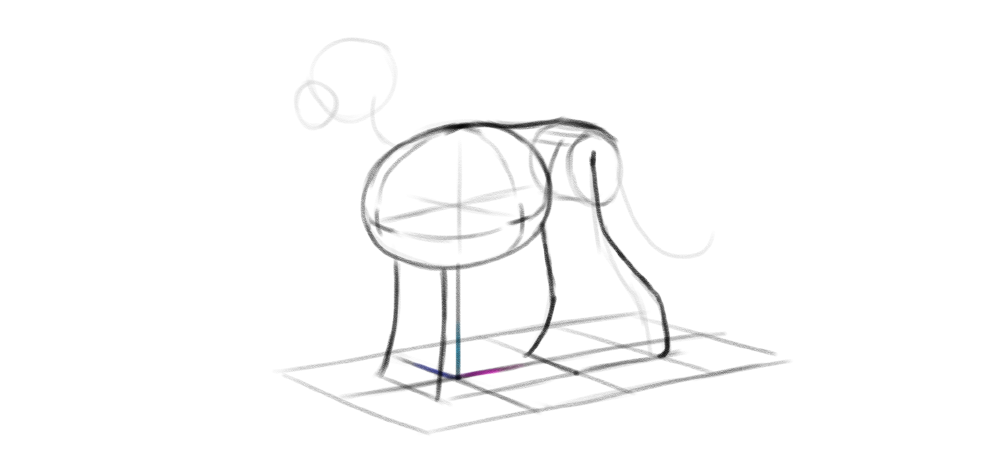
Let me show you how to use all these tricks to create a simple drawing. Let’s say I have this sketch, and I want to make it look 3D:

First, it’s good to create the ground plane. To do this, I draw a line from the belly towards the imaginary ground, and place a set of three dimensions here. I use a very wide angle for them — this will create a fairly neutral view.
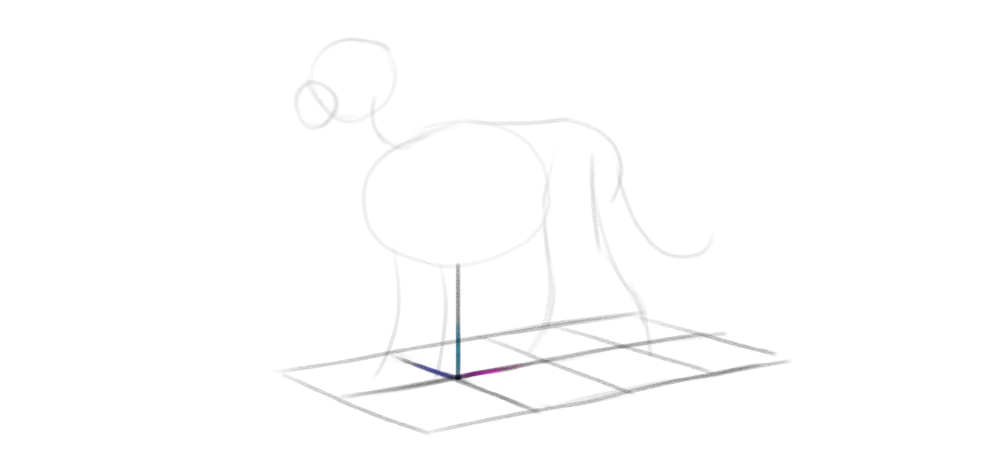
Once I have these lines, it’s easy to turn them into a plane (or a flat box).
Next, I add the short dimension lines to the sides of the torso’s ellipsoid. I make sure to tilt these lines properly towards the lines on the ground. I add some curves based on these lines, as well as a simple shape for the hips.

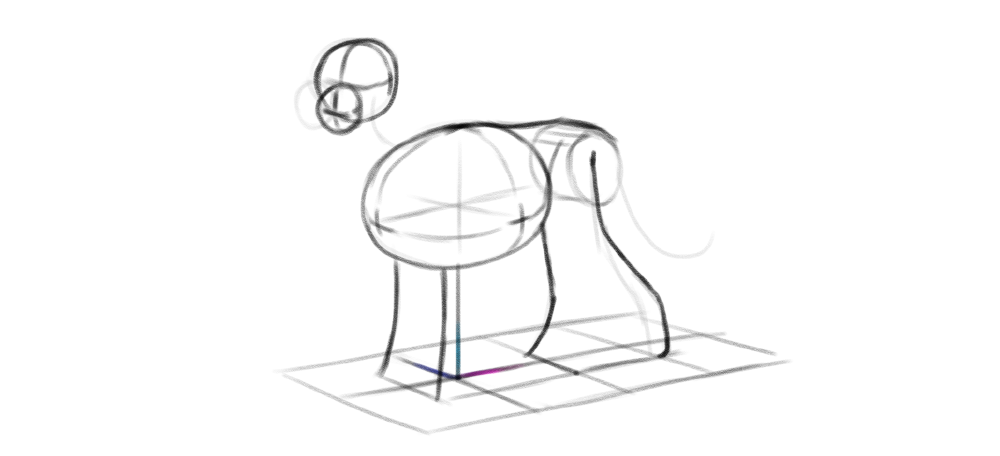
Then I align the legs by drawing the dimension lines between them. To make the pose less artificial, I intentionally break this rhythm in the hind legs, drawing one of the legs farther than the symmetry would require.
I can make the pose even more natural by turning the head slightly towards the viewer. To to this, I draw the head in a different view, while keeping the height dimension constant — indicating that this is the axis of rotation.
Finally, to keep the tail at a proper distance from the ground, I sketch a few vertical lines under it, making sure all of them touch the ground along its middle line.
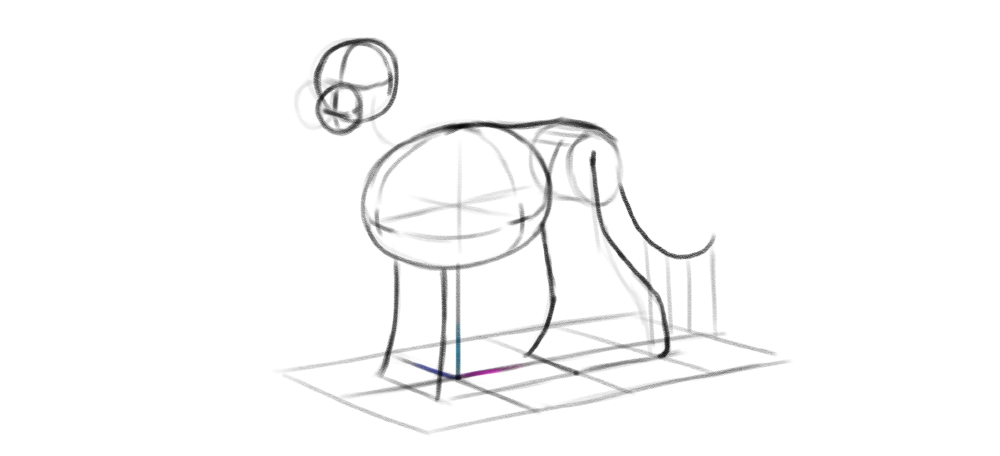
Once you sketch the perspective this way, adding any other elements is easy — all you need to do is to make sure the corresponding dimension lines are properly tilted to each other, and the rotated parts share one axis with the others.