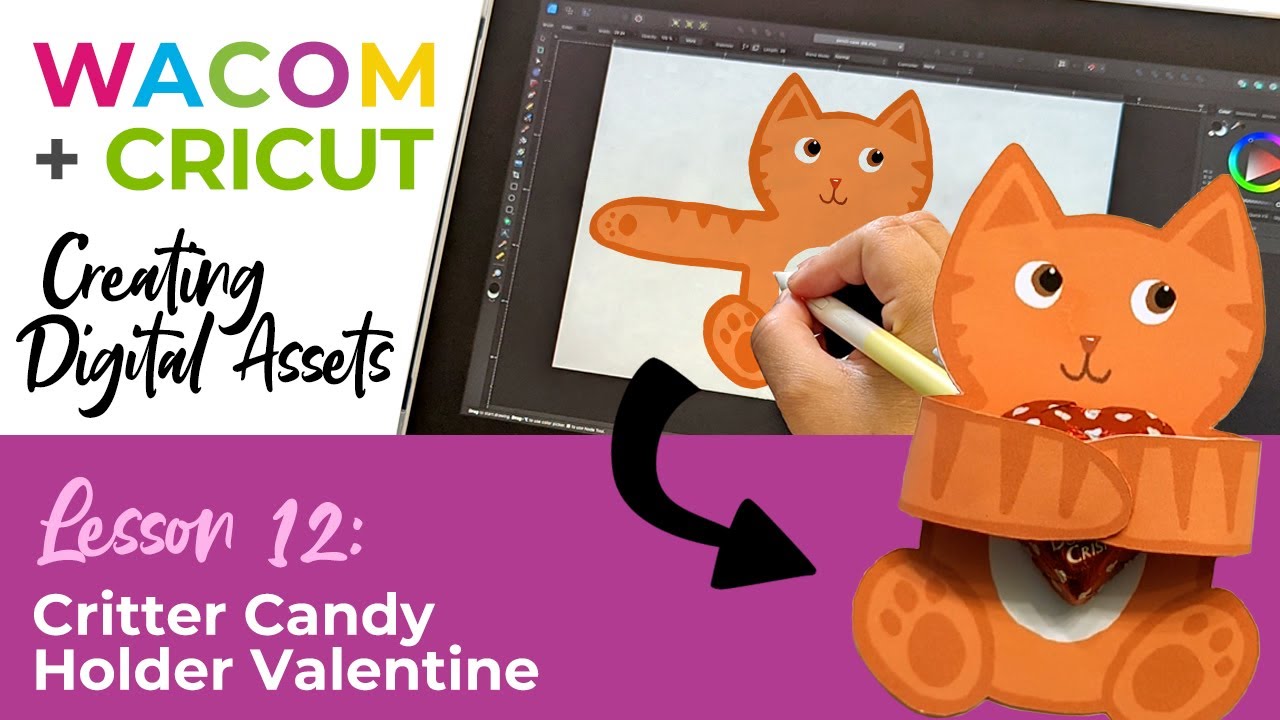
In the guest post and video below, crafter and creator Heather Cash continues her Wacom + Cricut series by showing you how you can use a Wacom One pen display and Affinity Designer software — included with every Wacom One purchase — to create your own Critter Candy Holder valentine!
Check out the video below, or read on for a text-based transcript.
Hi, my name is Heather, and welcome to another episode of Wacom + Cricut, my series where I show you how you can use your Wacom tablet to create projects for the Cricut. Today we’re going to be creating Valentine’s Day Critter Candy Holders!
First, get your supplies:
- Candy (mine is from Dollar Tree)
- Light cardstock paper
- White glue
- Clear tape
- Wacom pen display or pen tablet
- Affinity Designer software (a free trial comes with any purchase of Wacom One!)
Step 1: Create your design
We’re going to use Affinity Photo, because we will be creating this as a Print & Cut file.
Create your file
Create a new file in Affinity Photo by selecting File → New. Enter in the dimensions 8.5 for Page Width and 11 for Page Height, and make sure Inches is selected under Document Units. Set the DPI to 300, since we will be printing this project, and 300 dpi is a good resolution for print projects. Now click Create.
Sketch out your character
Grab your Brush Tool from the toolbar on the left and start sketching out your character. Draw the head, body, and feet. Then, grab the Move Tool and select the sketch. Go to the Transform panel in the lower right of your screen, and click the chain icon to lock the proportions. Set the height to 4″.
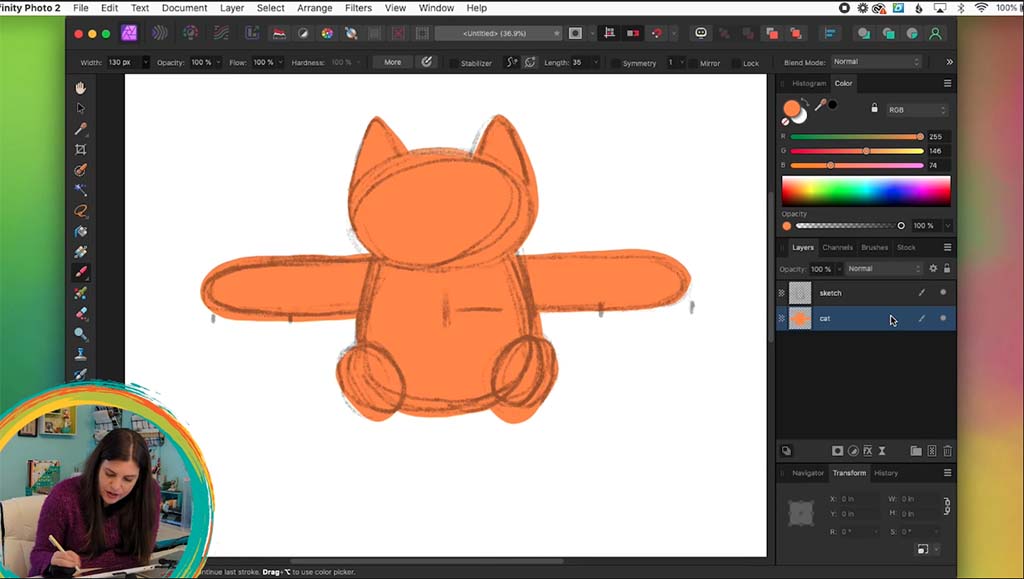
Next, grab the Brush Tool again, and sketch out the arms. In order for the arms to be able to wrap around the piece of candy, each arm should be equal to about the width of the body.
Add color
The next step is to start adding color. First, let’s lower the Opacity on the sketch layer. Go to the Layers Panel and click on the sketch layer, then slide the Opacity setting down to about 30-40%. You can also click on the Blend Mode dropdown next to Opacity (the dropdown that says Normal) and select Multiply.
Now, you can grab the Brush Tool and select a brush that you’d like to use from the Brush Panel. Select a base color for your critter in the Color Panel (I’m choosing orange) and fill in your character. When you’re done laying your base color, you can hide the sketch layer by clicking the little dot next to the layer name in the Layers Panel.
Make it symmetrical
This step is optional. If you’d like to make your character symmetrical, grab the Rectangle Marquee Tool from the Tools Panel. Decide which side of the character you like better, and select the other half with the tool. Then, press Delete on your keyboard or go to Edit → Cut.
Next, go to Layer → Duplicate. You’ll see two versions of your character in the Layers Panel. Grab the top layer and flip it horizontally by going to Arrange → Flip Horizontal. Then, grab your Move Tool and position the two halves next to each other to create one whole symmetrical character. Finally, grab both layers with the Move Tool and merge them by going to Layer → Merge Selected.
Create the back layer
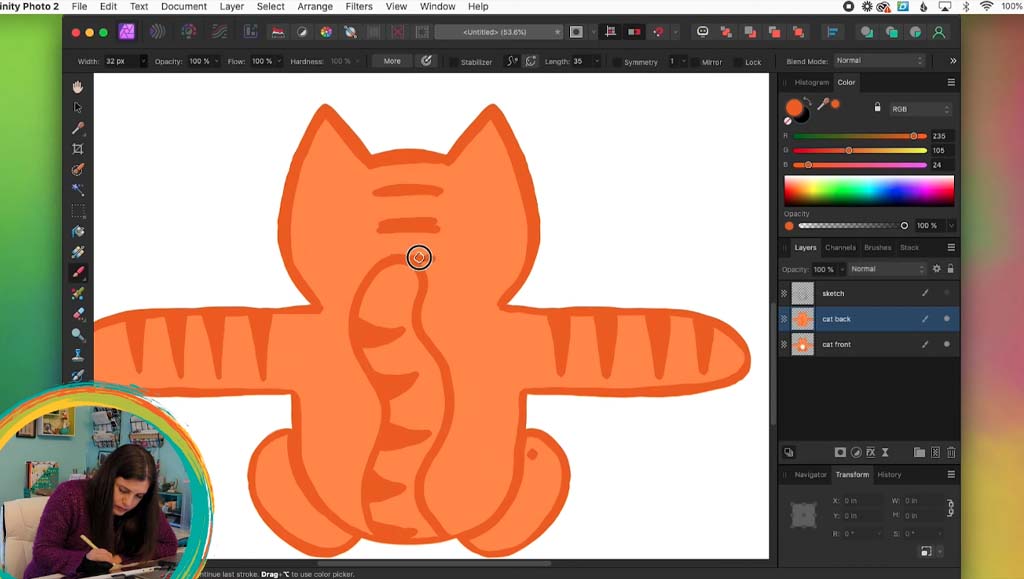
Now, we will need to duplicate the front of the character to create the back of the character. With your character layer selected, go to Layer → Duplicate. Use your Move Tool to position the new layer below the first layer. If you didn’t make your character symmetrical, you’ll also need to flip your back layer. To do this, go to Arrange → Flip Horizontal.
Add details
Now we’re ready to add details to the layers. To make this easier, you can lock the opacity of the pixels you are going to draw on. Grab your Brush Tool and go to the toolbar along the top of the screen. You’ll see a checkbox that says Protect Alpha (If you don’t see it, you may need to click the little arrow to expand your toolbar). Check this box, and then when you color, it won’t go outside of your character shape.
Export for Cricut Design Space
First you’ll want to save your design as an Affinity Photo file by selecting File → Save. Then, you can export it as a transparent PNG for Cricut Design Space. To make the background transparent, go to Document → Transparent Background.
Next, go to File → Export. Choose the following options:
- PNG
- Area: Whole Document
Then click Export.
Step 2: Bring into Cricut Design Space and cut
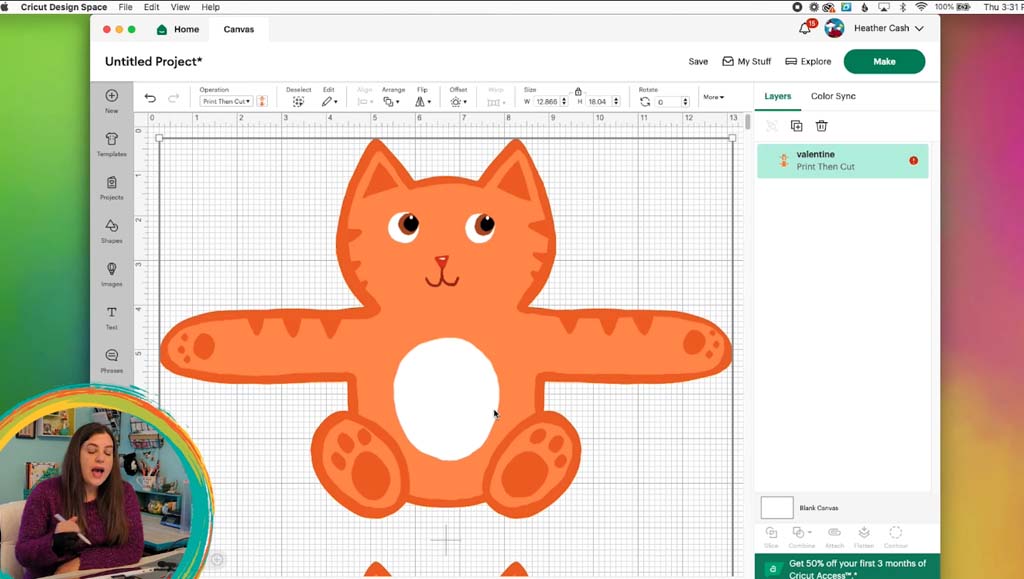
In Cricut Design Space, upload your new design. Go to Upload, Upload Image, Browse, select your PNG file, click Open. In the Upload dialog box, select Complex (since our drawing has many different colors). Then click Continue, then Apply & Continue. Under Select Upload Type choose Print Then Cut Image, then click Upload.
Click your design and select Add to Canvas. Since we saved the PNG at 300dpi, it will need to be resized down to the proper size in Cricut Design Space. So you can grab the design and set the width to 6″. Next, click Make, Continue, and Send to Printer. Make sure Add Bleed is turned on, so that the color goes all the way to the edge of your character when it’s cut out. Then, click Print.
Ensure that your Cricut is connected and that your material is set to Cardstock. Place your printed character on your mat. Then, you can run it through your Cricut, flip over your mat, and remove the completed cut-out material.
Step 3: Assemble your character
Once your character is cut out, you can glue the front and back together using white glue. In order to avoid wrinkling, sandwich the glued character between two pieces of white paper, and set it under some heavy books. This way, the character will stay flat and any moisture from the glue will transfer to the white paper.
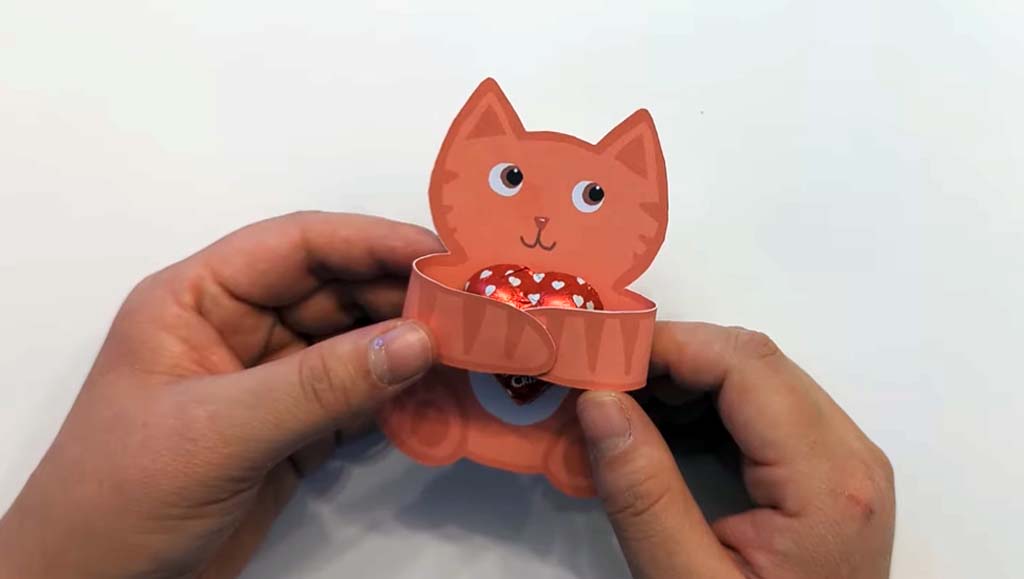
After about 20 minutes, remove the books and paper from your character. He’s now ready to hold some candy! Use some clear tape to stick a piece of candy to the critter’s belly. Then use tape to attach the hands to the top of the candy. You can write a sentiment on the arms or the back.
Have fun sharing your handmade Valentine with someone special!

