Virtually everyone who creates digital art is familiar with the Adobe Suite of software programs, and if you ask a graphic designer, most will tell you that Adobe Illustrator is the industry standard and their software application of choice. But Adobe isn’t the only option out there.
A great alternative to the Adobe suite is the Affinity suite: Affinity Photo for photo editing, Affinity Designer for graphic design, and Affinity Publisher for print design and document layouts. Want to give them a try? Every purchase of a Wacom One pen display or tablet comes with a free three-month trial of the Affinity suite so that you can give it a try.
You may have seen the recent news that Canva purchased Affinity. While exactly what this will mean in the long term is unclear, there’s definitely the possibility that the combined forces of Canva and Affinity will result in even more resources and innovation going into the software. One important promise they’ve made, however: they say that Affinity will always offer perpetual, one-time licenses to purchase the software, as an alternative to the subscription model Adobe and some other software companies use.
If you’re a graphic designer curious about how Affinity Designer compares to Adobe Illustrator, Vivienne Le has you covered. She’s a graphic designer currently based in Germany, and tried designing a book cover using her Wacom One tablet in both software applications to compare and contrast them. Check out the video she created below, or read on for a transcript.
Introduction
It almost feels tired to say Adobe Illustrator has long been the industry standard for vector graphic design, but with recent news of the online design platform Canva acquiring Affinity, I think Adobe has got some serious competition. Nearly 30 years old now, it’s worth reviewing how Adobe Illustrator holds up to its best competitor, Affinity Designer, in 2024.
Hi, my name is Viv and I’m a graphic designer based in Berlin. I’ll be exploring the design process of making a book cover with both Adobe Illustrator and Affinity Designer to compare the strengths and capabilities of each when paired with the Wacom One tablet. I made two abstract book cover designs to test the same tools on both programs, and I’ll be walking you through the process of turning my paper designs into vector graphics.
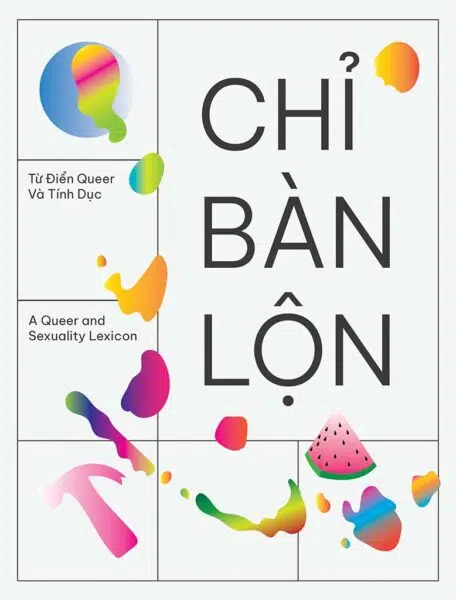
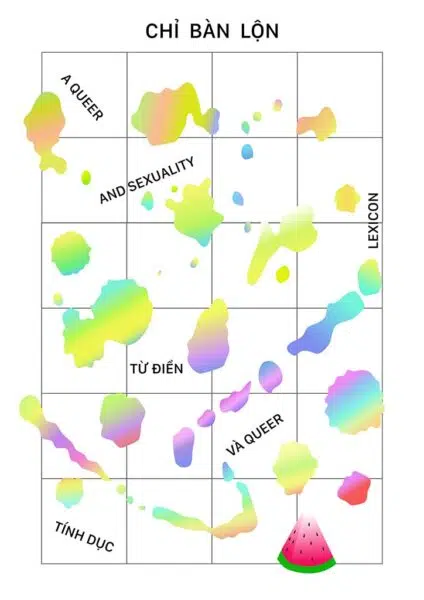
The book cover I’m designing is inspired by my friends in Vietnam who published the first collection of Vietnamese queer and sexuality slang with English definitions and many wonderful illustrations. For my sketches, I was inspired by children’s dictionary picture books and included some cute objects, shapes and some abstract paint blobs on top of a grid to convey the idea of breaking out of the mold.
My setup has my MacBook Pro connected to a monitor and the drawing tablet in front. Right now, I use the Wacom One M tablet as compared to an iPad or one of Wacom’s other tablets with a display, because I already do all my other work on my laptop, and this way it’s so much easier to keep all my files in one place. I’ll be using a combination of mouse work and the tablet to draw the vector graphics.

Designing with Adobe Illustrator
I began with Adobe Illustrator first. It’s just the one that everyone uses, so the UI is familiar to me. At the brainstorming stage, I am honestly a paper-and-pencil kind of girl, so I’m just gonna drop my sketch into here and work on top of it.
The basics
My Wacom One tablet works right out of the box without messing with any of the settings, and it’s so easy to pair to my laptop with Bluetooth and select the basic Brush Tool to draw simple vector paths tracing over my sketch. I mainly do minimalistic, abstract designs and don’t use all of Illustrator’s tools very often, but you can create way more complex shapes and illustrations with tools like Shape Builder and Blob Brush.
Working with stroke and fill gradients is as easy as clicking and dragging over the object to create the direction of the gradient how I want. I’m just using the preset swatches here and going for maximal color pop.
Image tracing
One tool that’s crucial to my workflow is called Image Tracing, and that’s exclusive to Adobe Illustrator. I’m not using it now, but I would say 80% of the time when I open Illustrator for work it’s because I’m using Image Tracing to turn bitmap or pixel-based images into vector paths, especially when I receive designs like stickers or illustrations from other people that weren’t made with vector graphic software, and I have to get them ready for print.
Typography
Illustrator also has way more features that are text-based, so if you work heavily with typography and need to edit not just the font but also mess with kerning and distortions, than this would be the match point. Here I just decided to use the Google Font “Be Vietnam,” since it’s pretty cute and one of the few typefaces with dedicated Vietnamese letterforms and adaptive diacritics (which are the accent marks above or below the letters), and is engineered for their readability. Illustrator is also integrated with Adobe Fonts, which is a massive library of some of the best fonts out there, and you can test them out in your project first before you decide to buy it.
Performance
I’m on a 2020 MacBook Pro, and Illustrator’s performance speed is pretty solid, though I usually have to mess around with settings each software update because it can get laggy dealing with complex files.
Layout
The new 2020-era updates attempt to make the entire program more beginner and user friendly. There’s a new AI popup bar that suggests contextual tools that adapt based on the selected object or tool, but it just always just kind of gets in my way. I would move it all the time and I’m due to reorganize my workspace, but also I just want Illustrator to work out of the box.
Compatibility
However, the synergy between InDesign, Photoshop, and Illustrator is crucial for me, and working in the Adobe ecosystem and being able to export in .AI files is crucial, as that’s the industry standard.
Here’s the finished design made with Adobe Illustrator:
Affinity Designer
Now to Affinity Designer.
Layout, performance, and Wacom compatibility
Right off the bat, I already appreciate the streamlined UI and the fact that it’s buttery smooth. It’s got all the main tools I use like Pen and Brush, and because it just feels lighter, I can actually see myself using the Pencil Tool to sketch if I wanted to do something quick while staying on my computer. It’s so easy to move objects around and I like that all the menus stick to the edges, so I can focus on the work and not on the settings.
My Wacom tablet also works out of the box without having to mess with any settings, but drawing just feels so much smoother. My entire workflow feels a lot easier, and I’m not constantly arranging so many open menus. Zooming in and out is seamless as I cleanup my vector paths, as you can see a lot of them didn’t close completely.
Colors, gradients, and menus
The gradient tool is pretty much the same as Illustrator’s, although I think Illustrator had nicer default color swatches. All the options are up here and are easy to understand if you hover over them, and you can even add noise to the gradient colors. Of course you can pretty much do anything in Illustrator that you can do in Affinity, but here the workflow and navigation feels more modern and intuitive. For example, Affinity uses sliders to control sizing and zooms, whereas Illustrator relies on its mainstay of drop-down numerical boxes, Affinity Designer’s sliders are a more intuitive way to determine sizing, whether you’re determining the appropriate stroke width or layer transparency.
If you haven’t used a vector graphics program before, or if you’re migrating from Illustrator like me, then tools are more or less in the same place. Except Affinity feels like a product designer removed every tool I don’t use, and kept everything I do use, then displayed it all more clearly and made everything faster. One drawback: Affinity doesn’t have a dedicated Image Tracing tool.
Compatibility
The file extension Affinity Designer uses is .afdesign, so to collaborate you would either share it with someone who uses Affinity, export it to another format like PNG, JPG, SVG, PDF, and I think the .PSD photoshop file too. But the risk in exporting to other formats is always that elements may be lost in translation, so that exported .AI files from Affinity Designer may arrive at the printer with missing or altered layers, making proofs even more important than normal. But it does import any Adobe extension file, so while it may not have the same level of integration and industry ubiquity as Illustrator within the Adobe ecosystem, there are easy workarounds.
Here’s the finished design I made with Affinity Designer:
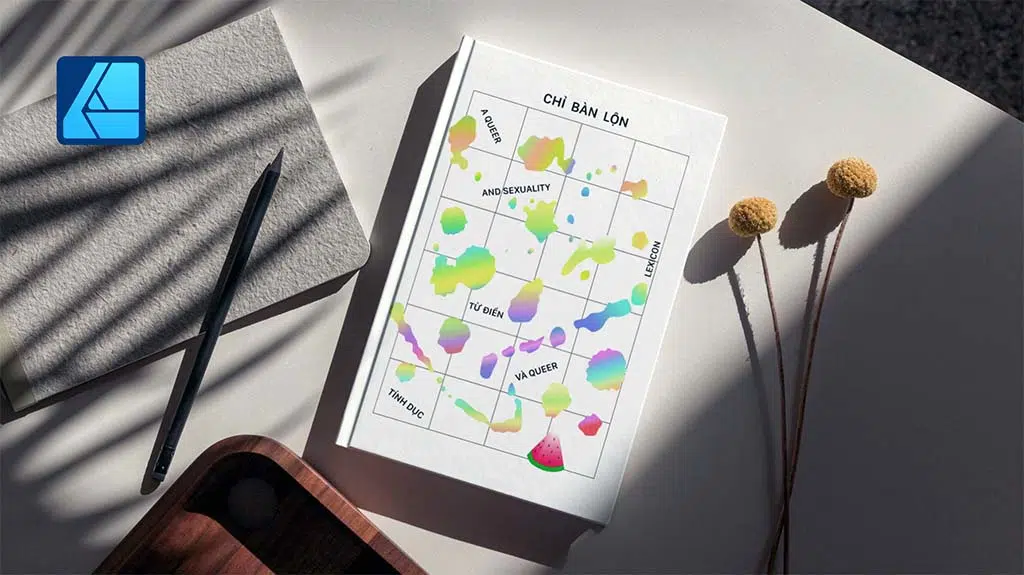
And here are the final versions, put into book mockups:

Conclusion
As you can see, the design process for both were … pretty much the same. Although Illustrator may have an edge in certain features, I just enjoy using Affinity Designer so much more when it boils down to the basics of actually drawing with it. Compared with how streamlined Affinity is, Illustrator is really hardcore and only a small percentage of people actually use all of the features.
On the other hand, Affinity Designer is faster, cleaner, easier to use, and cheaper. I actually got a free, three-month trial of Affinity with my Wacom One tablet, but you can buy it once for only 50 dollars, and own it forever. With how quality the product is, I’m pretty confident they’ll continue to update the program with quality features.
Now, will Affinity Designer actually replace Adobe Illustrator? Probably not. But there’s really nothing you can do in Illustrator that you can’t also work around in Affinity. And with Canva’s recent acquisition of Affinity, I think they could really challenge Adobe’s dominance over graphic design software in the coming years, especially in the AI space and for the 99 percent of people without design training.
The choice between the two ultimately depends on individual preferences, workflow requirements, and budget considerations. But if you’re looking for an excellent, cheaper alternative to just simply draw vector graphics, then I would highly recommend Affinity Designer.