Black River Studio’s Senior game artist, Ricardo Bess, works primarily on the studio’s mobile and VR games. As senior game artist, he’s responsible for bringing the art styles envisioned by the game designers to fruition. He also creates screen mockups, storyboards, animatics, paint-overs, concept art, UI, and level blockings that help both the game designers and artists understand and agree upon the visual goals of each project.
Ricardo was recently part of the art team for a VR game called: Conflict0: Shattered. In this article Ricardo shares the lessons he learned along the way, in his own words.
The situation
We had a rough start, I was new to the company and the art team was trying to figure out the overall look of the game, but we didn’t have a clear understanding of it, so it was hard to evaluate what we were trying to achieve. I had proposed a stylized approach to the art, but this didn’t resonate with many of the team members.
At this point, we had developed a simplified scene to help us envision what the game would look like, and a not-very-successful proof of concept.
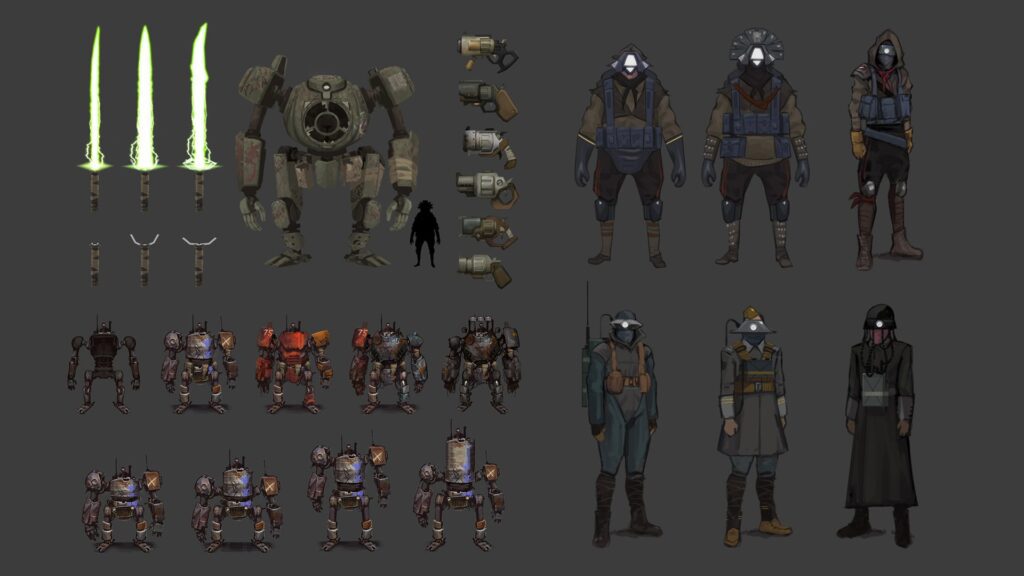
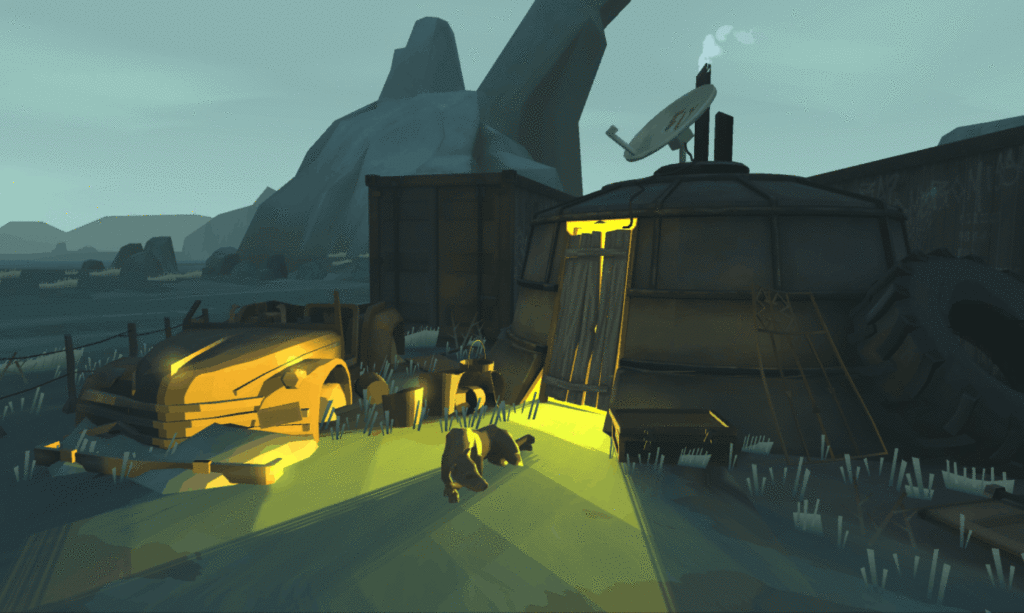
At this point we had a major time cut in our schedule and had three months to deliver the final product. Knowing that we had to be extra efficient, I asked the game designers for a script of the game’s storyline. After some days they presented us with a diagram similar to the one below.
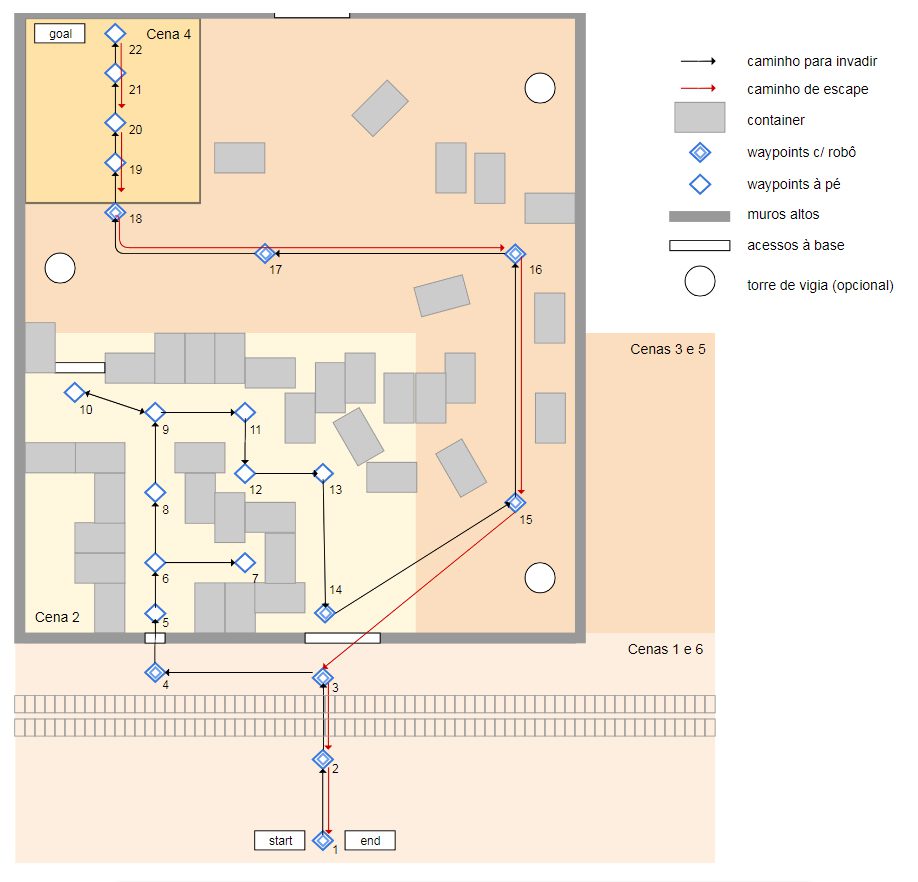
It wasn’t very detailed, but it was enough for us to start visualizing the game. Using this diagram and the script, I drew a beat board illustrating the main highlights of the game. After checking with the game designers to make sure it fit their vision, I asked the art team to scrutinize the beat board along with the diagram, so everyone (3d modelers, animators, UI/UX designers, tech artists and FX artists) could figure out what they had to do and how they could improve that vision. I kept the simple low poly style I was going for before, but I added a few visual elements which would make the art style a little more digestible for the team.
The beat board
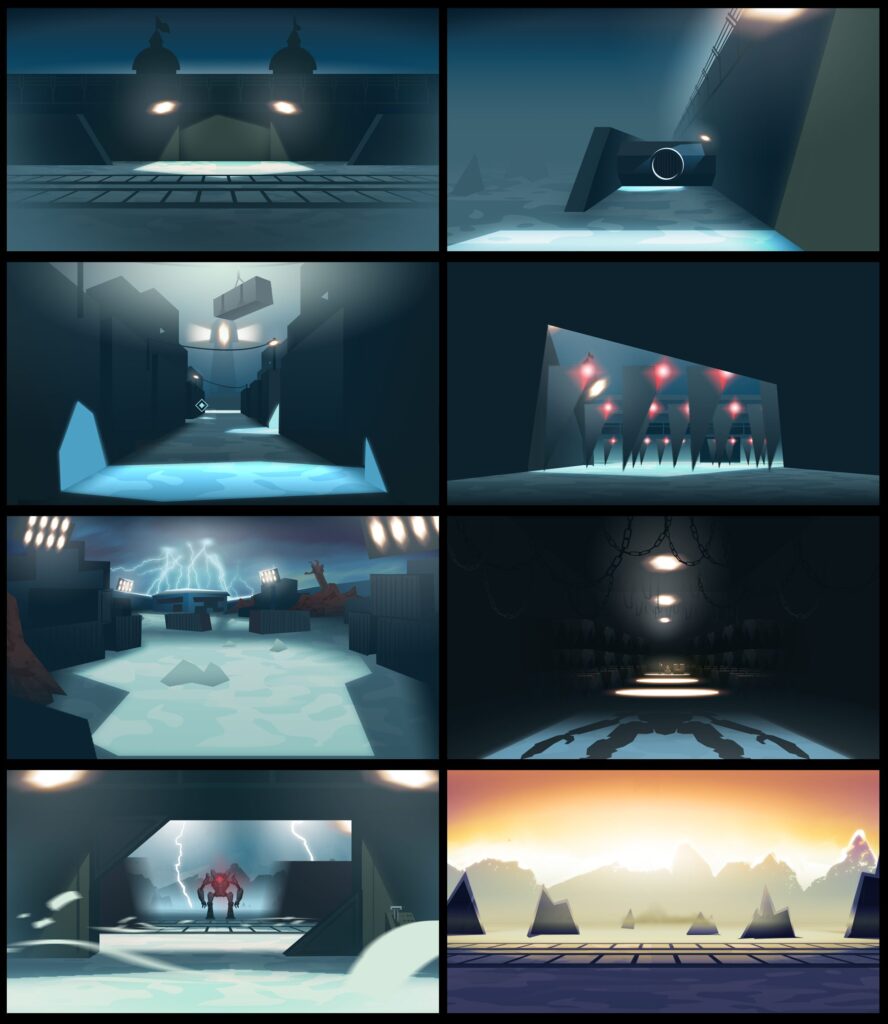
This set of images was good and it helped to make the game start a little more “real” for the art team. Now the tech artists could start thinking about the tools we’d need, the UI designers could start thinking about the communication with the players, and so on. I asked the 3D modeler to block the assets we would need as fast as he could, and in a couple of days he delivered the blocked 3D assets and I sat down with one of the game designers to make the level design. As he laid the assets on the scene I made sure to ask what he was trying to achieve with his asset compositions. After we designed half of the level together, I went to my computer and Cintiq and made a second pass at all the level designs, looking for more pleasing and entertaining compositions (always respecting his established intentions).
At the time I didn’t have a VR headset to test the level design, so I managed to use a workaround: the game locomotion was based on waypoints (to avoid motion sickness), and I used these waypoint positions as cameras to check the level design. Though it was still a flat screen, it was the most precise way I had to exactly mimic the player viewpoint. Because of this workaround, we avoided problems we’d normally face during the proof of concept phase (when the game designers laid out the standalone levels) and, although this freed the artists to work on other things, it made the levels lack in appeal and staging.
We continued this process till we had all the outdoor parts of the level blocked. Next the project tech artist made a first pass at the lighting, trying to achieve the overall mood indicated by the beat board.
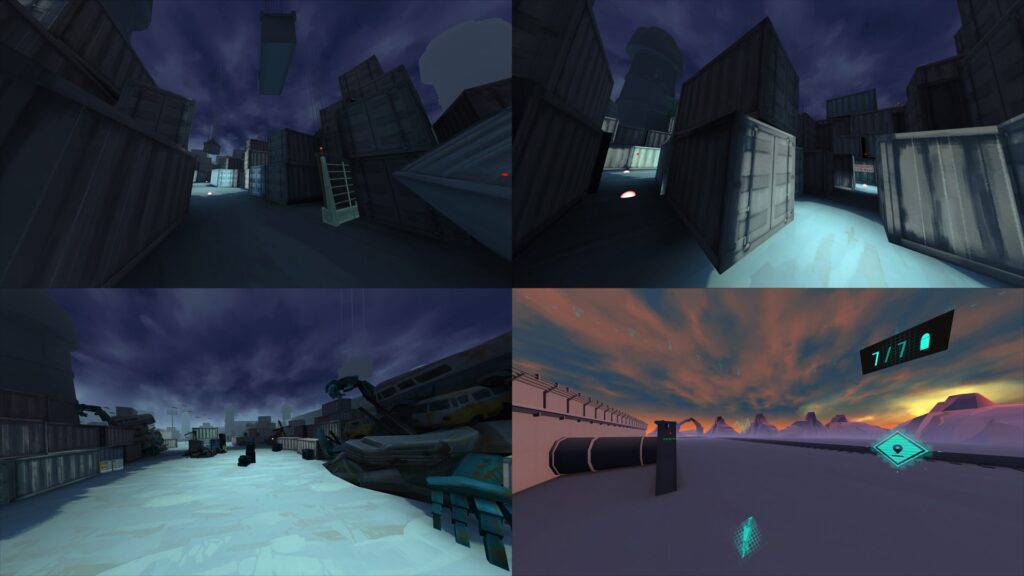
Since the beat board was made of rough-quality, bi-dimensional images and the game was a VR title (360° first person) we had room for improvement. So I took some 360° panorama screenshots from the lighting first-pass and painted over the concept art images for some of the key places.
All the art I created for this project was on a Wacom Cintiq 22 HD. In all of the 360° panorama paintings, the Cintiq allowed me to rotate my paintings and edit them directly on screen, which let me to work on small details without losing the reference of the whole picture.
From then on it was more a matter of daily production – figuring out what could be added to improve the game (searchlights, rain, droplets of water, etc.) and QA (looking for lightmap issues, missing polygons, etc.) – and constant iteration.
Lessons learned
- It’s OK to change the core of the game, but never lose sight of what the stakeholders are expecting for the final product.
- Always plan to make a game whose production fits the time you have. Maybe you just don’t have the resources you need to make the masterpiece you want to.
- I didn’t expect the art team would react so negatively to the art I was proposing. I tried to show top industry artists as reference, I was looking for fast producing assets and pipelines, and yet almost everyone was turning their noses up at my ideas. It’s essential to spend some time knowing the team before getting into production.
- Make sure everybody can visualize the end product (especially those directly involved with the end look of the game). This sets a goal and when the team knows what has to be done, they can spend their time doing it.
- Try to discover what is preventing people from doing their work and fix it (even if it is not your job to do so). Sometimes designers don’t feel comfortable working in the game engine, so be their hands for them. Sometimes 3D artists need an asset list of what has to be modeled, so take 15 minutes and make the list for them.
- Production time cuts and team members being reallocated to other projects are problems. Most of the time you can’t do anything but cut content to make deadlines attainable.
About Black River Studios
Black River Studios is a Brazilian game company established in 2015 that develops awesome digital entertainment experiences utilizing cutting edge technologies. They are the creators of critically-acclaimed games such as: Jake & Tess’ Finding Monsters, Rock & Rails, Angest, and Conflict0:Shattered. The studio specializes in creating games for Virtual Reality and Mobile devices which are both highly immersive and entertaining.
For more information, check out the Black River Studios website, or check out Ricardo Bess on Behance or at his website.

