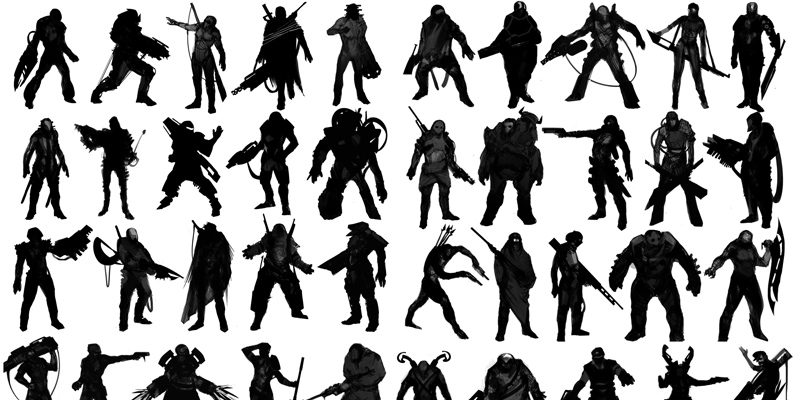
Header: 60 Thumbnails of Future Soldier by vefumm on Deviantart
—
It’s still basically back-to-school time. We’re one month in, reaching the part of the semester where normally, students would be getting settled into campus life and getting into the swing of their classes. Except getting into the swing of anything is impossible in 2020. A lot of art students are taking a gap year, and many of those who aren’t will be taking Zoom classes and doing all of their drawing at home.
Besides connections, the most valuable thing learning art in a class setting gives you is an itinerary. The teacher chooses a path and you take it in order, based on what they think is the optimum learning course. Is it really? Varies wildly from teacher to teacher. But the point is, the structure is there. At home, you’ll inevitably end up jumping around, unsure what you should be doing at any given point. You can literally be drawing anything. What’s the best use of your time? Grinding out exercises? Drawing your OC lookin’ cute?
We might have a hard time staying on task with no one checking over our shoulders, especially since we don’t have the work-life separation of having to go to a physical campus.
But this article is for everybody else, too. Whether you go to art school or not, most of your education over the course of your life will be self-guided. So what’s the most efficient way to go about it?
How to use your time
1. Study and practice in equal parts
“Practice, practice, practice,” sure. But if you’re practicing the wrong way, you’re just teaching yourself to do bad drawings faster. For maximum efficiency, you have to build study and deliberate incorporation of what you’ve learned into your drawing routine.
Youtuber YanSculpts lays out an exact process for getting maximum benefit from this combo: First, you draw the subject—in his example, a face—from reference. Then, you take the time to break it down, studying the head shape from different angles and the underlying muscles: this is the part where you do a bunch of studies and quicksketches. Then try drawing it from imagination. Repeat until you’re good.
And whenever you find yourself struggling to draw something and can’t get it through just repetition, a tutorial on it should be your first recourse.
2. Vary between practice and projects
Think of drawing practice as training for marathons: It’s essential, but you still have to go on marathons. A lot of your practice should be specifically for your projects, too. If you’re drawing a complicated illustration and find there’s a certain part you just can’t get right, stop and do studies of that thing until you think you have at least a functional understanding of it.
3. Set aside time to focus only on drawing
Focusing exclusively on drawing is sometimes hard for me, in no small part because when I’m working on a major piece, my workdays can go into the teens of hours. Am I supposed to go that long without a single Korone video?
The answer is aiming for short bursts of intent focus. There’s a good reason you’ve probably heard this a million times. And of course, the follow-up suggestion is always to try the Pomodoro Technique: Work for 25 minutes, break for five minutes, repeat three times, then on the fourth, break for fifteen.
I’ve messed around with timing myself in the past, but I decided I’d finally get serious about it. So I went to Microsoft Store (clearing the cobwebs off it) and downloaded a Pomodoro timer I could pin to my taskbar. Try to stick to a schedule once you pick one, but remember that not everyone works the same way. If 25 minutes ain’t it for you, monitor yourself to find the amount of time you can work without distractions* before you start feeling on edge or burnt out.
*Music is allowed, or podcasts and audiobooks once you enter flow. No TV, even as background noise: You’ll eventually want to look at it.
And remember, no one’s forcing you to grind all your work out in one session. If you’re the kind of person who can’t be broken out of their trance once they get started, awesome. But remember you can also get through entire projects just doing 30 minutes one day, an hour the next, and so on—sometimes even faster than if you work for hours on end, but only once a week.
4. But build drawing time into your daily life
There’s an old paradox about a boy who asks a priest if it’s OK to eat while he prays. “Of course not!” says the priest. “Prayer needs your undivided attention.” He then asks if he can pray while he eats. “Of course! You can pray while you do anything.”
Art is exactly like talking to G— OK, not really, but the principle is the same. When you’re focused on a particular exercise, try to stay focused. But if you have some spare time, you can definitely draw in a pad while, say, in audio Zoom calls with friends or watching Netflix. See the section on quicksketching later.
5. …Don’t forget breaks, though, and here’s why.
You might know, as stated above, that the brain can only focus for so long. But if you’re like me, you can convince yourself that you’ll simply make up for it by working less intensely for a longer time. But there’s another problem with that: Practicing tired brings what’s called “diminishing returns:” You keep putting in the same effort for less and less reward. The more burned out you get, the harder a time you have absorbing lessons and even drawing straight lines. Forcing yourself can result in drawings that are stiff or shaky instead of fluid and energetic.
I also know multiple artists who’ve injured themselves. I once lost the ability to squeeze things toward the end of an intense monthlong piece. Fisheye Placebo’s Wenqing Yan wrote about suffering from a crippling wrist injury that left her permanently unable to draw for more than a few hours a day, and called letting it get to that point her greatest regret. Julia Lepetit of Drawfee tells me she once injured her hand so badly due to overwork she ended up in a cast, unable to draw completely for six months, and still has sporadic pains from it to this day. Needless to say, this kind of thing will cancel out a lot of progress.
Also, take naps.
Technique
6. Practice both copying and drawing from imagination
“I had a drawing teacher in college who said, ‘Draw what you see, not what you know,’” says design writer Emily Potts. This is also common advice, and It’s… half-true. If you want to get as close to realism as possible, it’s great advice, but if you want to draw from imagination…. Well, you can only draw from what you know.
On the flipside, drawing without reference is a cool flex, but in the end it’s just a flex. Viewers only care what the finished product looks like, so don’t focus specifically on learning how to do it. Looking at a page of Akira or a Dennis Chan painting, do you think, “If I found out he used reference, I can’t enjoy it?”

“Psh, let’s see you do it blindfolded.”
Drawing from memory is mostly to ensure that you have the right way to do it memorized so that you can recognize if you’re doing it wrong from then on. The most essential skill a well-rounded artist needs is deconstructing and combining references. So basically, when you’re learning, drop all your preconceptions and copy what you see. Then, your goal is to build the skill to draw it from understanding.
7. Practice drawing subjects from a bunch of angles.
The holy grail is being able to think fully in 3d—to see an object from one angle, mentally sculpt a 3d model of it, then rotate that model and know how to draw it from different angles based on vanishing point perspective.
Side note: This also requires a basic knowledge of how light and shadow work with forms, and figuring out how to render texture. That’s what most of the drawing fundamentals boil down to.
8. Practice both digitally and traditionally.
Raw drawing skills and the use of digital tools are two separate disciplines, and it helps to practice them separately sometimes.
9. Vary between erasing a lot and not at all.
When I was a teen, like everyone who wasn’t a prodigy, I suffered from wonky faces, inability to draw symmetry, not getting how bodies were shaped in ¾ view, the usual. But I resolved to erase over and over until I got it right. This could make a simple character drawing take several hours, but training myself to be that perfectionistic paid off in the long run once I learned to get my drawings to the same standard faster. Possibly the most common flaw I see in amateur artists is noticing something’s wrong and not fixing it.
But years later, I started doing #noeraser challenges, starting when I was working a call center job and would sometimes only have a pen and printer paper to draw with.
So, for traditional practice, you’ll want to put in most of your time with pencils, but I also advise you to try the simplest drawing tool out there: The humble ballpoint. It’s skill practice in its rawest form. No eraser, Fox only, Final Destination. It’ll do wonders for your accuracy—and self-esteem, because when you nail a drawing you’ll feel like Kim Jung Gi.
Eventually, you’ll learn to erase just the right amount.
10. Quicksketch as often as possible
Quicksketching is, as I’m sure you’ve guessed, trying to express the subject as fast and in as few lines as possible. I do mine on paper so I don’t have to waste hard drive space, but you should use whatever medium you’re most comfortable with. My favorite thing to use it for is visual note-taking. Often, when I’m reading a comic or watching a show, I’ll stop to sketch out interesting poses or design elements for reference later. It’s like a screenshot with a little drawing tutorial built in. This morning I drew some expressions from Kill La Kill, which has some of the best funny faces in anime.
I also use it for most studies, all thumbnails, and the first drafts of any character or object design. It’s a lot of fun and the best way to build fluidity. These are for yourself, not social media. I almost never even scan mine, which is why there aren’t any examples shown here.
Practices
11. Don’t forget the old standards
There are a lot of simple drawing exercises that make for good warmups. Feel free to disagree, but I think these are the most important ones.
- Gesture drawings. Gesture drawings are the most important key to being able to draw the full human figure, especially in action poses.
- Copying upside-down. This introduces a topic called defamiliarization. When you start out, if you’re copying an image, you might end up trying to draw certain elements of it in your own style, or even discarding information you don’t understand. But understanding how to draw using only shapes, size ratios, and relative positions is crucial to accurately replicating a subject, and this will teach you to focus on that alone.
- Silhouette/negative space. Whether you shade inside the figure or out of it, you’re not drawing the whole thing, just its outline, with the focus on making sure it’s easily readable.
- Thumbnails. Tiny drawings. This will teach you to create strong silhouettes and draw figures in an even simpler form.
- Contour drawings. This ensures you understand a subject’s 3d form by making a topographical map of it.
- 30-10-5-second drawings. Quicksketching at its quickest.
12. Do genuine challenges
Drawing the concerned Sailor Moon is fine, but I’m talking things that will genuinely stretch you out of your comfort zone and force you to stay out of it for hours or days. Most of these will not be found in hashtags, but they can be as simple as finding out what you suck at drawing, then drawing that fifty times.
The goal of these isn’t to prove how hardcore you are, although drawing stamina is a great thing to have. It’s not even to improve your muscle memory, although that’s a side benefit. It’s to figure out the “formula” for drawing the thing, then how to apply it to as many situations as possible.
If you always hide hands in pockets, drawing fifty hands with the correct technique will teach you how to construct them from basic shapes and keep those shapes consistent with the fingers in different positions and at different angles, while approximating the way the skin folds around them when it’s stretched or wrinkled.
These can be literally anything you want to get better at drawing, but here are some ideas.
Draw 10/20/50:
- 3d shapes in perspective: Do a lot of these, and include vanishing points and perspective lines. Whenever I need to practice something as a warmup but can’t think of anything, this is what I default to.
- Apples: Teaches you texture rendering while letting you practice shading a smooth, almost spherical object.
- Hands or feet.
- Faces.
- Simplified skulls.
- Full-face turnarounds
- Expressions. As realistic or goofy as you want.
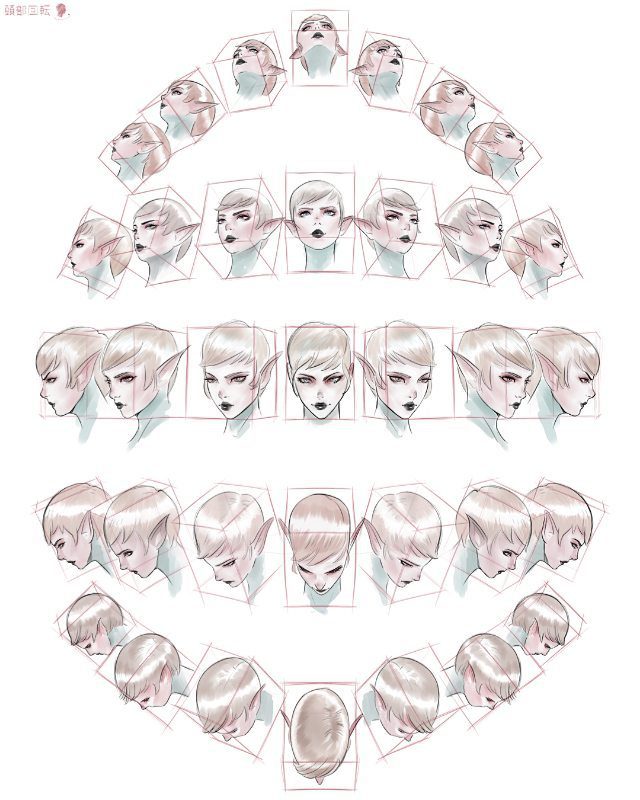
Try forcing yourself to stay on-model as if you were an animator. Check the flawlessly consistent perspective in this one by @ElolaIllustrator.
- Poses. This can be the same character or different ones, clothed or unclothed.
- Simple weapons.
- Simple animals.
- Insects.
- Simple vehicles.
- Household objects.
- Food items.
- Outfits for the same character.
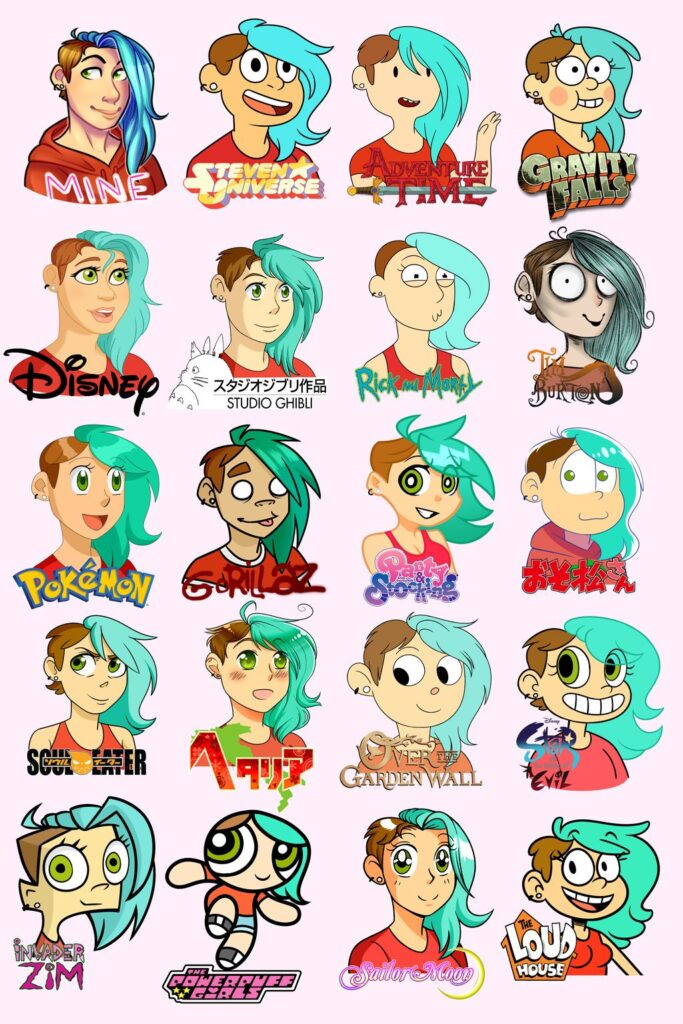
As an aside, the Style Drawing Challenge is actually more useful than the Draw this in your Style challenge, since it gets you out of your comfort zone, but also makes you realize how many more similarities than differences there are between drawing styles—and how they all have the fundamentals in common.
Further Resources
All these go into much more detail on the same subjects than I could here:
- Sycra — Iterative Drawing – The Fastest Way to Improve
- Ethan Becker — DRAWING BETTER FASTER- HOW TO PRACTICE THE RIGHT WAY
- FIXING Kim Jung Gi’s TRASH ART: DRAWING MORE WILL NEVER! EVER! MAKE YOU better
(Not what it sounds like, I promise.)
- FIXING Kim Jung Gi’s TRASH ART: DRAWING MORE WILL NEVER! EVER! MAKE YOU better
- Volen CK — I IMPROVED MORE AT DRAWING IN 1 YEAR than the 5 YEARS BEFORE – HERE’S WHY
(Has anyone told the Youtubers their caps lock is on?)
About the Author
![]()
CS Jones is a writer and illustrator based out of where bad things happen. He finally got around to updating the list of his articles, so you can see it here. You can also follow him at @thecsjones on Twitter or Instagram, where he’s once again active.

