Disclaimer: this article is adapted and republished with permission from an article by David Revoy on his blog.
David is not a professional ergonomist and does not work in the healthcare industry. He wrote this article from the viewpoint of a digital painter, as he has painted almost daily with digital graphics tablets since 2002. This article is based on his observations and personal experience, and should not be considered medical advice.
A graphics tablet with perfect ergonomics doesn’t exist.
However, you’ll eventually adapt to the unique specifications and ergonomic issues of your particular tablet model and make it perfect for you. This adaptation of your body to your hardware will have an impact on your health in the long run. It might also affect the pleasure you take in drawing and painting.
Since 2002, I have bought and used a lot of tablets in an attempt to build the best setup I could. This was necessary for my comfort because I was doing digital painting all day. Nowadays, my quest for the best tablet continues, as the technology keeps evolving year after year. If you want to read more about what I’ve used and why, read my Tablet history log article, from 2002 to today. But beyond the choice of the hardware itself, I’ve also studied other aspects of my setup. The first aspect that comes to mind is the ergonomics of my desktop position. So, let me share my experiences with ergonomics.
General thoughts about other input devices
First, what about the standard input devices most of us are familiar with? I am certainly not the only CG artist who uses a lot of keyboard shortcuts to speed up my workflow. And it is tempting to think graphics tablets can fully replace computer mice. Sure, they can. But for some workflows or games, it may not be the most convenient way of using the software.
The keyboard
Vendors and designers of graphics tablets have clearly understood the value of keyboard shortcuts, and have started to add more and more buttons to their products to give easier access to more custom shortcuts without a keyboard.
In the last couple of years, tablet vendors have started to innovate and have added tiny devices that look like remote controls, have added more buttons, or have removed all physical buttons and proposed a virtual keyboard with a touch interface. I’m not sure which setup will become dominant.
The mouse (if you use one)
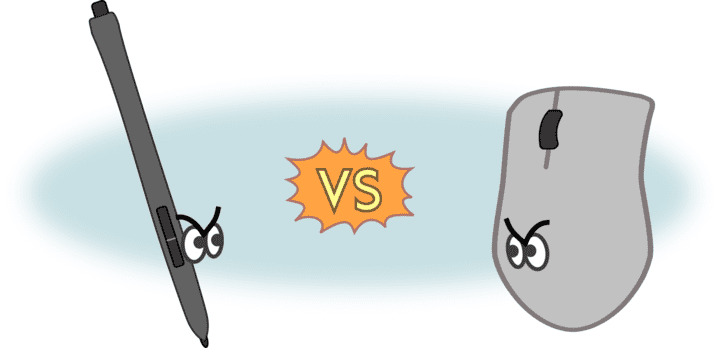
In certain situations, a mouse will be steadier and more precise and so the workflow will be faster using it. A lot of software is developed with the features of a classical mouse in mind (e.g. the mouse wheel and mouse wheel click to zoom/pan). That’s why I think it is necessary to keep an extra mouse on the desk.
Note about older Wacom tablets: Before 2010 many tablets − such as the Wacom Graphire 3 − had a mouse delivered in the package. This mouse only reacted to the active surface of the tablet. This trend was abandoned, and I can understand why: the mouse had to be removed from the active surface area each time the user switched between the pen and the mouse. I had two models like that; the built-in mouse was neglected in favor of a classic mouse connected to the system. I never used it.
1. Ergonomics for large graphics display tablets
A large graphics tablet (without a built-in monitor) like the Wacom Intuos pen tablet is, in my opinion, the most precise and comfortable from a technical point of view.
For a modern desktop user with a large external monitor, adopting a large tablet makes sense for better control of the pointer on the monitor. Indeed, if you draw a coin-sized circle on your small tablet and it displays as a huge balloon on your monitor, you’ll feel you have no control over painting details. You can imagine how you’ll struggle to draw a little eye or a detail. It will always be possible but you’ll have to zoom in a lot to balance your hardware’s precision issues.
But large tablets have also their drawbacks. The first is their price, and the second is the room they will take on your desk.
Positioning a large graphics tablet, to the side
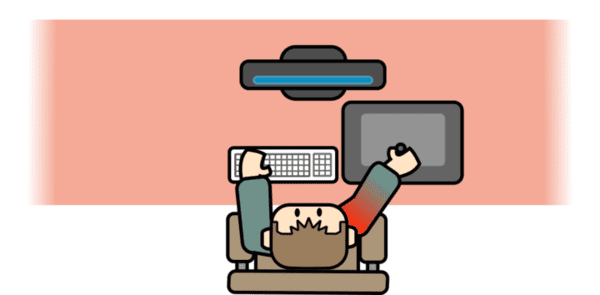
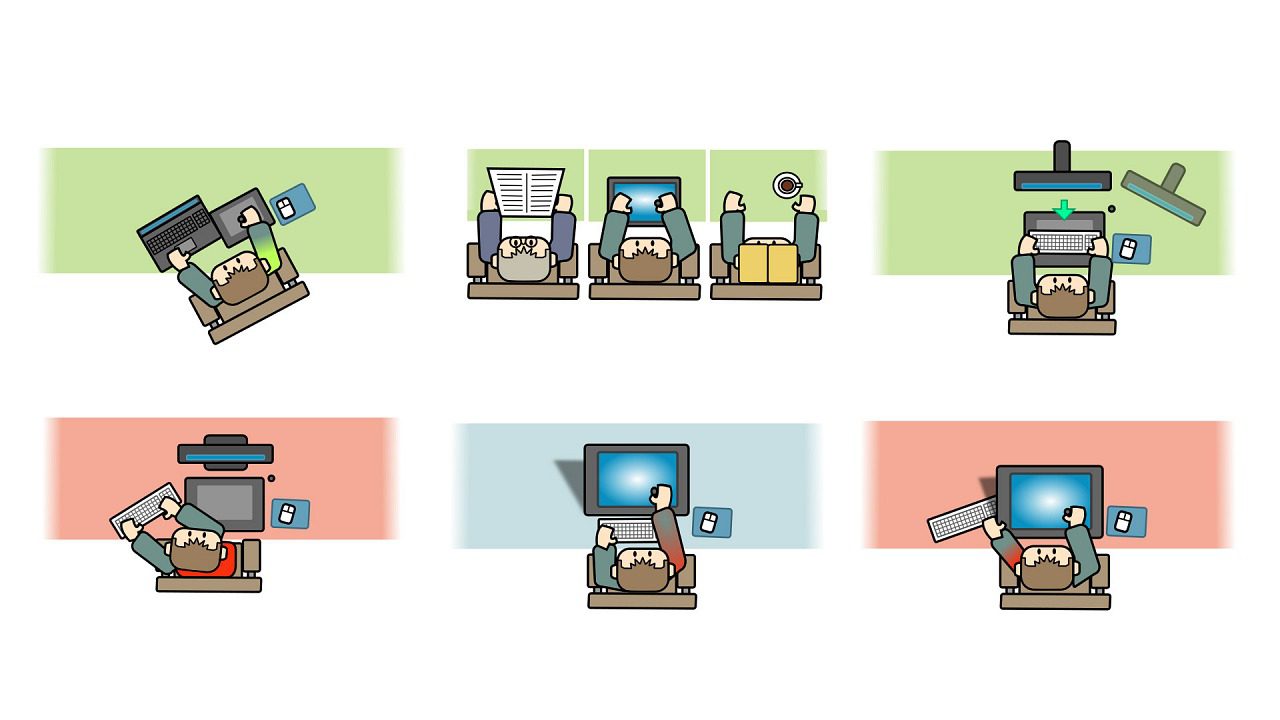
The first place people usually put their new, large graphics tablet is beside their keyboard, like a mouse pad. This position can put stress on the arm and shoulder if your main task is drawing, but could work if your main task is typing text and you’ll need the tablet occasionally. I often see this position being used by the people who were convinced that a graphics tablet should replace the mouse.
Some companies say the tablet is a healthier replacement for the mouse. For someone with repetitive stress injury from mouse overuse, a tablet can be indeed a good option. While visiting studios of 3D artists and video editors, I often saw this type of layout on desks. At the end of the day, I wouldn’t advise it myself unless you need a large tablet and have problems with mice.
Positioning a large graphics tablet, centered

Another solution is to put the graphics tablet in the center of the desk and your keyboard off to the left (or right, depending on which hand is dominant). Having the active surface of your tablet aligned to your display in this way allows comfortable motion and increases your ability to paint for hours.
But if you need to reach for the keyboard often, this layout can quickly become a pain. It will force you to twist your back to face the keyboard, even if it’s only a slight angle, and you’ll have to counter-rotate your neck to look at your monitor. Also many useful keyboard shortcuts (eg. Ctrl+Z, Ctrl, Ctrl+S, and Crtl+A) are located toward the left side of the keyboard, so I wouldn’t advise this position myself.
A tray for the keyboard (or keyboard on lap)
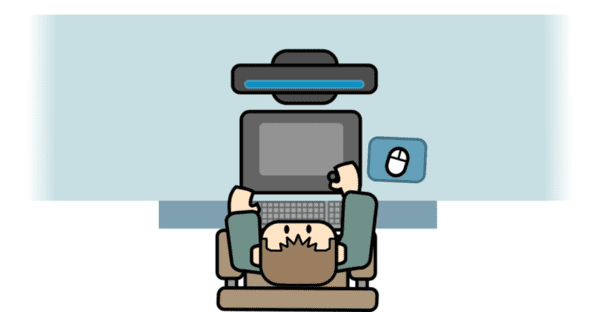
To keep the keyboard easy to reach, a reasonable solution is to adopt one of these trays you can screw under any type of desk (except if your desk is made of glass) to get a keyboard that can be mounted under the desk. The cheap alternative is to put the keyboard on your lap. I have tried this setup but I’m not a fan; this position makes it difficult to type on the keyboard.
Curved desk
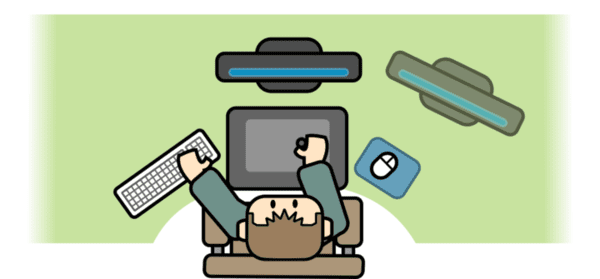
Adopting a curved desk with a swivel chair improves the situation a lot compared to putting the tablet in the center of a straight desk. By mapping the devices closely all around you, you can avoid twisting your back or extending your arm too much. You’ll also benefit from having a part of the desk to rest your arm on.
I had this setup for a month while I was working at a studio and it was working really well. One of the problems with a curved desk, however, is that they are often big, deep, and corner desks, which need to be placed in a corner of your room. I can’t get one for use at home for this reason.
Keyboard on top of the tablet
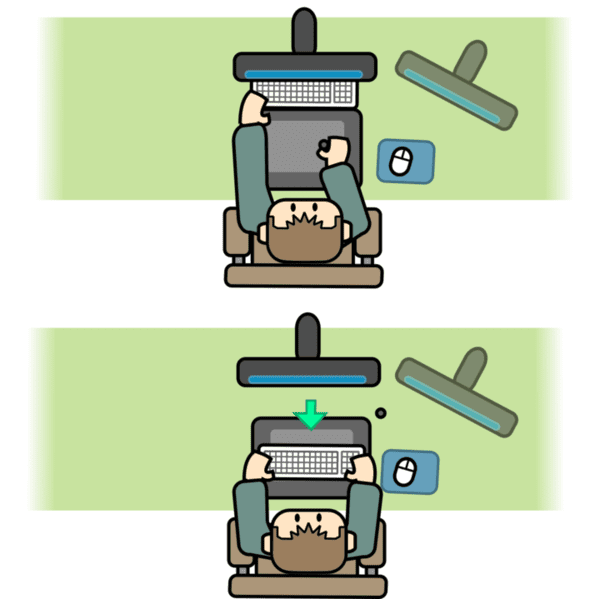
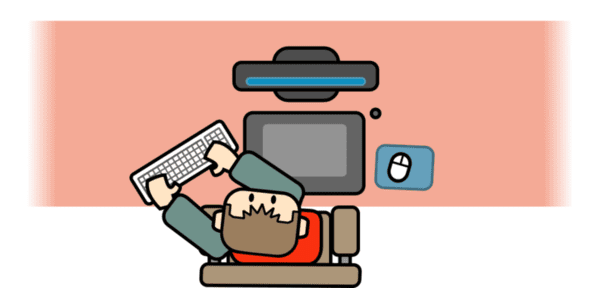
My favorite layout, the one I’ve been using for years, requires a little bit of DIY. First, the monitor needs to float on one of those horizontal metal arms. That way you’ll have room to put more things under the monitor (you won’t be blocked by the monitor’s stand).
For the typing/keyboard position: place your keyboard on the far side of your tablet. To protect the fragile surface of your tablet from scratches, you’ll need to glue little sticky pads under your keyboard (usually made for putting under furniture, sold in DIY stores). The keyboard will glide more easily this way, too, switching between positions with just one movement.
Then the last piece of the installation is a thick book or a plank of wood on the far side of your big graphics tablet, right under the display (not shown in the figure to the right, however). It will be an area for you to push the keyboard to, or to grab it when you need to type something. The keyboard will remain also accessible for using shortcuts while painting.
2. Ergonomics for small/medium graphics tablets
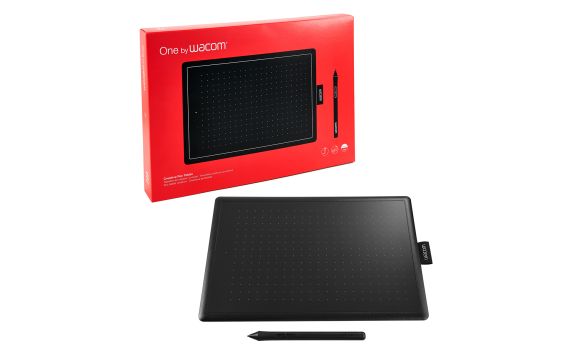
These graphics tablets, like the One By Wacom, generally have a smaller price and a smaller active area (and still no built-in monitor). They are of course less precise than the larger tablets.
Tablet vendors try a wide variety of attractive designs and optimizations to create cheap products. That’s why so many small/medium tablets exist on the market, with a wide spectrum of quality and design. There are not more of them because they are better, but just because they are much cheaper.
They are often considered entry-level tablets, for all sorts of consumers (and many digital artists started this way, me included). With a desktop computer, the ergonomics of small graphics tablets are usually better than those of larger tablets.
Angled-axis layout
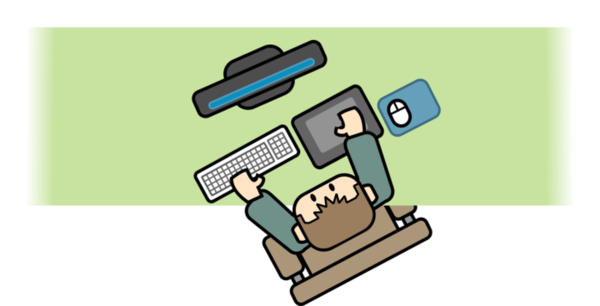
Here is how I prefer to use this size of graphics tablet: I rotate my whole body, putting my body’s axis at an angle to the edge of the desk. This gives me a large spot to rest my elbow. I can paint for longer periods this way. You can note that while it was problematic to keep a large tablet on the side of the keyboard, it isn’t a problem for a smaller tablet.
Curved desk
Here again, adopting a curved desk will improve the ergonomics of your workspace a lot.
3. Laptops, mobility, and travel
The users of graphics tablets often need to travel to another place to work. This means they often require a mobile way to work. A laptop can be used on the transit, at the desk of a client, in front of a classroom or during a conference. A small tablet is one way to remain creatively mobile.
The impossible match
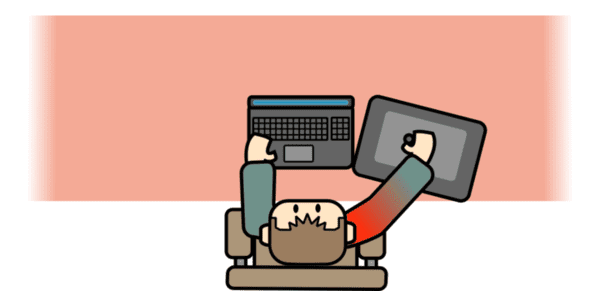
I wouldn’t recommend using a large tablet with a laptop. I know it sounds obvious, but it’s something to consider when buying a tablet – a large tablet is not very mobile-friendly.
The small tablet: flexibility
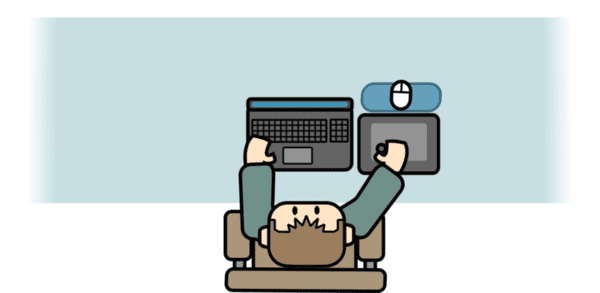
Working with a laptop and a small tablet is not that bad and can work in a lot of situations. Small tablets are usually also made in A4/Letter size, the same as a standard sheet of paper. This is great because it makes them compatible with many bags, so there are more packing options for traveling with them.
You can prevent pain in this setup by putting it at a slight angle with the desk. I taught in the classroom with a setup like this (when the desk had enough room) and I did a lot of public demos this way, too.
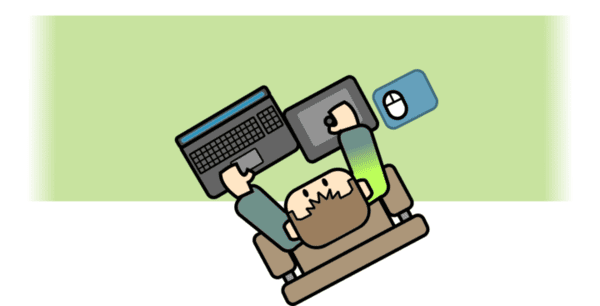
Here is another layout I enjoy using. I can cover the touch-pad of the laptop with the tablet, and align it with the monitor.
During travel
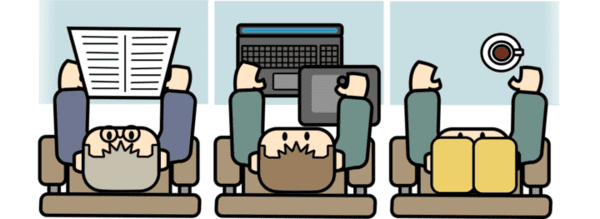
Small graphics tablets can be useful on a plane or a train. They are flexible enough to be used on this type of temporary and cramped situation. But believe me, completing your work while on a 5-hour train trip feels very rewarding.
Conclusion
While in my opinion the perfect graphics tablet doesn’t exist, the best way for you to find one that suits your body and lifestyle may well be to try a lot of them.
But I also want to insist that we all have bodies and habits that can adapt, so even an imperfect graphics tablet might still become your best tool if you take the effort to commit to using it consistently and finding the setup that works best for you.
So, if you already own a tablet, take care of it, whatever model it is; it can produce your next masterpiece. Just understand it, and with only what you find around yourself, and a bit of DIY, you can build and optimize a better environment, and enjoy your painting time longer. I hope this article inspired you to take a bit more care over your work position and think about it more.
About the author

My name is David Revoy and I’m a French artist. I’ll have soon 20 years of experience at working remotely as a freelance artist. My skills and expertise include illustration, art-direction, concept-art, storytelling and teaching; making art for comics, books, posters, board games, video games and movies.
Nowadays, I focus most of my energies on my webcomic project Pepper&Carrot. In-between the production of new episodes, I teach or do freelance commissions. Contact me at my website, feel free to support my webcomic at Patreon, or check out my YouTube.

