Though Wacom pen tablets and creative pen displays are often called “drawing tablets,” that’s not all they can be used for. Want to learn more about how I use my Wacom tablet for leveling up my writing workflow? Check out this blog post. Now, let’s take it a step further — using the ExpressKey Remote takes my writing efficiency to the next level.
What is the ExpressKey Remote for?
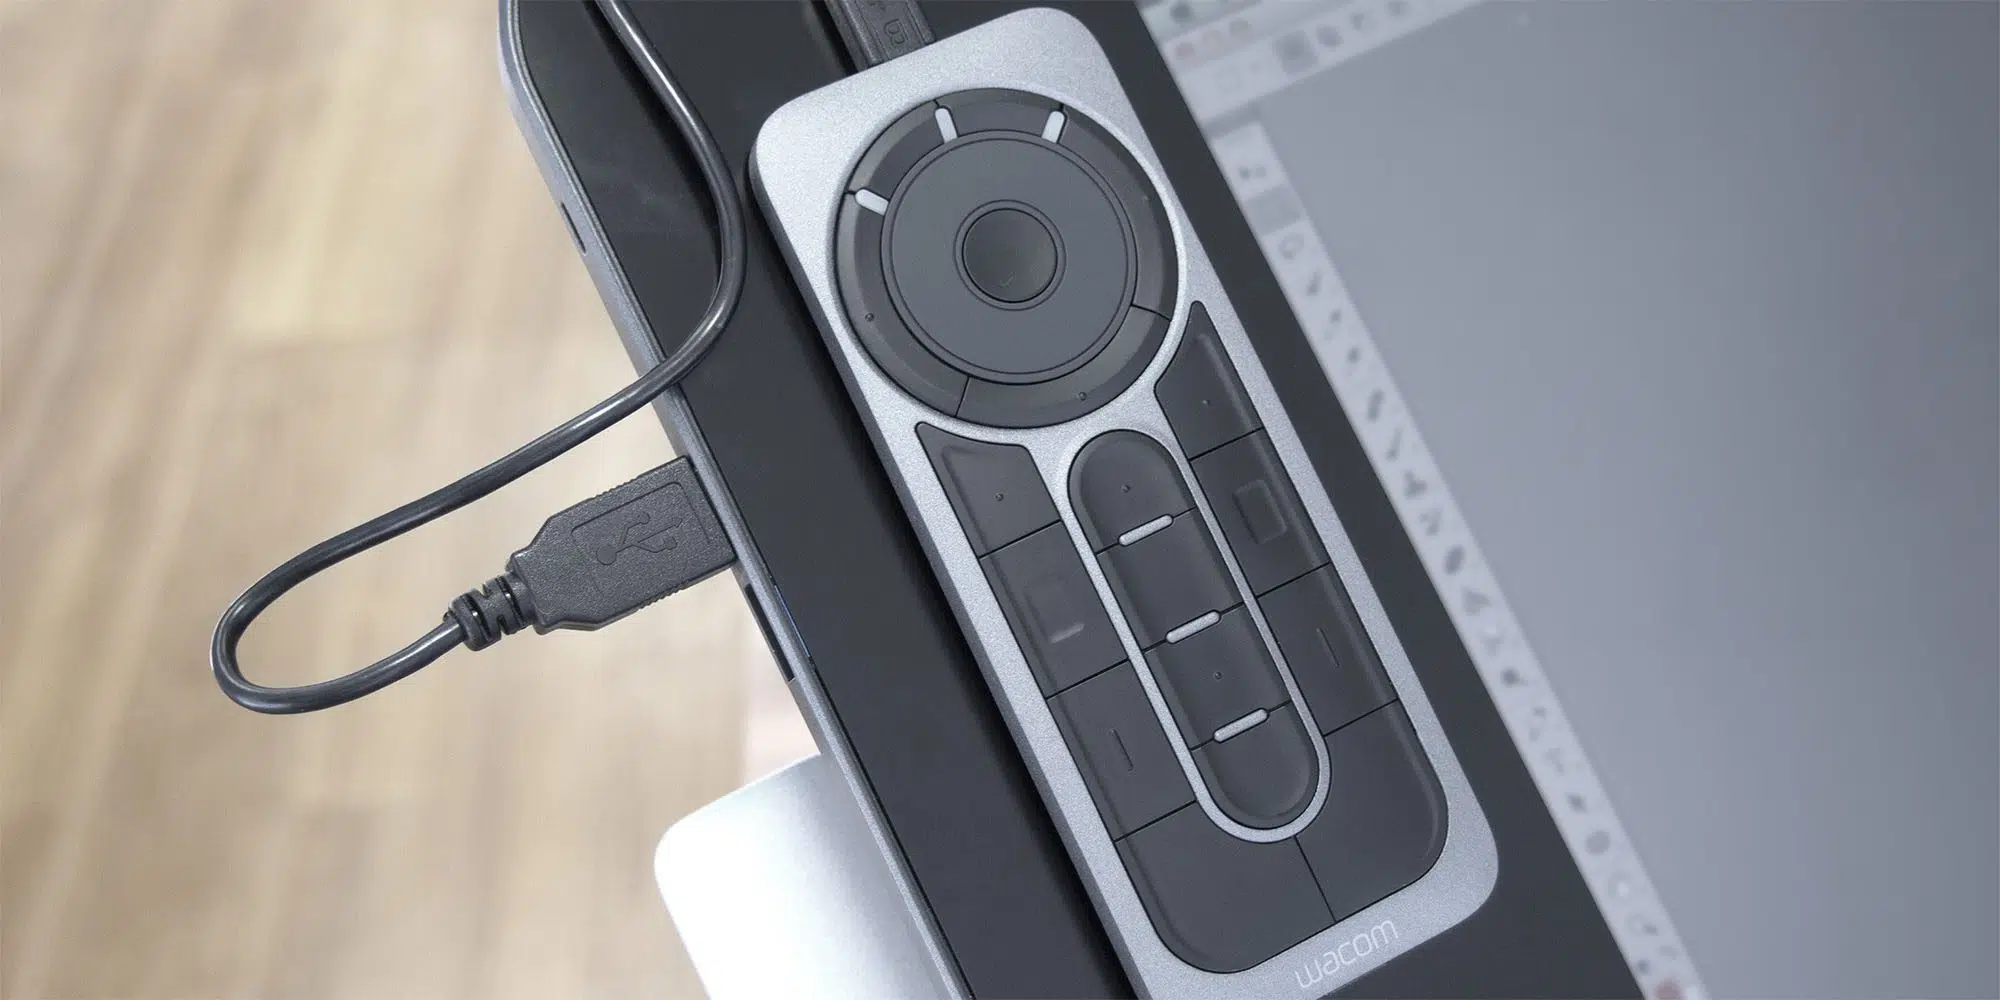
Some Wacom products — Intuos, Intuos Pro, and the new Cintiq Pro 27 — come with built-in ExpressKeys, which can be mapped to keyboard commands or to quickly perform other tasks, making workflows more efficient and customizable. But some don’t — and that’s where the ExpressKey Remote comes in.
But does it make sense to charge for a separate product that does something that, on some Wacom products, is included? Well, not so fast. First, the ExpressKey Remote has seventeen programmable buttons and a scroll wheel, compared to the four buttons included on the Wacom Intuos, for example — opening up nearly limitless uses. Because it’s separate from the device, it also can be placed anywhere, meaning setting up your workspace to be as comfortable and ergonomic as possible is completely up to you.
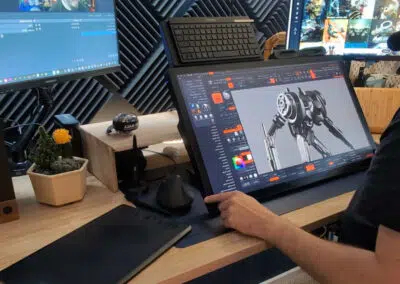
I’ve been using an ExpressKey Remote as a writing aid since I originally wrote the previous article, and sorry, Intuos, you’ve been replaced. Don’t get me wrong, using a tablet still works well. But these days, I’ve been using a combination of my Wacom Cintiq with its pen as my main display — more precise clicks, easier highlighting — along with a mouse for my second monitor, and the ExpressKey Remote, which fits all my writing shortcuts with room to spare.
It might take some time to memorize which hotkeys you’ve programmed to which buttons, but once you get fluid, you’ll be able to lay the ExpressKey Remote on your work surface — I keep mine between the keyboard and mousepad — and execute all your writing shortcuts one-handed, letting you focus on putting words on the page, not remembering hotkey combos.
Setting up keyboard shortcuts on the ExpressKey Remote
This is the arrangement I’ve arrived at after using the ExpressKey Remote, and tweaking the shortcuts, for several months for the purpose of writing things to publish online. Of course, you might have different preferences for your workflow — consider this a suggestion that you can use or build off of.
Software
I do my professional writing in Google Docs, so the focus for this article will be on Google Chrome key commands and shortcuts, but I’ve also tossed in shortcuts for Microsoft Word, since it was the program used for demonstration purposes in the last article. The difference in the two’s shortcuts are almost negligible, as they will be for most other programs.
If you’re looking for the default keyboard shortcuts for the software you use, here are shortcut lists for a handful of common alternative writing programs:
- Scrivener
- WordPerfect
- Apple Pages
- LibreOffice
- OpenOffice Writer
- WPS Office Writer
- Dropbox Paper
- FocusWriter
- Manuskript
- Quoll Writer
- Celtx
- Final Draft
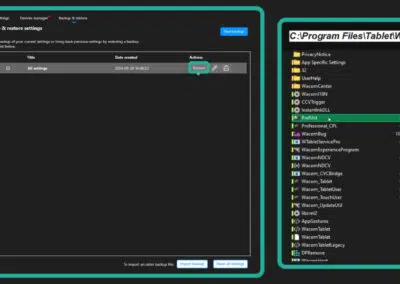
Once you know what your keyboard shortcuts are, it’s time to program onto the ExpressKey Remote. You can do this by opening up the Wacom Tablet Properties software, which can be found through the Wacom Desktop Center application.
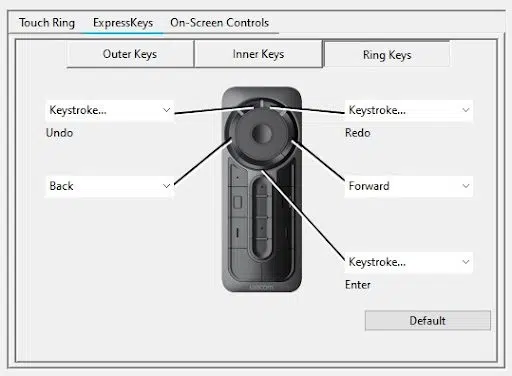
The ring keys
Left and right top: Undo and Redo
Those are the defaults, which hopefully need no explanation.
Left and right middle: Page Up and Page Down
I have mine set to Back and Forward, but equally useful would be Page Up and Page Down for navigating quickly through your document.
Bottom: Enter
This can be useful for completing other shortcuts, like Find and Insert Hyperlink, without having to return your hand to the keyboard.
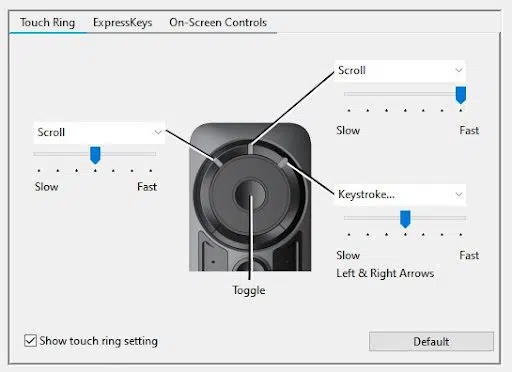
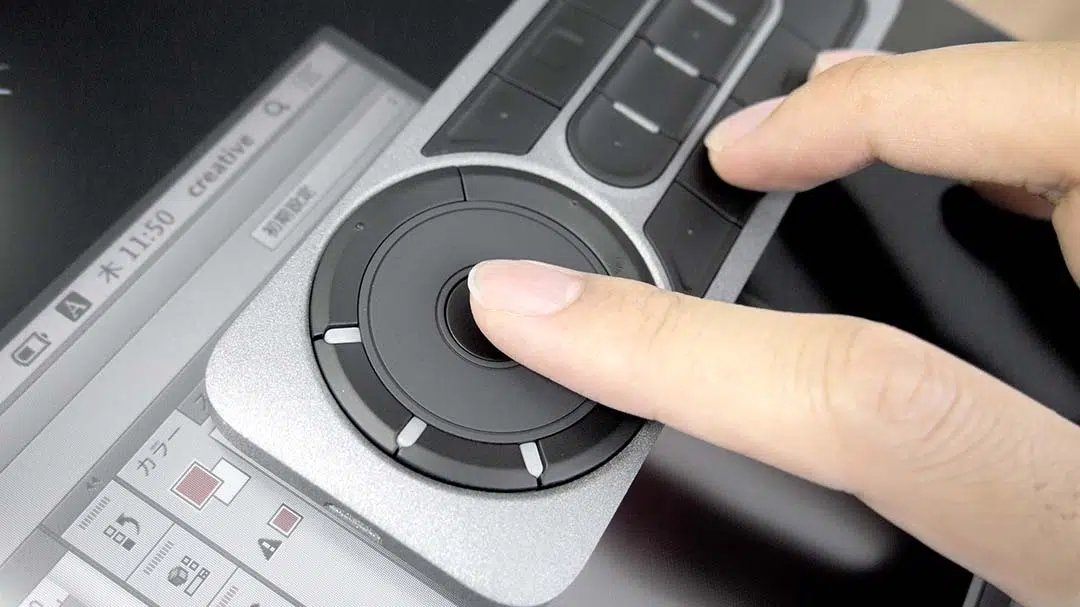
The touch ring
I don’t personally use these for writing, but one useful command is to set the left and middle to a Slow Scroll and Fast Scroll, in case you’re reading or moving through a document, and the Page Up and Page Down you set to other buttons in the previous step are too much.
For a non-writing-related use, I set the third option to the Left and Right Arrows to scrub through videos. Both functions are also uniquely useful when I’m casting a webpage to TV.
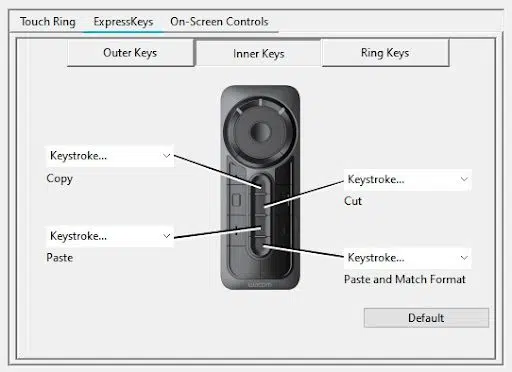
The inner keys
Top: Copy
Keystroke > Ctrl–C / ⌘–C
In my article writing work, I use Copy much more than Cut: for links, quotes, notes, all kinds of things.
Upper middle: Cut
Keystroke > Ctrl–X / ⌘–X
That being said, having Cut right below it saves me a lot of time editing.
Lower middle: Paste
Keystroke > Ctrl–V / ⌘–V
Copy and Cut wouldn’t be too useful without Paste.
Bottom: Paste and match format
Keystroke > Ctrl–Shift–V / ⌘–Shift–V
An extremely useful but little-known keyboard command, this is for when you want to copy something from one document or website, without also copying the text’s formatting — using this, you can avoid annoying mismatched fonts and line spacing and all the rest. It just pastes the text, and matches it to the destination’s text formatting.
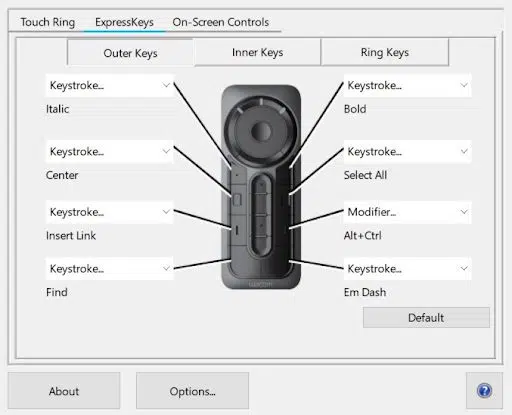
The outer keys
I use these for formatting and miscellaneous tasks. I’ve arranged the shortcuts roughly in order of usage from high to low and left to right, although I put a couple important ones on the big bottom keys.
L1: Italic
Keystroke > Ctrl–I / ⌘–I
I use italics more often than bold in both my professional and personal work, and pretty much exclusively in my fiction, so that’s right up top.
L2: Inline Hyperlink
Keystroke > Ctrl-K / ⌘–K
Highlight some text, and then hit this button to easily turn it into a hyperlink. Can work better than copy-pasting an entire URL!
L3: Center
Keystroke > Word: Ctrl–E
Keystroke > Chrome (Google Docs only): Ctrl–Shift–E / ⌘–Shift–E
In addition to inline images, I center most of my headers, so this one needed to be close at hand. Pressing the key a second time won’t return the text to left-justify — but Undo works for that.
L4: Find
Keystroke > Ctrl-F / ⌘–F
My main way to fast-navigate documents and find the relevant parts of research sources.
R1: Bold
Keystroke > Ctrl-B / ⌘–B
I still use bold for small subheaders, like the one above, so it warranted a place on the remote.
R2: Select All
Keystroke > Ctrl-A / ⌘–A
I virtually only use this to copy-paste articles I’ve written from Google Docs into WordPress to post them, but there could definitely be other uses, too!
R3: Headings
Modifiers > Ctrl–Alt / ⌘–Alt
I had no idea what to do with this one at first. I use Headings 1 through 4 almost equally, but didn’t want to use four buttons just for headings. It turns out, however, that holding Ctrl-Alt and then 0 through 4 — 0 is for normal text, and the numbers correspond to the standard headings — will apply a heading. So I set this button to Ctrl-Alt, and then while holding it, just use the number pad to quickly dial in a header size!
For this one, you’ll have to go to the Modifiers window instead of Keystroke, and check the boxes for Ctrl and Alt.
R4: Em-dash
Keystroke > Mac: ⌘– – (hyphen)
Keystroke > Word: two hyphens
Keystroke > Chrome: three hyphens
The process of getting an em dash into Google Docs used to be very annoying — but they recently fixed it! Now, it’ll automatically convert two hyphens to an en dash — the slightly shorter one, most commonly used for date ranges — and three into an em dash.
Conclusion
I encourage you to alter these shortcuts however you want and tailor them to your specific use cases.
Novelists could use an ExpressKey to keep track of word count (Ctrl-Shift-C / ⌘-Shift-C), especially if one of the options I use doesn’t fit your work style — if you’re a print-oriented writer who doesn’t use Insert Hyperlink much, for example.
If you’re one of those writers who needs to work without distraction, you could make one of the keys trigger Fullscreen Mode (F11 on Windows) for uninterrupted work. Student writers could set ExpressKeys to insert commonly-used symbols, equations, or citations in their documents.
Anything you can do with a key combo, you can do with a single button on an ExpressKey — and every time you can simply press a button, instead of manually doing something with multiple mouse clicks, or hunting around on your keyboard for little-used keys, you’ll have more time to actually devote to your writing.
About the Author

Cameron “C.S.” Jones is a West-Philly-based writer and illustrator who’s been contributing to Wacom for over three years now. You can see more of his work, including most of his contributions to this blog, at thecsjones.com, or follow him on Instagram or Twitter.
