This tutorial will allow you to create the coolest flame animation. Made with frame-by-frame animation style, you can also use it to jazz up your illustrations, or even make funky looking stop motions or GIFs. Let’s begin!
I’m planning to use this little animation as a GIF. I’m a verified artist on GIPHY, this means that whenever I upload a GIF to GIPHY, it will end up in sticker packages on most social media channels. Making use of GIPHY this way is something that I like.
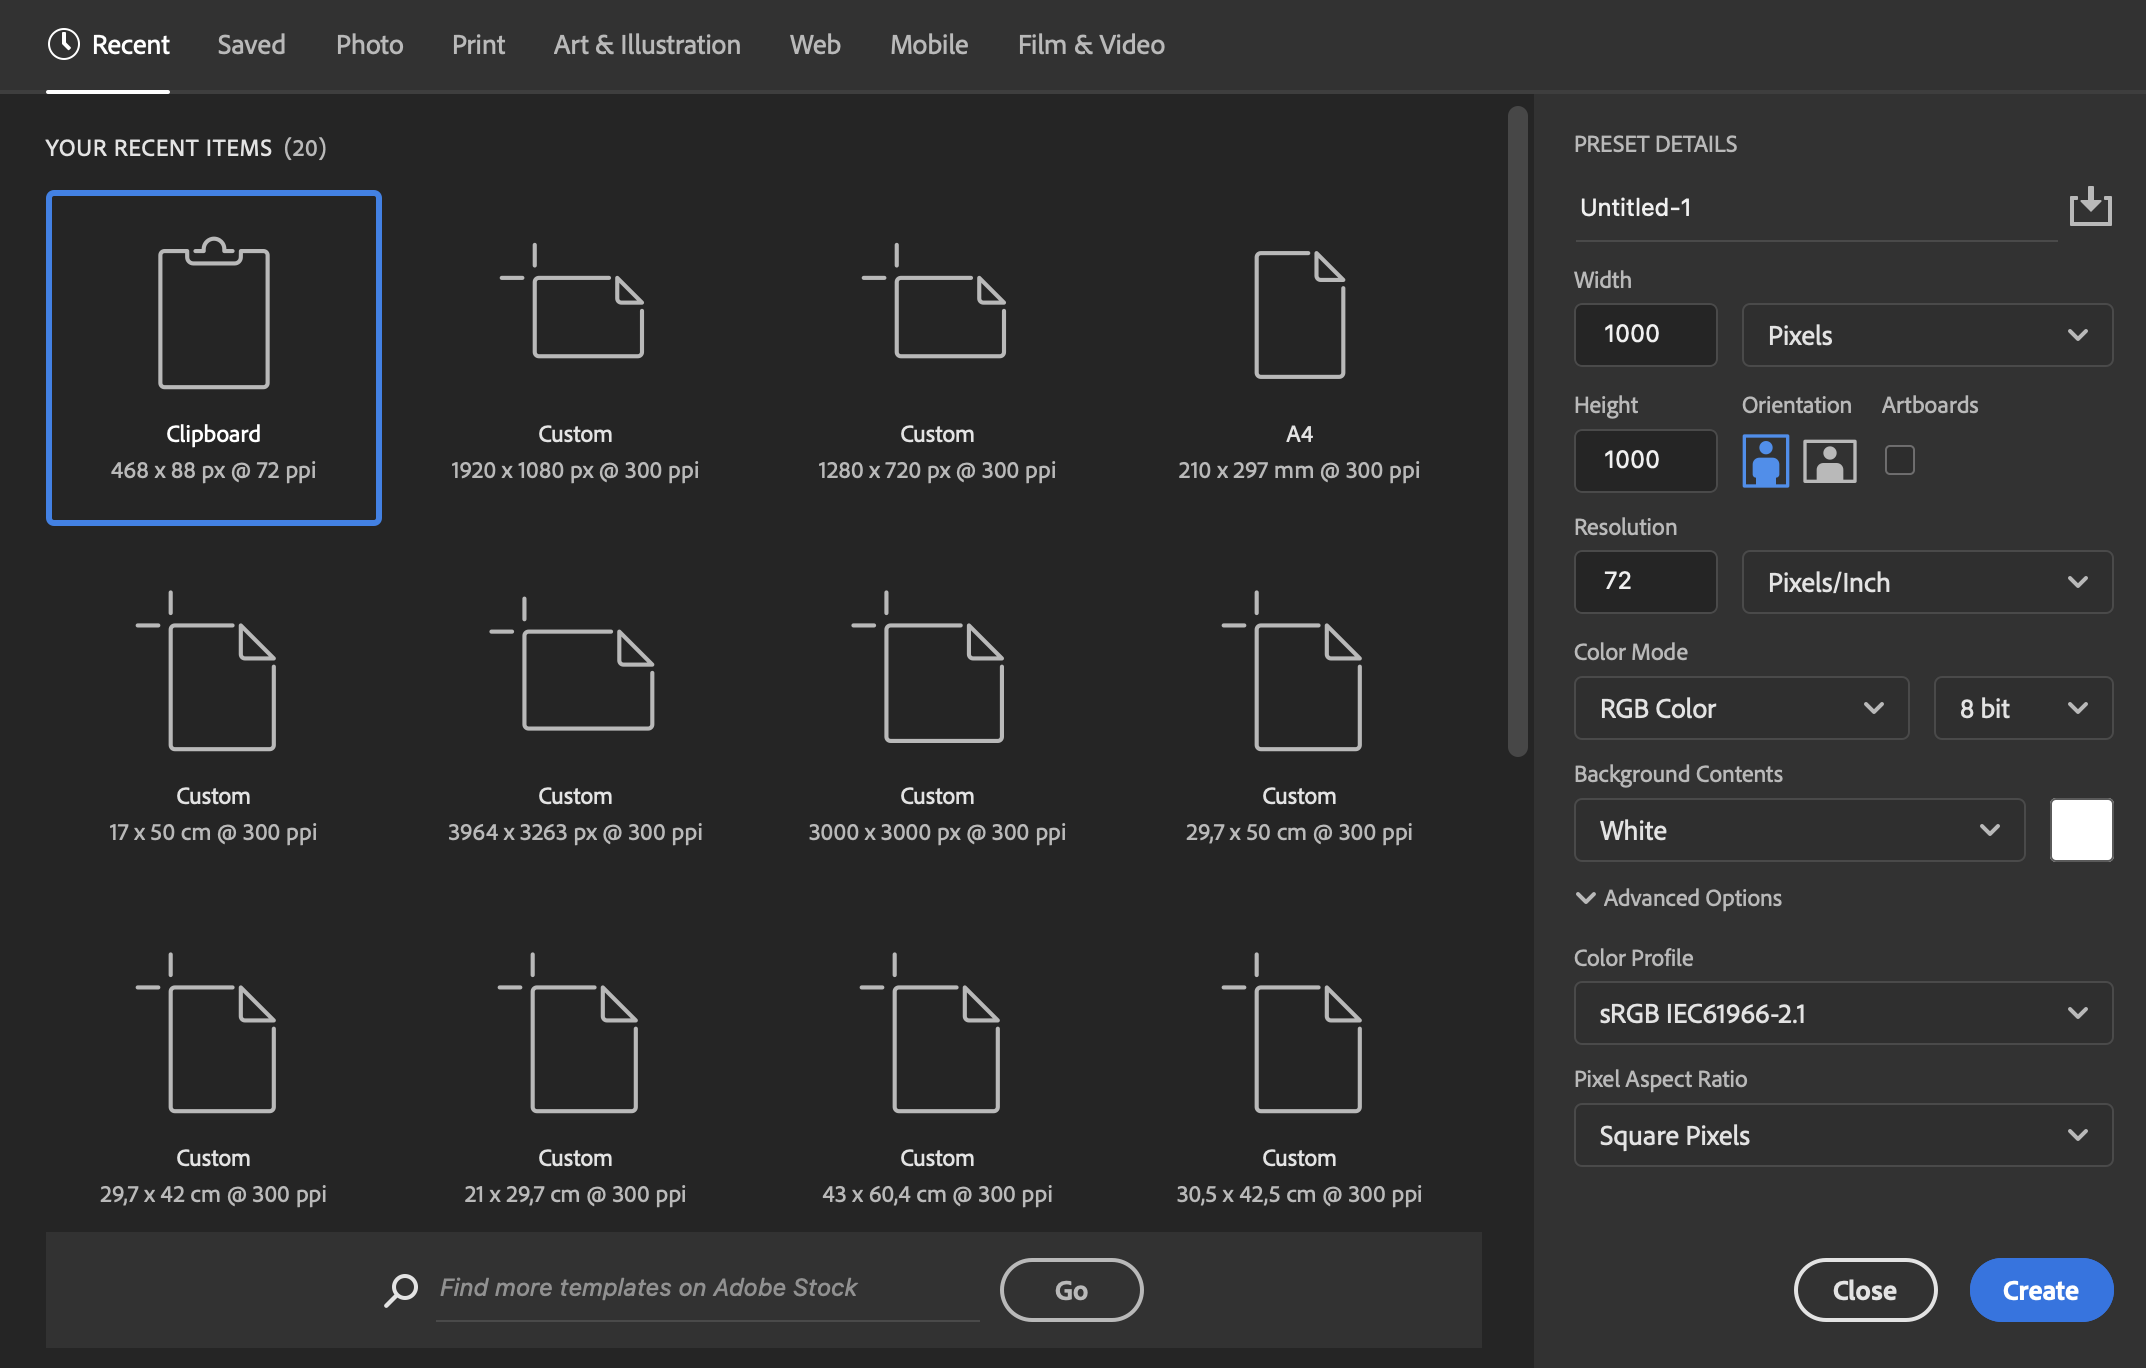
I turn on Photoshop and click on “New”. Since the GIFs you use on social media are very small, I’m creating a small canvas – 1000 x 1000 px. But for my purpose it could even be smaller than that, to be honest.
Step 1: Prepare your canvas
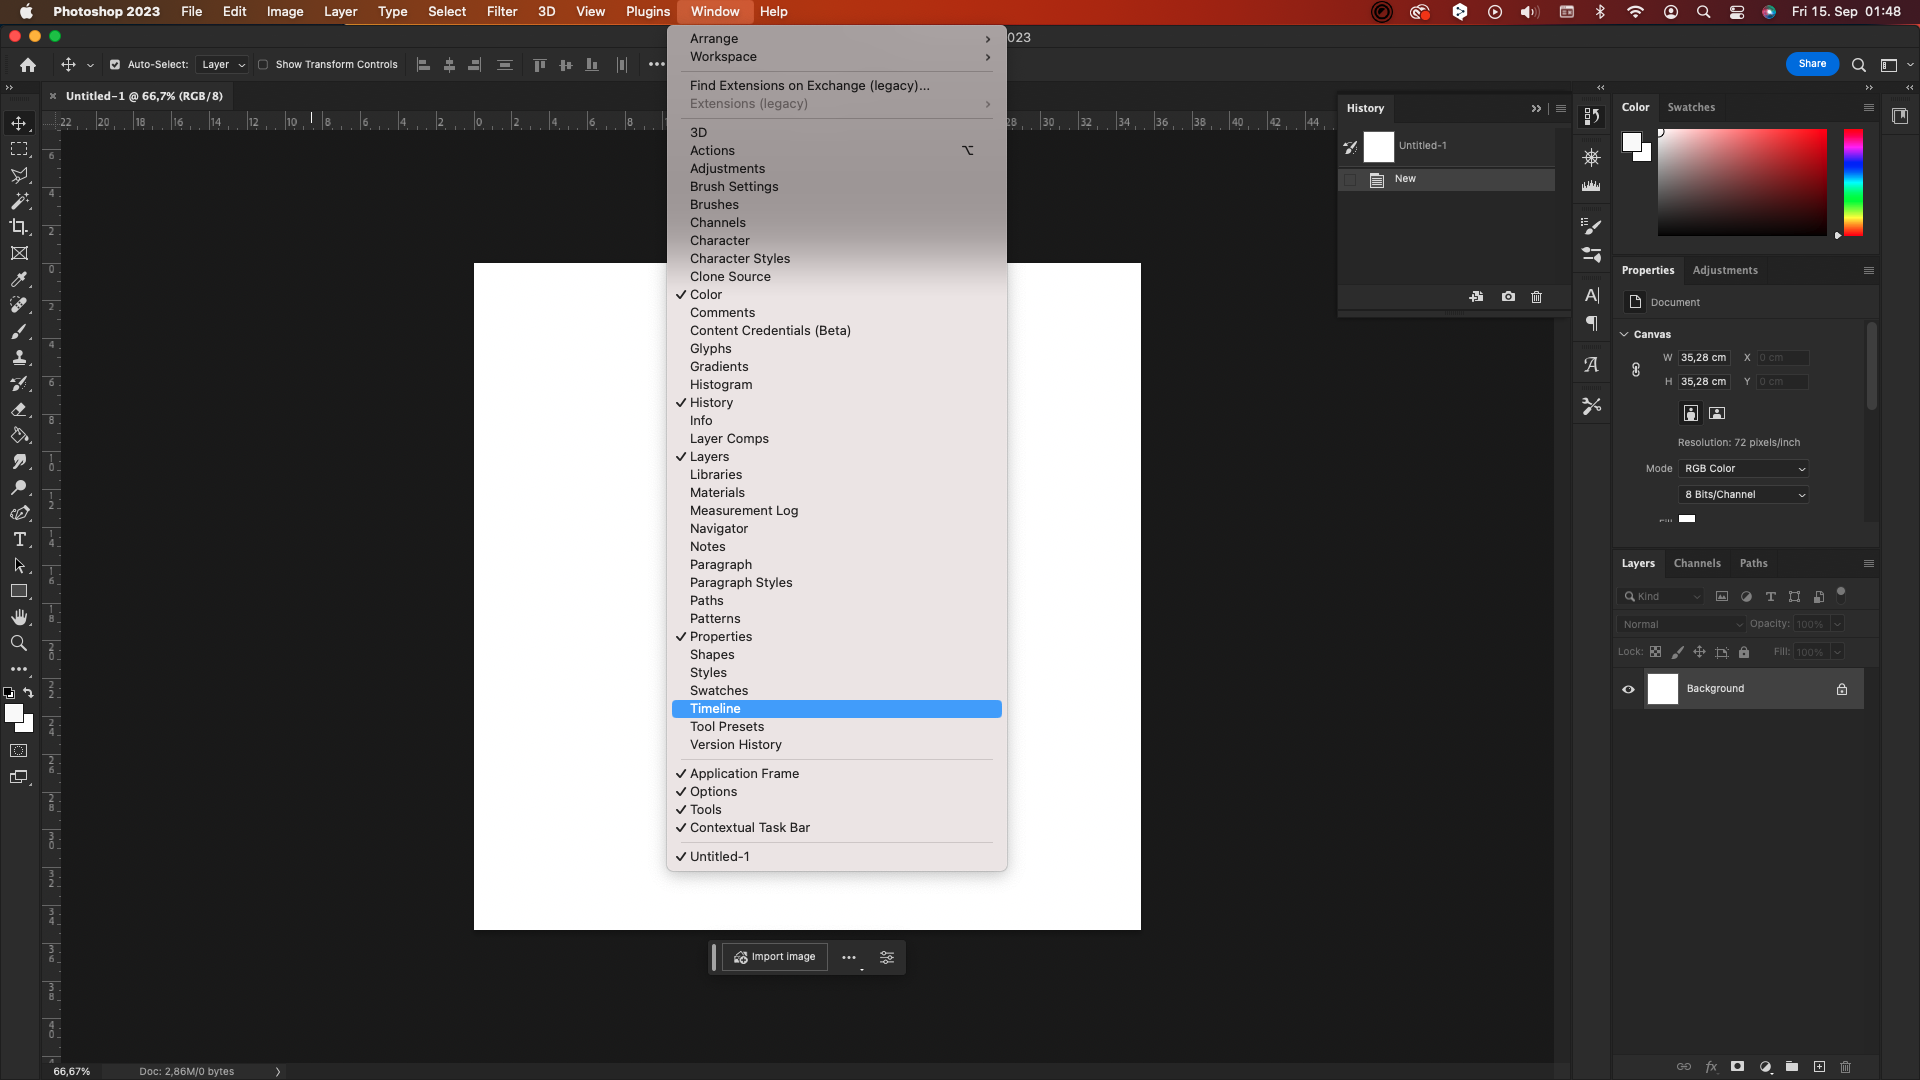
Second Step: Tick the Timeline Option Under “Window”
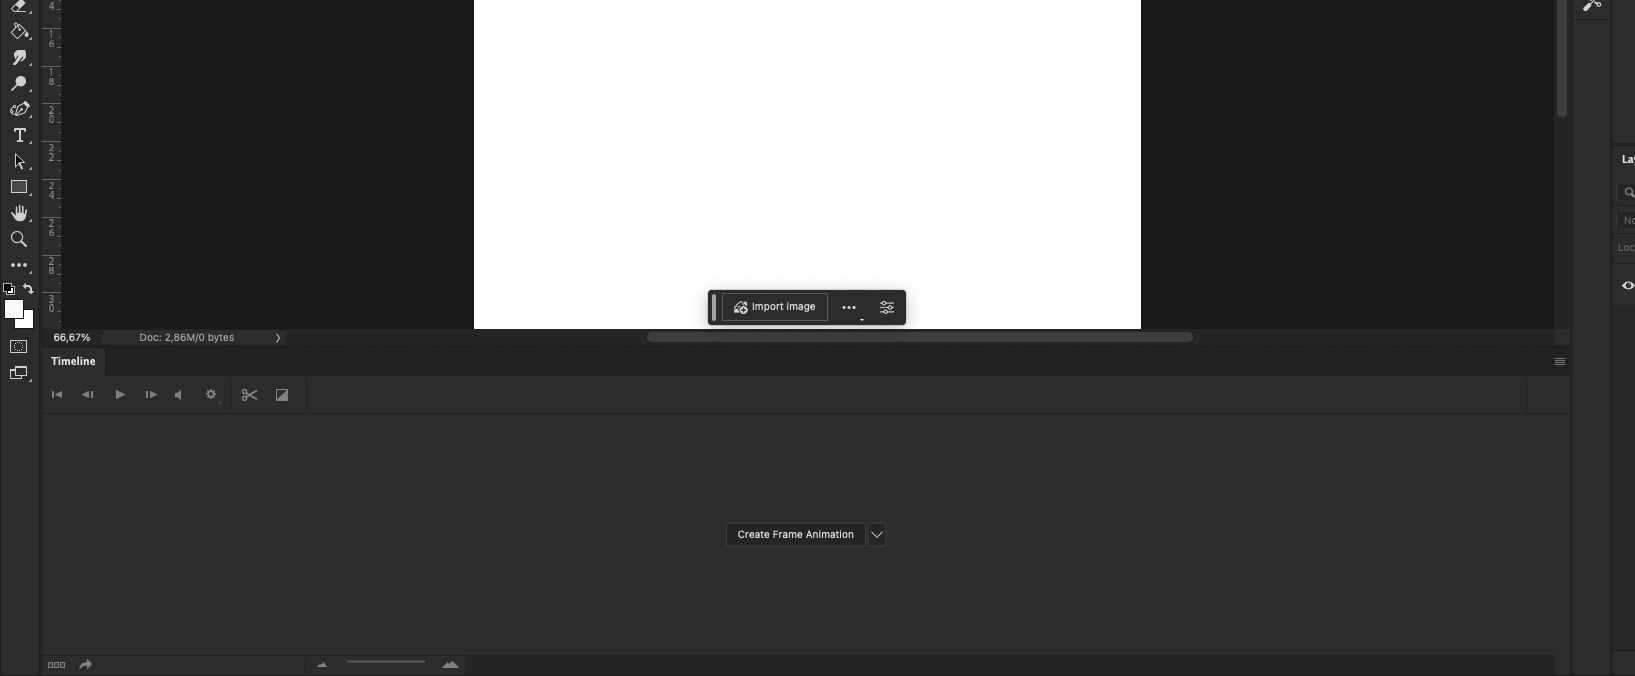
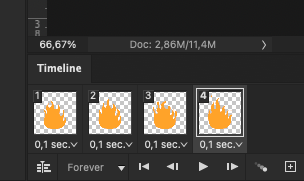
Clicking on this will activate the Timeline view, which is the bar under your main screen on Photoshop and it looks like this:
There, I click on the “Create Frame Animation” option.
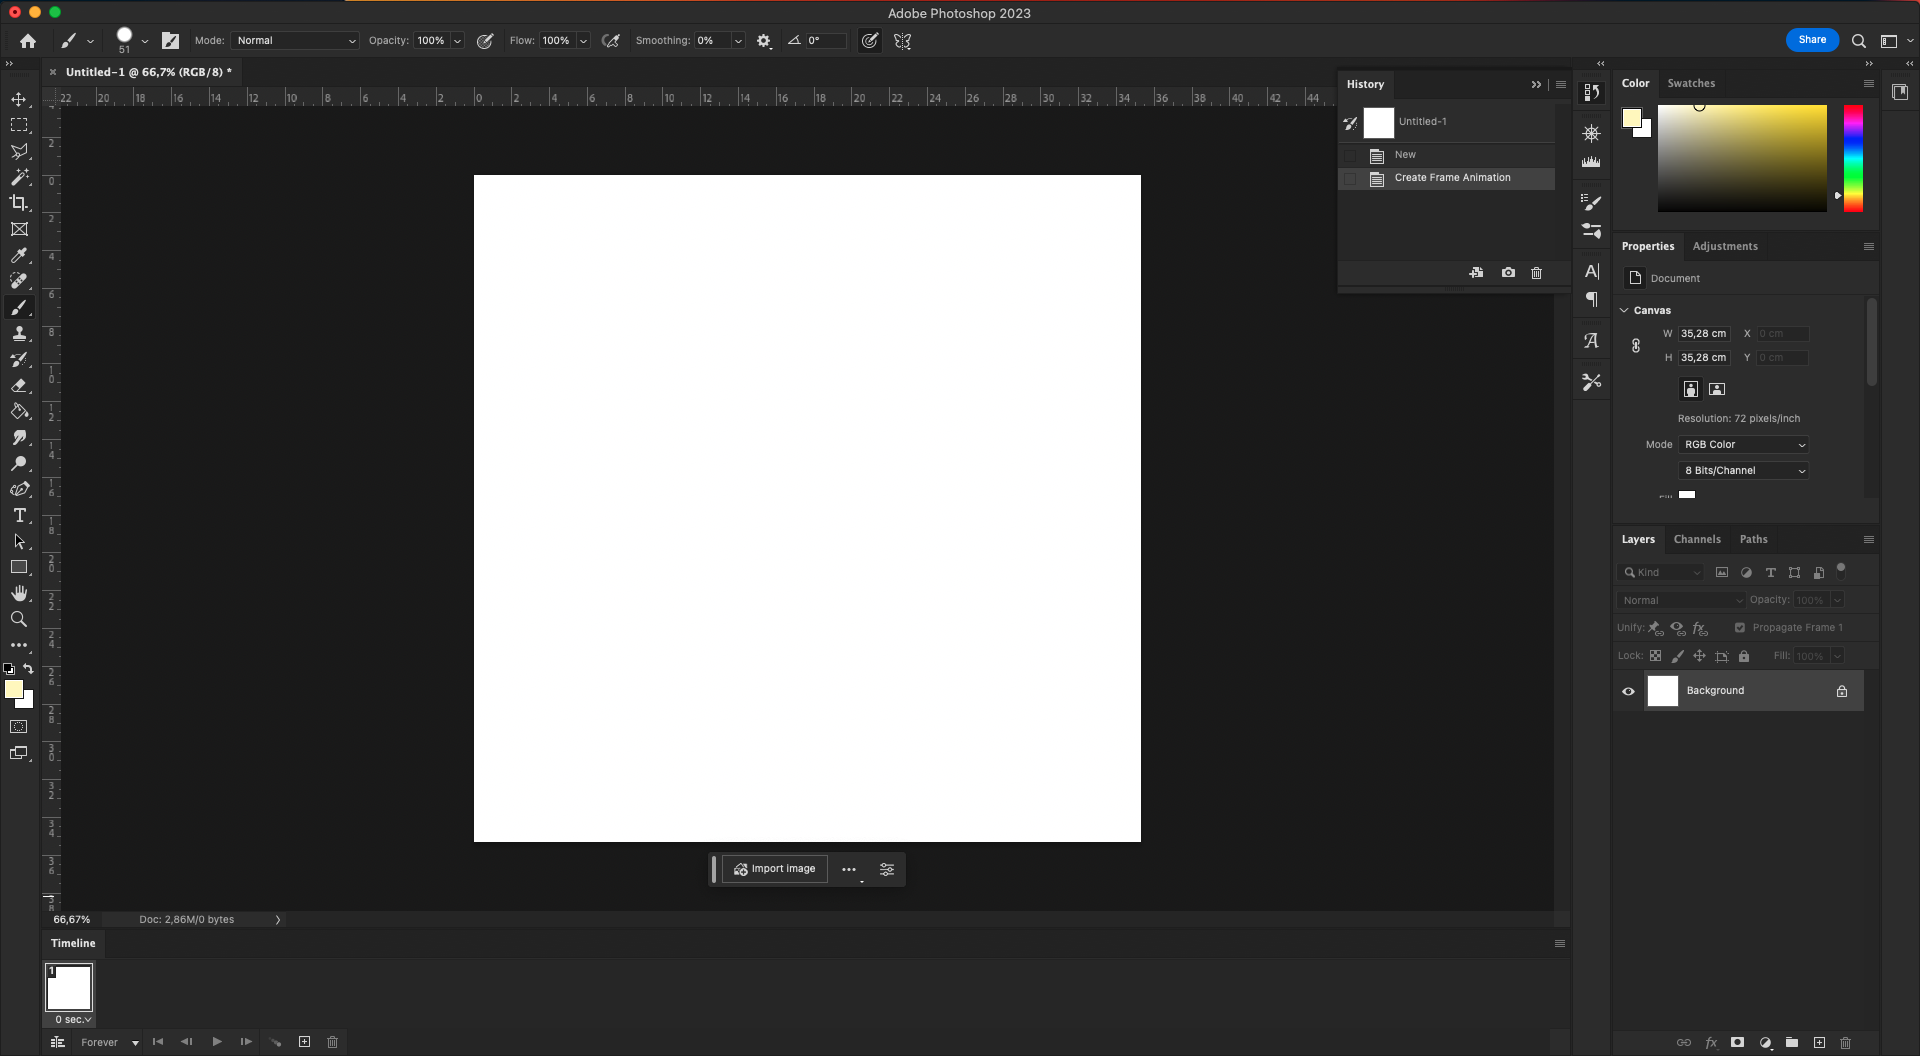
When using this method, you have two important terms you will see a lot when creating GIFs: Frames and layers. Frames are different than layers, and you will see why as we go on. Just keep it in your mind for now that when I say layer, I’m referring to our layers that we draw on, on the right to the screen. And when I say frames, I’m referring to our timeline which is at the bottom left part of the screen.
Step 2: Let’s Draw!
Now create a layer (on the right) and start drawing one random fire in the canvas with the color of your choice. I made this, very fast and quick:
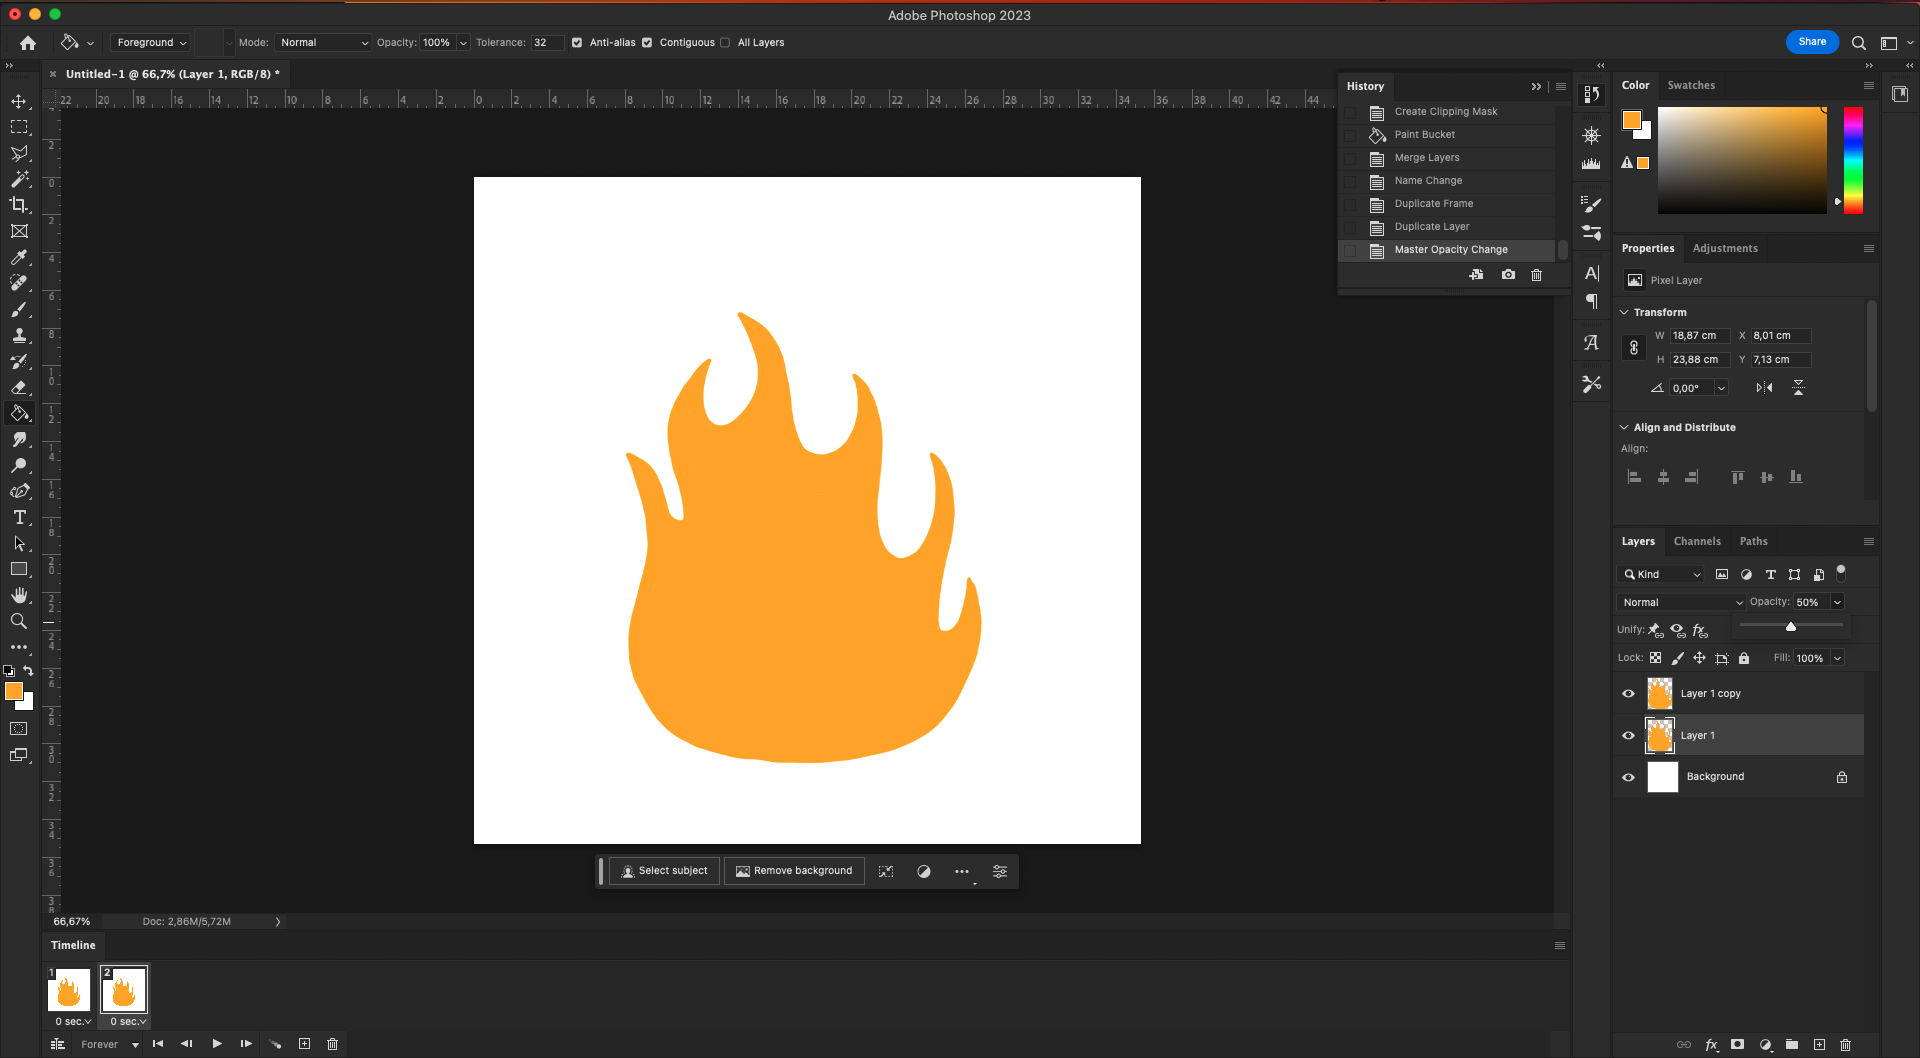
Congrats! You have your first frame.
Now, on the bottom left where frames are, click on the little plus sign in the square to create a new frame.
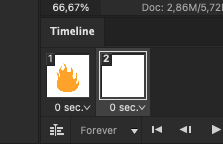

After this, go to the right, to the layers again and create a new layer.
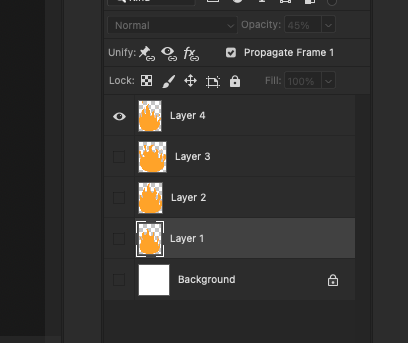
Now, remember: When animating on Photoshop, each Frame serves as a specific time stamp. Not layers, but frames. Whatever you do when a particular frame is selected, it will be only in that frame because, for animating an image, we need different frames. So Photoshop keeps the changes on the selected frame, so that the rest can stay different. But there is one exception to that, and it is the first frame. Whenever you do something new, even if it’s on a different frame, the first frame takes it and always memorizes it. And automatically repeats it in all the other frames. This may be useful for some other animations, but with this specific one, we don’t want our still frame drawings to show up in all the other frames and cause our animation to be distorted. So each time you make a change (like creating a new layer), you should go to the frame 1 and deselect your new layer, so that your animation won’t be messed up afterwards. I will explain this a bit clearer below.
Now that you have your new layer, when frame 2 is selected, decrease the opacity of layer 1.
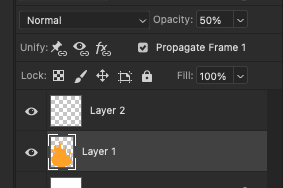
I decreased my first layer to 50% percent. This will help me see the first frame while drawing the second one.
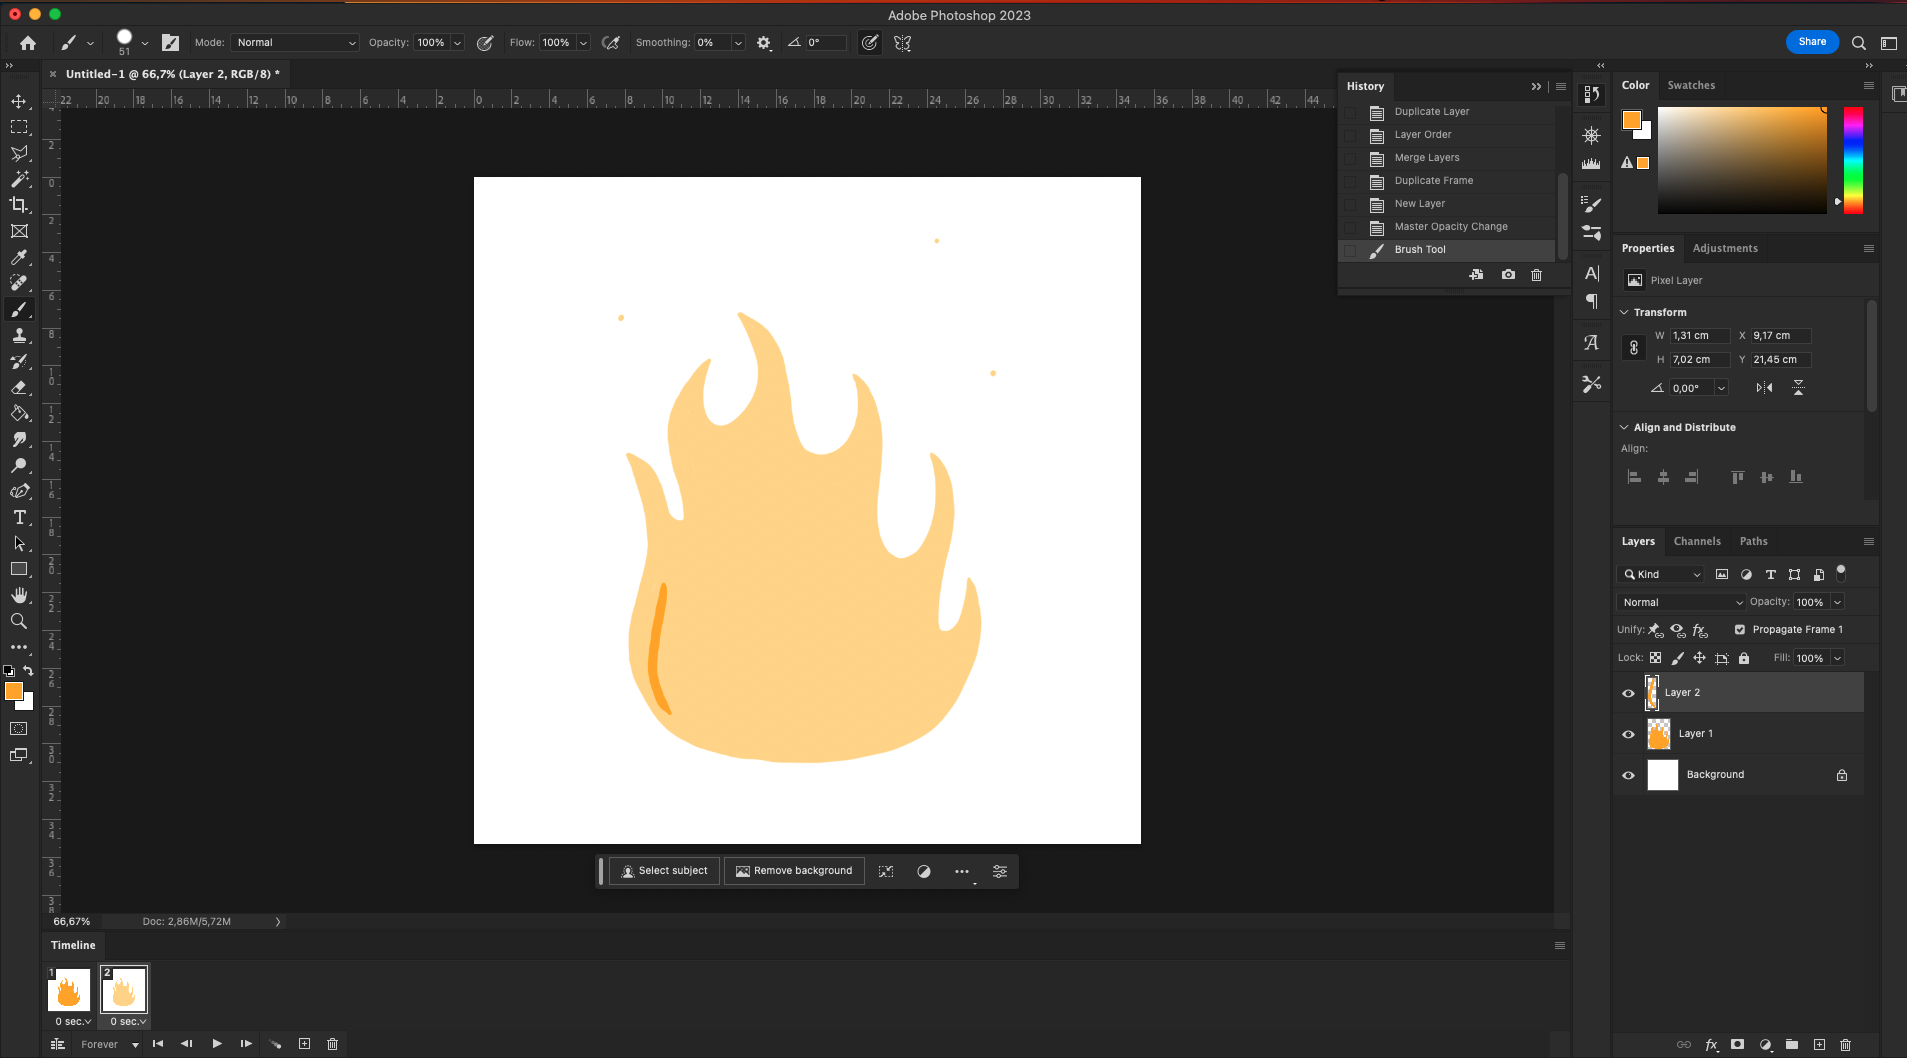
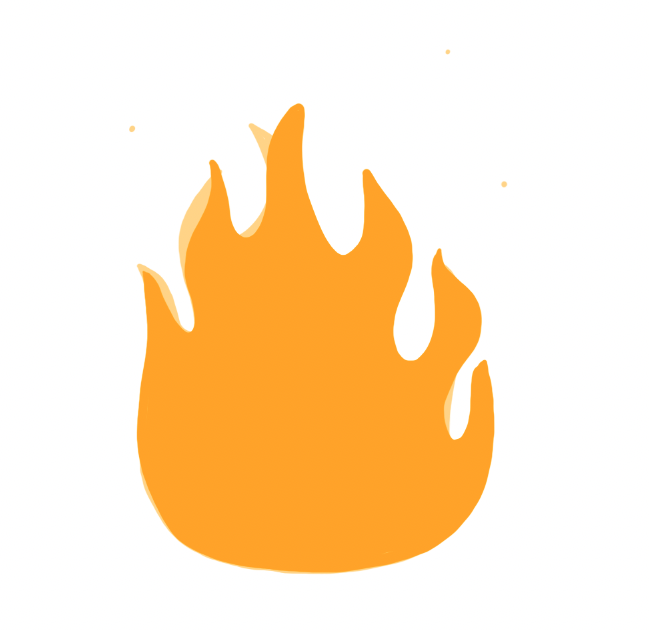
Now start drawing a second random flame shape but this time pay attention to different parts of flame, see how some parts are longer and the others are shorter. Try to make them different than each other but try to keep the bottom somewhat same. Always draw random shapes. When you finish drawing the second layer, it should look like this:
Step 3: Time to pay attention
Go to the layers and deselect the first layer.
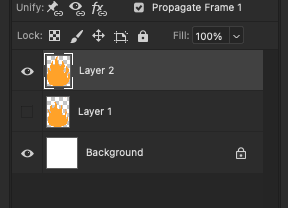
But also remember that when you had created the new layer, the first frame memorized it. It is very important to be able to tell your frames from layers by this point, so I hope we’re on the same page. So, we need to click on the first frame, go to the layers and deselect layer 2,
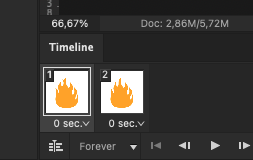
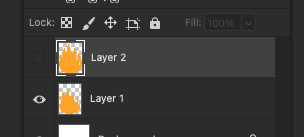
and then click on frame 2, after that come back to layers, and select Layer 2

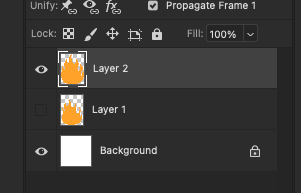
Yes, I know, this part is a bit complicated, and I promised something easy. But bear with me. Once you get the hang of it, you will get used to it. The first few times may be a bit confusing but that’s why we have the screenshots, which I hope are being useful.
Now that you made it, you have two frames. Which means you already have a looping animation!
Don’t forget to select the little arrows under the frames and select 0,1 sec. for each of them (once you do it, every new frame will come out with the same length so you won’t need to do it for all the frames).
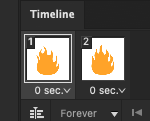
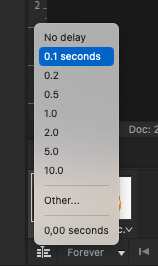
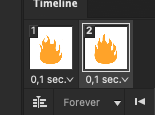
let’s create a third frame and repeat the same actions, and then with a fourth frame and repeat it again.
Now you have four different layers, in four different frames. With each also present in the frames pane.
Step 4: Exporting the animation as GIF
Congrats, you made it!
Press play to see it. When you press play, there will be a looping flame animation right in front of your eyes! (If the animation doesn’t loop, pay attention to where it says “Forever” on my screenshot at the bottom. If it says “once” or “3 times” there instead of “Forever”, click on it and select “Forever”, so that your animation will be looping.)
But how will you turn into a GIF? Don’t worry , I got you.
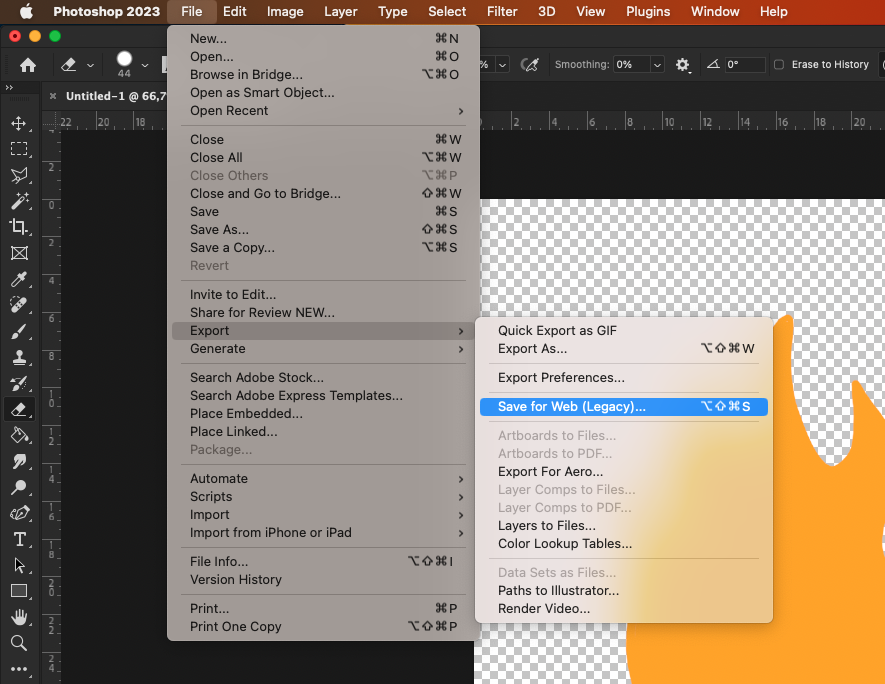
If you’re happy with your animation, go to File -> Export -> Save for Web
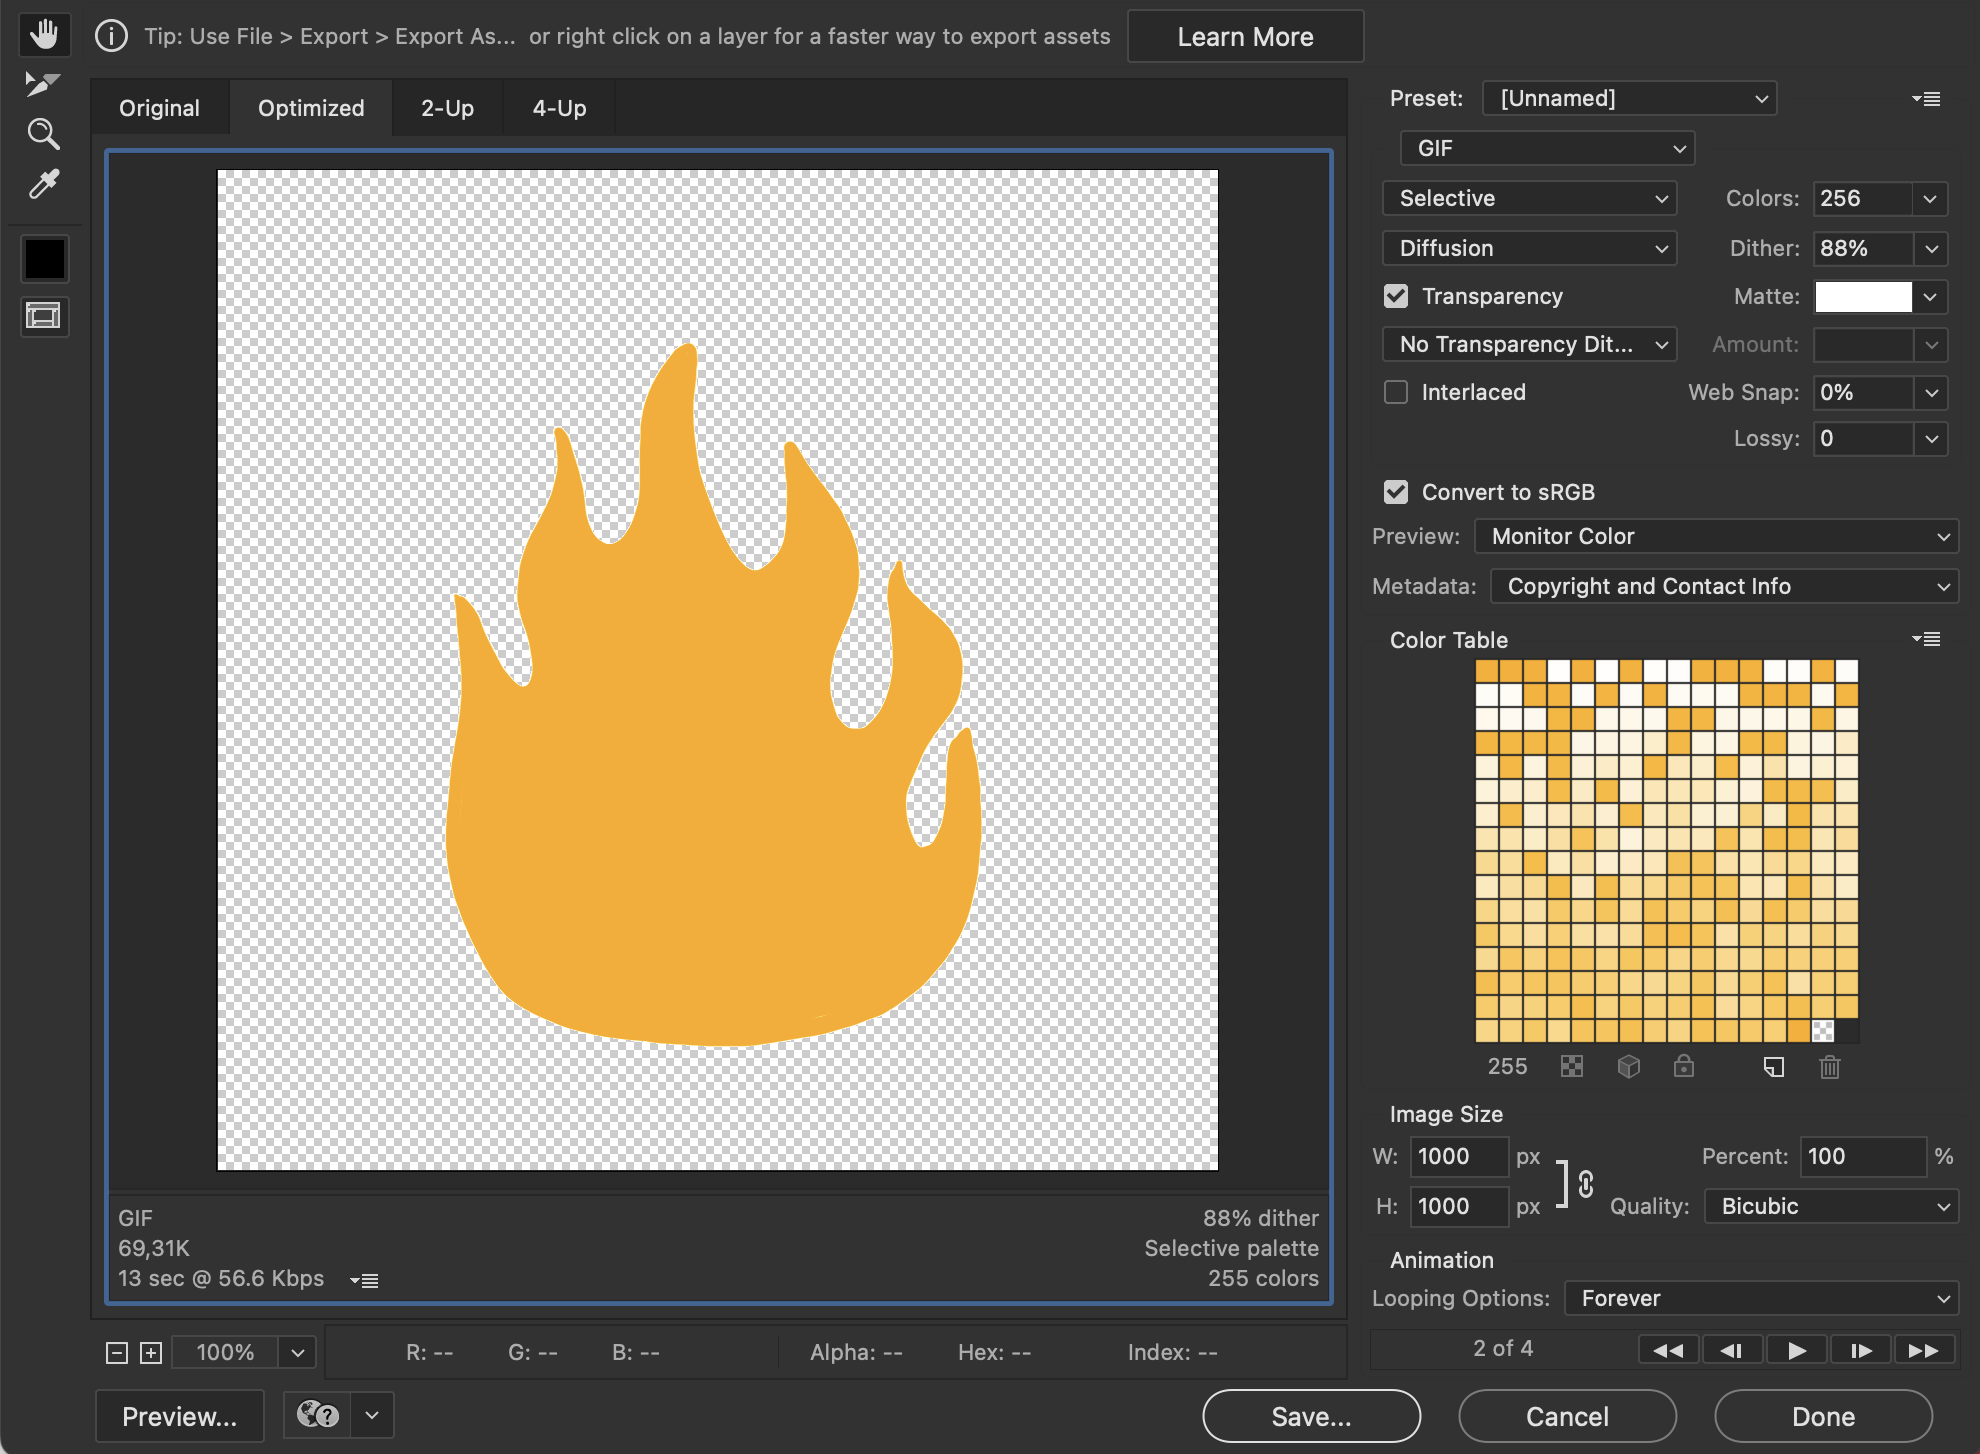
On the “Export as…” dialogue box, make sure your presets are similar to those in the below screenshot. On the top right, GIF should be selected as your export file type. And when you click “Save” it should be ready to go.

You did it! Now you can get registered to GIPHY and upload your GIF there. Or use it in your videos, or just animate some parts of your illustrations, so that they are just funkier.
Result: Easy & Quick Flame Animation
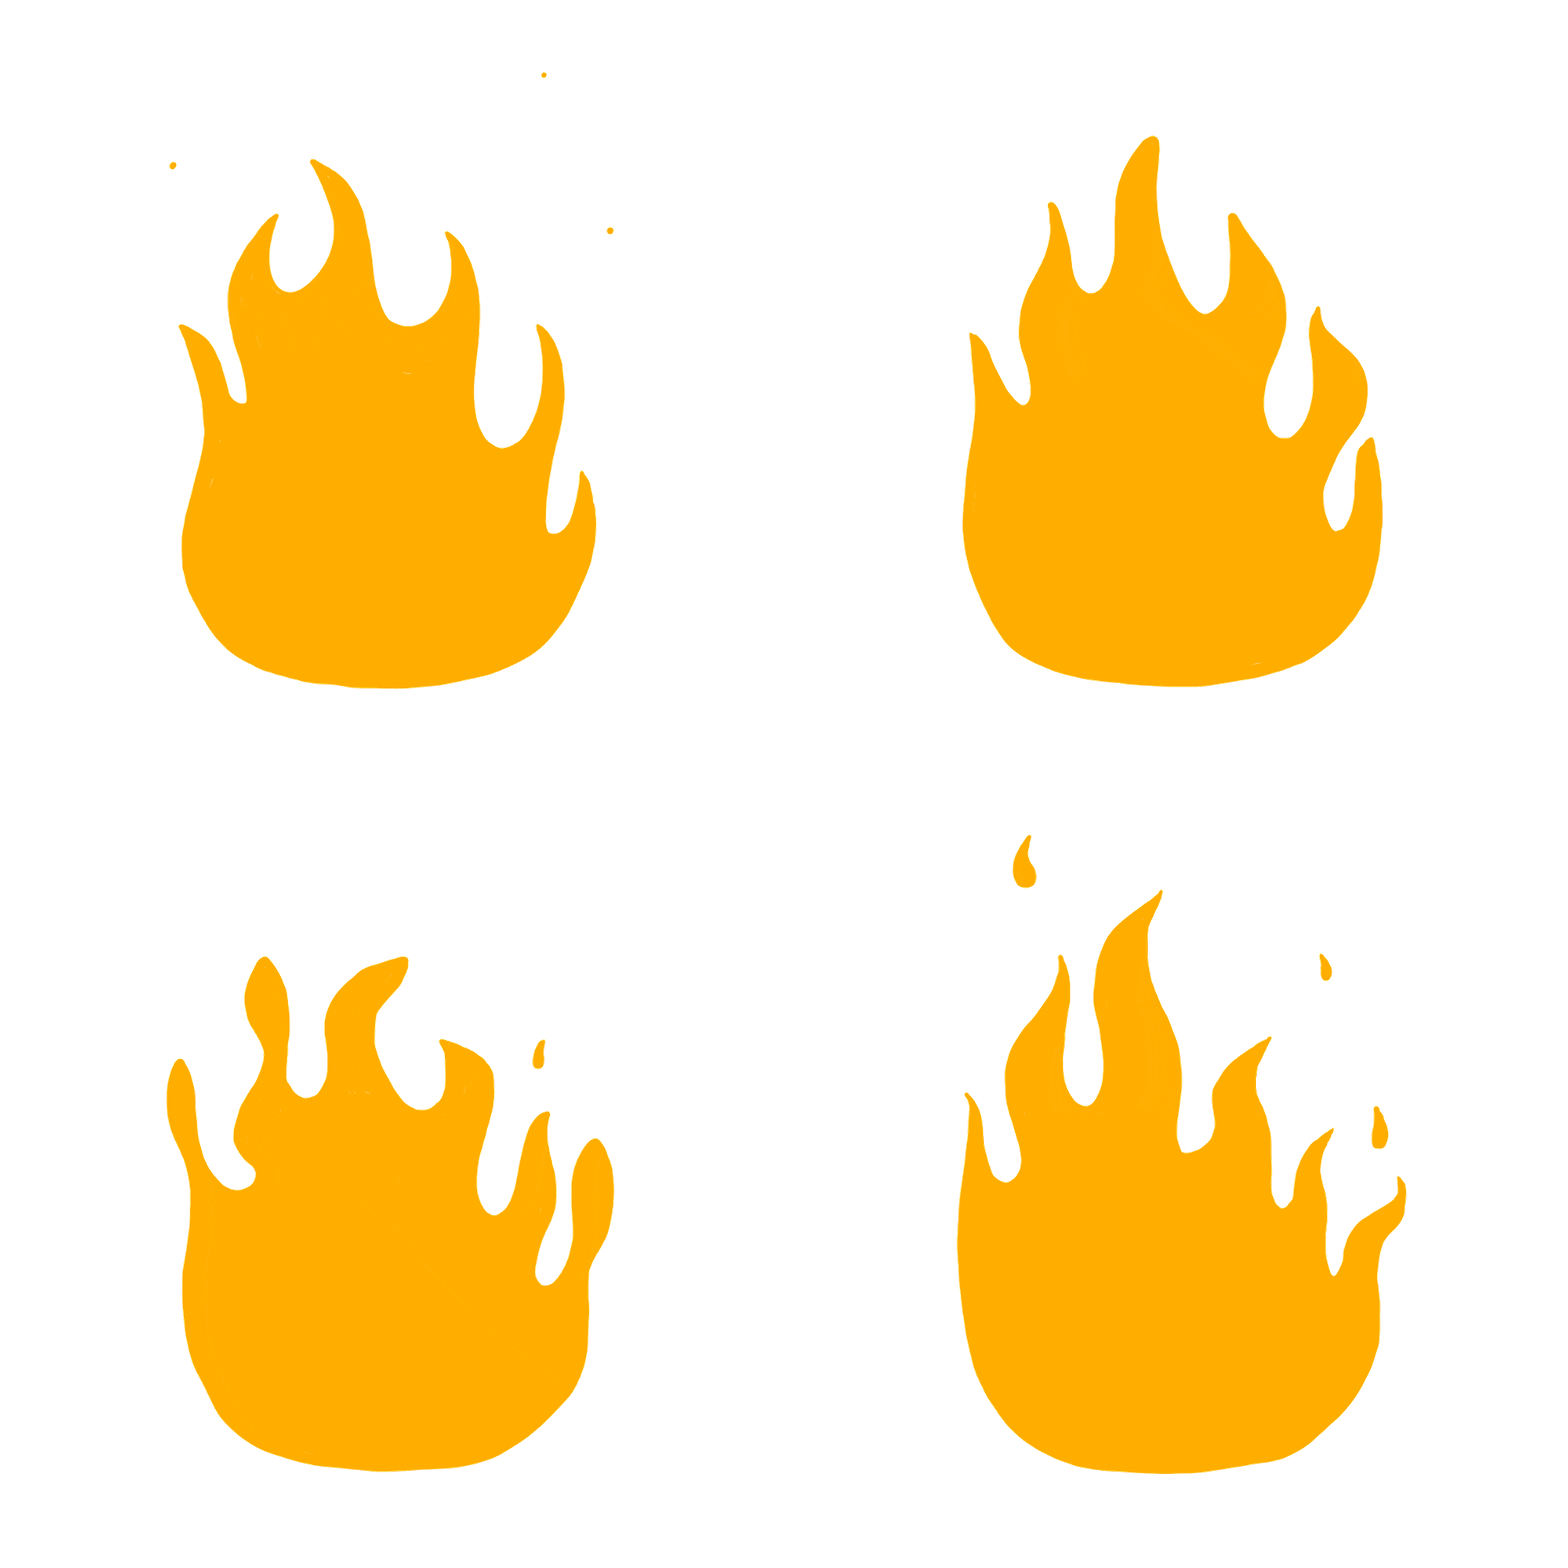
If you want, you can add more layers to the drawing and make the flame a bit more detailed.
For that, you need to group your layers for each frame. So in one group, there should be the different layers that belong to first frame, in the second group the second frame’s layers should be, and so on.
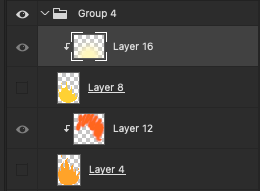
I painted more layers on top and turned my flame animation into this:

To be honest I like simple versions too, but painting more is always nice. As you can see, with a few simple steps in Photoshop, you can create endless animations for your artwork. Using this technique will allow you to level up your artwork.
Have you made an animation using my tutorial? Don’t forget to post your results on social media and tag @wacom and put the hashtag #madewithwacom so that we can repost your work!

About the author:
Zeynep Alpay is a freelance multidisciplinary artist and illustrator based in Düsseldorf, Germany. Their work encompasses illustrations, animations, paper cut-outs, and traditional artwork.
For more information or to see more of Zeynep’s works, check out their portfolio.


