Sam Yang is a digital artist who goes by the name SamDoesArts online. He primarily creates digital drawings on his Wacom Cintiq Pro in an anime/manga-inspired cartoony style that is very popular – his YouTube channel has over 1 million subscribers and his Instagram has over 2 million! Subscribers tune in for a variety of content types, including art advice, challenges, vlogs, and detailed digital art tutorials.
Many beginning artists struggle with perspective, but there’s a pretty simple way to learn it, according to Sam. Here’s his tutorial for how beginners can master 1, 2, and 3-point perspective. The below article is based on this video from his YouTube channel. All ideas are Sam’s.
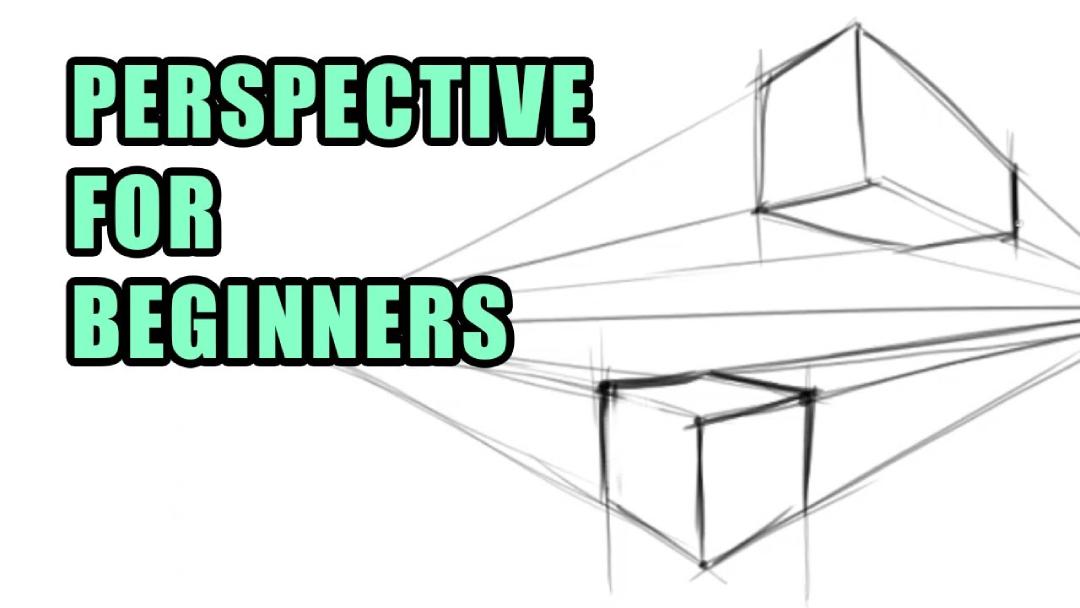
If you hear the word perspective and don’t know where to begin then you came to the right place. This post is tailored to guide you through the fundamental principles of drawing perspective, with a focus on three distinctive types: 1, 2, and 3-point perspective.
1-point perspective
1-point perspective is the most basic type of perspective. There is one point — the “vanishing point” — that all of the lines will point towards. Let’s start by making a basic square in 1 point perspective.
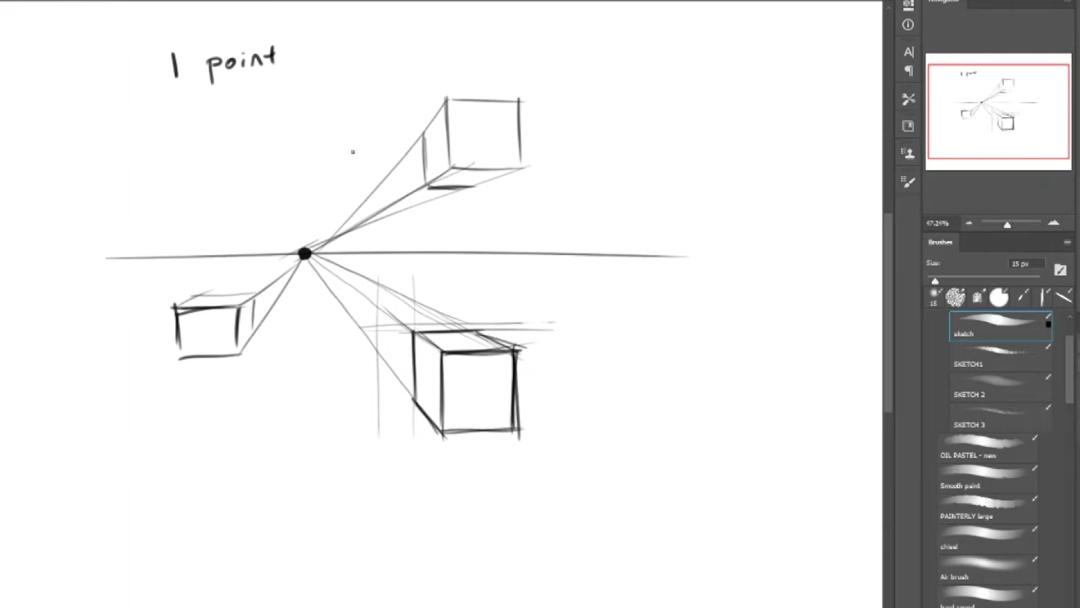
- Draw a horizon line and put the vanishing point anywhere on the horizon.
- Draw a square somewhere on the paper.
- Connect all of the corners back to the vanishing point.
- Cut out the shape of the cube wanted using the vertical and horizontal edges.
- Trace the cube over and now there is a cube in three-dimensional space.
This same concept can be done anywhere on the page as long as the corners are leading back to the vanishing point. Also, there is no limit to the shapes that can be used; there can be triangles, spheres, pretty much anything.
2-point perspective
2-point perspective is all in the name. Take the same concept from 1-point perspective, but this time there will be two vanishing points on the horizon line.
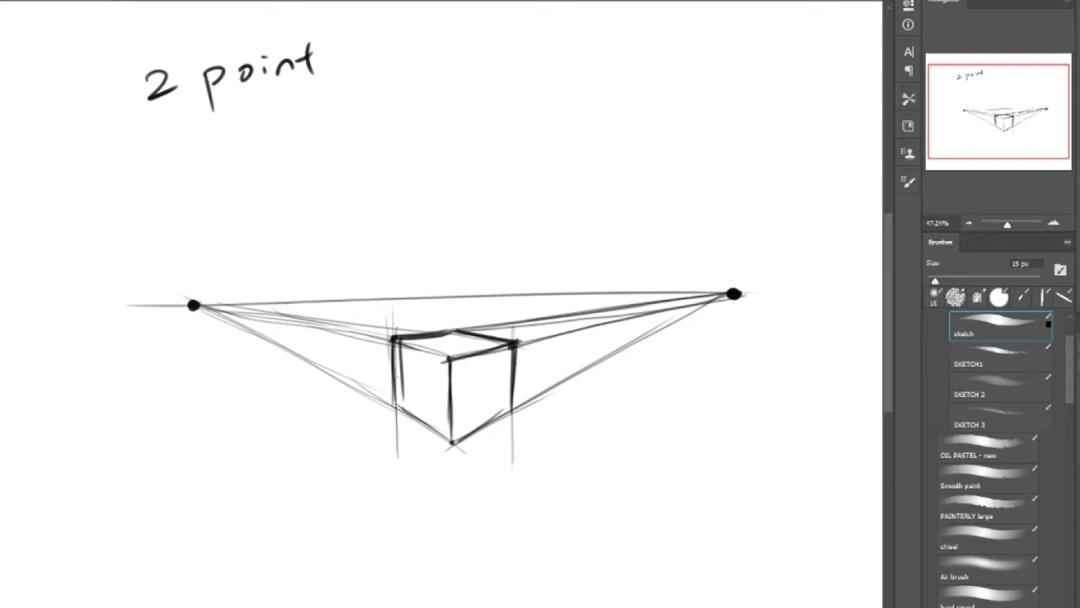
- Find the midpoint between your two vanishing points.
- Draw the middle edge of the cube there.
- Connect each end of the line to both vanishing points.
- Figure out where the cube will be and draw vertical lines on both sides on the middle edge.
- Connect the top of both lines to the opposite vanishing point.
- Trace the cube out and erase the connecting lines to get a cube in 2 point perspective.
3-point perspective
3 point perspective is more complex, but is not as scary as it sounds. The steps are almost the same as 2-point perspective until the last few steps.
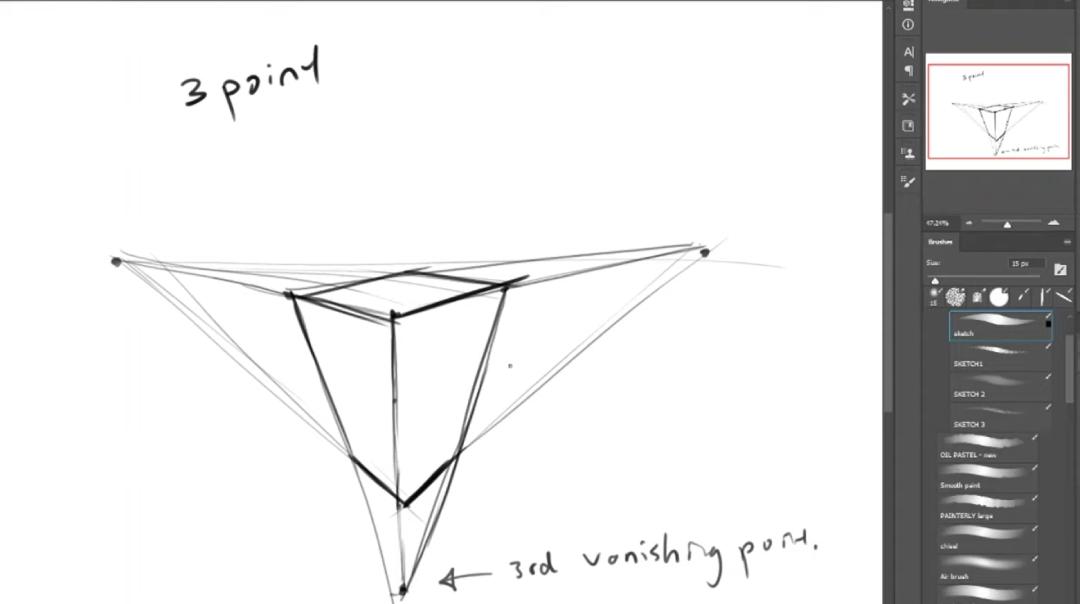
- Find the midpoint between your two vanishing points.
- Draw the middle edge of the cube there.
- Connect each end of the line to both vanishing points.
- Figure out where the cube will be and draw vertical lines on both sides on the middle edge.
- Connect the top of both lines to the opposite vanishing point.
- Add a third vanishing point to the bottom below the middle edge.
- Connect the outer edges of the cube down to the third vanishing point.
- Trace over the outlines of the cube and erase the connecting lines to get a cube in 3 point perspective.
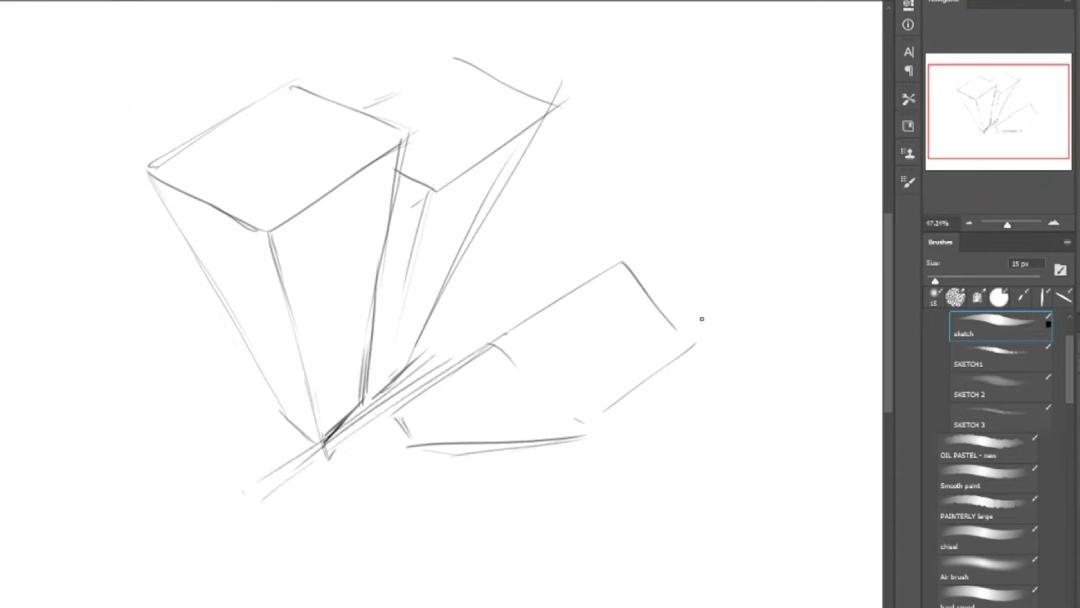
3-point perspective can be a very exaggerated view, but has its place in drawing. An example of where this can be used is if you were drawing a bird’s eye view of multiple tall buildings. 3 point perspective is perfect for this and creates a real sense of three dimensions that otherwise would be missing.
Conclusion
This introduced three basic ways to start drawing perspective. Starting with these principles can help build a strong foundation if perspective is new to you. While there is much more that can be covered, 1, 2, and 3 point perspectives will be a great starting place.

