Armadillo_Kat is an avid dungeons & dragons (D&D) player, and also a self-taught artist. They often bring these two passions together – to the benefit of the regular crew they play D&D with – to help their friends flesh out their player characters with a custom model sheet!
In this video, Kat uses the new Wacom One 14 entry-level pen display to design a model sheet for a spooky vampire character for a friend – it is Halloween after all! They start by consulting with the friend to learn more about the character, then do some sketching and ideation, and then check in with their "client" for feedback. Finally, they put together the full body pose, some expressions, some items, and even an action pose.
Now, their friend's character doesn't just exist in their and the rest of the players' collective imaginations! Check out the video below to see the entire process.
How to design a custom Dungeons & Dragons character in 4 steps:

Step 1: Consult with your "client"
First, Kat met with their friend to learn about the character. He's a young vampire paladin, thin, dark and traditionally vampire-looking, but with a good heart, intent on traveling the world. They went over color palettes, and especially that the "client" wanted him to be owl-themed, with an emphasis on big, bold eyes!

Step 2: Ideation & sketching
After getting the brief, Kat went to work on sketching a variety of outfits, hairstyles, and items. A bit of backstory was that the character had an injured leg, so used a cane – but both because it was cool and because it fit the character's fighting style, they created a cane that hid a sword within it! This also contributed to the costume design with details like the stitching on the character's leg.
Step 2.5: Feedback from "client"
Kat then showed the preliminary sketches to their friend to finalize the details and the color palette. They landed on the Southern White-Faced Owl as the chosen owl inspiration, and then Kat got to work finalizing the design.

Step 3: Finalize design
Model sheets can take many forms, and when it's for a friend's D&D character, there are no clear rules. But Kat likes to include a full shot, lots of expressions, an action pose, as well as some items and detail close-ups whenever possible. So they worked on finalizing all of these different aspects of the character's design.

Step 4: Lay out model sheet
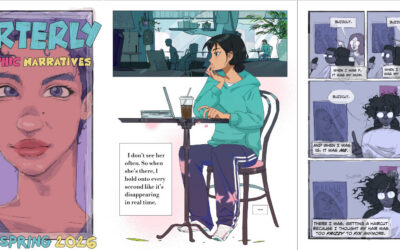
Finally, it was time to put it all together! One detail they realized they needed to land on at the end was the character's name. They had originally been calling the character "Terry," but there was another player character in the campaign named something similar. So they looked around and came across the name Peregrine, which means "wanderer," which is perfect for the character and also is bird-related (though typically with a falcon). And it can be shortened to "Perry!"
The model sheet was complete!


About the artist
Armadillo Kat is a self-taught artist who just graduated with a dual degree in mechanical and aerospace engineering. Even though they’re going into engineering, drawing has been one of their passions since childhood, and they have been teaching themselves for around 10 years now. They draw most of their illustrations with Clip Studio Paint, and their primary subject matter is fantasy and character designs.
Check out their work on Instagram, Tumblr, X (formerly Twitter), or Tik Tok.

Want more step-by-step drawing tutorials? Learn to draw with Wacom
Check out Wacom's Learn to Draw page for tons of tutorials for character design, anime & manga, and more digital drawing tips from the experts!