
Did you know that Wacom devices come bundled with free trials of a bunch of creative software, and every purchase of a Wacom Intuos comes with a free trial of Corel Painter? If you want to give Corel Painter 2023 a try, Aaron Rutten has you covered.
In the following tutorial, you’ll learn how to make the most of your Wacom pen tablet or display and Corel Painter by utilizing the various shortcuts for resizing your brush, changing the opacity of your brush, changing the squeeze of the dab, and changing the angle of the dab. If you’re ready to dive in deeper afterward, check out the bottom of this blog post for even more resources.
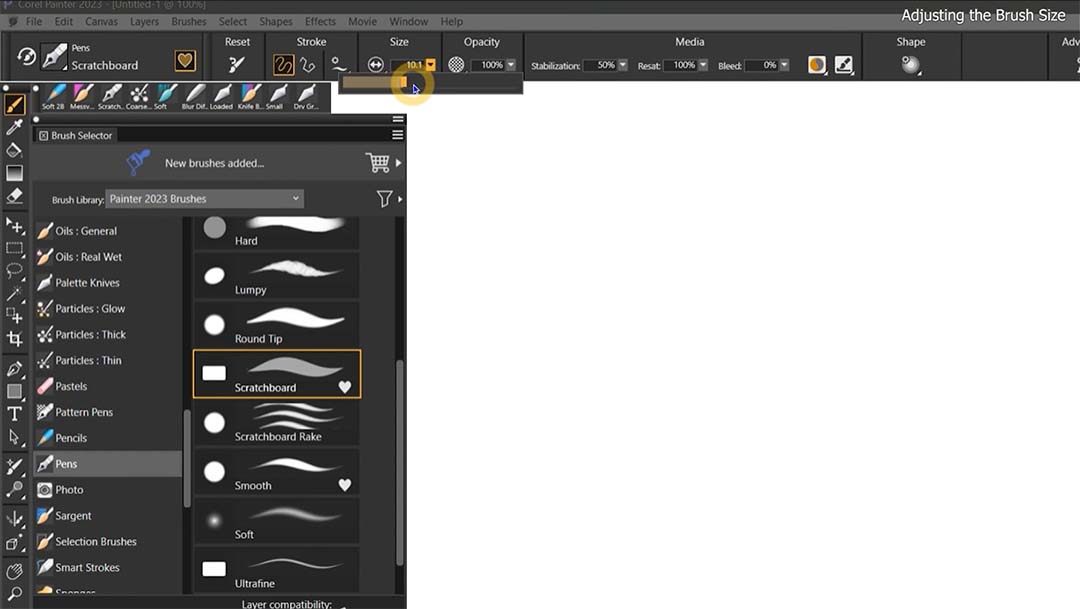
Adjusting the brush size
Let’s take a look at some of the ways we can resize our brush. I have the Scratch Board selected, and I can go up to the properties bar choose a brush size there. I can enter a numeric value, or there’s a drop down with a slider that I can drag to increase or decrease the brush size.
Tip: holding down the Ctrl (Mac: Command) key slows down the slider making it a little more precise. But I’ll show you a faster way to change your brush size in just a bit.
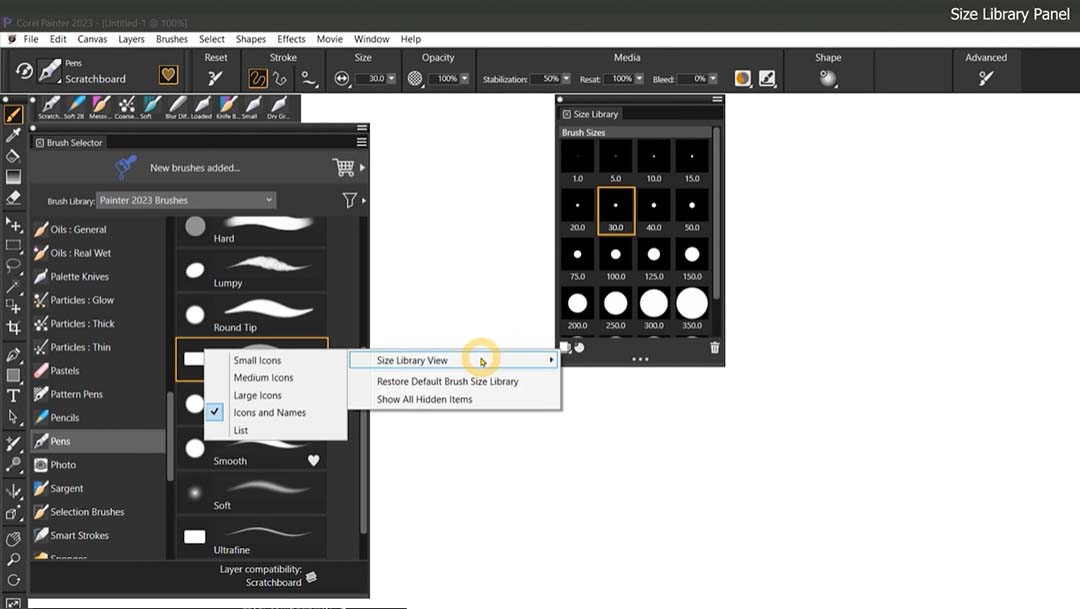
Size library panel
There are two basic ways you might go about choosing a brush size. The first is choosing a specific point size for pencil or ink drawing — for example, if you want to use an exact brush size so that your line widths remain consistent. You could enter the value numerically in the Properties bar, but what may be faster is to use the Brush Size Library, found in Window > Brush Control Panels > Brush Shape > Size Library.
The Size Library offers you a series of preset brush diameters, from very fine to the maximum brush size of 750 pixels. You can create your own preset brush sizes, delete presets, and even change the view of the icons using the buttons at the bottom of the panel.
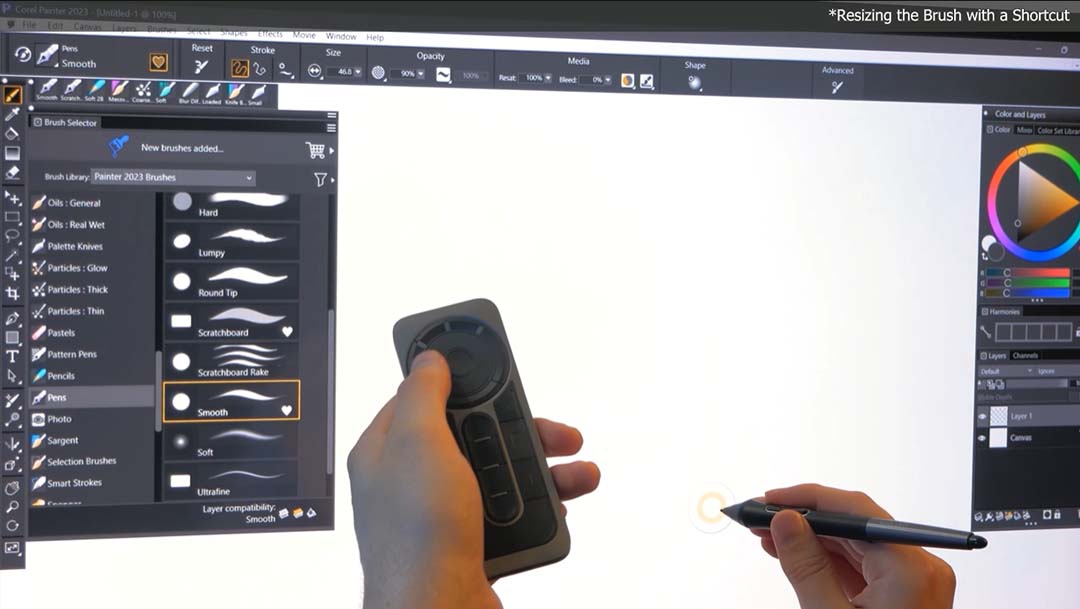
Resizing the brush with a shortcut
The second method for choosing a brush size is to choose a diameter that is relative to your canvas size. In this case, you’re not really concerned about a specific brush size, you just know that you want a big, medium, or small brush. You could use the slider in the properties bar, but a faster way is to use a keyboard shortcut.
Hold down Ctrl-Alt (Mac: Command-Alt) and tap and drag your brush on the canvas. This will create a circle that defines the diameter of your brush. In most cases, this visual cue is fairly accurate, but with some brushes like particle brushes, the actual brush stroke may not match the radius. In addition to the circle visualization, there’s also a meter that shows your radius numerically.
Tip 1 – Touch Ring: Using the Left and Right Bracket Key ( [ or ] ), you can adjust the radius by small amounts. If your Wacom tablet has a built-in Touch Ring, like the Wacom Intuos Pro, or you have a Wacom ExpressKey Remote, you can assign the Left and Right Bracket Keys to the Touch Ring, so you can smoothly increase or decrease brush size that way as well.
Tip 2 – Wacom Pen Buttons: Another option is assigning one of the buttons on your Wacom Pen to Ctrl-Alt (Mac: Command-Alt), so any time you hold the button down and drag your pen, you can adjust brush size on the fly. If you adjust your brush size frequently, this helps you stay in the moment without having to reach for your keyboard.
Adjusting brush opacity
Now let’s talk about how to vary the opacity of our brushes. We can control the opacity of a brush from the properties bar. Just like with the brush size, we can numerically enter an opacity level. If we set the opacity to 2%, then the paint is not going to be as opaque when we make strokes and it will take more effort to build them up to full opacity. There’s also an opacity slider that we can drag, and if we hold the Ctrl (Mac: Command) key we can slow down the sensitivity for more precision. Alternatively we can use the number keys on our keyboard — I can press 1 to set the opacity to 10%, or 9 to set the opacity to 90%, and so on.
I don’t often change the opacity setting unless I find a brush is a bit too strong or a bit too weak. Typically I build up opacity gradually using overlapping strokes, so usually I set my opacity pretty low.
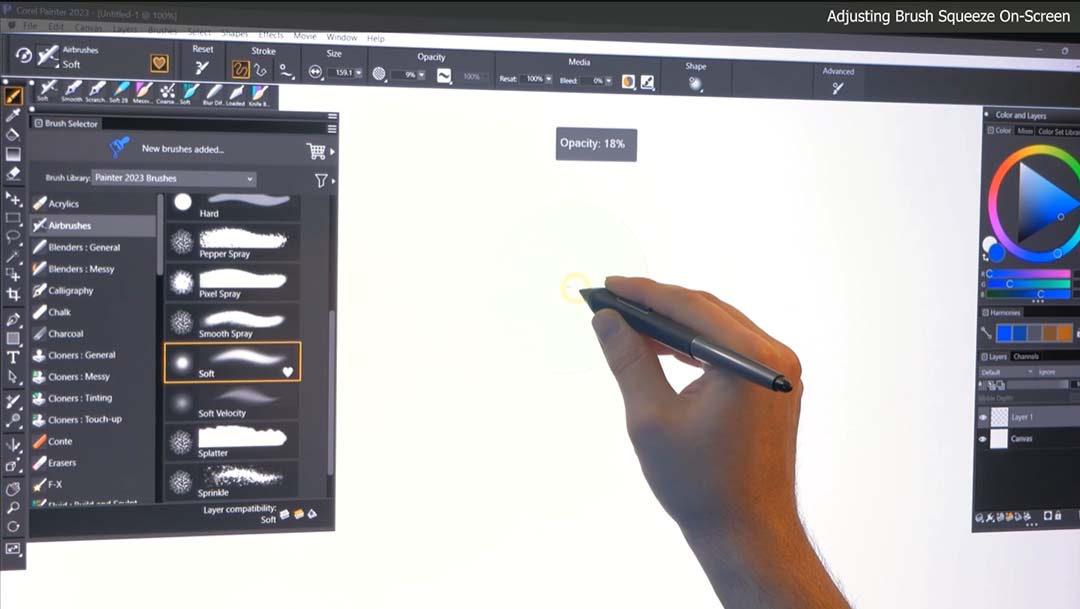
Adjusting opacity on-screen
Similar to how you used a keyboard shortcut to increase and decrease the size of your brush, you can also increase and decrease the opacity of your brush. Hold down Ctrl-Alt (Mac: Command-Alt), tap, and drag out a circle, like we did with brush size. But this time, let go of Ctrl-Alt (Mac: Command-Alt) and then, without lifting your pen, press Ctrl (Mac: Command) once on its own. That changes the mode from size to opacity. Now if you drag the pen, the opacity of the circle changes, which in turn defines the opacity of the brush.
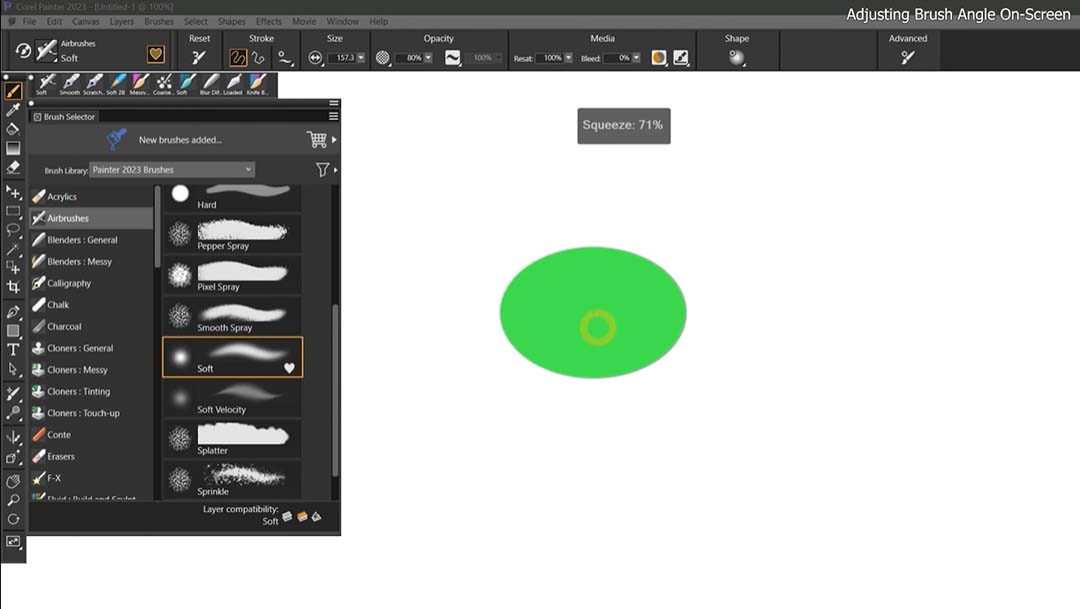
Adjusting brush squeeze and angle on-screen
It’s also possible to control the squeeze or flatness of the brush tip with an on-screen shortcut. Hold down Ctrl-Alt (Mac: Command-Alt), tap, and drag out a circle. But this time, let go of Ctrl-Alt (Mac: Command-Alt) and then, without lifting your pen, press Ctrl (Mac: Command) twice on its own to enter squeeze mode.
Hold down Ctrl-Alt (Mac: Command-Alt), tap, and drag out a circle. But this time, let go of Ctrl-Alt (Mac: Command-Alt) and then, without lifting your pen, press Ctrl (Mac: Command) three times on its own to enter angle mode.
As you can see, you can quickly and intuitively shape your brush using the on-screen brush controls.
About the artist
Aaron Rutten is a Seattle-based Corel Painter Master, who specializes in combining traditional art techniques with modern digital art tools. While he works with both traditional and digital media, he prefers to be on the leading edge of a constantly-evolving profession by embracing the latest art tools and technology.

He is currently putting most of his focus into his popular YouTube channel, where he teaches people how to make digital art. He also sells art courses on Gumroad.
If you’ve found these two sample lessons to be helpful, consider attending Rutten’s Corel Painter 2023 Beginner’s Training Course — Wacom blog readers who sign up save 15% on purchase of the course by buying through the link above. Here’s a full syllabus of the course, so you can see exactly what Rutten teaches. And if you become a member of Rutten’s training platform, you can save even more on his courses.


