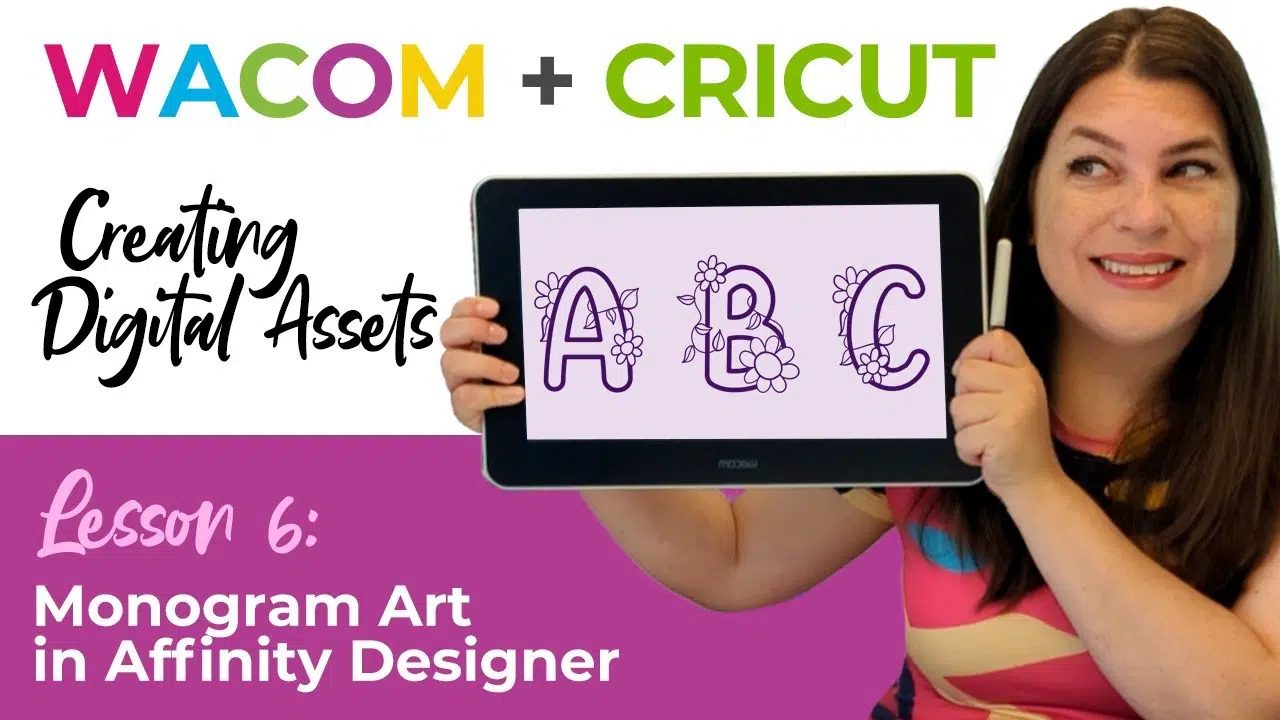

In the guest post and video below, crafter and creator Heather Cash continues her Wacom + Cricut series by showing you how you can use a Wacom One pen display and Affinity Designer software — included with every Wacom One purchase — to create monogram letter art that you can sell on Cricut Design Space. Check out the video below, or read on for a text-based explanation.
Hi, my name is Heather, and welcome to another episode of Wacom + Cricut, my series where I show you how to create digital assets for the Cricut, using your Wacom Tablet. And of course I’d like to give a huge thank you to Wacom for sending me this tablet, and sponsoring this series!
What is monogram letter art?
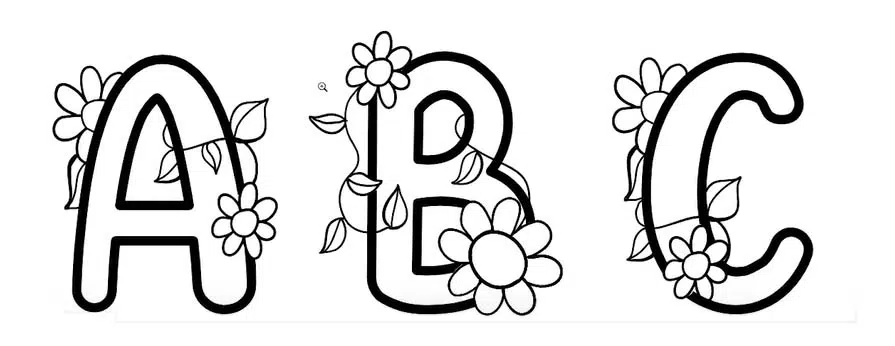
First, let me explain what I mean by monogram letter art. We’re going to take the entire alphabet of letters, and we’re going to draw embellishments to make them more creative and visually appealing, so they can be used as monograms.
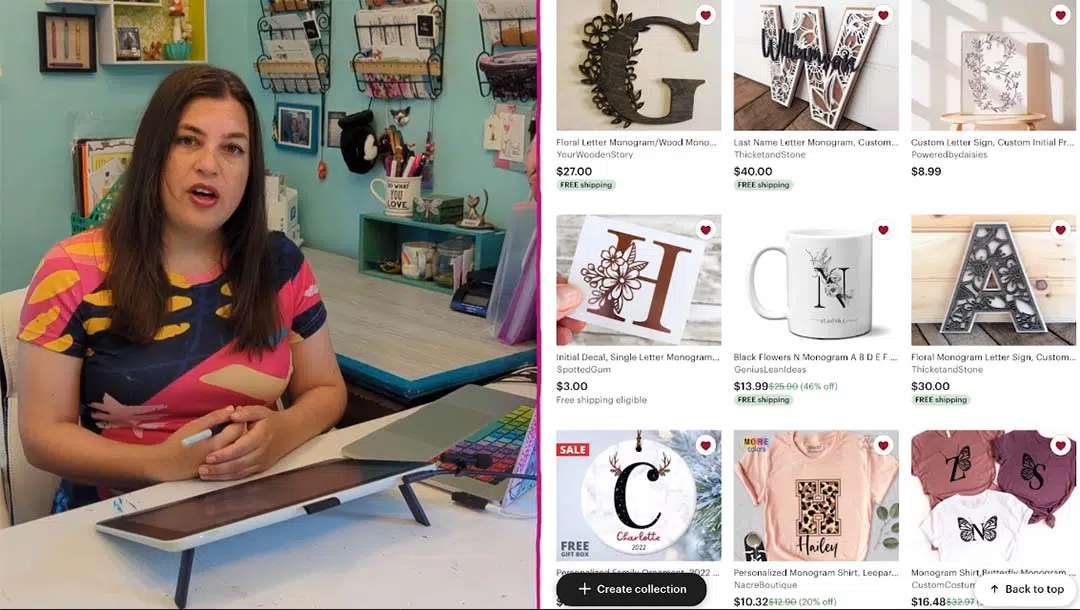
Monograms are very popular right now – next time you’re out and about, try to notice what the people around you are wearing or carrying, and I bet you’ll notice some monograms! I see them all the time on sweatshirts, hats, water bottles, jewelry – you name it – if it can be embellished, it can be monogrammed.
Some examples of embellishments for the letters are floral designs, animal prints, patterns (polka dots, stripes), a creature with the letter (woodland animal, dinosaur, etc).
Setting up your document and choosing a font
First, you will create your file, choose a font, and get your document set up. Then, you’ll add embellishments using your Wacom device and your artistic skills!
Create your file
Create a new file in Affinity Designer by selecting File → New. I like to start with a standard letter-sized page. Make sure you set the DPI to 72, as this will ensure that it gets pulled in as the correct size in Cricut Design Space.
Write out your letters
Grab your Text Tool from the left toolbar, and click and drag however big you want the letter to be. Then, you can start typing the alphabet. I like to also add a space between each letter to give more room to draw. When you get to the end of a line, just add a line break by pressing Enter, and keep on going! Continue until you’ve added all 26 letters of the alphabet.
Now, you can grab your Move Tool from the toolbar, and resize the letters if you need to — hold down Shift to constrain proportions — and position them how you would like.
Select a font
Now you can select which font you want to use for your letters. I like to find a font with thick letters, that way I’ll have lots of room to draw! With your letters selected, you can go up to the toolbar and click the font drop-down and scroll through the fonts to find one you like.
A note about font licensing: If you downloaded your font from a website, you’ll need to make sure you have a commercial license to use the font in a design if you plan to sell it. A lot of the “free” font websites have fonts that are meant to be for personal use only. If the font came with your computer, or it is from Google fonts, then you don’t need to worry about licensing — you’re free to use those in designs that you’ll later sell.
Outline your letters
For this project, I want the outline of the letters, not the filled in shape. To do this, we’re going to add a stroke to the letters, and remove the fill. Since the letter currently has NO stroke, and a black fill, we can really just swap the fill and the stroke. To do this, just head up to the Color Panel in the upper-right of your screen, and find the little curved arrow near the stroke & fill color. Click that arrow to swap the fill & stroke.
You can change the thickness of the stroke by going to the Stroke Panel (if you don’t see it, go to Window → Stroke). Pull the Width slider to the right to make the stroke thicker.

Convert your letters to shapes
In order to work with our letters more easily, we’re going to convert them from text elements to vector shapes. To do this, just go to Layer in the top menu, then Convert to Curves. Now, you can look in the layers panel and you’ll see that all those letters are now listed as Curves. This means that they are strokes, and we need them to be shapes.
To convert them from strokes to shapes, we first need to ungroup them by going to Layer → Ungroup. Then, we’ll convert them to shapes by selecting Layer → Expand Stroke.
You can see the resulting shapes by clicking on your Node Tool, and it will show you all of the nodes that make up the shapes of your letters.
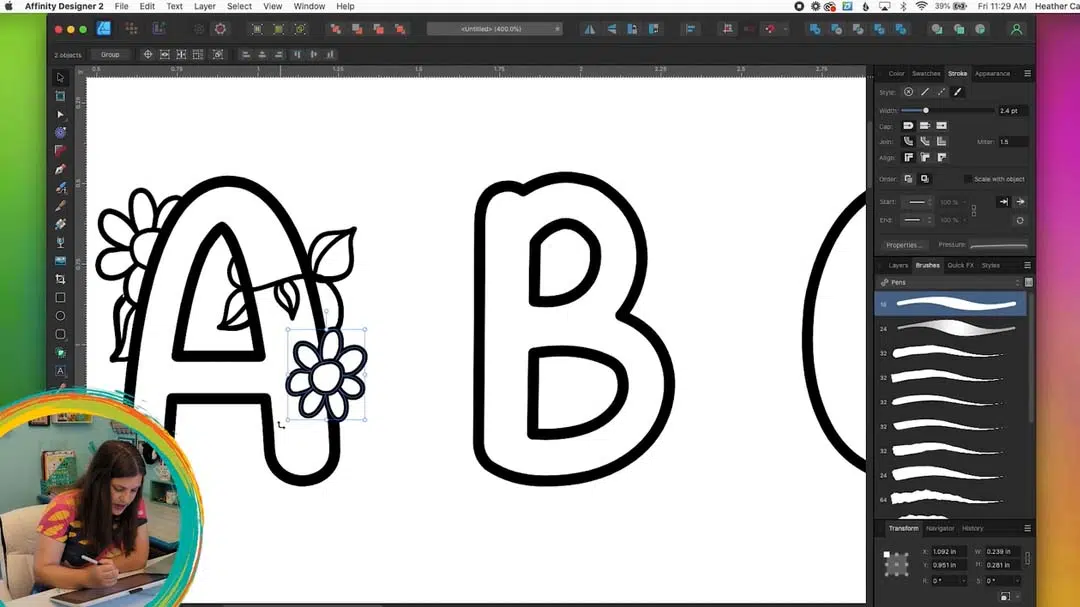
Embellishing the letters with your Wacom Device
Start drawing!
Grab your Brush Tool from the toolbar on the left, then go over to your Brushes Panel (If you don’t see it, go to Window → Brushes), and choose the most basic brush. I chose Solid Pen with Pressure. You should also check in the options along the top, that you have Controller set to Pressure.
Now, you can test out your brush by drawing some test strokes. If the brush is too big or small, you can change the size in the top toolbar next to Width. One of the benefits of using a Wacom device is you can control the pen pressure for precise designs and embellishments. I’m doing a floral design for this project, so I’m going to draw some flowers around, and overlapping, the letters.
Refine your design
If you have any elements that should be “in front” of the letters, then you’ll want to remove the part of the letter that is behind that element. To do this, make sure you have the letter selected, and then grab the Knife Tool from the toolbar on the left. Now, you can slice the letter wherever you want to cut it. After you’ve sliced it a couple places, you can switch to your Move Tool so that you can select that section of the letter and delete it.
If you need to adjust the shapes at all, you can grab your Node Tool from the toolbar and select individual nodes to move them around.
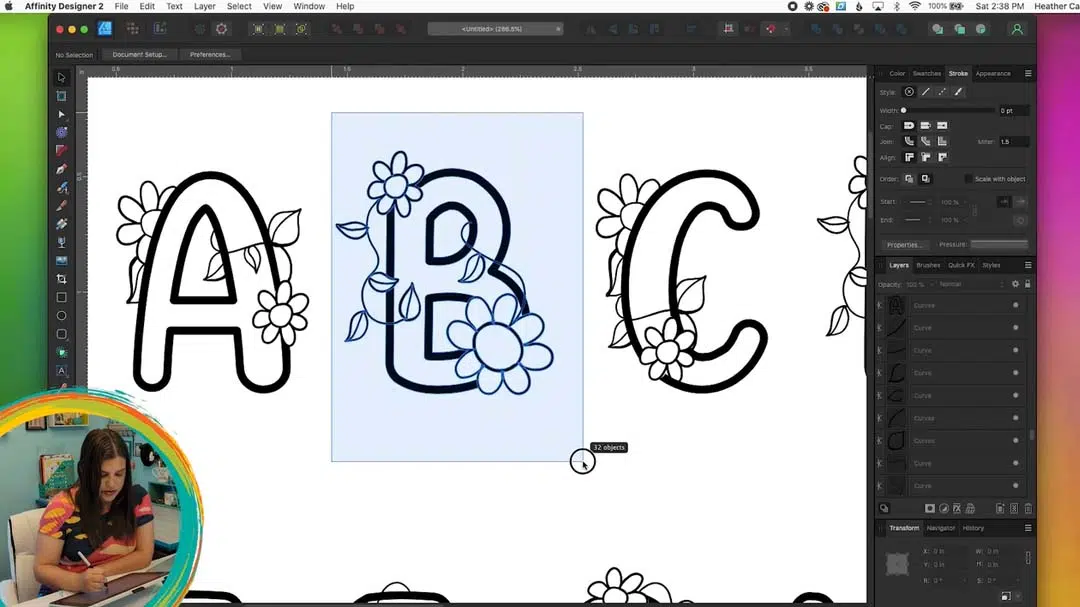
Speed up your work
26 letters is a LOT of letters! You can speed up your work by copy & pasting elements. For example, if you drew a flower on a letter, you use your Move Tool to grab the flower and then go to Edit → Duplicate. Then, you can grab that duplicate flower and move it to a different letter.
Format for Cricut Design Space
After you’re all done designing your letters, you’ll need to format everything into shapes for Cricut Design Space. To do this, grab your Move Tool, select everything, and select Layer → Expand Stroke. This will convert all your lines into shapes.
For each individual letter and its embellishments, you’ll need to combine those into one shape. To do this, select a single letter and its embellishments and click the Add button in the toolbar (looks like two shapes and a plus sign).
The reason we combine each letter separately is to make it easier for our customer, so that they can easily grab a single letter and hide or delete the others after bringing the file into Cricut Design Space.
Export for Cricut Design Space
First you’ll want to save your design as an Affinity Designer file by selecting File → Save. Then, you can export it as an SVG for Cricut Design Space. To do this, select File → Export. Choose the following options:
- SVG
- Preset: SVG (for export)
- Uncheck “Set view box”
Then click Export.
Check your work
The last step to any vector art project for the Cricut, especially when creating digital assets to sell, is to check your work in Cricut Design Space. So head over to Design Space and import your design. Check the Layers Panel in Design Space to ensure that everything came through correctly, and that each letter is its own separate shape.
Note: Files always come grouped when imported into Cricut Design Space, so you will need to Ungroup everything in order to grab a particular letter.
You’re done!
Now, your monogram letters are ready to sell online or share with friends! Have fun and happy creating!