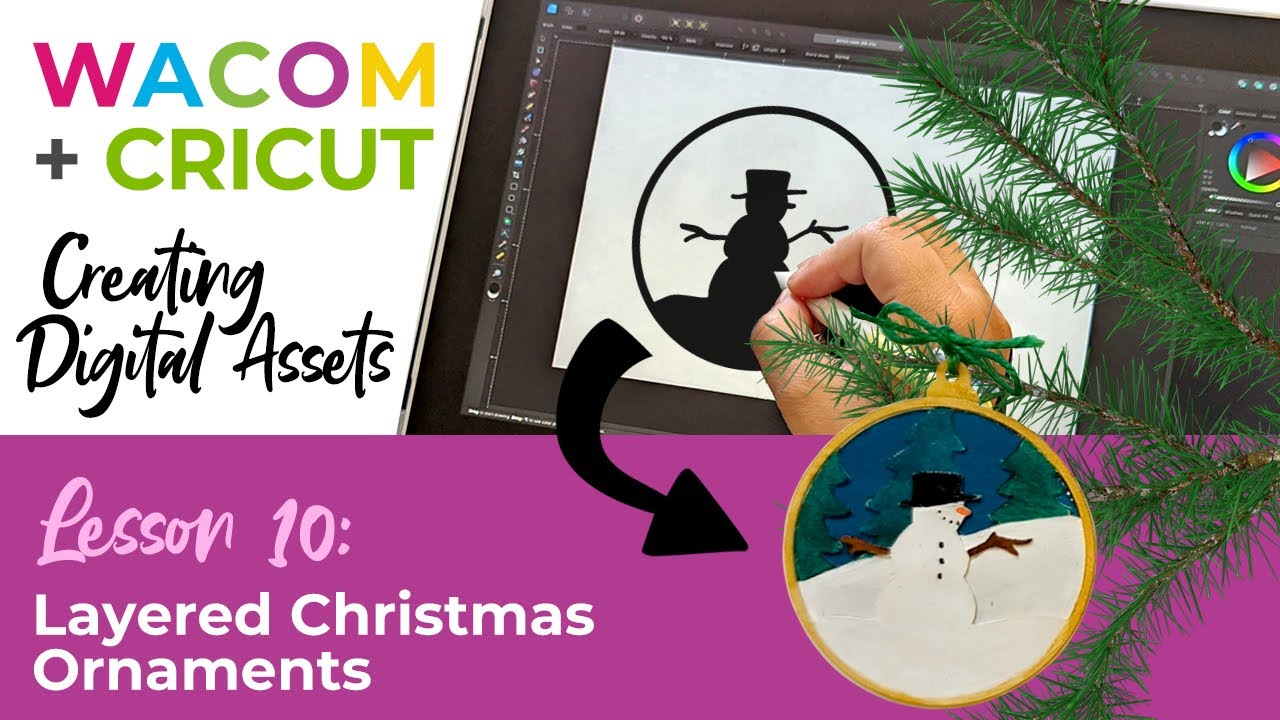
In the guest post and video below, crafter and creator Heather Cash continues her Wacom + Cricut series by showing you how you can use a Wacom One pen display and Affinity Designer software — included with every Wacom One purchase — to create a layered Christmas ornament as a fun project to add some creativity to your holiday decorations!
Check out the video below, or read on for a text-based transcript.
Hi, my name is Heather, and welcome to another episode of Wacom plus Cricut, my series where I show you how you can create projects for your Cricut using your Wacom tablet. Today we’re going to be creating layered Christmas ornaments.
I got this Cricut natural wood veneer from Michaels. I’m going to be using my Cricket Explore to cut this, and I’m going to be using the Deep-Point blade. So the Deep point blade, you’ll recognize it because it’s in an all-black housing. So if you don’t have it, then you would need to go grab that from the craft store.
First, get your supplies:
- Cricut Explore
- Cricut Natural Wood Veneer
- Cricut Deep Point Blade
- Wacom pen display or pen tablet
- Affinity Designer software (a free trial comes with any purchase of Wacom One!)
Step 1: Set up your document
I’m in Affinity Designer here, and I’m going to create a new document. I have the dimensions set to 8 inches wide by 8 inches high, and that’s fine for this. The DPI is set to 72; that’s very important because that ensures that your project comes in at the right size in Cricut Design Space. So I’m going to go ahead and click create.
For our ornament, let’s figure out how big we want the ornament to be. Here’s my ruler, and I’m just going to kind of estimate about how big I want it to be. It’s going to be a circle, so I think maybe three inches is probably good.
Step 2: Create the ornament base
I’m going to start by making a circle. So I’m going to grab my Ellipse tool, and I’m just going to click and drag. I can hold down shift to constrain the proportions, and you can look at the dimensions as you make it bigger or smaller. So you can just make it around three inches. If you want it to be exact, you can go over to your transform panel down here, and you can actually just set it to 3″ x 3″.
So this is going to be our ornament, and we also want to have a part that we can put the little hanger on. So I’m going to add a little rectangle, which is going to be the little top of the ornament, and then just a circle that we can put the hook through. Let’s do a Rounded Rectangle. I’m just going to make that however big I want it, maybe like that. Then I’m going to grab another ellipse and make a circle right here. For the size of that circle, I think a quarter of an inch is a pretty good size. So I’m going to go down here, and I’m just going to set it to 0.25″ for the width and the height. Then I’m going to make it so it’s only an outline and not filled in.
Up here where it has the stroke and the fill, you can see the fill is in the front, and that means the fill is selected. With the fill selected, we’re going to click the No Fill button here. Then you can see it puts that red line in it, so there’s no fill, and all there is is a stroke. But as you can see, it’s super skinny. Let’s click on the stroke, and I’ll just pull this up, and then you can see it gets thicker. So that looks pretty good, I think. I’ll go ahead and put that here, and then I’ll just make this a little bit smaller so they kind of match a little better.
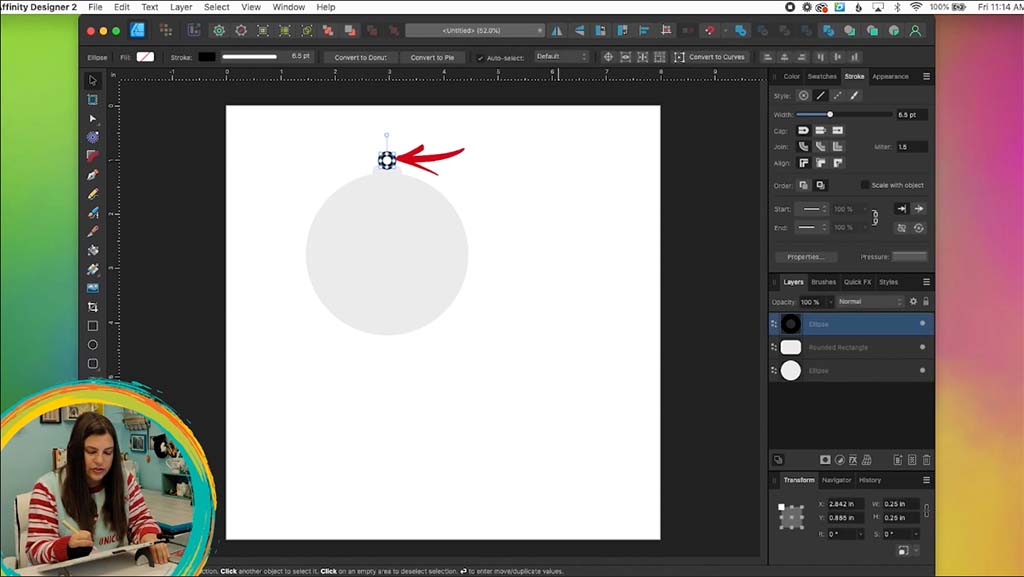
Now I want this all to be one shape. First of all, let’s make sure it’s all aligned center. So I’m just selecting all of them, and I’m going to go to my toolbar up top here, and I’m going to click Align Center. So now they’re all aligned. Then I want to click my little circle, and this needs to be converted from a stroke to a fill. So I’ll just do Layer > Expand Stroke, and now it’s a shape. Now I can select all three things, and then up in the toolbar, I’m going to click Add. So now this is all one shape, and then you can reuse this over and over as many times as you want for different ornaments. This is going to be the back piece of our ornament, so we’re just going to keep that as is.
Step 3: Design
I’m going to have it on this layer here, and I’m going to lock the layer so that way I know I can’t move it around, and then I’m going to add a new layer. So I’m going to click that Add Layer button. This is where we can start doing more of our design, but first of all, we want to have an outline of the circle, and that’s what the whole design is going to be connected to. That’s going to be our second layer. We’re going to have a circle with elements on it.
I’m going to grab my Ellipse tool again and click and drag and hold down Shift. Then over here, I’m going to set this to 3 inches by 3 inches, so that way it’s exactly the same as the other circle. We have this stroke here, which is good because that’s going to be the circle that we’re going to have everything in. However, the stroke is center-aligned to the actual line that goes around. I don’t know if that makes sense, but basically, you have the ornament, and it’s going to kind of add a stroke, so it’s going to make it a little bit bigger than 3 inches.
Instead, what we want to do is have the stroke aligned inside so that we have our 3-inch circle, and then we’re going to have the line going inside of it. All we have to do is go over to our stroke panel over here, and where it says Align, we’re going to pick the second one that says Align Stroke to Inside. So now it’s exactly the same as the base ornament.
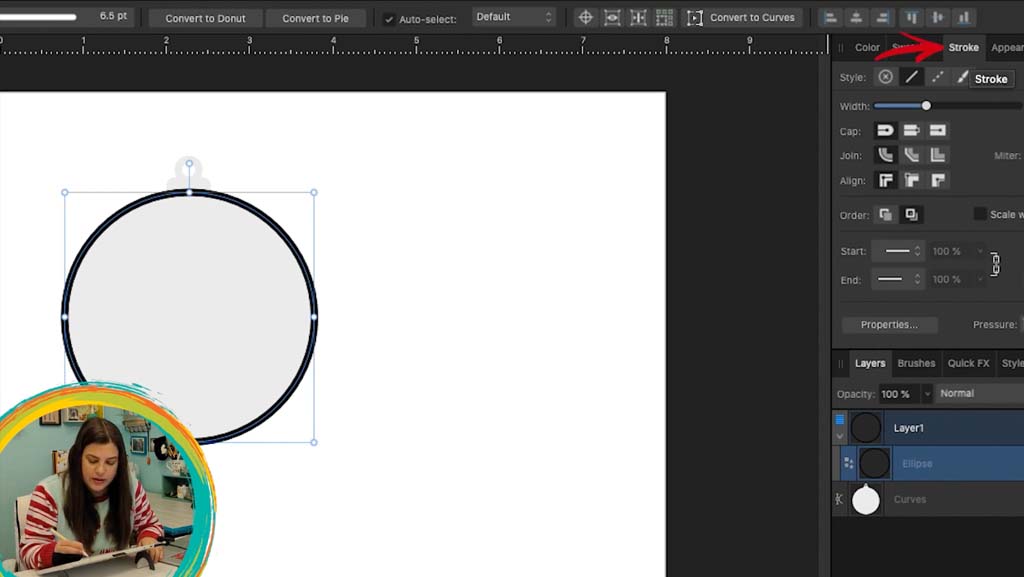
Now I’m going to lock that layer so that’s just going to make it easier so we don’t accidentally move it around, and I’m going to add a new layer. I’m going to click that Add Layer button, and then this is where I can start drawing. Actually, I like to start drawing with the layer in the front because I just feel like it’s easier to kind of visualize your main subject that you want in the front and then to add the background elements afterward. Let’s start with what we’re going to have in the front.
Step 4: Adding elements
For mine, I want to do a snowman because I love snowmen. I’m going to grab my Pencil tool, and I’m going to draw and make sure it looks how I want it to look. It’s a little bit thick right now, so I’ll undo that, and I’m just going to go up here to width, and I’ll bring it down some, and that’s pretty good. I like that. This is three and a half, so let me just zoom in here, and I’m going to start with some ground, and then I’m just going to draw my little snowman.
I’ll fill these in later, but you want to make sure that everything connects. That’s the main thing. Give them a little hat. I’m going to go ahead and connect this too, just so it’s easier to fill it in. Now I’m going to grab my Select tool and select everything. I’m going to go to layer expand stroke, so now this is all shapes, and I want to combine it all into one shape. I’m going to go up here and click Add, so now this is all one shape.
But I want it to be filled in, so I’m going to go up to Layer Geometry > Fill Holes, and there we have our silhouette. If you want to touch it up at all, you can use your Node tool. I probably want to bring this hat in a little bit, and if you want to delete any points, you can just select the point and click delete on your keyboard. Maybe I’ll add a little nose also.
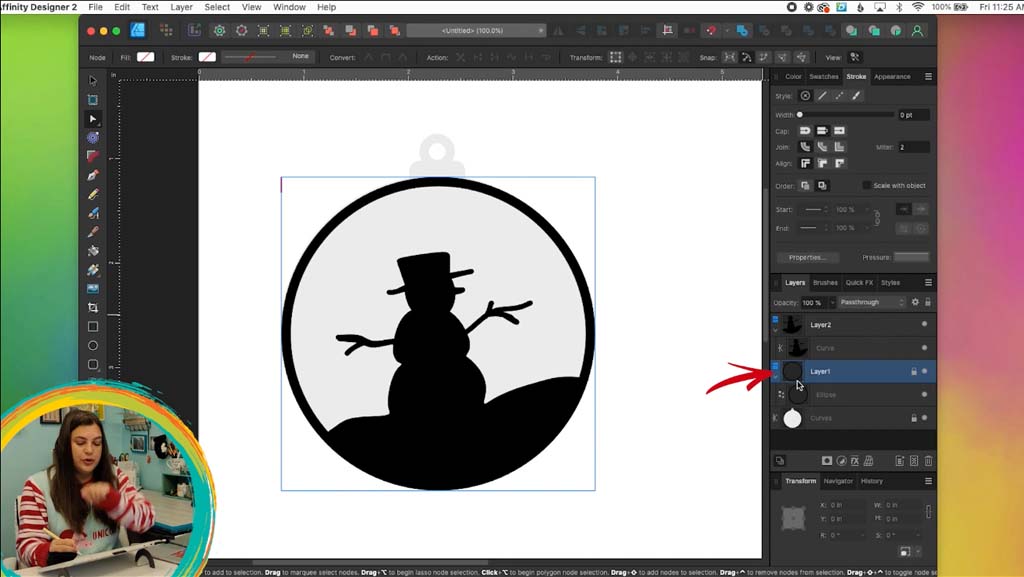
Then I can just go through the same steps, where I’m just going to select everything and go to Layer > Expand Stroke and then select everything and Add. Now my top layer is done, so I can go over to my Layers panel. I’m going to grab the layer that is just the loop, the outside loop, and I’m actually going to duplicate it. I’m going to go to Edit Duplicate, and I’m going to take this unlocked one. It’s still a circle shape, so I do need to go to layer expand stroke, and then now I could select the loop and the snowman and click add.
Now he is perfectly inside the loop, and as you can see, if we hide him by clicking this dot here, we still have our original loop. This is going to be the layer that’s behind him. Let’s go ahead and unlock that and I’ll make it a different color so that we can distinguish it from the other layer. I’m going to go up to color, and I’ll just pick something different. Maybe blue. Then we can turn the snowman layer back on, and he’s in front here. I’m going to lock him so that we don’t accidentally move it around or anything.
Step 5: Adding another layer
We have that one locked, and we have our blue loop. We’re going to be drawing behind the snowman. Now, let’s lock the blue loop layer and then add a new layer above it. This is going to be the rest of the blue stuff we’re going to add on. I’m going to grab my pencil again, and I want to have a stroke here, and I want it to be that same blue color. I’m just going to click it in my recent swatches here, and now I can go ahead and draw whatever else I want in the background. I could do some trees and whatever you do, just make sure that it connects to the loop outside. I couldn’t just put a bird here. It would just fall out. It would have to be connected.
I’m just going to kind of trace around so that I’ll be able to close it up. Let’s connect that and connect that. Now I’m going to grab my move tool and select everything. I’m going to go to Layer > Expand Stroke, and now all these strokes are shapes. Then we’re going to click add so that they become one shape. Then we’re going to go to Layer Geometry > Fill Holes, and there’s our nice background. Of course, you want to connect that with the loop, the blue loop.
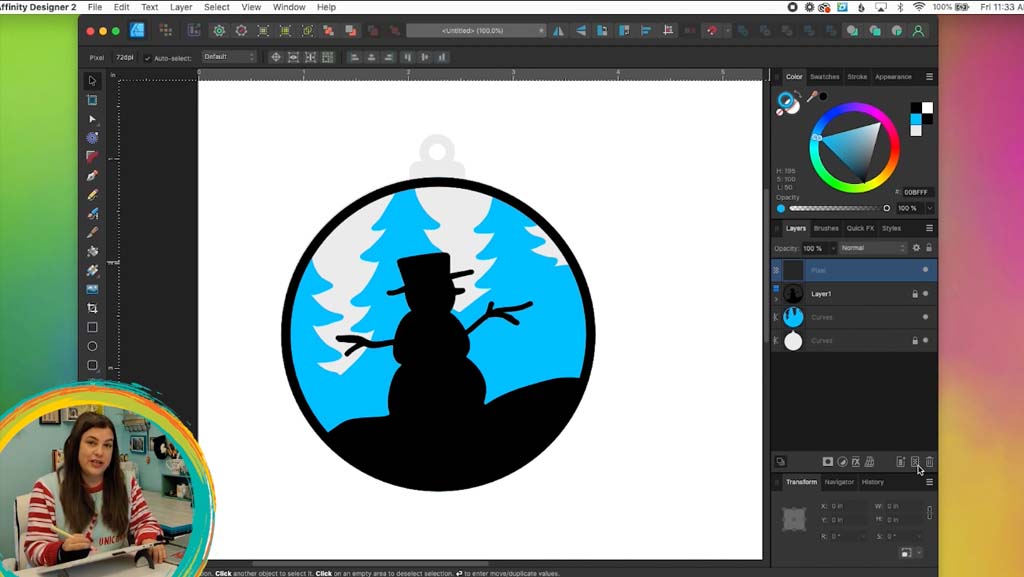
As you can see, they’re in two separate layers here. Let’s go ahead and hide our other layers so that we only see these two, and I’ll unlock the blue loop layer. You can see that we do have some empty holes right here. Let’s just make sure that part’s filled in. I’m going to grab my node tool, and I’ll just click on this. I’m just going to pull these nodes so that they overlap that circle, and then we don’t have those holes there.
Remember, the loop, we do need to make that into a shape because it’s still an ellipse, as you can see in the layer panel here. I’m just going to go to layer expand stroke, and now it’s a shape. Now I can grab both of those layers and do add. I have some empty layers here. I’m just going to delete those. Now I can show all my other layers, and this would be my finished ornament.
Step 6: Importing into Cricut Design Space
Now this is ready to go ahead and bring into Cricut Design Space. I’m going to first save this as an Affinity Designer file. I’ll name it “Ornament,” and then I’m going to go to File > Export, and I’m going to pick SVG for export. Under Advanced, we’re going to use DPI and do 72. Then we’re going to uncheck Set View Box, and that will ensure that it comes through as the correct size in Cricut Design Space. Now we can click Export.
Now I’m going to open up Cricut Design Space. I’m going to create a new project, click Blank Canvas, and now I’m going to upload. Upload image > Browse, and I’ll grab my Ornament.SVG and click Open and Upload. Now I’m going to click that and do Add to Canvas. So here is my ornament.
As you can see, we do have them as separate colors, and that’s good for in case the customer has like different kinds of wood they want to use, or say they want to cut it out of paper and they want to use three different colors. But for today, I’m going to be cutting them out of the same kind of wood. So really, they can just all be the same color because they’re all going to be cut out of the same piece of material.
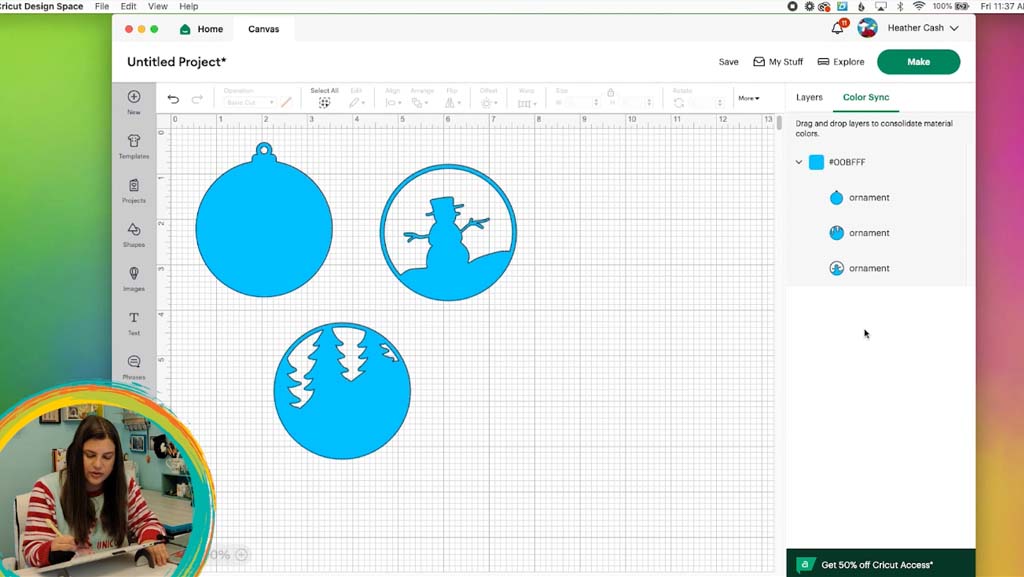
So I’m going to click on my ornament over here, and I’m going to Ungroup it. So I’ll click this right here for ungroup. And then I have my three different pieces. I can go over to Color Sync, and now I’m just going to make them all the same color. For example, I can grab this layer and just drag it onto the next one, and then those are the same color. And then I can grab this layer and drag it into those. And now everything is the same color, so they will now cut out of the same material. And now I can click make, and I’ll just give these a little bit of extra room here.
Step 7: Cutting
So as you can see, for my material, I could probably just use like 12 inches by maybe four and a half or five. And so I’m going to click Continue. Here is my mat, and this is actually one of the full-size mats that I cut down so that it would be easier for smaller projects. So I’m going to go ahead and take the cover off, and here’s my material. So I’m just going to cut this down to size, and I’ll just use my scissors for that. And I’m going to stick this here, and you really should use a strong grip mat, but I don’t have one. So I’m using my standard grip, but I’m also going to add some masking tape just along the edges, and that’ll help it to stick better too.
Here’s my masking tape, and I’m just going to try to put it right on the edge where it’s not going to get cut by the Cricut. And since we did move those pieces in further, it should be okay. It shouldn’t end up getting cut. I set my material to custom, and I’m going to click browse all materials, and then up here in the search bar, I’m just going to type veneer. I’m going to go ahead and bookmark it and also select it and click done so that is chosen there. And then I need to put my Deep Point Blade in my Cricut.
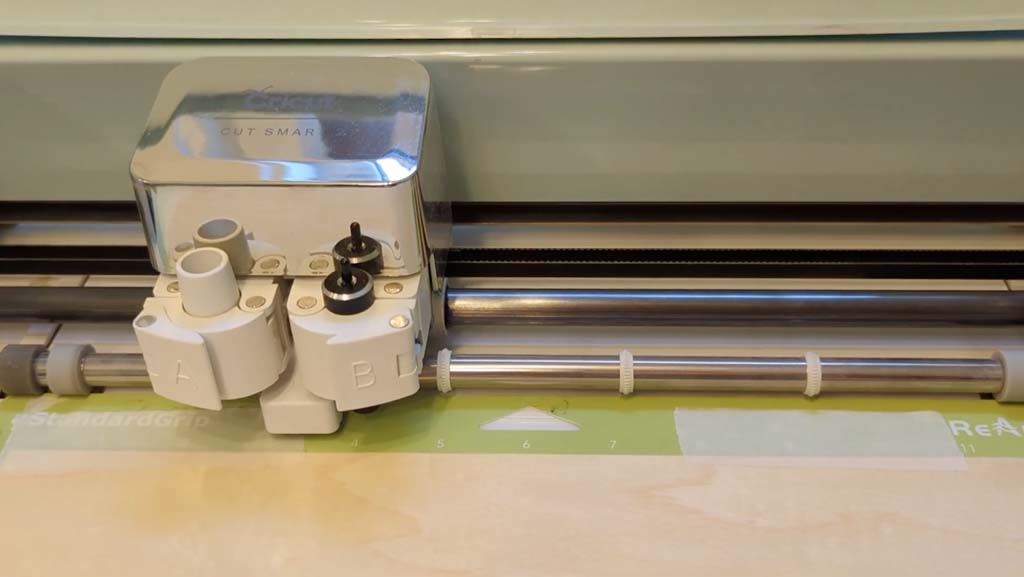
The blade is always in B, so I’m going to go ahead and open that and take the old blade out. And then I’m going to put my deep point blade in. So I’m just going to drop that in and secure it. And now I can go ahead and run this through.
Step 8: Finalizing
As you can see, the Cricut did a really good job with it. So I’m just going to pick this up from my mat, and I’ll just pop out the insides here. I’m just going to use my little X-Acto knife here just to be sure that I don’t rip anything.
Now here is our layered ornaments, and if you wanted, you could stain this wood different colors. But what I want to do is I’m going to paint them. So I got these colors of paint: teal, black, green, and white. Actually, I’m also going to add some brown so I can do his little arms and then maybe just a touch of orange for the carrot nose. My background is really going to be the sky, and it’s just going to kind of show through. So I’m going to use the blue for that, and you’re not really going to see anything else under that. So I’ll just paint that much of it. And now I can go ahead and paint the snowy parts white.
And now I’m just going to add some of these little details. Since this snow is going to actually be behind this one, I want to make it a teeny bit darker so that you can kind of tell that it’s not just one big white blob. So I’m just going to mix a teeny bit of black in with my white so that it can just be like a very, very light gray.
For the finishing touch, I’m going to have some gold around the edge and on the little top part. This is my gold metallic paint. I think silver probably would look better, but I don’t have silver metallic. So I’m just going to do gold, and I’m just going to do it on the little loop part of the topmost layer. And then I’m going to do it on just this little part of the back layer, the little extra part at the top, the hanger.
Now these are all dry, and I’m going to glue them together. I’m going to use E6000 because that’s my favorite craft glue. It works really well, but you do have to be careful and read all the warnings because you really shouldn’t breathe it in, and it can be dangerous. But you can use whatever craft glue that you like the best.
So I’m going to start with my bottom piece here. I’m just going to put some glue around the edge, and then I can also put a little bit extra on the piece that’s going to go on top of it. And then I’ll just stick those together. Now I want to put my little snowman on top. So I’m going to flip him over, and I’ll put some glue on him and around the ring here. And I’ll just set him on top like this. And now I have this green twine, so I’m just going to put this through the hole and tie a little bow. And then it’s all ready for a little hook to put it on a tree, or you could also use it as like a gift tag for a present. I always think those are so cute, like to use an ornament as a gift tag or just like a little embellishment for a present that you wrapped.
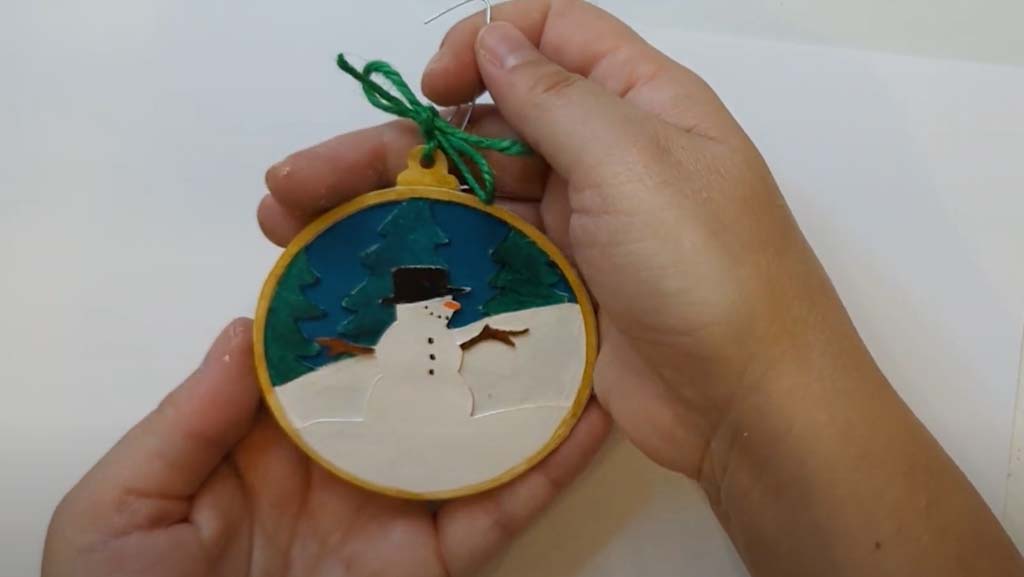
So here is the finished layered ornament. I hope you liked this video!
