Whether you’re planning some DIY, crafting, or decorating, Michael’s is your go-to. Now, level up your design skills as you prep for your next project by using a Wacom tablet! Whether you’re ideating a pattern for sewing, designing a card for an upcoming holiday, or creating assets for other crafters to utilize, Wacom is a great partner — and Wacom products are now available at Michaels.com.
In the video below, crafter and creator Heather Cash continues her Wacom + Cricut series by showing you how you can use a Wacom One pen display and Affinity Photo software — included with every Wacom One purchase — to create word art! Check out the video below, or read on for a text-based explanation.
What is word art?
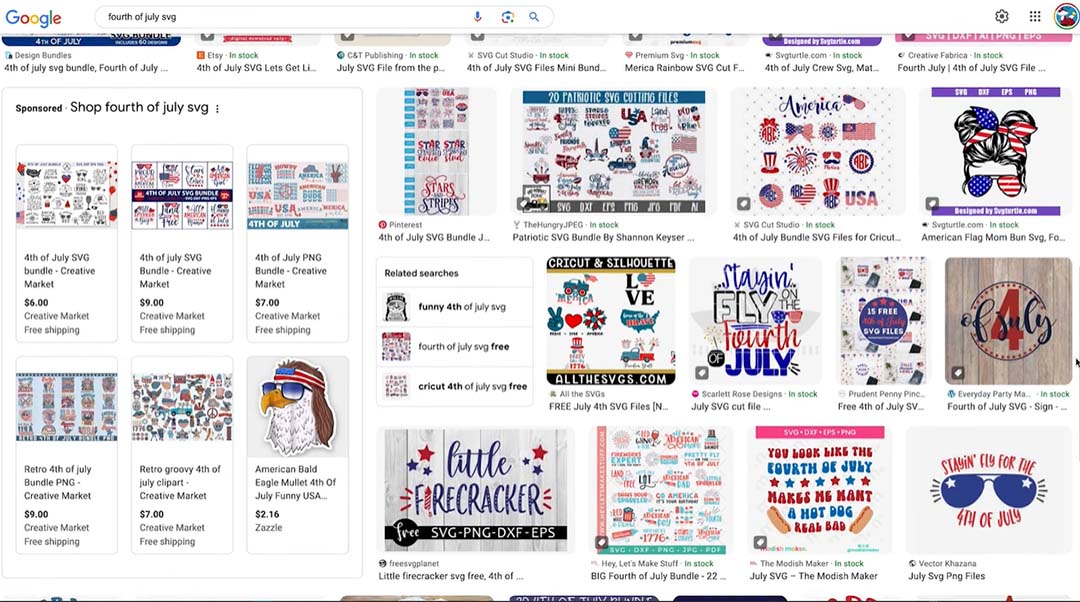
If you search online for certain SVGs for use with your Cricut, you’ll find that a lot of cute quotes and sayings come up. For example, if we search for “4th of July SVG,” the phrase “4th of July” will come up, but also sayings like “land that I love,” “fireworks and freedom,” etc. One way to describe these kinds of files is “word art.”
These files would be perfect to add to a t-shirt, water bottle, hat, or other item. You can create your own, and then use them to put onto products – or sell them to others so they can do so. This is what we’re going to create today, and since July 4th just passed, I thought that would be a fun subject to do!
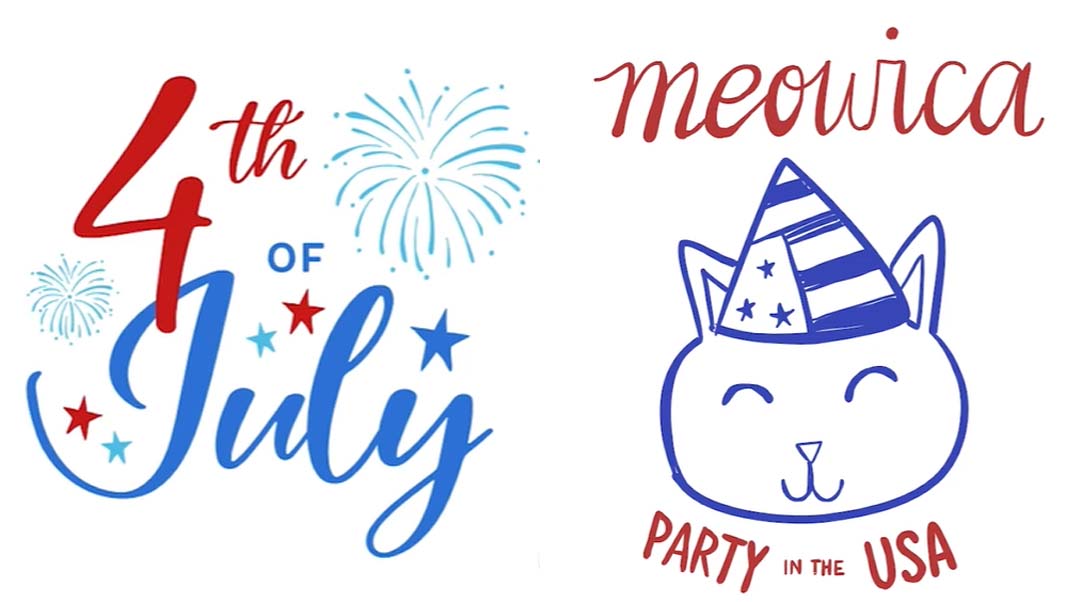
For this project, we’ll create word art for “4th of July,” and I’m also going to do one that says “Meowica,” because I like anything that has to do with cats. We’re going to cover both methods of creating word art – using ready-made fonts as well as hand-lettering.
Design 1: 4th of July (using fonts)
1. Create your file
First, create a new file in Affinity Designer. The size doesn’t really matter, since we are creating vector art, which can be scaled to any size. So I usually just go with the default letter-size document at 300dpi. You can hide the margin guides, since we don’t need those – just go to View → Hide Margins.
2. Add text
To add text, click on the Artistic Text Tool in the toolbar on the left-hand size of your screen. Click and drag a rectangle as big as you want your text to be. Then, go ahead and type the first word in your phrase – in this case, we’ll do “4th,” since our phrase is 4th of July.
Click on the Move Tool to move the text where you would like it. Repeat this process for each word in the phrase (in this case, “of,” and “July”).
3. Select your fonts
Click on the word July, since it’s the longest word that we have in the design. This way, we can really see what the font will look like. Click on the font drop-down in the upper left corner of the screen, and mouse over the different fonts to find one that you like.
Tips for selecting fonts:
- Be sure that you don’t select too thin of a font. The thinner fonts don’t stay as well when they are ironed on to a design. If you have some skinny portions of the letters, that’s ok, as long as they are connected to thicker parts.
- Don’t stick with the standard fonts (Arial, Times, etc) – we’ve all seen them a million times, and we want to see something different!
- Vary the sizes of the words in the design, to give emphasis to more important words and de-emphasize the less important ones.
- Use both a script and a regular font in your design to add visual interest.
- Avoid using more than one font of a single style, e.g. two script fonts, as they will cause visual conflict.
- Play around with the positions of the words. Look at the shapes of the words, and fit them together like a puzzle, or try overlapping parts of words.
4. Embellish
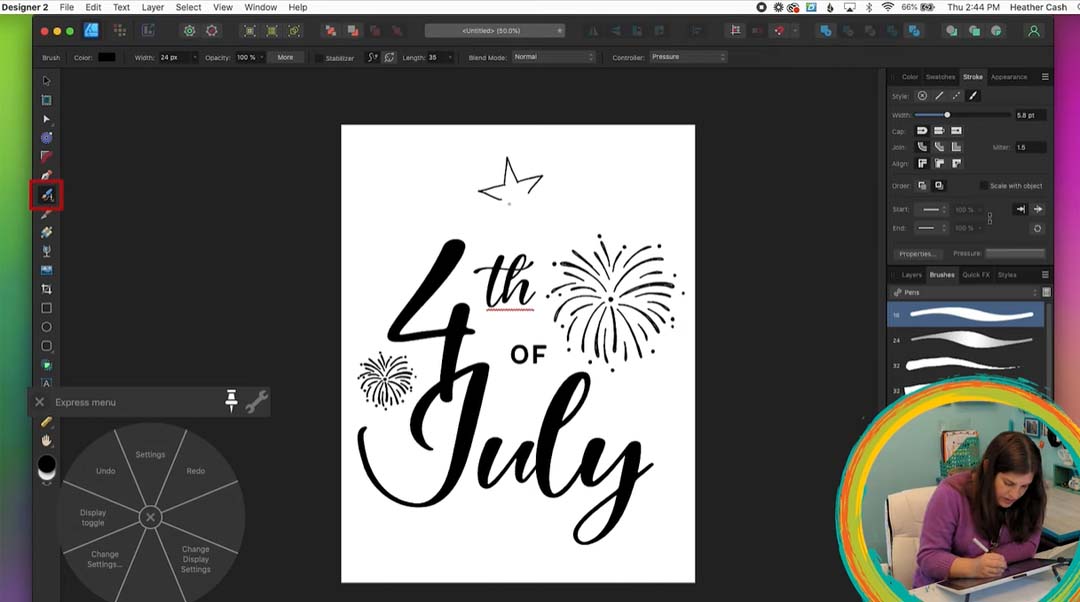
Use the Vector Brush Tool to add embellishments to your design. You can choose a basic brush, like the Solid Pen With Pressure. For my 4th of July design, I’m adding fireworks and stars. Remember not to draw pieces that will be too tiny, since they are more likely to peel off prematurely if used for iron-on.
Use your extra embellishments to fill in empty spaces in your design. You can duplicate your elements by going to Edit → Duplicate, and then resize and rearrange them to balance out the visual space in your design.
5. Save as two files
Make sure you save your completed design as an Affinity Designer file by going to File → Save. Then, save a new version of the file by going to File → Save As, and name it something like [original name]-shapes. This way, if you ever want to change some things about the design, you can do it using the original artwork that hasn’t been reformatted for exporting.
6. Format for Cricut Design Space
In order for Cricut Design Space to properly import and read the file, it will need to be made up of only shapes, not lines or text. So, with the “shapes” file open, you’ll first need to ungroup everything, just in case you had some things grouped. Select everything, then select Layer -> Ungroup All. Then select everything again, and select Layer → Expand Stroke. This will convert all your lines into shapes.
To convert the text to curves, grab all of the text elements (you can use shift to select multiple elements) and then select Layer → Convert to Curves. When you do this, all of the letters in a single word end up as separate objects and are grouped together, so you’ll also need to select each word and ungroup it by selecting Layer → Ungroup All.
For each individual object (like a firework or a word, for example), you’ll need to combine it into one shape. To do this, select the object and click the Add button in the toolbar (looks like two shapes and a plus sign).
If you have any accidental holes in your design, just select the object with the holes and go to Layer → Geometry → Fill Holes.
7. Add color
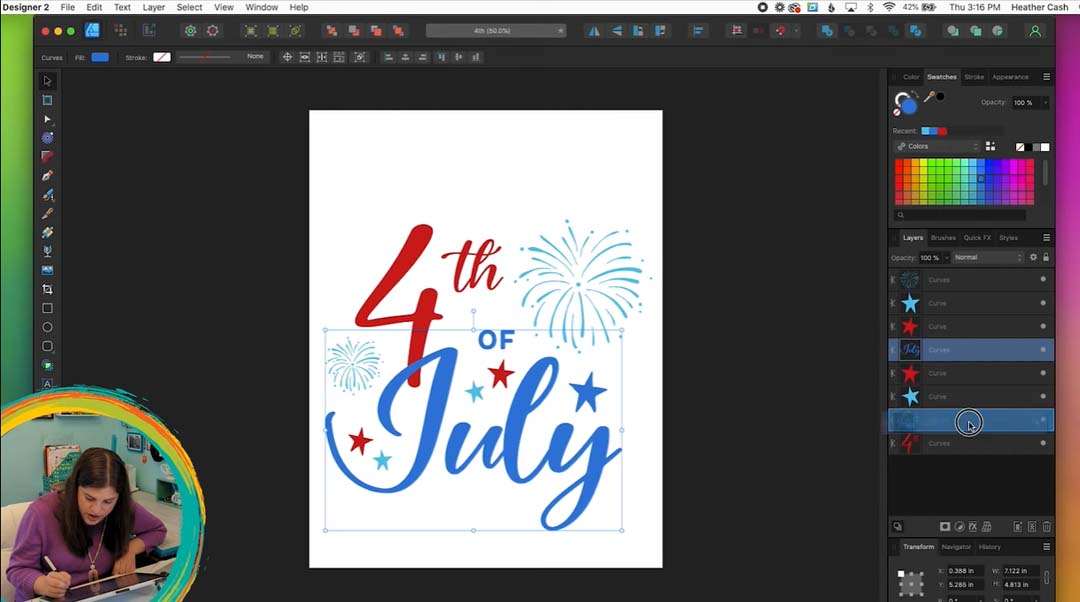
Now you can select each element, and double-click on the colored circle in the bottom of the Tools Panel, and choose a color. Once you choose a color, it will be added to Recent in the Swatches Panel at the top-right of your screen, so you can access it more easily when coloring subsequent objects.
8. Combine same-color shapes
Next, you can combine shapes that are the same color for easier placement with iron-ons and decals. When the shapes aren’t combined, they will be cut out in random places on the vinyl, leaving the crafter to figure out the correct placement. However, when they are combined, they will be cut out in the correct place on the vinyl in relation to each other, which makes placing them much easier.
You can skip combining for elements that are far away from each other, but for elements that are close to each other (and the same color) it usually makes the most sense to combine them.
Note that if anything is grouped at this point, then combining won’t work – so you can check the Layers Panel to make sure nothing is grouped – if it is, select that item and select Layer → Ungroup.
Now, just select the items you’d like to combine into one object, and click the Add button in the toolbar (the button with two shapes overlapping and a plus sign). Check in the Layers Panel that the items successfully combined into one shape.
Repeat this for each of the items in your design.
9. Group everything & export
When you are finished combining the same-color shapes in your design, you can grab everything and select Layer → Group. Save your design by selecting File → Save, then you can export it as an SVG for Cricut Design Space. To do this, select File → Export. Choose the following options:
- SVG
- Preset: SVG (for export)
- Uncheck “Set view box”
Then click Export.
Design 2: Meowica (hand-lettering)
1. Create Your File
Create a new file by selecting File → New. Just like with our 4th of July design, the size doesn’t matter since we are creating vector art, so you can select the same options as before: the default letter-size document at 300dpi.
Select View → Show Grid to display guidelines to help you write straight and size your letters the same.
2. Write Out the Text
Select the Vector Brush Tool and use the same brush that we used for our embellishments in the previous design – Solid Pen With Pressure. When you write out your letters, if you use more pressure on the downstroke of the letters, you’ll get a brush lettering effect. Another option is to write out your letters and then go back over the downstrokes later, with more pressure. You can choose the method that’s easiest for you.
I also added the subtext, “Party in the USA”. You can add this saying or a different one of your choosing! When you’re done writing out your text, you can toggle off your gridlines by selecting View → Show Grid.
3. Embellish
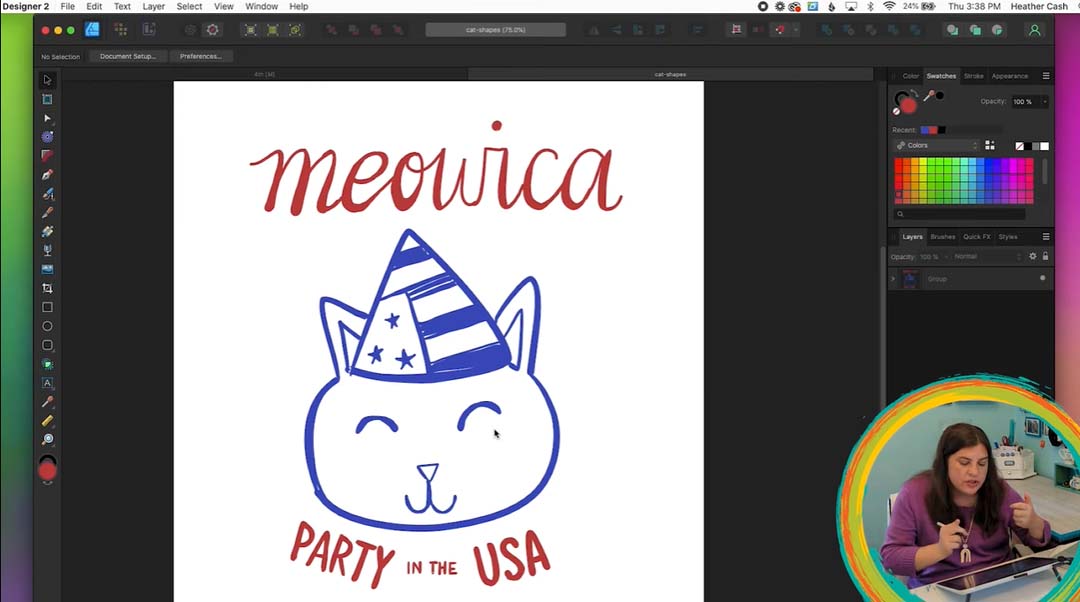
Now, you can select your brush tool again and draw out any art you’d like to include in your design. I drew a cat in a party hat to go along with the subtext “Party in the USA”.
After you add art, feel free to move around & resize the elements to create a cohesive design.
4. Save as two files
Just like with the 4th of July design, you’ll need to make sure you save your completed design as an Affinity Designer file by going to File → Save. Then, save a new version of the file by going to File → Save As, and name it something like [original name]-shapes. This way, if you ever want to change some things about the design, you can do it using the original artwork that hasn’t been reformatted for exporting.
5. Format for Cricut Design Space
Just as with the previous design, we will need to format this one so that it is only shapes rather than lines. So, with the “shapes” file open, select everything, and select Layer → Expand Stroke. This will convert all your lines into shapes.
For each individual object (like the word “Meowica” or the cat head), you’ll need to combine it into one shape. To do this, select the object and click the Add button in the toolbar (looks like two shapes and a plus sign).
If you have any accidental holes in your design, just select the object with the holes and go to Layer → Geometry → Fill Holes.
6. Add color
Now you can select each element, and double-click on the colored circle in the bottom of the Tools Panel, and choose a color. Once you choose a color, it will be added to Recent in the Swatches Panel at the top-right of your screen, so you can access it more easily when coloring subsequent objects.
7. Group everything & export
When you are finished adding color to your design, you can grab everything and select Layer → Group. Save your design by selecting File → Save, then you can export it as an SVG for Cricut Design Space. To do this, select File → Export. Just as before, you’ll choose the following options:
- SVG
- Preset: SVG (for export)
- Uncheck “Set view box”
Then click Export.
8. Check your work
The last step to any vector art project for the Cricut (especially when creating digital assets to sell) is to check your work in Cricut Design Space. So head over to Design Space and import your designs. Check the Layers Panel in Design Space to ensure that everything came through correctly, and pieces that should be in a single shape are combined. You can also make sure that everything is placed correctly.
You’re Done!
Now, your designs are ready to sell online or share with friends! If you’re uploading to Etsy or another digital market, you can upload each SVG as its own product to sell, or you can bundle them together into a zip file and sell them as a set. You can also create a few more files to have a nice bundle of 5 or 6 designs.

