Sometimes, the way you package a gift is nearly as important as the gift itself. If you’re tired of the boring holiday wrapping papers lining shelves this time of year, and want to do something a little more special and unique, you can design and print your very own custom holiday wrapping paper! But how do you do it?
Our friends at The Queer Store are experts in creating custom holiday cards, wrapping paper, and gifts, and we’ve partnered with them to create this tutorial for creating your very own custom Holiday wrapping paper. For more about the Queer Store, check out this interview we did with them last year for Valentine’s Day about their quirky and inclusive holiday cards.
Otherwise, whip out your Wacom pen tablet or pen display and check out the video below for a quick, simple tutorial on how to design your very own custom holiday wrapping paper!
What you’ll need:
- An inspiring idea
- A Wacom creative pen tablet or pen display
- Design software such as Adobe Illustrator or Photoshop, or Affinity Photo or Designer — a free trial of Affinity comes with every purchase of a Wacom One pen tablet or display, by the way!
- A printer (either a local company, or an online company like Printify or Zazzle)
Step 1: Theme
Firstly, think about your theme. I’m going to focus on creating a design that reflects who we are as a business, so I will take Pride as an inspiration. I tend to start my ideas flowing by consuming lots of images, so I Google Image Search for “pride.” Flags are clearly prominent, so that’s definitely something I want to focus on in the design.
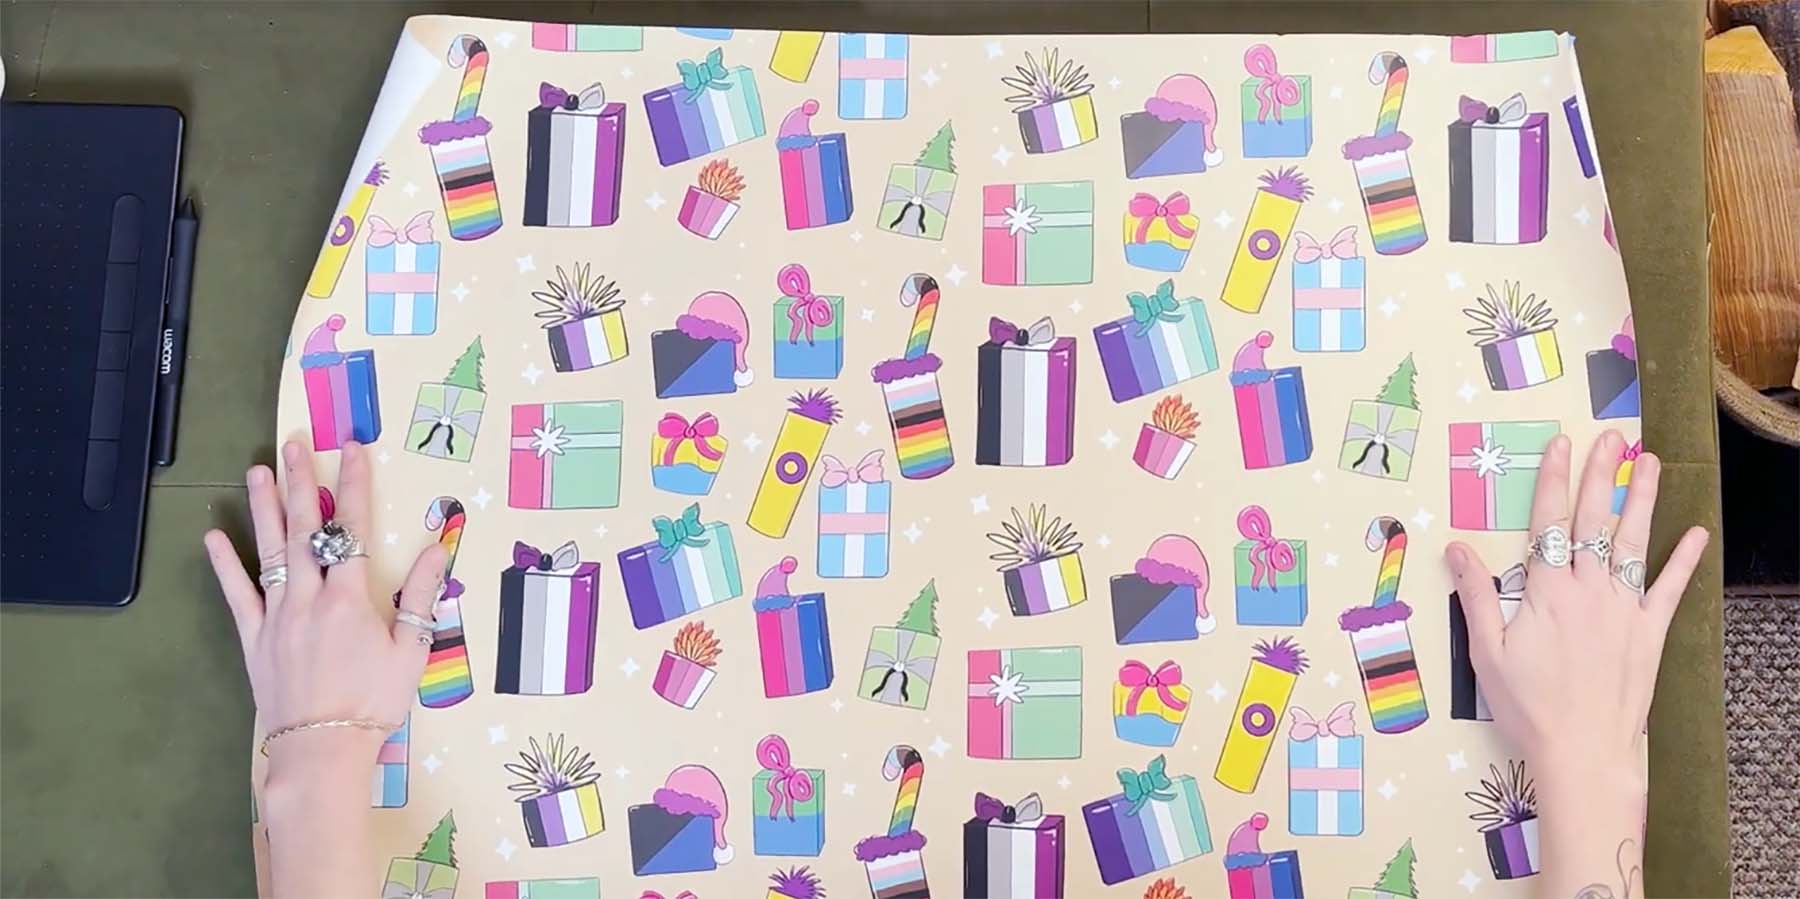
Next, let’s look at Christmas wrapping paper to get some inspiration and incorporate the Christmas theme. Straight away, my idea came to me: I’ve decided to create a pattern of presents that all have different LGBTQ+ Pride flag colors.
Step 2: Initial Sketch
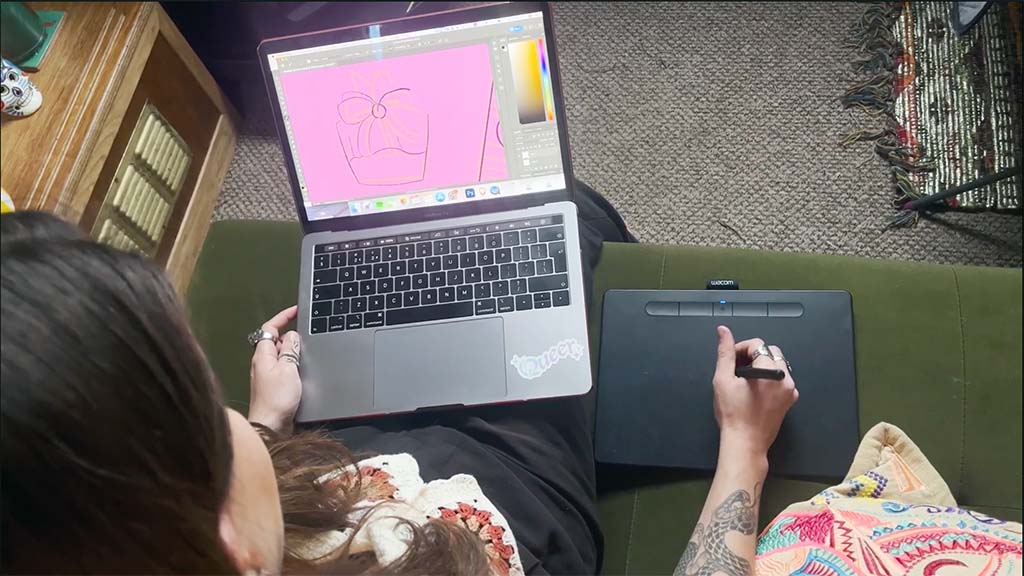
Now it’s time for the initial sketch! I use Adobe Potoshop to illustrate, combined with my Wacom Intuos tablet. To create the wrapping paper, I will start by creating a square tile that I will turn into a pattern. I will use images of presents as references, because I always find it’s best to use a reference so dimensions and details are more accurate.
Step 3: Cleanup
Now that I’m happy with the rough sketch, I will go over with a black line because I like the definition it gives my illustrations. The brush I’m using has a rough texture, because I like my digital illustrations to have that hand-made feel. This is also why I don’t create perfectly straight lines. My Wacom tablet is perfect for this, because it feels like I’m drawing straight onto paper and it makes illustrating onto a computer feel more natural.
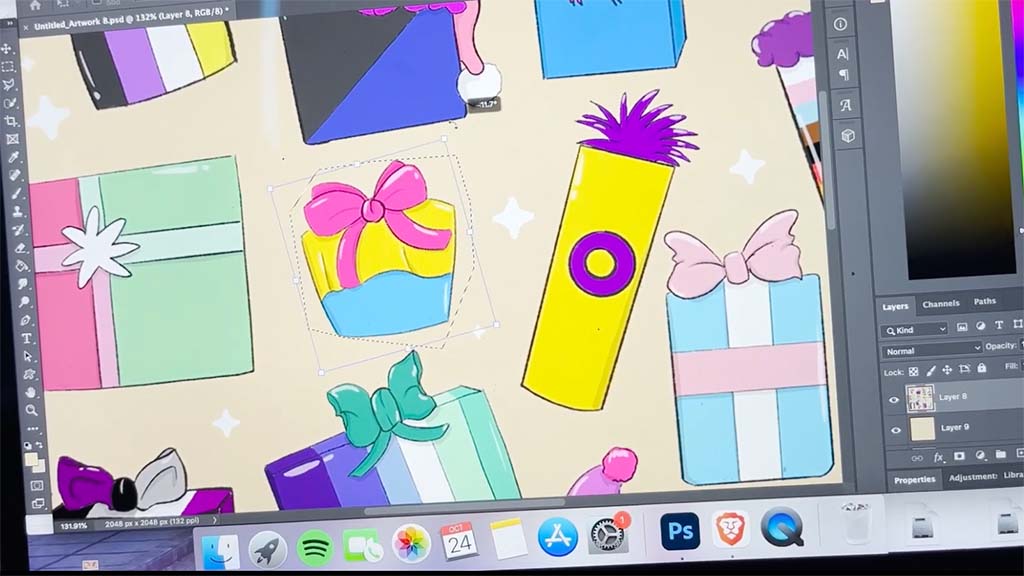
Now the lines are down we can look at color. I’ve found an image of the flags, so I can match the exact color to my presents. I create a new layer and color underneath the black, and also made a couple of changes as I went along.
Step 4: Finalize and export
So far, I think it’s looking great! It’s just the finishing touches now, using lighter and darker tones to create a bit of depth. The next step is to play around with the size and orientation of some of the presents until I’m happy they fit my square. I’ll then add some stars just to give the background a bit of something so it looks better overall.
I’ll now export the image into a large, high-resolution image file.
Step 5: Choose your printer
Next, it’s time to import that image into an Adobe Illustrator file. But wait! At this point, you need to decide what size you want to create the AI file. This depends on how large you want your print to be. If you only have a few presents to wrap, then a smaller print will work. If you have a lot, then you might want a whole roll.
You need to figure out what printer you’re planning to use, and research whether they have standard sizes or if you can print at whatever size you’d like. For the best results, you’ll use a local print shop. Not all of them print wrapping paper, however, so you might need to do some research, shop around, and make some calls. Local printers will often have more flexibility with sizes, and an added bonus is you won’t have to worry about Holiday shipping delays — you can just go pick up your wrapping paper when it’s done! Make sure to ask about sizing and printing times when you’re doing your research.
If you don’t have a local printer who can print your custom wrapping paper design, you might need to go with an online printer. Some options include Zazzle, Printify, and Overnight Prints. Each one will have different standard sizes they will print — for example, Zazzle has a standard 30″ x 180″ size, which is perfect if you have a handful of presents. They also have a smaller 19″ x 29″ size if you’re only wrapping a couple of small things.
Step 6: Create the repeated pattern
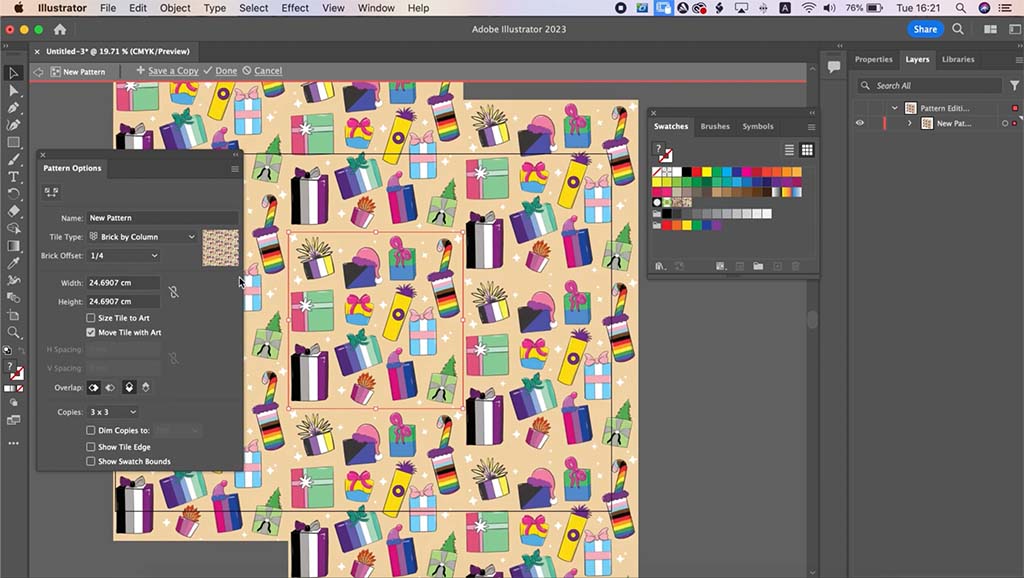
Once you know your print size, create an Adobe Illustrator file of those dimensions at 300dpi or higher, and import the image you created in Step 4 into the Illustrator document.
To create a repeated pattern in Illustrator, I’ve found the best way is to select Object > Pattern > Make, and then you can play around with the different options. For this image, the Brick By Column style works best, so I’ll use that. I’ll save it, and it will be in my swatches. Then all I need to do is select it, and fill the page!
Note: you can do this in other software too; for an Affinity Designer example, click here.

Step 7: Export and print
Once you have your finalized project, export the file into a high-res document in the format your printer needs — usually a PDF, but it could be another format. Check with your printer.
If you’re using a local printer, you can probably just send them the document, and they’ll take care of everything for you. If you’re using an online printer like Zazzle, you’ll need to use their custom wrapping paper builder. Every printer has a slightly different system, but typically you’ll upload your file into their builder, choose your size and settings, and finalize your purchase.
Once it’s printed, wrap your presents in your custom design, and wait for the surprise and joy on your loved ones’ faces as they enjoy not only the gift you’ve gotten them, but the creative way you’ve packaged it!

About the creators
The Queer Store offers a unique collection of greeting cards and gifts for all occasions. Our products are inspired by pop and LGBTQI+ culture, which we showcase through various fan art illustrations. Every card is made with love and genuine admiration and passion. From birthday cards to anniversary celebrations, we have a card for it. As a family business, we continuously make a wide variety of new well-made, high quality greeting cards, from classic to trendy! To follow us on social media, check out our Instagram and Tik Tok.
