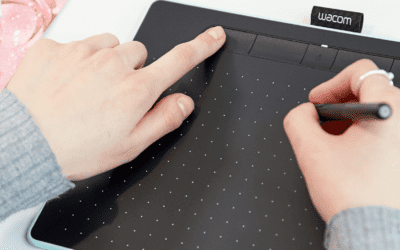
Need help getting starting with your new Wacom tablet or are you just researching drawing tablet options? It is easy to start creating with your new Wacom Intuos pen tablet.
Just follow the steps in the videos below to setup your Intuos (!the videos are audio-less!).

Set up your Intuos in just a few easy steps
Step 1
Plug the USB cable into your tablet and computer.
Step 2
Download and install the driver.
You can ‘Run Set up Wizard’ to already get some useful tips about how the Intuos tablet works.
Step 3
Restart your computer if you´re using Windows (it´s not required for Mac) and follow the instructions to set up your Intuos and get your software.
To get the complimentary software you need to sign in or create a Wacom ID and register your Intuos. Additional registration with software vendors might be required. If you’ve skipped the software download during set-up, just go to My Account, register your device, and download your software there. To download your software, click here.
Connecting your Wacom Intuos tablet via Bluetooth for Mac
Step 1
Unplug your tablet.
Step 2
Open the Bluetooth settings in the Mac System Preferences and turn Bluetooth on.
Step 3
Press and hold the power (middle) button of your Intuos for 2 seconds and the LED will start blinking blue.
Step 4
On your Mac, select ‘Connect’ for the ‘Wacom Intuos’ and you´re good to go.
Connecting your Wacom Intuos tablet via Bluetooth for Windows
Step 1
Unplug your tablet.
Step 2
Open the Devices settings in the Windows settings on your computer and select Bluetooth.
Step 3
Press and hold the power (middle) button of your Intuos for 2 seconds and the LED will start blinking blue.
Step 4
On your computer, you will now see that the ‘Wacom Intuos’ is ‘Ready to pair’ so now go ahead and click on ‘Pair’.
Customizing your Wacom Intuos tablet settings
Step 1
Open the Windows Desktop Center on your computer.
Step 2
Open the ‘ExpressKey SETTINGS’ so that the tablet driver opens up.
Step 3
Under the tab ‘Tablet’ you can customize the tablet ExpressKeys. ExpressKeys are customizable buttons for keyboard shortcuts or application functions. Learn more about ExpressKeys in the Wacom Desktop Center.
Under the second tab ‘Pen’ you can make adjustments of the pen input and also add customized actions to the pen buttons.
The tab ‘Mapping’ allows you to adjust the pen active area. Place the pen in the top right corner of the tablet and the cursor will snap directly to the top right corner of the screen.
Using your Wacom Pen
Make sure to grip your pen right in the middle so that your index finger is placed right over the front pen button. Hover the pen above the surface of the tablet to move the cursor in real-time. The tablet active surface area reflects the area of your display(s)/ monitor(s). Place the pen in the top right corner of the tablet and the cursor will snap directly to the top right corner of the screen.
Tap the pen tip to the surface of the tablet to perform a mouse click and so a double tap of the pen tip performs a double mouse click. Press the button on the pen while hovering to right-click.
Dragging the pen tip on the tablet, allows you to drag documents, for example. You can also apply pressure with the pen on tablet and that will make for thinner or thicker strokes in drawing tools.
Learn more about customizing the pen buttons in the Wacom Desktop Center.
Replacing nibs in your Wacom Pen
There are three spare nibs included in your Intuos package. You can find them at the back end of your pen. Simply screw the back of the pen off, take out one of the spare nibs and use the back end of the pen to remove the old nib.
Downloading software for your Wacom Intuos
First, open the Wacom Desktop Center. Register your product to redeem your software. Sign in or create a Wacom ID to start the process. You can always go back to the Wacom Desktop Center to register.
When you´re logged in you can select your free bundled software and start your new creative experience. Simply ‘Select Software’, choose your OS, scroll down to see the available software programs, choose and click ‘Add to Software Library’, and download the software.
Thank you for reading/ watching!
We hope this was useful to you.


