Every teacher, at some point in their career, dreams of being in multiple places at once. But is it just a dream?
You’re at the whiteboard, explaining a concept – but in the back corner, some students look puzzled. On the other side of the room, an often-rowdy pair is distracted. And outside your door, the assistant principal needs a minute of your time!
In the classroom, I often wished that I could be in many places at once. If only I could multiply myself!
I would direct Self 1 to facilitate small groups in the back of the room, Self 2 to rove around the room assisting students as necessary, Self 3 planning and prepping for future classes, and have Self 4 liase with the AP. I would probably also task Self 5 with running home and starting dinner! While this scenario isn’t exactly realistic, it is fun to daydream about.
But what if I told you there is a feasible way to multiply yourself in the classroom … with video!
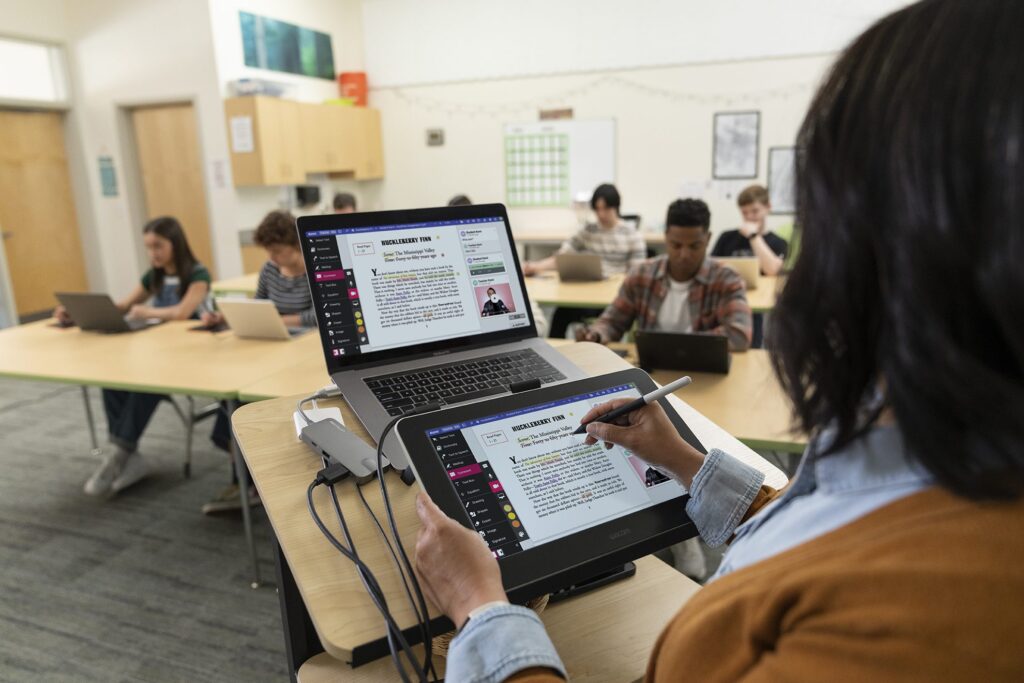
Through the use of video, you can “be” in multiple locations around the room at once. And I don’t mean full on video production, complete with posting to YouTube or TikTok. It can be as simple as opening a screen recording tool, or the camera on your device, and pressing record. Video tools such as Screencastify, Zoom, Google Meet, and Explain Everything let you layer video instruction with digital inking, creating a powerful tool for learning – allowing you to be in multiple places at once!
Ways video can multiply the teacher
Feedback
Video is a great strategy for providing personalized feedback. Again, this is as simple as starting a screencast video while looking at student work online. With Screencastify or Google Screencast, you can annotate on top of an assignment without actually annotating the assignment itself. This helps the student see the specific example you are referencing in your feedback.
If you use Google Docs, you can drop the video link directly into a comment on the document, giving students quick and easy access to your feedback. With the feedback in video form, the student can play and rewind the video as much as needed when working through their assignment.
Best of all, you can reuse video feedback. If you take the time to make a feedback video, it can be used for multiple students. For example, if multiple students need to see an alternate approach to solving a problem, or you notice a trend in conclusions for your students’ writing? Make a quick video addressing the issue, and reuse it for all students needing that specific feedback.
This could be particularly useful in a math course, where students all solve the same problem. You could show how to solve a similar problem, and prompt students to try again with their problem. Video feedback allows you to connect with your students; they get to hear your voice and see their work on the screen.
Reteach and Extension Videos
When planning for instruction, we can identify where we think students might get hung up around common misconceptions or think about ways to push students that need to have a concept elaborated upon. It is at this point that you might pause and consider creating a quick video that provides an extension for students that need it.
For example, you can add an alternate perspective for consideration, provide a problem in context for students to solve, or preview the next step of a project. If you know that every year there is a small group of students that struggle with a specific concept or get caught on a specific step, you can create a video for them to utilize at the point of need.
These types of videos do not need to be done ahead of time. When reviewing student work or reflecting upon our day, we might find that there is a need for a reteach or extension. These typically are not for the entire class, making video a great option. You can utilize them as an entry task while you meet with other students in small groups or one on one. This will help you by reaching as many students as possible at their level. Once enough time has been given for them to view a video, and you to meet with others, you are now ready to start your lesson for the day with limited time lost.
Modeling Process
If you are working on a Chromebook, the latest release of Google Screencast – a tool built into the Chromebook itself – allows you to create screencast videos that will auto caption as well as allow for inking over a website. This is a powerful feature for modeling processes to students. As we know, the beginning of the year is full of modeling processes in order to set up routines for the school year. The ability to record yourself modeling how to access online resources, turn in an assignment, or complete a daily entry task will save exponential time throughout the year. With Screencast, you can easily model and create video right from your Chromebook.
This is also a time-saving strategy for moments when a student is distracted and needs things repeated – you can point them to this resource. It also works as an accommodation to meet the needs of students who need to slow down the pace of directions or need multiple reminders. Taking time to record the modeling of process is not only a time saver for you in the classroom, but it provides an ongoing resource for your students.

Connecting with absent students
If you have students that are absent, they can connect with content that you post in an online space such as Google Classroom or your Learning Management System. This might require one small shift in instructional practice. Instead of drawing on the whiteboard and the drawing getting erased and recreated the next period or the next day, you’d need to utilize a “digital whiteboard” that you can draw on while recording yourself speaking. This might not be an everyday practice, but if you realize multiple students are out of class, transitioning from the physical whiteboard or chart pack to a digital whiteboard can save you time the next day.
Using tools like Explain Everything and Wacom together makes it easy to recreate the whiteboard or chart experience on a digital whiteboard. Explain Everything gives you a blank canvas that you can freely write on with your Wacom pen tablet. In addition to the blank canvas, you can also import a screenshot or a file that you are able to ink right on top of. While teaching, simply press a button to record your canvas as well as your voice. While it is not a replacement for in-class instruction, it would be a great support for absent students.
Sub plans
All educators understand the difficulty and time it takes to create sub plans. Sometimes it’s easier to provide a “filler” lesson when you’re out, because you don’t know who will be in your room. In 2012, I realized that recording a video was the solution to all of my sub woes. Using a whiteboard screen recording app similar to Explain Everything, I was able to create short instructional videos that I gave the sub to play for my students. This was much easier and faster than trying to write out my lesson plans, and it helped my students remain on track with our current work.
You don’t need to do anything special for these types of videos. You can utilize a digital whiteboard and screen recording software, or you could just do a quick recording of yourself giving your students directions for what to focus on during that work period. Either way, this is faster, and typically results in better outcomes, than typing it all up for a guest teacher to read and attempt to understand and implement.
Get multiplied!
This all may seem like one more thing to do in your teaching routines, but once you get the hang of it, recording video will ultimately be a time saver for you. If you can point students, co-teachers, guest teachers, and families to a video of your instruction, announcement, or support, you can save time by not having to repeat yourself or catch someone else up. By sharing instructional videos and video feedback, you’re teaching students to take ownership of their learning, and this is an invaluable tool in their educational career. Video is powerful, and it does not need to be overly planned and produced. Try it out: press the red record button and once you’re done, your dream of being in multiple places at once can be a reality!

