Maybe you’ve been using Adobe Photoshop for a while, or maybe you’re just getting started. There are many ways to do every type of edit in the software, as well as all kinds of tips, tricks, and hacks to do things more simply and easily.
Unmesh Dinda, the creator behind PiXimperfect, is known for tutorials featuring some of the most dramatic and striking transformations possible with Adobe Photoshop — such as previous tutorials we’ve featured on this blog including Turning Day into Night, Cutting Out Hair From A Busy Background, and Making it Snow in Summer.
While eyeglasses help people see the world better, they also make it harder for the world to see one of the most important features of a subject — their eyes. In the below video and tutorial, Dinda shows you how to “magically” remove the glare from glasses in photos in Adobe Photoshop. Watch the video or read on to see how he does it.
The absolute best way to fix glare is through using two photographs of the subject in the same position, with and without glasses, and overlaying them in Adobe Photoshop. But if the only image you have has some detail around the eyes, we can make it work. Otherwise, removing glare from glasses in Photoshop is impossible when the eyes are entirely obscured.
For the past three years, I’ve relied on the Wacom Intuos Pro medium, which has accompanied me on numerous journeys worldwide. We’re gonna be doing a lot of dodging and burning, and the kind of precision and speed that we need for this is gonna be very hard to achieve with a mouse. Using Wacom’s drawing tablet for employing techniques used in this tutorial makes it an invaluable tool.
First we should desaturate the image, so its color doesn’t distract us from matching the brightness. Create a Solid Color adjustment layer, select a color with zero saturation, and set the blend mode to Color.
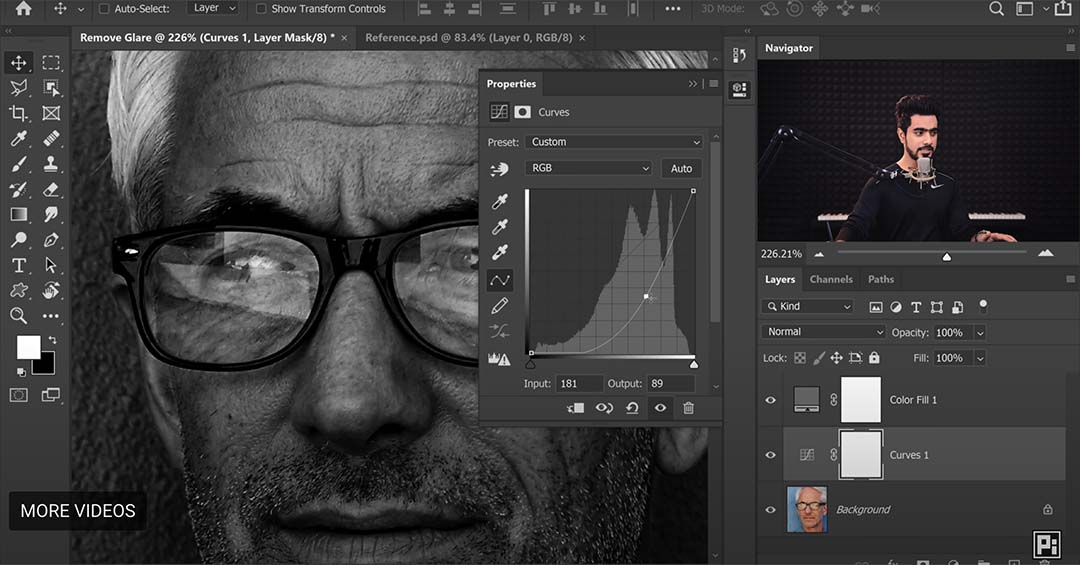
Next, let’s correct the brightness using curves. Create a curves adjustment layer, adjust the middle node downwards until bright areas appear natural, then invert (Ctrl/Cmd+I) the mask selection. Before the mask was white, and now all of it is black – this means changes will only show up on areas we paint white. Use a soft round brush with low flow to paint white on areas requiring adjustment.
Start painting. If you have practice and a tablet, this process will be faster than you think. Don’t worry about the glare edges, our focus right now is to use a basic burn to match the brightness.
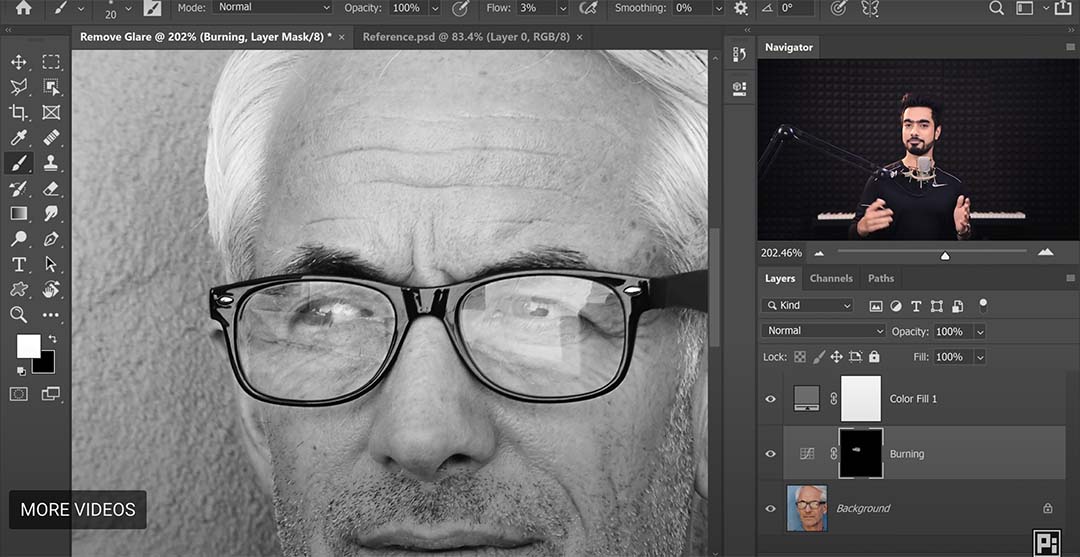
For further refinement, create additional dodging and burning layers to enhance results. Use an empty layer with Soft Light blend mode and adjust brush flow between 1-2 percent for precision.
Next we must match the glare color to the surrounding image. If you disable the desaturation, you’ll see the colors don’t match at all. Easily fix this by creating a new layer, choosing a brush with 5-10 percent flow, and setting blend mode to Color. Use the eyedropper tool to sample nearby colors and paint over mismatched areas.
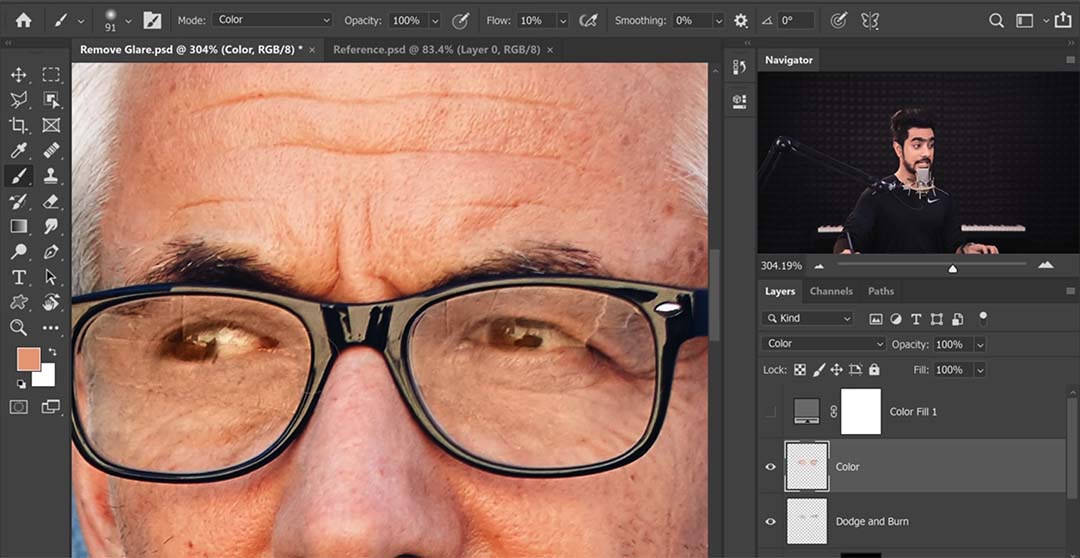
Darken the eyes using another curves adjustment layer, focusing on eye areas and painting with white on the inverted mask. Now, the last thing we need to fix are glare edges. Create a new layer and use tools like the Healing Brush or Spot Healing Brush to fix imperfections.
Keep in mind the Stamp tool doesn’t work on an empty layer, so we’ll have to create a visible layer for it. Ensure alignment of spectacle edges by sampling adjacent areas and painting carefully. For other areas, create another dodge and burn layer with a soft light blend mode.
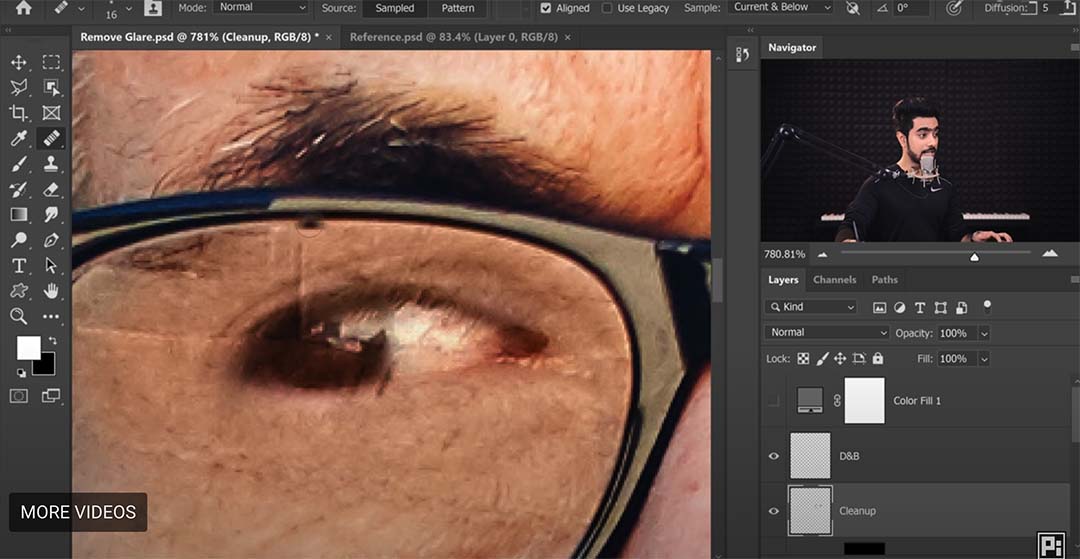
To avoid overcorrection, maintain natural features by adjusting layers as needed. If desired, retain a hint of glare by grouping adjustment layers and reducing opacity.
To recap: First, match brightness using curve and dodge/burn layers. Second, correct colors with a Color blend mode layer to sample from surrounding areas and paint to match. Third, clean the edges with tools like Clone Stamp, Healing Brush, and Spot Healing Brush. Continuously adjust layers to maintain natural appearance throughout the editing process.
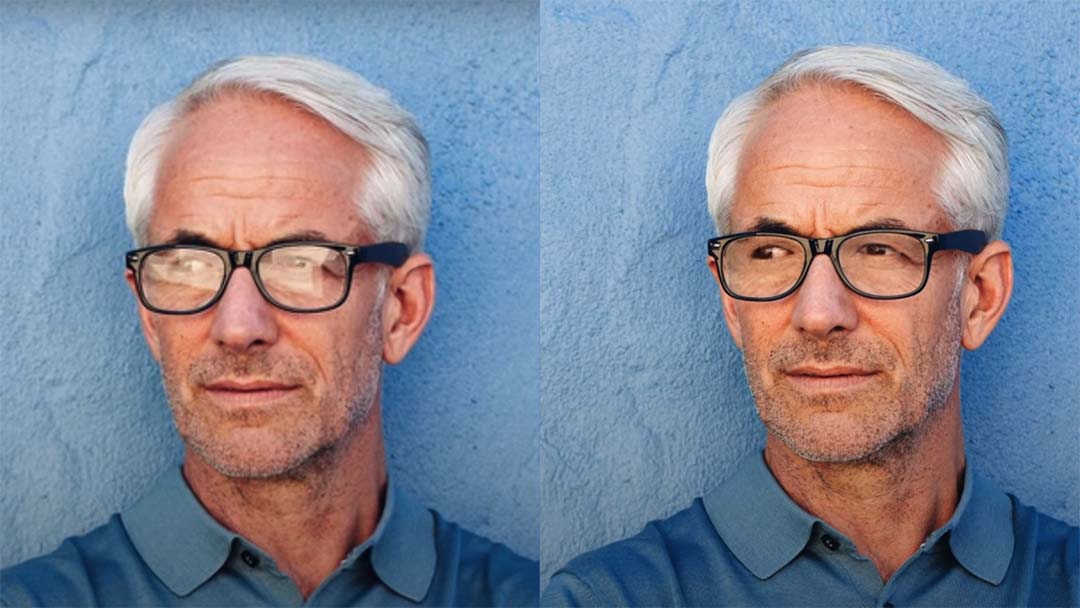
And that’s it! Let’s take a look at the before and after:

About PiXimperfect
PiXimperfect is one of the premier free online resources for learning Adobe Photoshop and Lightroom. With over five million subscribers on YouTube, it’s clear that his high quality tutorials are some of the best.


