

In this tutorial, Piximperfect’s Unmesh Dinda isn't teaching us about adjustment layers, one of his signature techniques, like in the last couple tutorials. Instead, he shows us how to cut out a subject’s hair from any background, no matter how cluttered or busy it is.
This one is a longer tutorial! The video is over 30 minutes long. This blog post will be a general summary, but if you're looking for a step-by-step walkthrough of the technique, you'll need to watch the video.
The original image:

Drawing a path
Before we even begin, Dinda draws an extremely complicated path around the outside of the subject. He renames the path in order to save it, then creates a selection out of it by right clicking and going to Make Selection, then clicks on the Mask button with the selection active to create a layer mask. Creating a black background layer underneath the mask shows us that the cutout is perfect around the hard edges, but not around the hair.

Making Hair Brushes
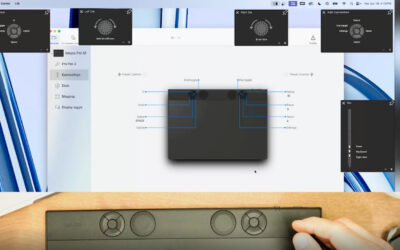
So, in order to patch in some of the hair that’s been lost, Dinda will need to make a few new brushes. It’s also the part that will be most reliant on his Wacom pen tablet, as there’s no true equivalent way to do this with a mouse.
Taking the default brush, he goes to the Brush Settings panel, and under the Transfer submenu, sets Opacity and Flow to Pen Pressure. Then in the Shape Dynamics submenu, he sets the size to Pen Pressure as well, and Hardness somewhere in the middle. He saves this as a brush preset for painting in hair in the future, then saves it into a new brush Group so that he can keep the next brushes he’ll make together with it.
He then makes second and third brushes using a different method: zooming in on a section of the hair and scattering black dots over it.

This requires some more complex work within the brush functions, as he selects around them, sets the background color to white, and uses them to define a new Brush Preset through the Edit menu. Then he goes back to the Brush Settings panel and sets similar properties for them as he did for the single-strand brush.
Key Tip: Whenever you want to vary a brushstroke, you can go back to Brush Settings and in the Brush Tip Shape window, adjust the Angle.
Refining the hair inside the mask
The name of the tutorial isn’t entirely accurate, as instead of cutting out hair, it mostly has to do with painting it back in after cutting it out so that it looks more natural. This is the longest part of the tutorial, but also the most straightforward. For it, he relies heavily, again, on his Wacom pen tablet.
To start with, he selects the layer mask that he made over the subject at the beginning, then uses his various hair brushes to paint away parts of it, exposing the “overflow” hairs underneath, the ones that he didn’t capture when cutting it out with the pen tool.

Note: When working with Layer Masks, black is a part that’s excluded, and white is a part that’s included. Dinda uses white brushes for the hair to paint parts of the layer mask back in.
Key tip: To decrease the opacity of a mask, click on it, go to Window > Properties to open up the Mask Properties window, then decrease the Density.
After decreasing the mask opacity to see where the hair falls, he selects one of his “multi-strand” brushes and begins to paint in the wider swaths of hair. Then, during a long timelapse, he goes in and, circling the entire head, paints in large amounts of flyaway hairs as he sees fit, adjusting the mask opacity to make sure it’s following the flow of the original hair.
Blurring the edges according to the depth of field
One problem with simply painting the hair in will leave is that the edges he painted in are crisp and in focus, which is not how cameras capture flyaway hairs due to depth of field. So to fix this, he takes the blur tool and runs it around the edges of some of the outer hairs.

Painting additional hair
Dinda calls this step “Where the magic happens,” and it’s the part where he takes the most creative license. For this step, you don’t have to be accurate since you’re adding entirely new hairs, not painting through a mask.
First, he creates a normal layer named “Hair 1,” then with the Eyedropper, samples the root color of the hair near where he wants to paint, then just paints additional flyaway hairs going wherever he wants them to. Occasionally, he stops to blur some of the hairs as well.
Hair 1 is just the first of five hair layers he’ll end up creating, one for each part of the hair, in order to keep them organized.

Corrections
If you go back to the mask and increase the density, Dinda says, you’ll notice some parts of the hair are pink. Personally, this is invisible to me, but he insists. You may want to skip this step. This is because he painted over the hair and into the background, which contains some pink flowers.
To fix this, he creates a new layer above the subject and sets it to be a Clipping Mask, meaning it’s constrained to the bottom layer, then takes a sample of the hair color and paints it in. If you want to do this without losing texture, he suggests, you can use the Color blending mode to make sure only the underlying image’s tint is affected.
And with that, he has an isolated image that, while substantial repainting was done, looks exactly like the original image with the hair masked out.
The original compared to the final image: