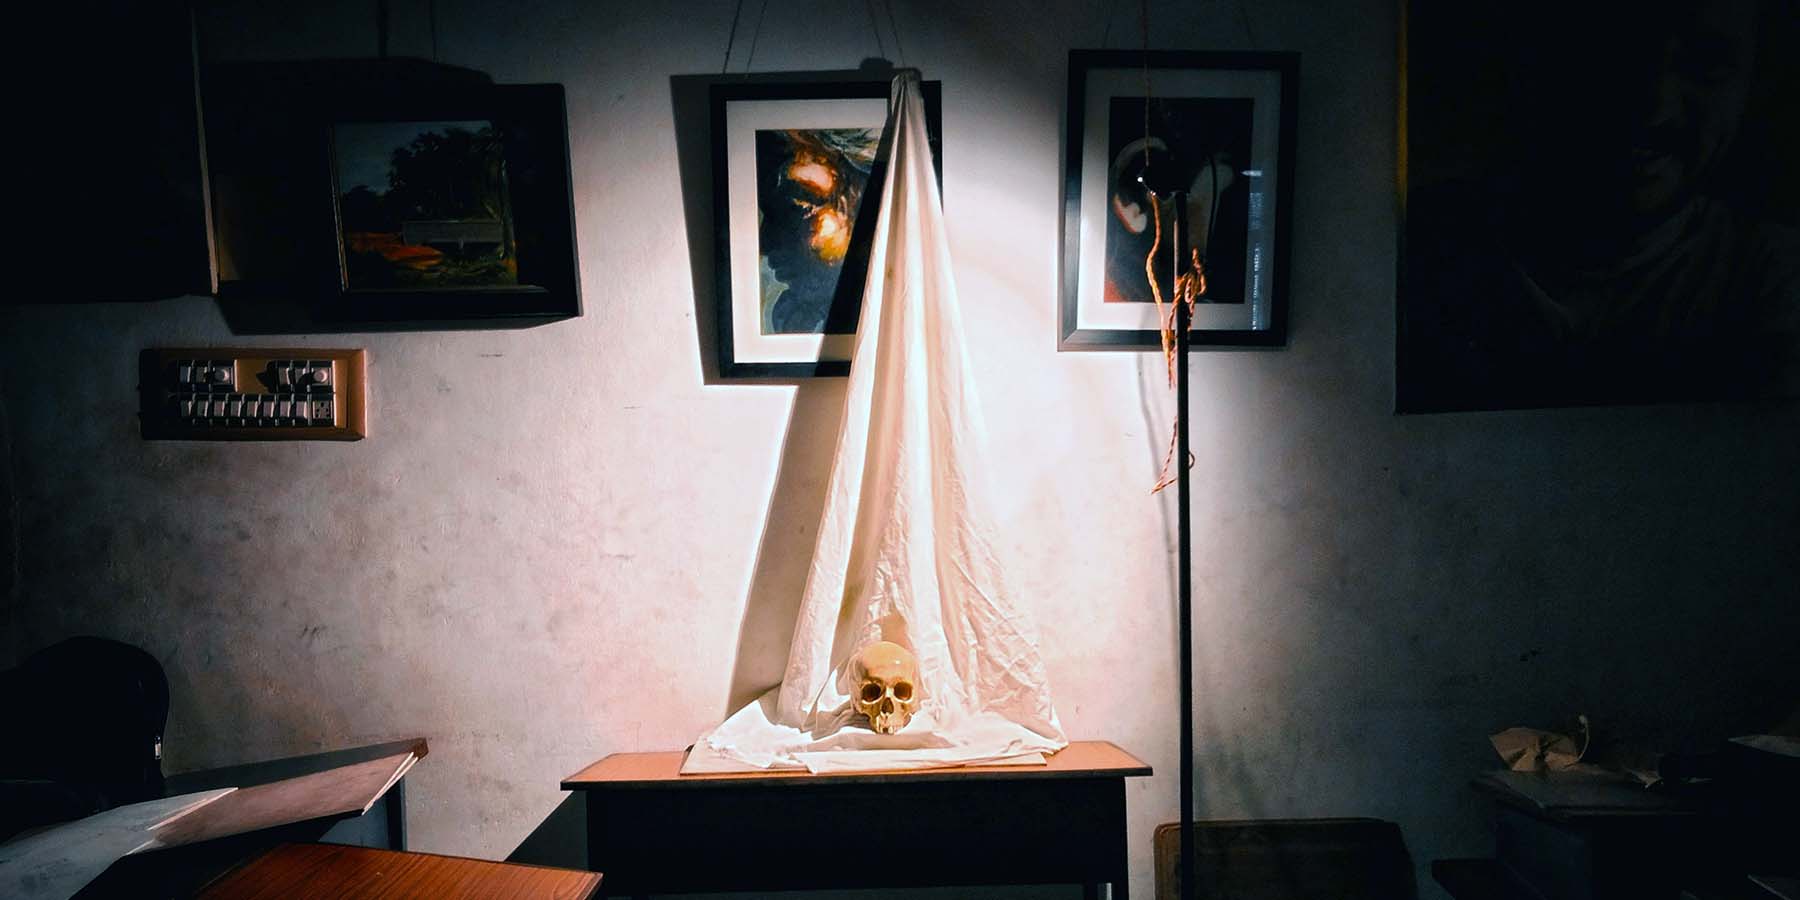
Still Life Skull by Av Creations on Unsplash

Wacom’s digital art lesson plans: Exploring light, shadows, and highlights, Part Three

September 20, 2024

As your resource for creative education, the Wacom team is excited to share an introductory mini unit on exploring light, shadows, and highlights. This blog post is Part Three of a series. For Part One, click here and for Part Two, click here.


Mastering light and shadow is key to helping students create depth and realism in their digital art. In this lesson, students will refine their understanding of how light sources affect a composition by applying shadows and highlights to their artwork. Through hands-on practice, they will develop the skills necessary to enhance the quality of their digital paintings. 

The objective of this lesson is to guide students as they improve their digital painting skills, specifically focusing on how to effectively apply shadows and highlights. Students will analyze the role of light sources in their compositions and use this knowledge to bring depth and realism to their work. 

This lesson builds upon the first two lessons in the series. In the previous lessons, students interacted with lights and shadows through taking photos of objects. Then they looked at how color gradients play a part in developing light and shadow in a piece of artwork. Now, students will focus on applying shadows and highlights, helping them move from basic color transitions to more advanced techniques that create realistic lighting in their artwork. Understanding how light interacts with objects will add new layers of depth to their work. 

Begin by briefly reviewing how color gradients work to add depth in digital art. Gradients allow for smooth transitions between colors, helping create a sense of form. From there, shift the focus to shadows and highlights, which are essential for making digital art feel three-dimensional. Explain how shadows and highlights define how light interacts with the forms within the composition, adding a sense of realism.

Light and Shadow Example Image

Show examples of digital paintings that use shadows and highlights effectively. As students study these works, they’ll observe how the direction and intensity of the light source determine where shadows and highlights fall. This visual exploration will provide them with the knowledge they need to enhance their own digital paintings. 

Next, demonstrate how to identify the light source in a reference photo and analyze its impact on the placement of shadows and highlights. Using Adobe Photoshop, model the process of adding shadows and highlights, focusing on how brush size, opacity, and blending modes can be adjusted to achieve realistic effects.

Once you’ve provided the demonstration, allow students to practice on their own digital paintings using reference photos from previous lessons. Encourage them to experiment with different techniques and settings to see how varying effects can change the depth and feel of their artwork.
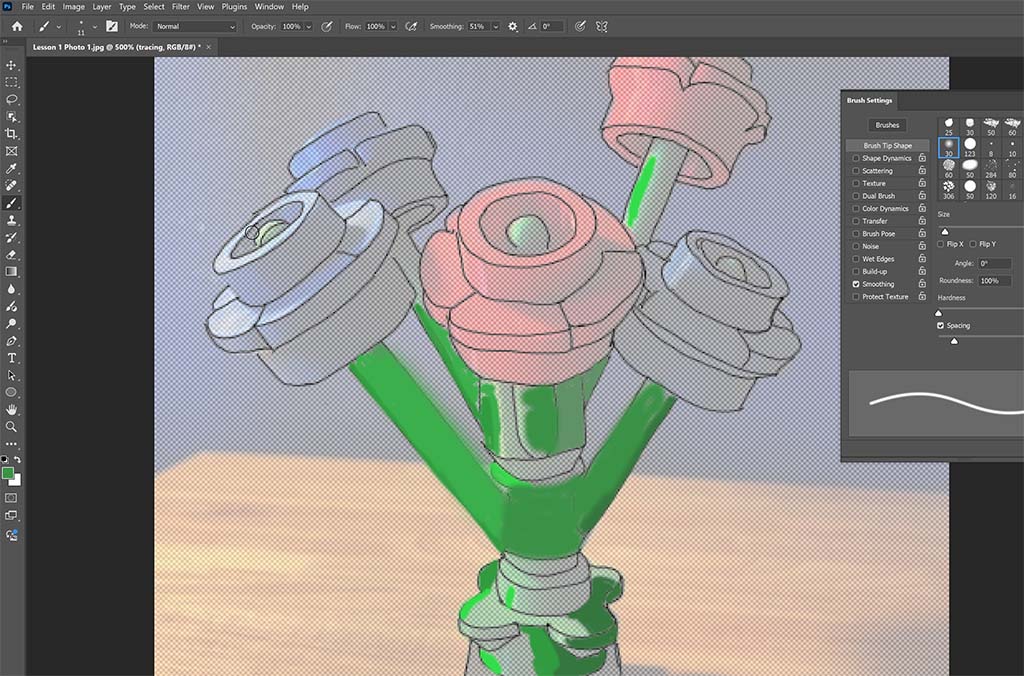
Digital Paint with layers 2

After students have had time to work on their pieces, review the concept of light sources and how they influence the placement of shadows and highlights. Have students compare their digital paintings to their reference photos, identifying areas where adjustments may be needed to better align with the light source. 

At this point, demonstrate the next steps for refining shadows and highlights. Show students how to use layers in Photoshop to separate shadows and highlights from the base painting. This gives them more flexibility to make adjustments and experiment with blending modes, helping them achieve more realistic lighting effects. 
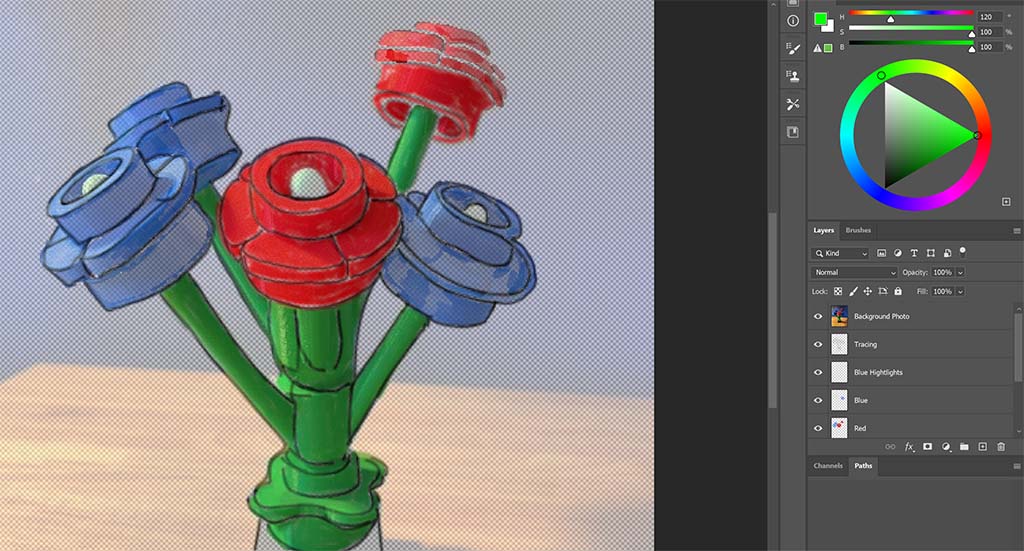
Digital Paint with Layers

Allow students to continue refining their work, and as they do, circulate through the classroom to provide feedback and guidance. Encourage them to frequently reference their photos, ensuring the shadows and highlights they’ve added enhance the overall depth and form of their compositions. 

Wrap up the lesson with a class discussion. Ask students to share the challenges they encountered while adding shadows and highlights and discuss how they overcame these obstacles. This reflection will help solidify their understanding and provide opportunities for peer learning. 

As an extension, you can assign a more complex project, such as painting a portrait or still life, where lighting plays a critical role. For students who want to dive deeper, suggest additional tutorials that explore more advanced shadow and highlight techniques in digital painting software. 

By the end of this lesson, students will have gained the skills and knowledge needed to use shadows and highlights to create more lifelike, three-dimensional digital paintings. This experience will help them understand the power of lighting in transforming their work from flat to dynamic.

Get access to the complete lesson plan, with materials — and more

If you’re interested in accessing detailed lesson plans and teaching resources, for this lesson series and more, we invite you to join our new Wacom Creative Educators Facebook group. Exclusive access to resources and other exciting opportunities awaits within our community of creative educators.

Related posts:

Preparing Students for Careers Using Professional Tools: A Wacom Case Study

Preparing Students for Careers Using Professional Tools: A Wacom Case Study

Wacom is Helping to Unlock Classroom Potential with our Media Arts CTE Funding Guide

Wacom is Helping to Unlock Classroom Potential with our Media Arts CTE Funding Guide

Wacom’s digital art lesson plans: Exploring light, shadows, and highlights, Part Two

Wacom’s digital art lesson plans: Exploring light, shadows, and highlights, Part Two

How Wacom technology can strengthen classroom relationships, ease student anxiety, and empower learners — with Stacey Roshan

How Wacom technology can strengthen classroom relationships, ease student anxiety, and empower learners — with Stacey Roshan

Connect with Wacom on social media

🎉✨ December of Giveaways is HERE! ✨🎉

The holiday magic is upon us and we're ecstatic to bring you weekly giveaways throughout the month of December! 🎁 Come back every Friday for your chance to unwrap something amazing! ✨

This week, we're giving away a Wacom Movink! 🎨 

Here's how to enter:

🎅 Follow @wacom and @wacomedu

❤️ Like this post

🌟 Tag a friend + your favorite creator!

This week's giveaway ends 12/27 at 9 am PST. Winner will be tagged in this post and ONLY contacted through official Wacom accounts. Please be extra cautious if contacted via DM – make sure the sender is @wacom or @wacomedu before sharing any personal info. 📩 We’ll only ask for your shipping details if you win!

Good luck 🍀 #Wacom #WacomForEducation #WacomGiveaway
550 346
Have you ever tried masking out a person using a mouse? 🫢 @ruthiesmagicalcamera did and it really sucked. 🤷🏻‍♀️
Ruthie likes to have full control over every single detail on her photo composites, and editing with a Wacom pen allows her to get really deep in the details, with razor sharp precision, as if she were painting over her photos 💃✍️📸🌾
Check her out trying out the new #WacomMovink! 

PS. The Wacom Movink is now on sale! 

#photoediting #photoretouch #madewithwacom #creativeprofessionals #creativesonthego #digitalphotography
365 9
Jake aka @killerrabbitmedia prefers working on a Wacom Intuos because it's easy to carry and super durable. He also loves pixel art and Asperite because it blends artistry with technical skill. There's a long tutorial video on our YouTube explaining how Jake achieved this look. Go check it out! 
#madewithwacom #wqcomintuos #intuos #wacomtablet #pixelart #artistsoninstagram
397 6
Enjoy this stylized illustration created by @bonehaus inspired by his recent trip to Amsterdam. ⁣
⁣
He goes full circle, collecting inspiration and reference, sketching in #AdobePhotoshop, illustrating in #AdobeIllustrator, and then right back to #photoshop for finalizing color and texture 🔄✌️⁣
⁣
Once in Illustrator, Kirk outlines and traces the major shapes of his sketch, then removes the lines and focuses instead on shapes and shadows. ⁣
⁣
"I start building in more shadows and more details to help separate any of the shapes that are struggling without that outline. I like my art without a ton of outline, so I prefer the challenge of using some shadows and highlights and stuff to separate them.”⁣
- @bonehaus⁣

Head to the #WacomBlog to read the full interview! 
⁣
#MadeWithWacom #WacomCintiqPro #DigitalIllustration #adobeillustrator #Photoshop
341 1
El óleo perfecto para tus ideas es tan delgado como un espejo. 🪞🌾
Descubre la magia de Wacom Movink, nuestro primer lienzo digital OLED. 
Video creado por la maravillosa @martinab.illustrations 🌹
#WacomMovink #creativeprofessionals #creativesonthego #tabletadigital #artedigital
477 5
#WacomSale⁣
The festive season is upon us, and adventure calls! 🏁✈️🌎⁣
Unleash your creativity anywhere with a #WacomMovink.⁣
Shop now through the link in our bio!⁣
128 2
📝 Managing license requests and agreements is an essential part of protecting your work as a professional artist.

And in this tutorial we show you how to do it easily.

Wacom Yuify allows you to easily view, approve, or reject requests, ensuring your creative rights are secured. Streamlining the process means more control over your art and less hassle.

🔒 Ready to simplify your license management? Register for free at yuify.com

*Yuify Licensing is only available in selected regions and may require additional agreements for specific cases not covered by the License Builder.

#WacomYuify #Yuify #CreativeRights #DigitalRightsManagement
79 2
This week's giveaway is closed now. ✌️✌️✌️
Congratulations @dumartrigali, you're the lucky winner. 
Thanks to everyone who participated.

Stay tuned for this week's giveaway coming up soon! 

🎉✨ December of Giveaways is HERE! ✨🎉

The holiday magic is upon us and we're ecstatic to bring you weekly giveaways throughout the month of December! 🎁 Come back every Friday for your chance to unwrap something amazing! ✨

This week, we're giving away a Wacom Cintiq 16! 🎨 

Here's how to enter:

🎅 Follow @wacom and @wacomedu

❤️ Like this post

🌟 Tag a friend + your favorite creator!

This week's giveaway ends 12/20 at 9 am PST. Winner will be tagged in this post and ONLY contacted through official Wacom accounts. Please be extra cautious if contacted via DM – make sure the sender is @wacom or @wacomedu before sharing any personal info. 📩 We’ll only ask for your shipping details if you win!

Good luck 🍀 #Wacom #WacomForEducation #WacomGiveaway
926 583
Therapeutic break! 
Let's draw some Winnie stickers with @konistudio on a #WacomOne 13. 🧣❄️🌲
#Wacomworkspace #madewithwacom #artistsoninstagram #artistlife
695 13
How to draw fire without burning yourself 🧯🔥
@lplucas thank you for this important service. 
Stay cozy and stay safe out there friends ✌️
#madewithwacom #drawingtips #digitalartist #digitalart #wacomtips
146363 105
How do you keep inspired during ordinary days? 
@buttersketch shares a glimpse into her creative process, full of graphic novels, picture books, music, journaling and art materials. 

"“I really love bribing myself with new materials,” she confesses with a smile. “I think it helps my brain bypass the anxiety of starting, because now I’m focused on just playing.”
- @buttersketch✌️
#Wacomworkspace #WacomMovink #creativeprofessional #artistlife #artistsoninstagram #creativeinspiration
233 2
As an artist, protecting your work can feel impossible. Watermarks distort your art, and even then, they can be removed.

Many have felt the frustration of seeing creations copied without credit - and that’s why Wacom Yuify exists ✨ —it adds an invisible mark to your work, keeping it safe and traceable without compromising its beauty.

🔒 Ready to protect your art? Visit Yuify.com for more info. Now available for @escapemotions 

#WacomYuify #Yuify #CreativeRights #DigitalRightsManagement
152 2