Whether you’re planning some DIY, crafting, or decorating, Michael’s is your go-to. Now, level up your design skills as you prep for your next project by using a Wacom tablet! Whether you’re ideating a pattern for sewing, designing a card for an upcoming holiday, or creating assets for other crafters to utilize, Wacom is a great partner — and Wacom products are now available at Michaels.com.
In the video below, crafter and creator Heather Cash continues her Wacom + Cricut series by showing you how you can use a Wacom One pen display and Affinity Photo software — included with every Wacom One purchase — to create a sticker sheet that you can sell to other creators! Check out the video below, or read on for a text-based explanation.
Today we're going to be making sticker sheets for the Cricut. These will be files that you, or your customers, can use with the Print & Cut feature of the Cricut - they can be printed on sticker paper using your home printer, and then run through the Cricut to cut around the stickers.
How to sell?
These are great because you have the option of selling either digital files, physical products, or both! You can sell the digital file for the sticker sheet by uploading it to your shop, and then the user can download the file and use their own home printer and Cricut to create their sticker sheet. To sell the physical products, you'll print and cut the sticker sheet yourself, and then mail it to your customer.
Types of stickers
You can get some great ideas for the types of stickers you can print by searching Etsy for "printable sticker sheet." You'll see that there are planner stickers, inspirational stickers, tumbler stickers, stickers for notebooks, etc. I recommend choosing a subject that you are passionate about, so that it will be easy for you to come up with ideas for that sticker set.
For this example, I'm going to use rescue rabbits, because I volunteer at the local rabbit shelter where I live, so that's a subject that's very close to my heart.
Sticker sheet size and software
The Cricut Print & Cut feature is limited to a size of 6.75" x 9.25". Because of this, I think that 6x9 is the perfect size for a sticker sheet. Because this is a Print & Cut project, we don't need it to be "vector." Vectors are best for digital files that you might want to scale larger or smaller. Because we have an exact size for this project, it won't need to scale. Also, vectors are better for basic flat colors, but we'll want our stickers to have complex shading and coloring. So because of that, we'll be creating a "raster" file using Affinity Photo; it'll be better for a known size and complex coloring.
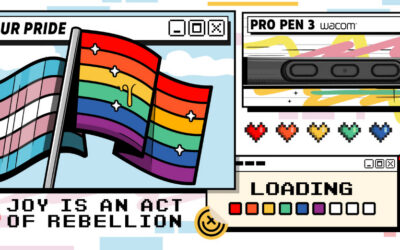
Did you know? Every purchase of Wacom One comes with a free trial of the Affinity Suite. For more information, click here.

Document setup
First, we need to create our file. Open up Affinity Photo, and create a new file. Make sure the document units are set to inches, and then you can set the dimensions to 6"x9" at 300dpi. Then, you can click Create.
Next, we'll need to create a new layer for our sketch. You can head over to the Layers Panel on the right side of your screen, and click the Add Pixel Layer button.
Start sketching
Now, you can grab the Brush Tool, and from the Brushes Panel you can choose any of the pencil brushes. Set the color to grey in the Color Panel and you're ready to sketch out your stickers!
Some tips
As you draw your stickers, you can also duplicate some of the stickers and later color them in a different color. You can see in my video, I duplicate the bunny head to make four of them -- and then later color each one a different color. This helps if you start running out of ideas, or running out of steam. Another thing I like to do in my sticker sheets is add cute little small things to take up the extra areas on the sticker sheet where a larger drawing may not fit. For example, I added flowers, carrots, lettuce, and strawberries to my bunny sticker sheet.
If you'd like to rearrange some of the stickers, you can grab the lasso tool to select different stickers and move them around.

Layer setup
When you're done with your sketch, merge any extra layers you may have created so it's all on one layer. You can do this by going to Layer → Merge Visible. When you do this, it merges everything onto one layer - but it does still leave all the other layers behind. So after that, you'll need to select all the other layers and click the Trash Can icon at the bottom of the Layers Panel to delete them.
Next, you'll need to select your sketch layer and set it to Multiply via the drop-down at the top of the Layers Panel. You can also turn down the Opacity from here as well -- this will make the sketch lighter so that it will be easier to see what you're drawing.
Then, you can create a new pixel layer by clicking the New Pixel Layer button. You'll also want to drag that new layer underneath the sketch layer, so that you can see the sketch while you're drawing on your new layer. You can double-click on the layer name and rename it Stickers for easier organization of your layers.
Start coloring!
Now, we're ready to add color to our stickers! Go ahead and grab the Brush Tool, then head over to the Brushes Panel to select a brush. There are so many different options for brush type - watercolor, crayons, oil paints, and many more. I recommend going through those different brushes and testing them out until you find one you like. For this tutorial, I'll be using Directional Wash, a watercolor brush.

Some more tips
To change the color, go up to the Color Panel and click on the colored circle to change it. Also, you can change the size of your brush by going to Width all the way on the left of the toolbar, and adjusting the value there.
To preview what it will look like without the sketch, you can go over to the Layers Panel and click on the dot on the right side of the layer to hide it (click it again to make it visible again).
If you'd like to add text, you can click on the Text Tool, click anywhere on the canvas, and start typing. You can change the font, text style, and other properties in the Toolbar along the top of the screen.
When you're all done with the sketch, you can select the sketch layer in the Layers Panel and then click the Trash Can icon to delete it.
Adding white
Next we'll need to add some white around our stickers, to show the Cricut where to cut. To do this, we can head over to the Layers Panel and create a new layer by clicking the New Pixel Layer icon. Drag that new layer underneath the stickers layer. Next, you can double-click on the layer name and type "white," or something similar.
To preview everything easier, go to Document → Transparent Background. Now you'll see a checkerboard wherever the file is transparent. The Cricut is going to cut out any of the shapes that are on the transparent background. Because we don't want the Cricut to cut right up against our stickers, we are going to add a white border around each of the stickers.
To add the white, grab the Brush Tool, and select a basic solid brush from the Brushes Panel. Change the foreground color to white by clicking on the colored circle in the Color Panel. Then, just make sure you are on the correct layer (the bottom layer) and start outlining each sticker in white. The edge of the white is where the Cricut will cut. Note: Make sure that "Wet Edges" is not checked in the toolbar.
Adding branding
If you'd like to add branding to the top of the sticker sheet, you can do that as well. First you'll just need to make some room at the top of your sticker sheet by rearranging your stickers. You can do this by merging your layers using Layer → Merge Visible, hiding the old layers (by clicking the dot to the right of the layer), and then using the Lasso Tool to select elements and move them around.
Note that we hid the old layers, rather than deleting them, so that we have the original versions (without the white behind them) available in case we ever want to use them for another project.
Once you have enough room at the top, you can grab the Rectangle Tool and draw a white rectangle at the top of your sticker sheet. On top of the rectangle, you can add any text or drawings that you'd like.
Export!
Now we are ready to export this file as a transparent PNG. After you've saved it as an Affinity Photo file, then you can go to File → Export and select PNG, then click Export.
Now, you can go into Cricut Design Space and upload your file and make sure everything comes through correctly. For Image Type, you can choose Complex. At the Background Remover screen, you don't need to do anything, because we saved it as a transparent PNG, so Cricut Design Space already knows which parts of the image need to be transparent.
Click Preview Cut Image in the upper right to make sure the cuts all look correct, then click Apply & Continue. On the next screen, choose Print & Cut Image.
You may need to set the size, since Design Space sometimes resizes elements on import. So just make sure that you have the sticker sheet selected, and go up to Size in the top toolbar, and type 6 in the space for width and click Enter - the height should adjust automatically.

Print & cut!
Now, you are ready to print and cut your project! Click Make It, then Continue. Insert a sheet of sticker paper into your printer and click the Send to Printer button in Design Space. Choose your printer, and turn off the Add Bleed option. Then, click Print.
Once your sticker sheet is printed, you can place it on your mat in the upper-left corner. Go into Design Space and find where it says Set Base Material. You're going to want to choose Washi Sheet as your material type. If you don't have it bookmarked, then you'll need to click on Browse All Materials and find it there. You can adjust the pressure slightly by selecting More or Less under the Pressure option. Note: If you're using Cricut brand sticker paper, then go ahead and use the options that are listed on the packaging.
Then, you are ready to run your mat through the Cricut. When the Cricut is done, release the mat and remove the sticker paper. You'll need to trim the edges off of the sticker sheet so that you end up with a 6"x9" sticker sheet. Enjoy!