

![]() Whether you’re planning some DIY, crafting, or decorating, Michael’s is your go-to. Now, level up your design skills as you prep for your next project by using a Wacom tablet! Whether you’re ideating a pattern for sewing, designing a card for an upcoming holiday, or creating assets for other crafters to utilize, Wacom is a great partner — and Wacom products are now available at Michaels.com.
Whether you’re planning some DIY, crafting, or decorating, Michael’s is your go-to. Now, level up your design skills as you prep for your next project by using a Wacom tablet! Whether you’re ideating a pattern for sewing, designing a card for an upcoming holiday, or creating assets for other crafters to utilize, Wacom is a great partner — and Wacom products are now available at Michaels.com.
In the video below, crafter and creator Heather Cash continues her Wacom + Cricut series by showing you how you can extend the lesson in the previous video by creating a multi-color SVG for use with a Cricut cutting machine or to share or sell to others in Cricut Design Space! Check out the video below, or read on for a text-based explanation.
In this series, I’ll be showing you how to create digital assets for the Cricut cutting machine using your Wacom tablet. These are great to use for your own personal projects, or to sell online! We’ll be using Affinity Designer, since every purchase of a Wacom One pen display comes with a free 90-day trial of Affinity software. In this video, I’ll be showing you how to take the single-color SVG that we made in the first lesson, and add color to it!
Note: One way to create a color SVG is to implement the outline as an outline, with empty space for the colored pieces. Some people do it this way, but I don’t recommend it because things don’t always line up properly, and it may result in gaps between the colored pieces and the outline — especially when doing iron-on, where there may be shrinkage. The way I recommend, and how we are going to do it in this video, is to create a black silhouette of the shape as the bottom layer, and then all of the colored pieces will be placed on top of that shape. This way, the placement doesn’t have to be perfect, and there won’t be any gaps. For a more detailed explanation, see my video “How to Get Perfect Outlines with Cricut Iron-On.”
Getting started
First, open up the file that you created in the previous tutorial, the single-color SVG.
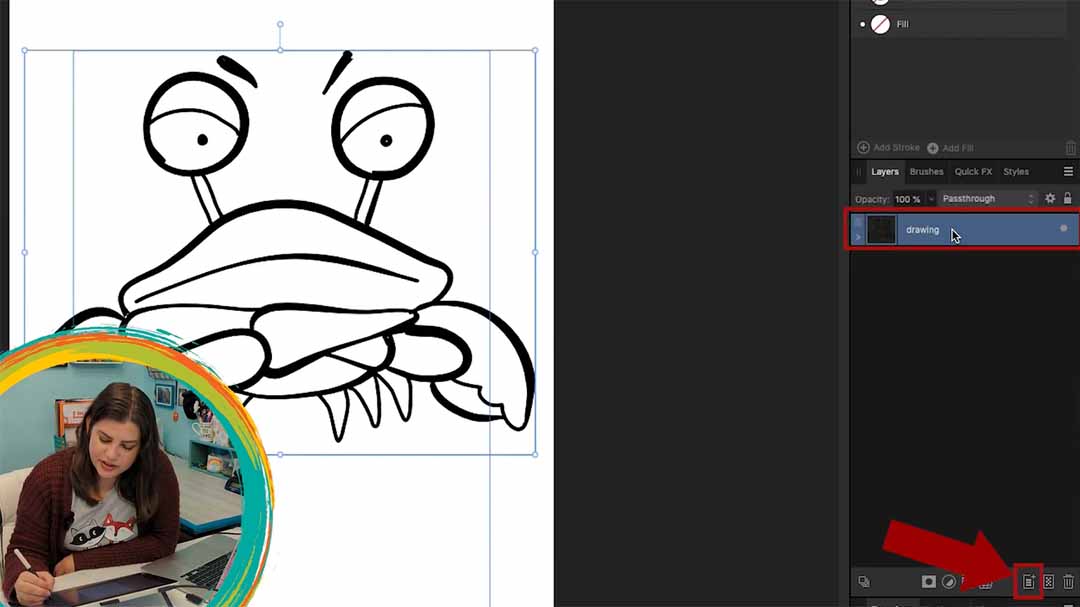
1. Create the silhouette
First, grab the layer containing the drawing, and drag & drop it onto the new layer icon at the bottom of the layers panel. Hide the top layer (Layer → Hide) — this will end up being our outline layer containing our colored pieces. Select the bottom layer, grab everything, and go to Layer → Geometry → Fill Holes. You can look at the nodes using the node select tool, and looking at the nodes that go around the shape. This will be our silhouette layer. Lock this bottom layer — we are done with it!
2. Create colored pieces
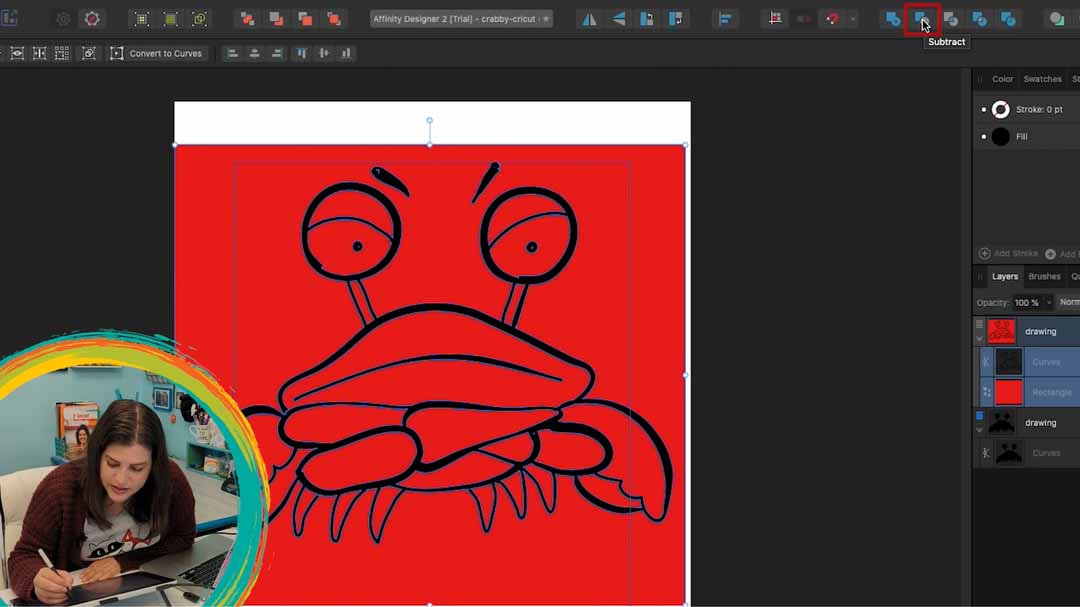
We’re going to use the outline layer essentially as a cookie cutter — putting a color behind each outline section and then punching the shape out of the color.
Show the top layer by selecting it and going to Layer → Show. Hide the bottom layer by selecting it and going to Layer → Hide. Now, we’re going to use the outline layer as a cookie cutter. Grab the rectangle tool, select a color for the fill, draw a rectangle that fully covers the entire outline, then click the Send to Back button at the top. Grab your select tool, select everything, and click the Subtract Front button at the top in the Operations panel.
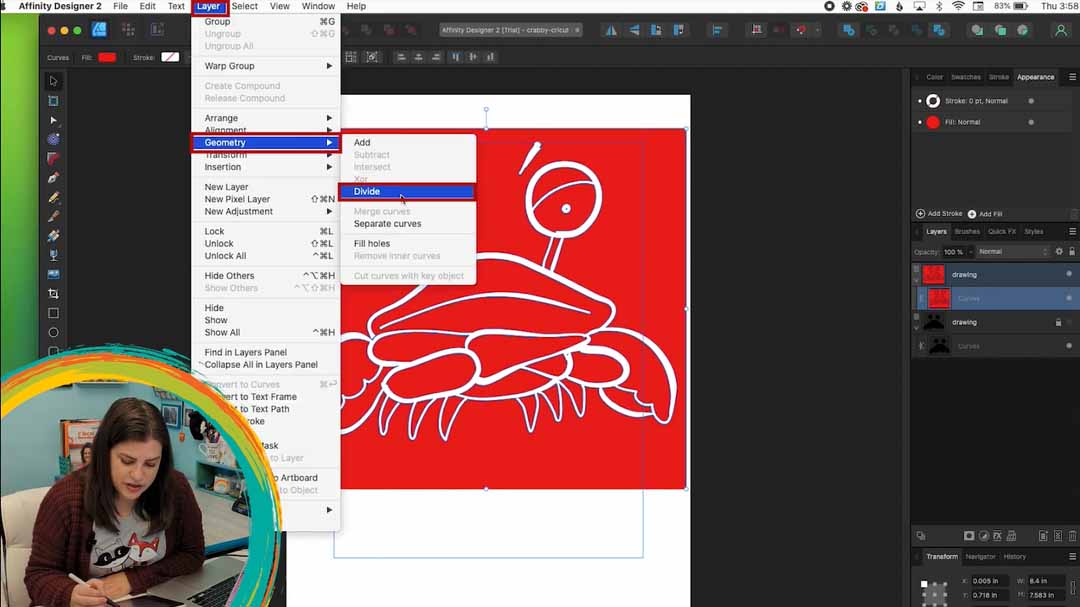
Next, you’ll need to separate the pieces by going to Layer → Geometry → Divide. Click the background and delete it by clicking the delete button at the bottom of the Layers panel. You might find other weird little pieces; you can delete anything you don’t want.
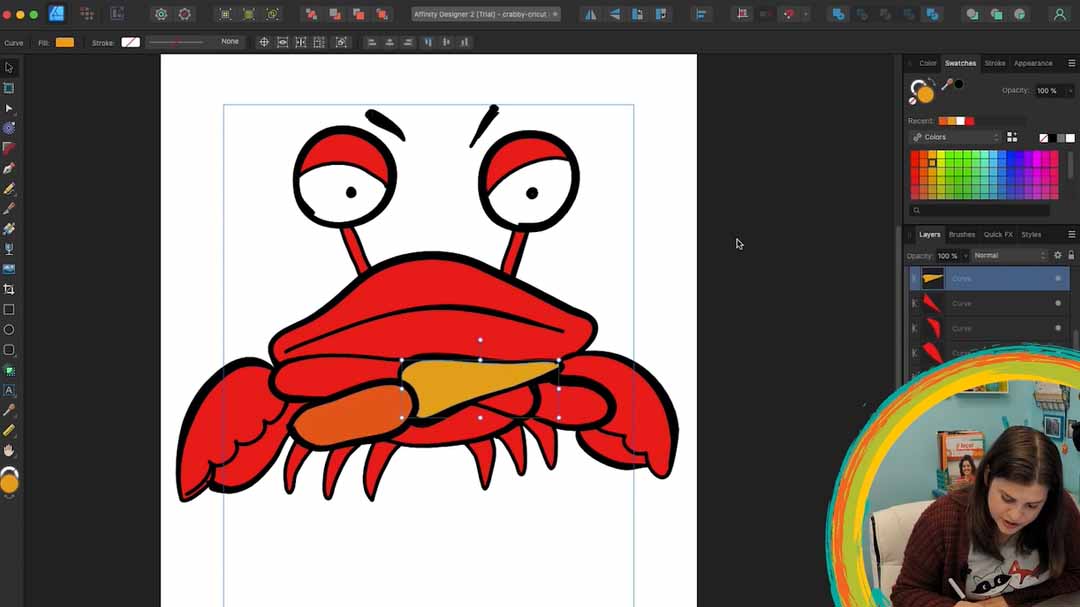
3. Time to Color!
Show the bottom layer now (Layer → Show), so we can see what it will look like in the end. Select the top layer, then select each piece and set it to your desired color using the color swatch in the bottom left, or the swatches panel in the upper right.
4. Combine same-colored shapes
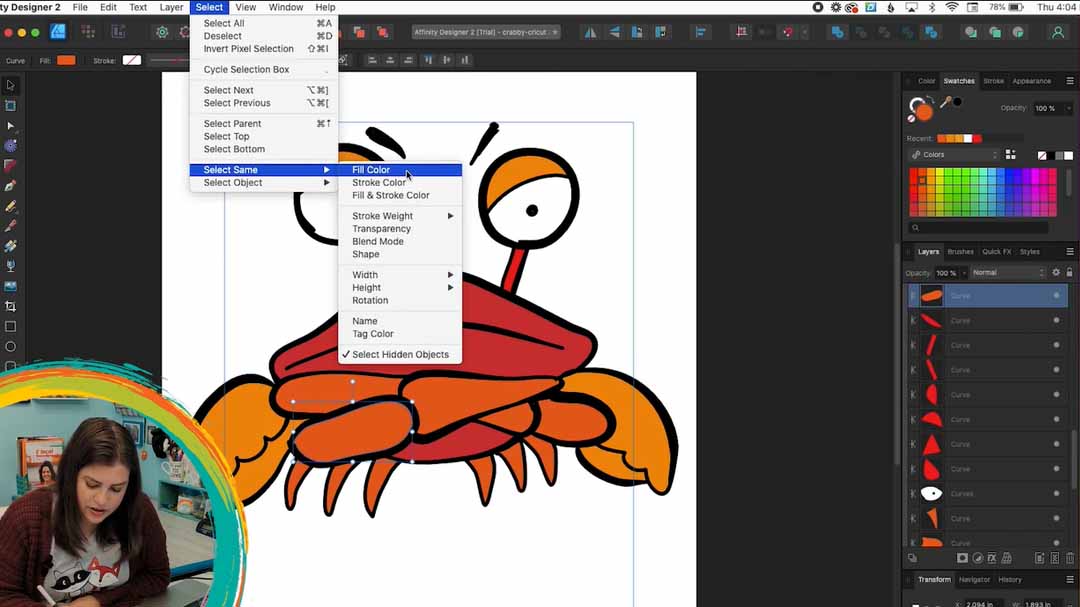
To ensure that each shape is placed on the vinyl in the correct position relative to each other, all shapes of the same color need to be combined so that they are classified as the same object. For example, all red pieces are one object, all orange pieces are another object, etc.
To do this, select a single piece, and then to select all other pieces of that same color, go to Select → Select Same → Fill Color. In the Operations menu in the upper right, click Combine. Then repeat this for each color.
Check for any pieces that were missed by looking at the layers panel, and find any single pieces. Either add them to the object of the same color, if you missed them the first time, or if they’re extra, you can delete them.
5. Export
To export, go to File → Save As and then name your file — a good idea could be the same title as the previous one, just adding “color.” Then go to File → Export, select SVG, and click Export.
6. Check your work
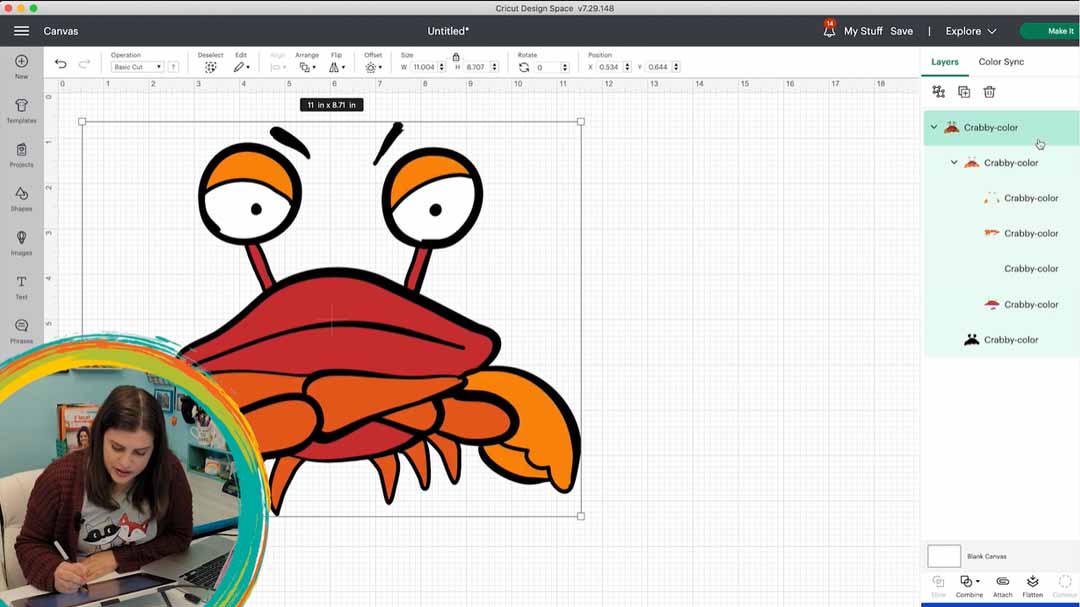
Make sure that everything worked correctly and the SVG uploads correctly. Open Cricut Design Space, create a new project, click Upload, then Upload Image, then Browse for your file, and then click Add to Canvas. When it loads, look at layers panel to make sure everything came through OK. There should be layers for each color and then a bottom layer with the silhouette.
That’s it! Now you can create single-color or multi-color SVGs for your own Cricut projects or to sell to other Cricut users for them to use.


